Loading ...
Loading ...
Loading ...
17
16
WARNING!
1 2
2
1
3
WARNING!
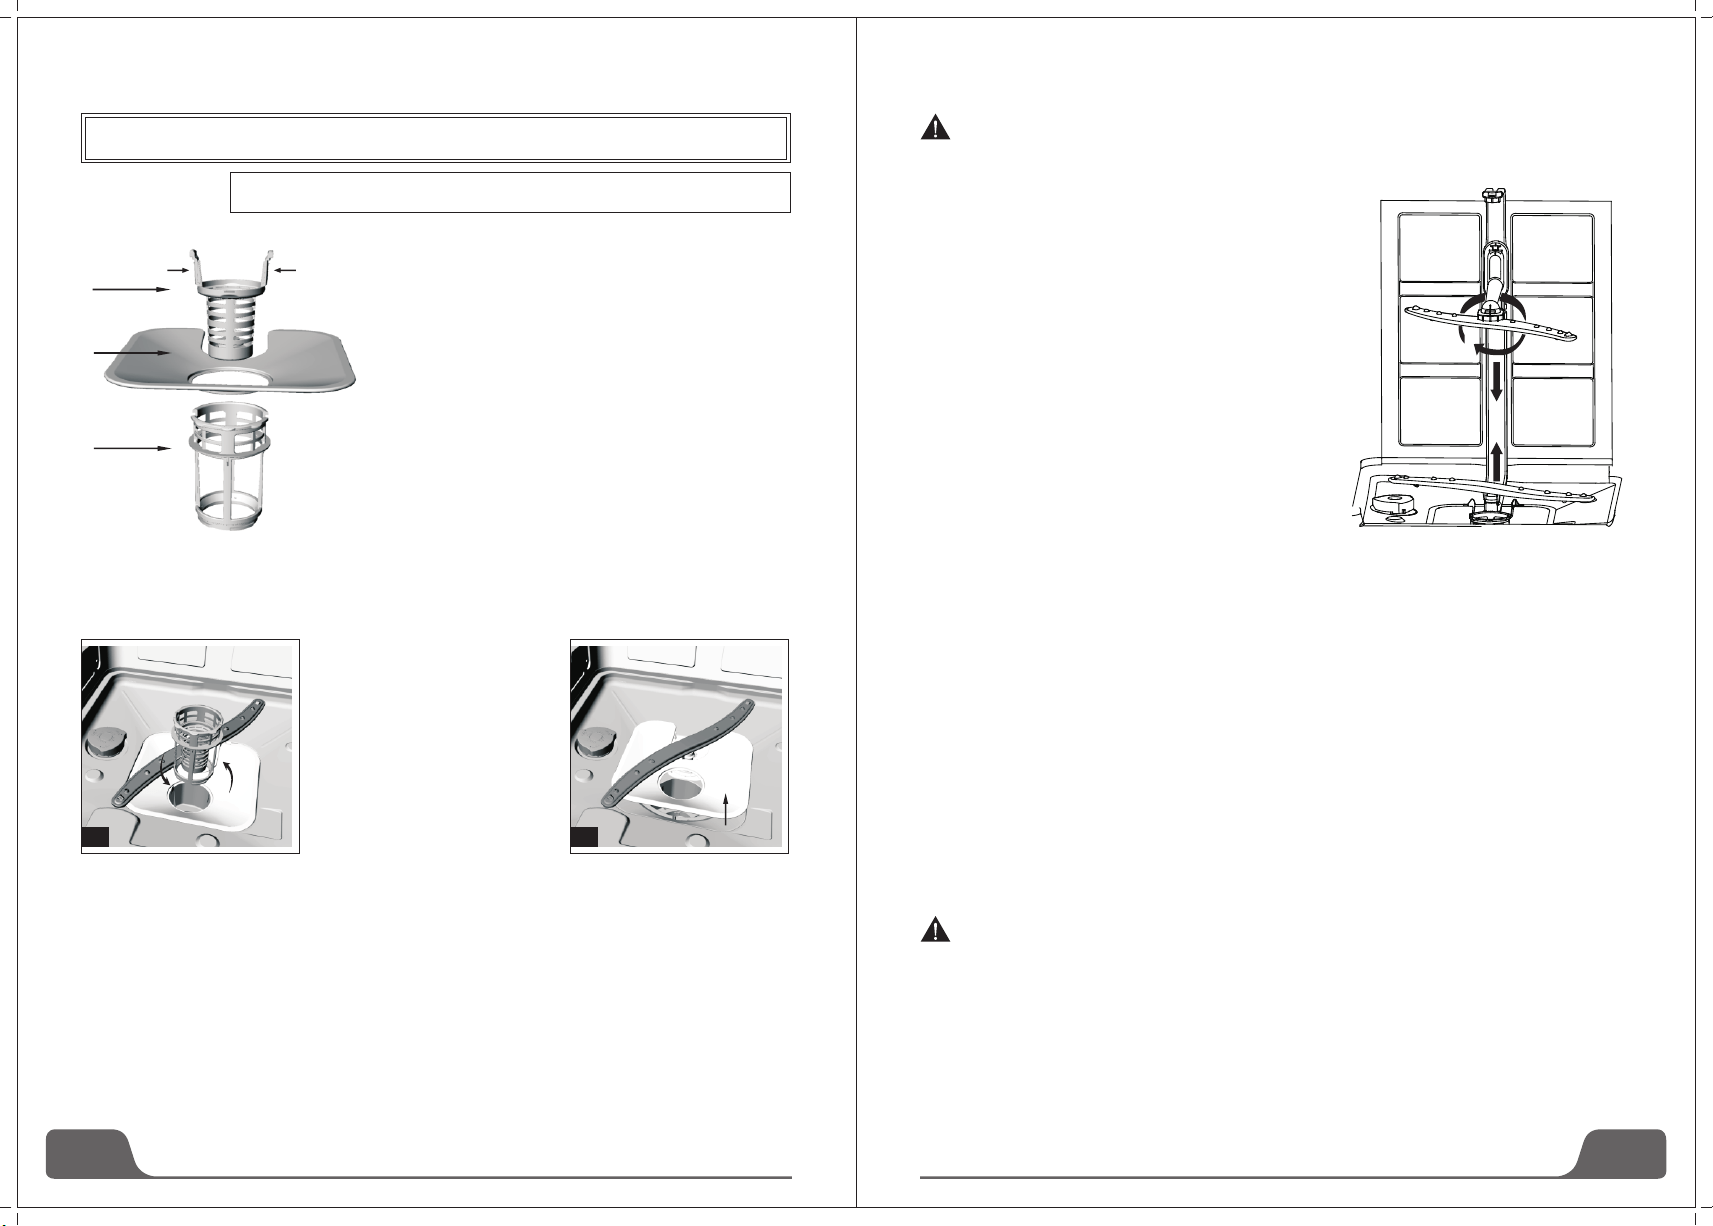
Filtering System
The filter is used to avoid the big remnants and other sundries getting inside
the pump. The residue can obstruct the filter in sometime.
The filter system consists of a coarse filter, a flat
(Main filter) and a micro filter (fine filter).
1 Flat filter
Food and debris will be trapped by a special jet
on the lower spray arm.
2 Coarse filter
Big debris, such as bone and glass that could clog the
drain will be trapped in the coarse filter.
To remove an item caught in this filter, gently squeeze
the taps on the top of this filter and lift it out.
3 Micro filter
This filter holds soil and food residue in the sump area
and prevents it from being redeposit on the dishes
during a cycle.
- Inspect the filters for obstructions every time the
dishwasher has been used.
- By unscrewing the coarse filter, you can remove
the filter system. Remove any food remnants and
clean the filters under running water.
Step 1:contrarotate the
Coarse filter ,and then lift it up;
Step 2:lift the filter upFlat
7. Maintenance and cleaning
NOTE:
to step 1, the filter system will be installed.
If operate from step 1 to step 2, the filter system will be removed; while operate from step 2
Filter assembly
For best performance and results, the filter assembly must be cleaned. The filter efficiently removes
food particles from the wash water, allowing it to be recirculated during the cycle. For this reason, it
is a good idea to remove the larger food particles trapped in the filter after each wash cycle by rinsing
the semicircular filter and cup under running water. To remove the filter assembly, pull on the cup
handle in the upward direction. The entire filter assembly should be cleaned once a week. To clean
the coarse filter and the micro filter, use a cleaning brush. Then, reassemble the filter parts as shown
in the figures above and reinsert the entire assembly in the dishwasher, positioning in its seat and
pressing downward. The dishwasher must never be used without the filters. Improper replacement
of the filter may reduce the performance level of the appliance and damage dishes and utensils.
Never run the dishwasher without the filters in place. When cleaning the filters, don't knock on them.
Otherwise, the filters could be contorted and the performance of dishwasher could be debased.
Cleaning the Spray Arms
It is necessary to clean the spray arms regularly for hard
water chemicals will clog the spray arm jets and bearings.
To remove the spray arms, screw off the nut clockwise to
take out the washer on top of the spray arm and remove the
arm. Wash the arms in soapy and warm water and use a soft
brush to clean the jets. Replace them after rinsing thoroughly.
Caring for the Dishwasher
To clean the control panel, use a lightly dampened cloth then
dry thoroughly.
To clean the exterior, use a good appliance polish wax.
Never use sharp objects, scouring pads or harsh cleaners
on any part of the dishwasher.
Protect Against Freezing
If your dishwasher is left in an unheated place during the winter, ask a service technical to:
1.Cut off electrical power to the dishwasher.
2.Turn off the water supply and disconnect the water inlet pipe from the water valve.
3.Drain water from the inlet pipe and water valve. (Use a pan to catch the water)
4.Reconnect the water inlet pipe to the water valve.
5.Remove the filter in the tub and the bottom and use a sponge to use up water in sump
Cleaning the Door
To clean the edge around the door, you should use only a soft warm, damp rag. To prevent
penetration of water into the door lock and electrical components, do not use a spray cleaner of any
kind.
Also, never use abrasive cleaners or scouring pads on the outer surfaces because they will scratch
the finish. Some papers towels can also scratch or leave marks on the surface.
Never use a spray cleaner to clean the door panel for it could damage the door lock and electrical
components. It is not allowed to use the abrasive agent or some paper towel because of the risk of
scratching or leaving spots on the stainless steel surface.
If the above chart does not solve your problem, contact a dedicated repairman.
Loading ...
Loading ...
Loading ...