Loading ...
Loading ...
Loading ...
17
Crisper Humidity Control (On Some Models)
You can control the amount of humidity in the moisture-sealed
crisper. Adjust the control to any setting between Low and High.
Low(open) – lets moist air out of the crisper for best storage of
fruits and vegetables with skins.
� Fruit: Wash, let dry, and store in refrigerator in plastic bag or
crisper. Do not wash or hull berries until they are ready to use.
Sort and keep berries in original container in crisper or store in
a loosely closed paper bag on a refrigerator shelf.
� Vegetables with skins: Place in plastic bag or plastic container
and store in crisper
High (closed) – keeps moist air in the crisper for best storage
of fresh, leafy vegetables.
� Leafy vegetables: Wash in cold water, drain, and trim or tear
off bruised and discolored areas. Place in plastic bag or plastic
container and store in crisper.
Utility Compartment
The utility compartment may be removed for easier cleaning.
To remove and replace the utility compartment:
1. Remove the utility compartment by squeezing against one
side while raising the utility compartment up and pulling it
straight out.
2. Replace the utility compartment by positioning one side in the
lock and sliding in the opposite side until it stops.
Ice Maker
For models with a water filter, after connecting the refrigerator to a
water source or replacing the water filter, fill and discard three full
containers of ice to prepare the water filter for use.
For products without any parts of the ice dispensing circuit, ice
maker and internal water circuit parts must be installed by the
manufacturer or by its qualified service technician.
For Easy Connect (ice maker ready) products, ice maker can be
easily installed by the user, following instructions given with the
kit.
In order to know which type of ice maker fits in your product,
please refer to the serial tag inside the food compartment of
appliance for ice maker kit model information.
Refer to the Quick Start Guide for contact information.
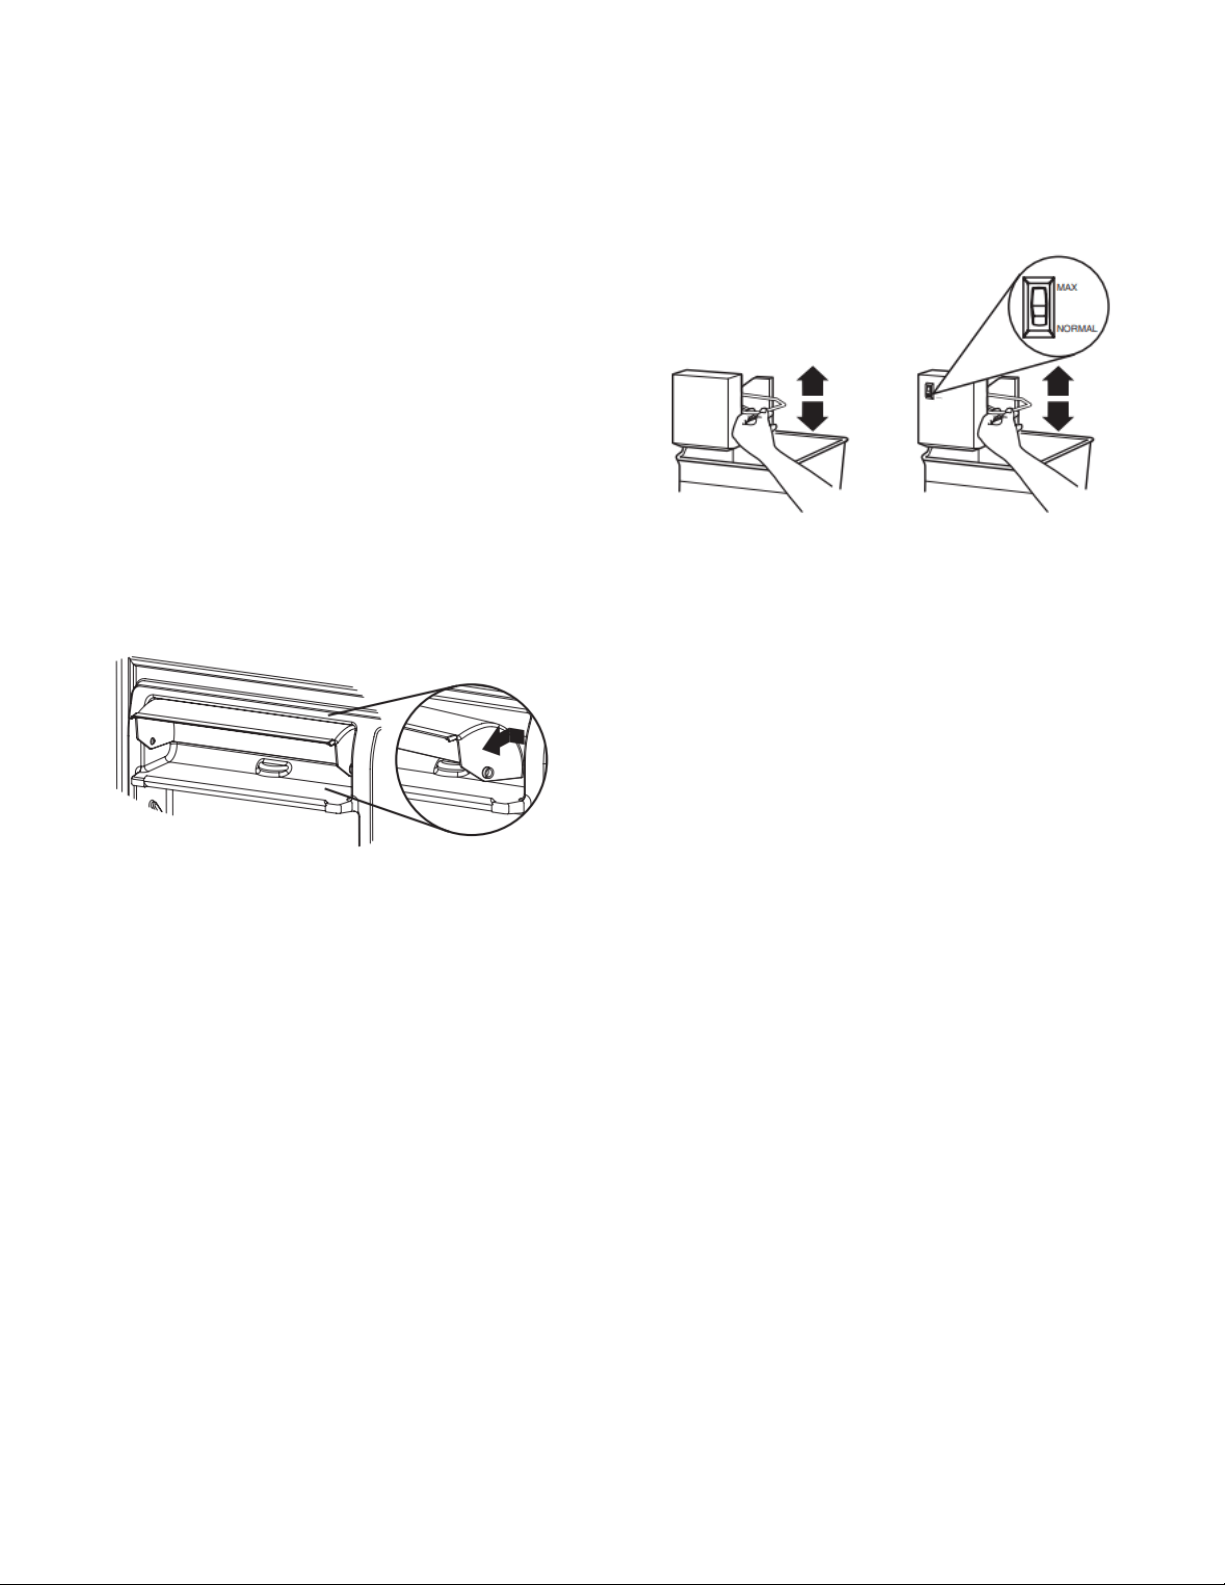
Turning the Ice Maker On/Off
� To turn the ice maker On, simply lower the wire shutoff arm.
� To manually turn the ice maker off, lift the wire shutoff arm to
the off (arm up) position and listen for the click.
NOTE: Your ice maker has an automatic shutoff. As ice is made,
the ice cubes will fill the ice storage bin and the ice cubes will raise
the wire shutoff arm to the Off (arm up) position. Do not force the
wire shutoff arm up or down.
Ice Storage Bin
NOTE: Turn off the ice maker before removing the ice storage bin
to serve ice or to clean the bin. This will keep the ice cubes from
dropping out of the ice maker and into the freezer compartment.
After replacing the ice storage bin, turn on the ice maker.
1. Wash the ice storage bin with mild soap and warm water.
2. Slide the ice storage bin under the ice maker and push it
toward the back as far as it will go.
3. Lower the arm on the ice maker to the On position.
Ice Production Rate
� The ice maker should produce a complete batch of ice
approximately every 3 hours, approximately 8 to 12 batches of
ice in a 24 hour period.
� To increase ice production, lower the freezer and refrigerator
temperature. See “Using the Controls” in the Quick Start
Guide. Wait 24 hours between adjustments.
� Maximum ice production (on some models): If your refrigerator
has the maximum ice production feature, push the switch to
Max to produce approximately 16 to 20 batches of ice in a 24
hour period.
Remember:
NOTE: The dispenser will automatically turn off Measured Fill
after 1 minute of inactivity. When Measured Fill is turned off, any
changes you have made will be lost and all defaults will be
restored.
Loading ...
Loading ...
Loading ...