Loading ...
Loading ...
Loading ...
18
Installation Instructions
INSTALLATION – RECIRCULATING
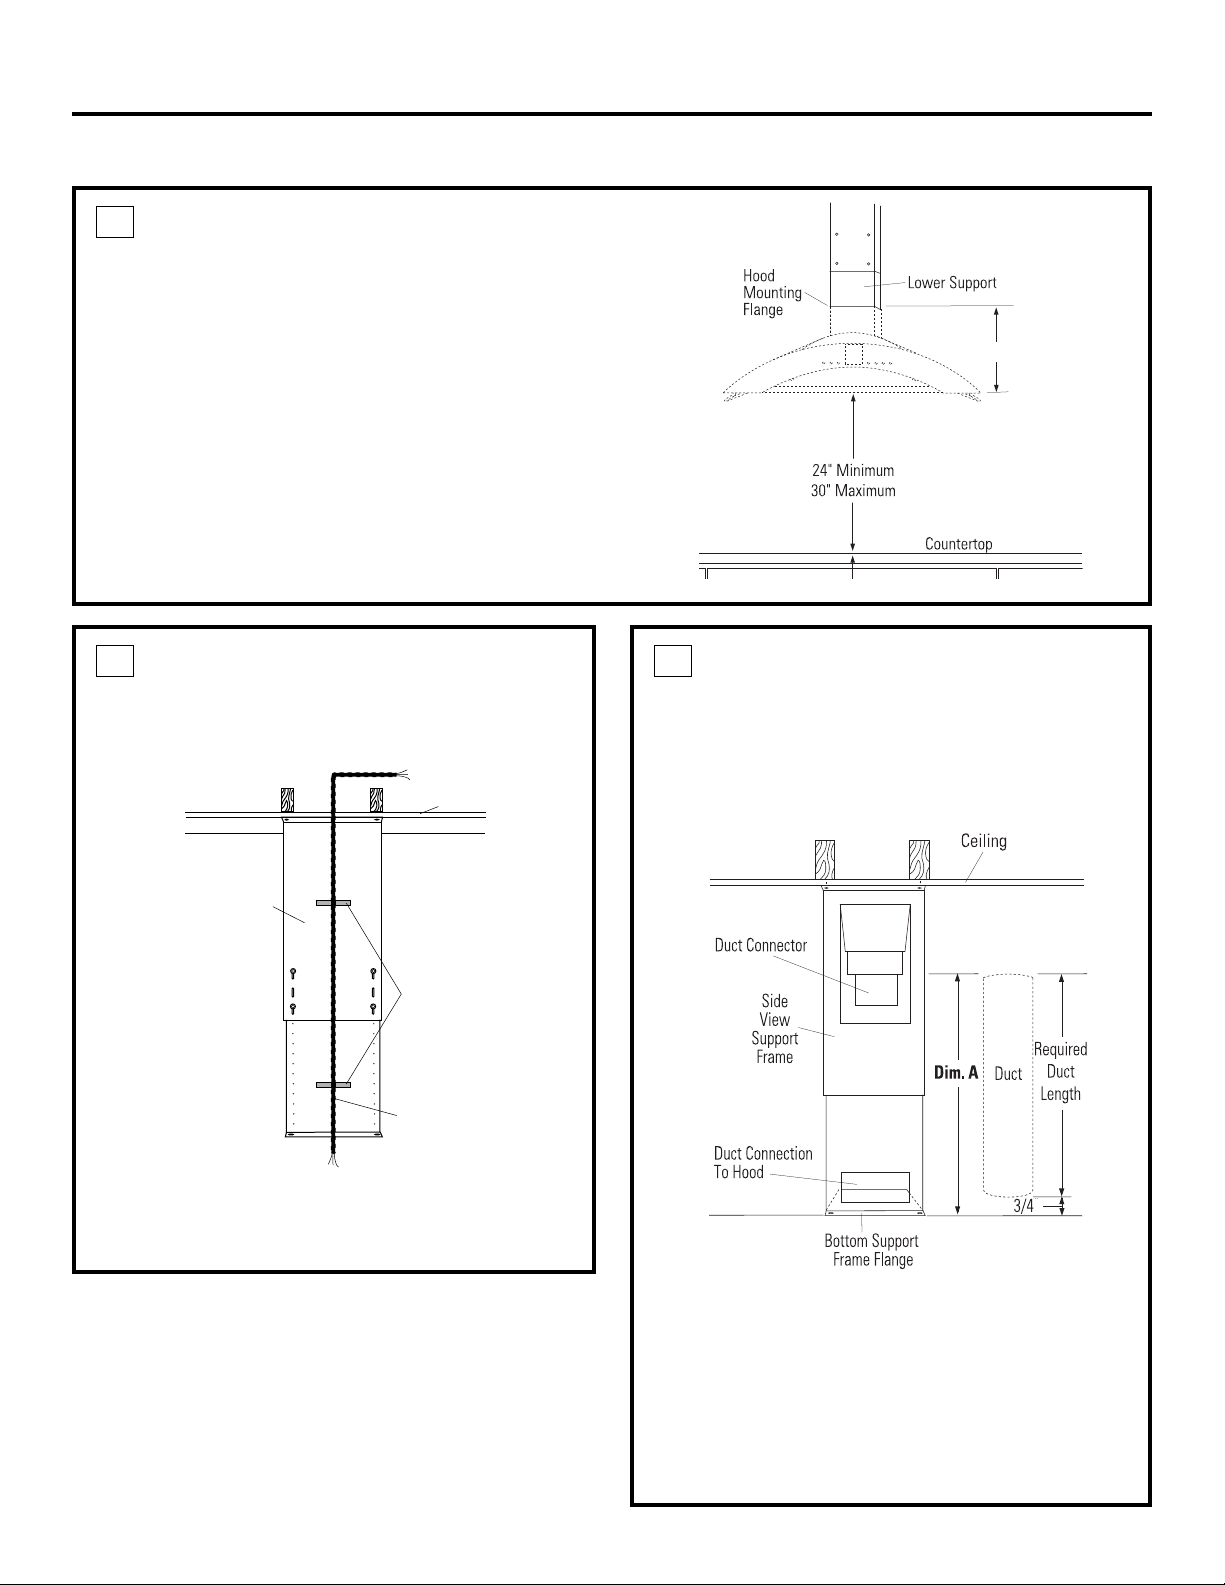
SECURE WIRING
• Route house wiring through the ceiling hole
and pull a length to reach the hood junction box.
• Tape the wire to the front of the frame support to
prevent damage during installation and service.
4
658Dia19
Ceiling
Support
Frames
Tape
House
Wiring
Front Side
SIZE AND INSTALL DUCTWORK
• Measure from top duct connector (Dim. A)
to bottom of support frame.
– Subtract 3/4″ for hood insertion into the bottom
of the frame.
• Cut the 6″ dia. duct to the required length.
NOTE: The bottom end of the duct must be flared
slightly, to facilitate installation of the hood.
• Install duct up through support frames onto the
duct connector. Push duct up until it is 3/4″ from
the bottom of the support frame flange. See
illustration.
• Seal duct connection with duct tape, making sure
the connection is secured in place.
5
″
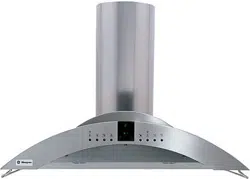
INSTALL LOWER SUPPORT FRAME
• Insert lower support frame into the upper support
frame and loosely secure with 8 screws and
washers (4 on the front and 4 on the back sides).
• Adjust the lower support frame up or down
to the desired height above the countertop.
Tighten screws.
IMPORTANT: Again, check to be sure the support is
level in both directions. There is no way to level the
hood after the hood is secured to the frame.
3
13-5/8
″
Loading ...
Loading ...
Loading ...