User Manual F007C ROBOT VACUUM CLEANER
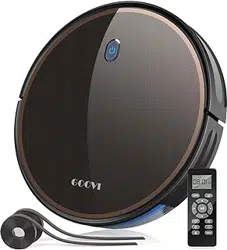
Product Diagram
- Robot
- Accessories
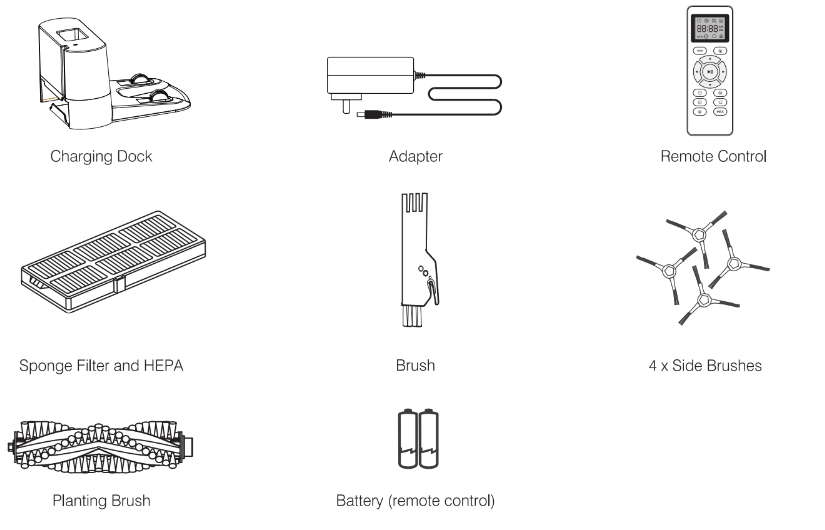
- Charging Dock
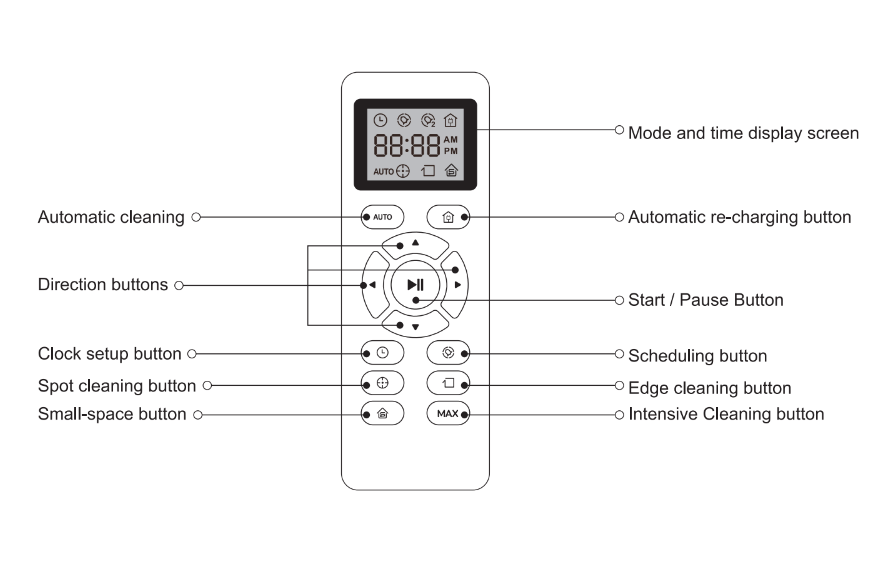
- Remote Control
Operating and Programming
Notes Before Cleaning
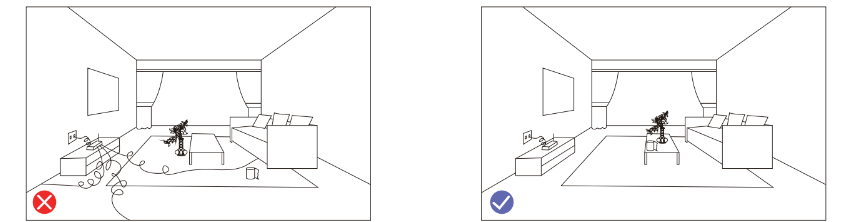
Before using Robot, pick up objects like clothing, loose papers, pull cords for blinds or curtains, power cords, and any fragile objects. If the Robot passes over a power cord and drags it, there is a chance an object could be pulled off a table or shelf.
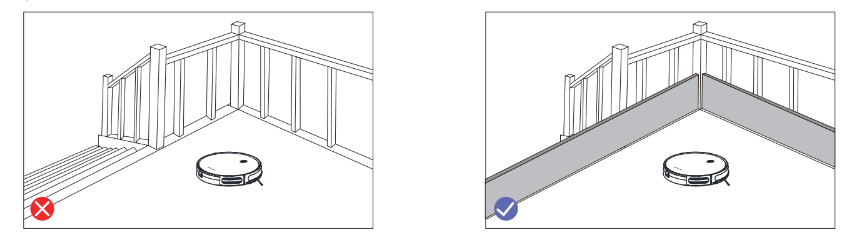
If the room to be cleaned contains a balcony, a physical barrier should be used to prevent access to the balcony and ensure safe operation.
Quick Start
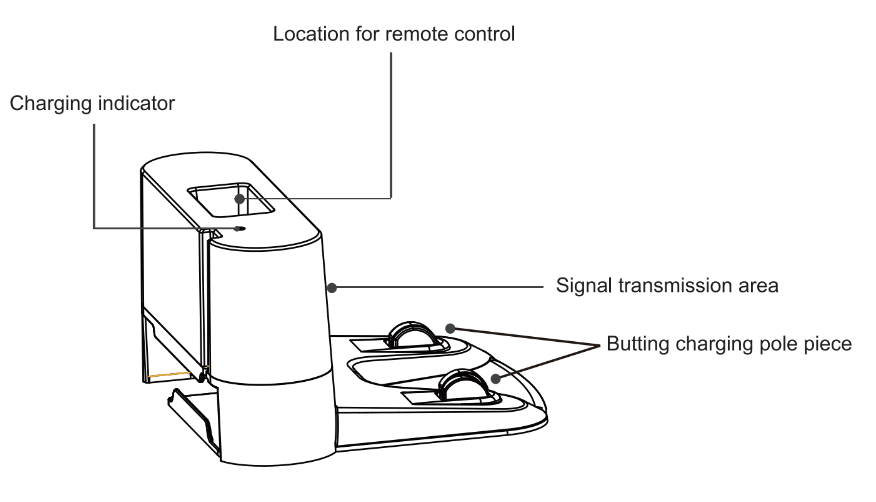
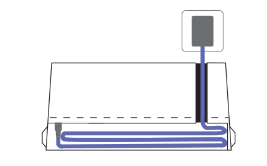
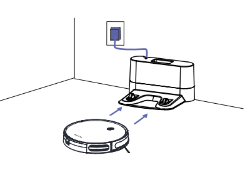
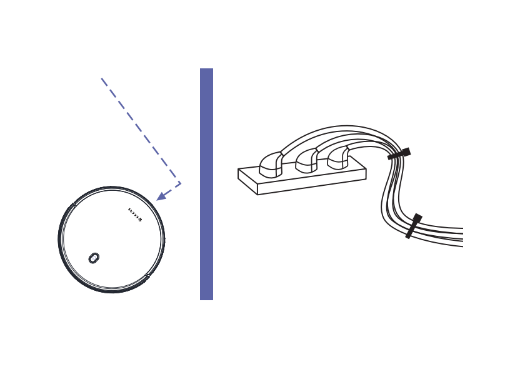
1. Plug in the Charging Dock, and take the rest wire into the trunking at The bottom of Charging Dock.
Note: Didn’t put the rest wire into the trunking may stuck the Robot while Charging or Cleaning.
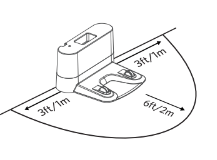
2. Charging Dock Position
Place the charging Dock again the wall & make sure the place is open & uncluttered area leaving at least
- 2 meters (6.5 feet) in front of the charging Dock
- 1meters(2.3 feet) on both sides of the charging dock
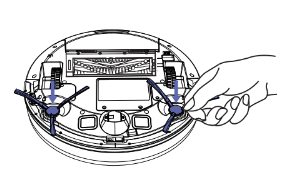
3. Install Side Brushes
Attach side brushes to the bottom of By pressing a brush into each slot with the matching color until it clicks
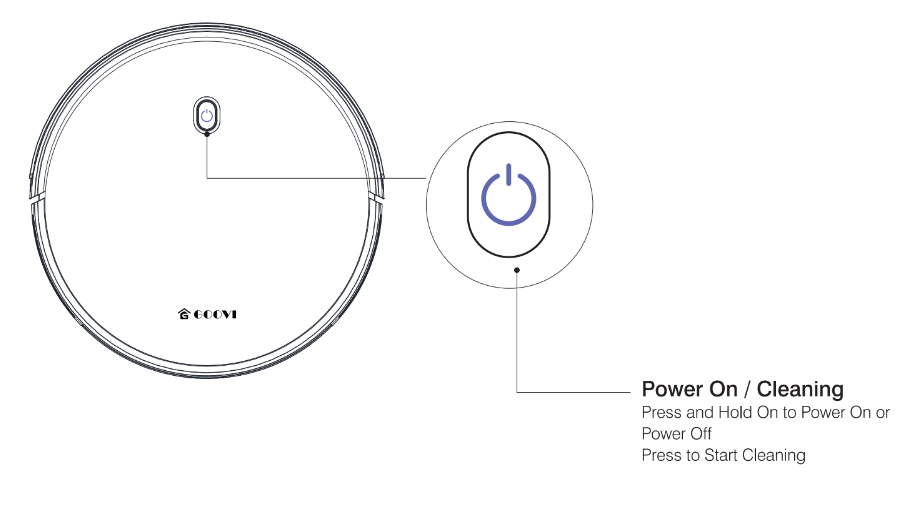
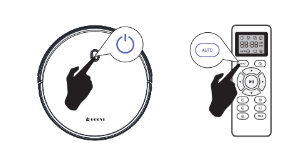
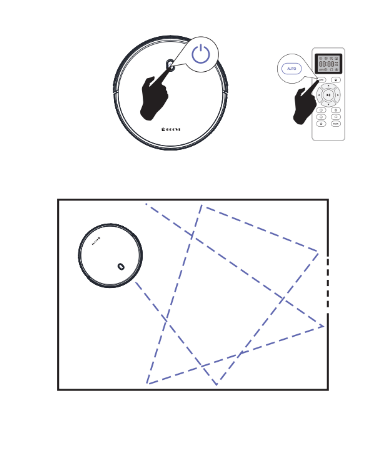
4. Activate the Robot
Place onto the Charging Dock, making sure the metal charging contacts on the charging Dock match up with those underneath the robot.
If successful you will hear a series of tones, once the  Power button illuminates is ready for use.
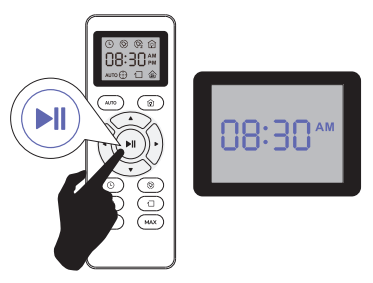
5. Start Cleaning Cycle
- Press
 the power button Once to wake up the robot.
- Press
 the power button again to start a cleaning cycle
(or press the  button on Remote control).
If its battery gets low before finishing a cleaning cycle, robot Returns to the Charging Dock to recharge.
If the Charging Dock is inaccessible, Robot will not be able to recharge, please place the robot manually on.
Charging Dock for charging. (Refer Activate the Robot).
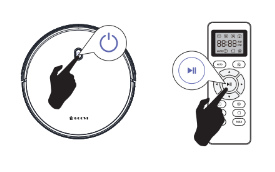
6. Pause
- To pause the robot during a cleaning cycle press the
 button or press the
  button on Remote control.
- To resume the cleaning cycle, press
 button again.
- To send robot back to The Charging Dock, press
 button.
Note: The actions listed above can also be managed from the Remote control
7. Power OFF
- To end the cleaning cycle and put robot in standby mode, Press and hold
 button until robot's indicators turn off.
How Cleans your home
F007C is designed to Intelligently navigate and clean an entire level of your home, a multifunctional function robot with cleaning Sweeping, Vacuuming, Wet/Dry mopping for your home.
1. Auto Cleaning
- At the start of a cleaning cycle,will map out your home and cleaning them efficiently.
- At various times throughout the cleaning cycle,touches up around the edges of the room, as well as chair legs and other furniture.
- Once finishes its cleaning cycle, returns to the Charging Dock recharge.
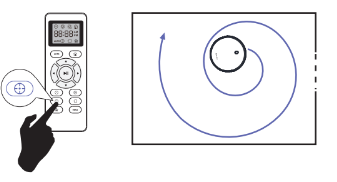
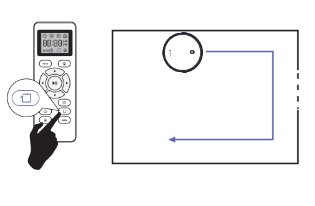
2. Spot Cleaning
When you select Spot Cleaning, robot intensely cleans a localized area by spiraling outward about 3 feet(1 meter) in diameter and then spiraling inward to where it started. When Spot Cleaning,Robot boosts is vacuum power to provide (I'e) the best cleaning possible where you need it. To use Spot Cleaning, place robot on top of the localized debris and press  (Spot) on the Remote control.
3. Max Vacuuming Cleaning
Robot increases its vacuum power to provide a deeper clean when press the  button on Remote control, Max Vacuuming Cleaning if Off by default
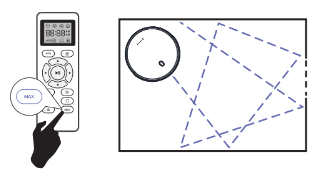
4. Edge Cleaning
After robot finishes cleaning the open areas of your floor, it uses Edge Clean to ensure that it has cleaned along walls and around furniture Legs, If you prefer a quicker edge cleaning, press the  button on Remote Control.
Cleaning Schedule
Robot has cleaning schedule settings which allow you to customize when Robot cleans your home. These settings are available only through the Remote Control.
Note: Please make sure the Remote Control near by the Robot while setting the Clock or Schedule.
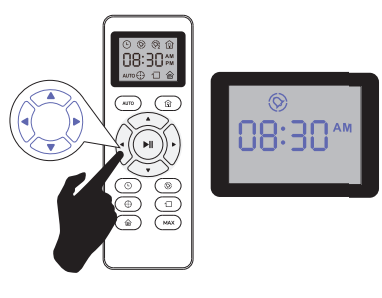
1. Set the Remote Control's Clock
Press  button on Remote Control, and then the hour section begins to flash in the clock display setting window.

Press  or
or  button to select the desired figures. Press
  the or
  button to select the minute or hour section.
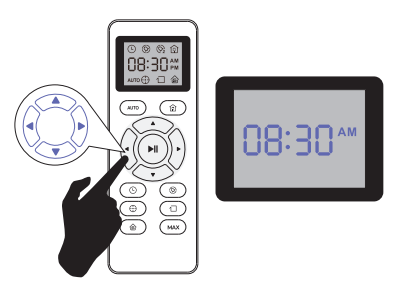
And then press the  button. The Robot will “BEEP” when the clock setting completed.
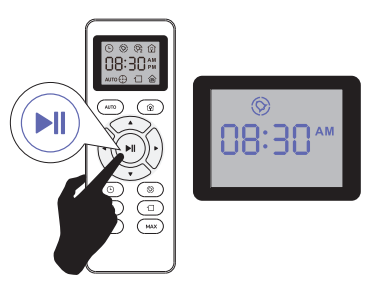
2. Setting Cleaning Schedule
Press button on Remote Control, and then the hour section begins to Hlash in the Cleaning Schedule display setting window.
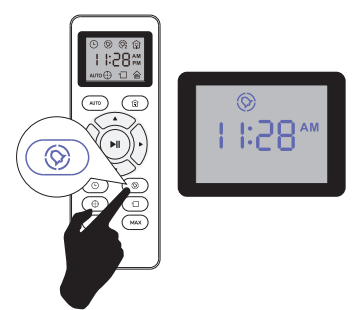
Press or button to select the desired figures. Press the or button to select the minute or hour section.
And then press the button. The Robot will “BEEP” when the Cleaning Schedule setting completed.
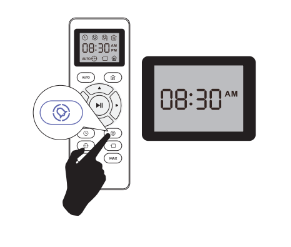
3. Cancel the Cleaning Schedule
Press and hold  button approximately 4 seconds on Remote Control, the Robot will "BEEP" twice when the Cleaning Schedule process cancel completed
Regular Robot Care
To keep robot running at peak performance,perform the following care procedures.if you notice robot picking up less debris from your floor then empty the bin clean the filter and clean the extractors
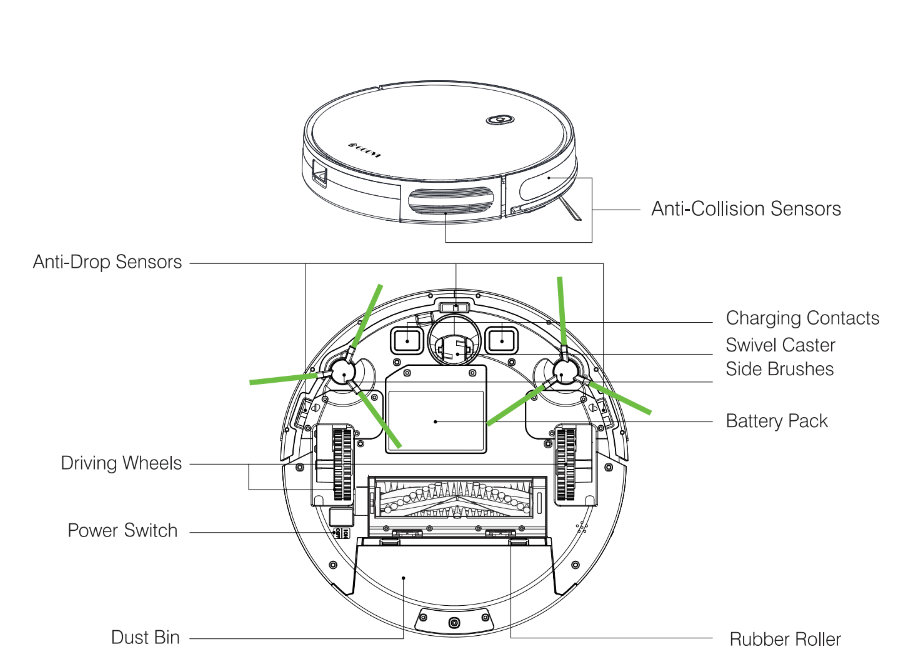
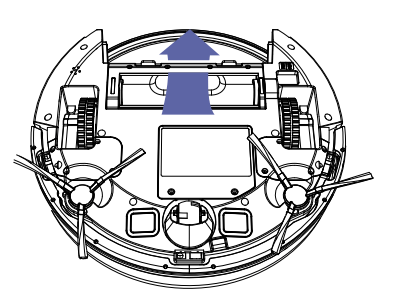
1. Emptying Robot's Bin
1. Press bin release button to remove bin.
2. Open bin door to empty bin.
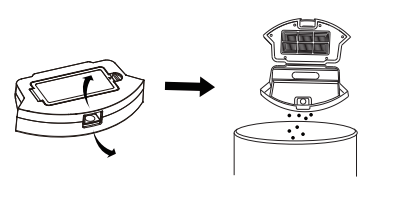
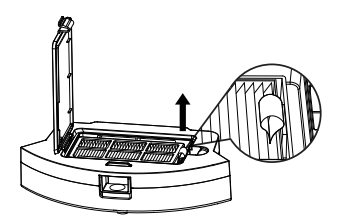
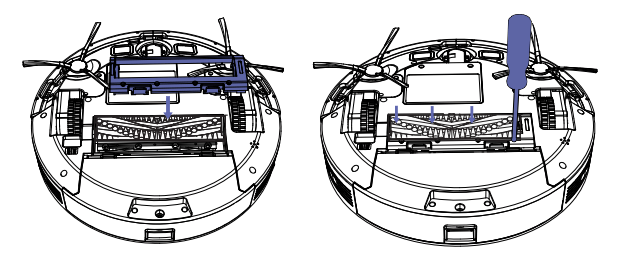
2. Cleaning Robot's Filter
1. Remove filter grasping the white tab.
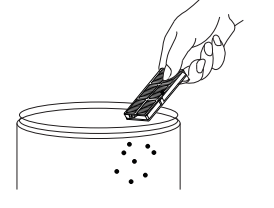
2. Shake off debris by tapping the filter against your trash container.
3. Cleaning Robot's Floor Tracking Sensor
Use a clean,dry microfiber or soft cotton cloth to wipe any debris that has accumulated in the round sensor opening on the right side of the bottom surface.
Do not spray cleaning solution directly into the sensor Opening.
4. Cleaning Robot's Extractors
- Use a coin or small screwdriver to remove the screw, remove the extractor frame and obstructions.
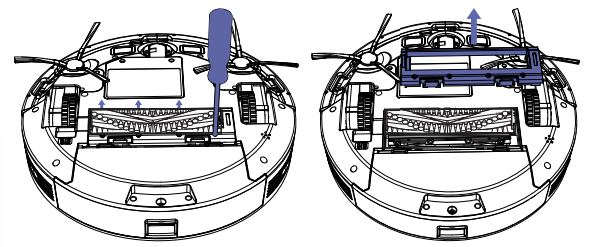
2. Remove the extractors. Remove any hair or debris that has collected underneath the caps and around the axles.
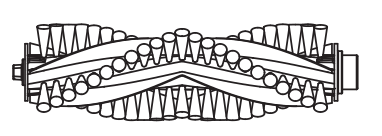
3. Clear Robot's Vacuum path
4. Rein stall the extrators. Match the color and shape of the extractor pegs with the color and shape of the extractor icons on the cleaning head module.
5. Battery and Charging / Information
Lithium I on Battery
Important: Lithium ion batteries and products that contain lithium ion battery es are subject to stringent transportation regulations.
If you need to ship this product (with the battery included) for service,travel or any other reason.you MUST comply with the following shipping instructions:
- Remove the lithium ion battery from the product
- Place a Piece of tape over the battery's metal charging contacts
- Rein stall the battery (with the tape on it) in the product and secure the battery door
- Package the product in its original packaging or in your own packaging that prevents any movement during transportation
- Ship via ground transportation only (no air shipping)
Battery Charging
To extend battery life,always keep robot charged on the home base when not use.
Battery Storage
If storing robot off of the Charging Dock, remove the battery first. Then store robot and the battery in a cool, dry place.
Battery Disposal
Contact your local waste management authority for battery recycling and disposal regu I at ions in your area.
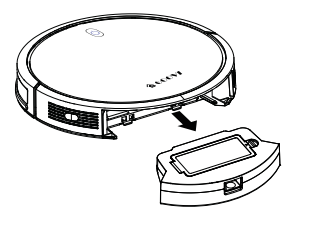
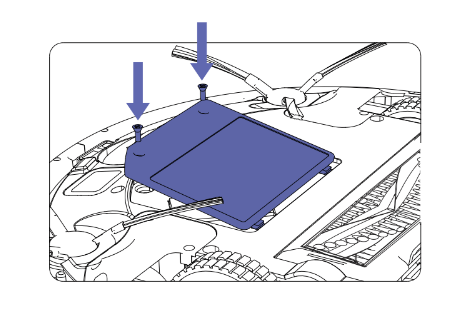
Battery Removal
Follow these Instructions to remove and reinstall robot’s battery:
1. Unscrew the two screws on the battery door, then remove “* the door and battery.
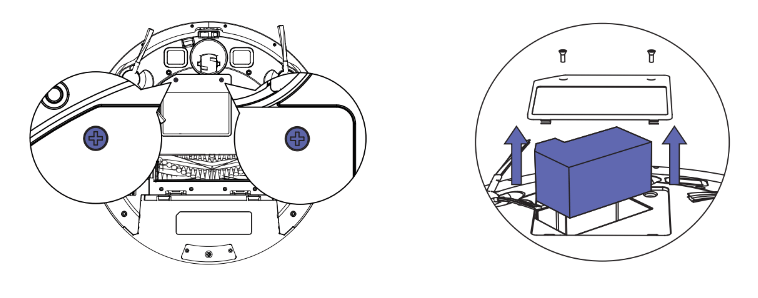
2. Reinstall the battery with the battery label and tabs facing up.
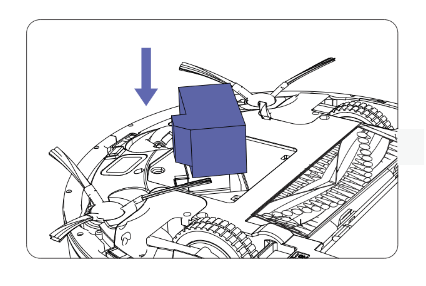
3. Reinstall the battery door and the two screws. Take care not to pinch the side brush in the battery door when re-installing the battery.
Use the Boundary Strip
With the Boundary Strip, you can keep Robot away from any area or item you do not want Robot to clean. Robot will recognize the Boundary Strip and will not cross into the blocked-off area.
- Identify the area or item you do not want Robot to get close to.
- If necessary, use scissors to cut the Boundary Strip to a shorter length. Be sure to correctly measure the length before cutting.
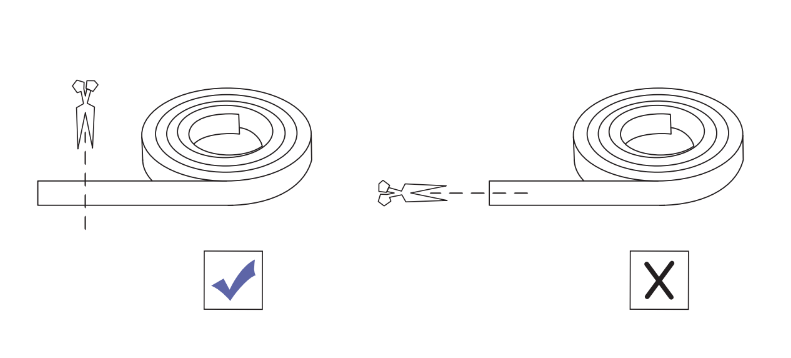
- Apply adhesive tape to lay the Boundary Strip flat on the floor. Make sure the strip is placed FLAT on the floor.
Troubleshooting
Robot will tell you something is wrong with a two-tone distress sound followed by a spoken message. The indicator will also blink or lit red. Refer to the chart as below to resolve Robot's problem. If the e problem is not resolved, please contact our COST FREE customer service team for more assistance.
Rebooting Instructions
For some errors, rebooting Robot may resolve the problem.To reboot Robot, press the power button on the bottom on Robot, you will hear an audible tone signifying a successful reboot.
Beeps and red light flashing
| Beeps |
Error |
Solution |
| 1 |
No dust or water tank installed |
Insert the dust or water tank in the robot. |
| 2 |
Bumper error |
Check the bumper and remove any object that could be blocking it. |
| 3 |
Free-fall sensors error |
Clean the free-fall sensors. |
| 4 |
Other error |
Contact the Technical Support Service of Cecotec. |
Beeps and steady red light
| Beeps |
Error |
Solution |
| 1 |
Driving wheel error |
Manually spin the wheel and remove any object that could be blocking it. |
| 2 |
Side brushes error |
Unblock or untangle the side brushes and clean them. |
| 3 |
Motor error |
Empty the dust tank and clean the suction channel. |
Specifications
| Classification |
Item |
Specifications |
| Structural Class |
Diameter |
325mm |
| Height |
70mm |
| Net Weight |
2.6kg |
| Electronic Class |
Voltage |
14.4 V |
| Battery Capacity |
Lithium Battery 2600mAh |
|
Cleaning
Parameters
|
Dustbin Volume |
0.5L |
| Charging Type |
Automatic Charging |
| Cleaning Mode |
Automatic Cleaning Spot Cleaning Edge Cleaning Appointment Cleaning |
| Description of Light Display |
Red Light: Failure warning |
| One-time Charging Time |
About 300 Minutes |
| One-time Cleaning Time |
About 100 Minutes |
| Host Button Type |
|
Mechanical Button |