Product may vary slightly from the item pictured due to model upgrades.
Read all instructions carefully before using this product.
Retain this owner’s manual for future reference.
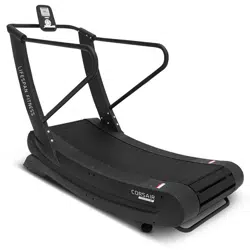
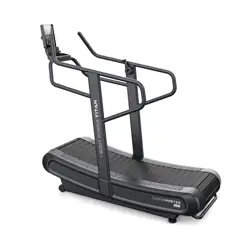
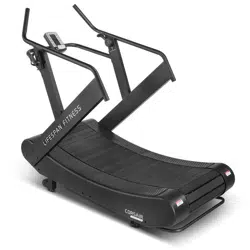
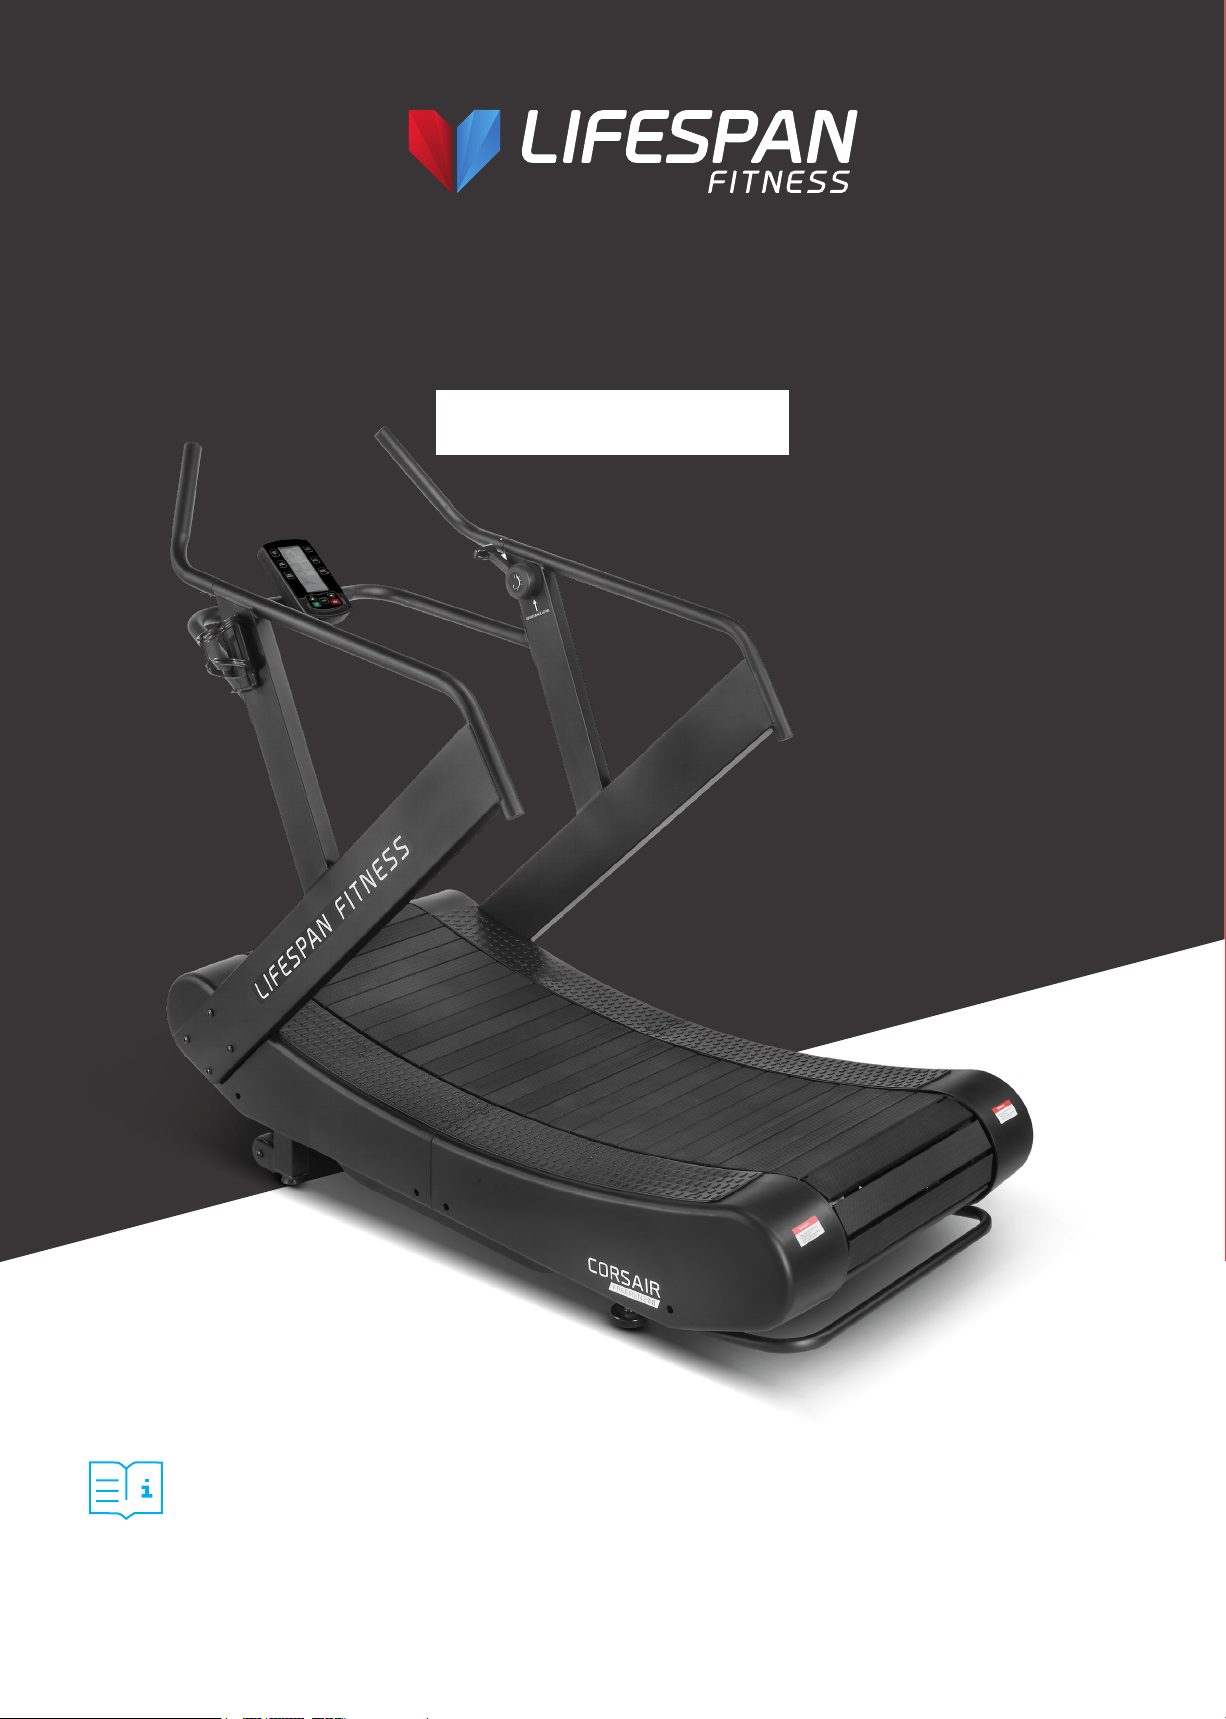
Corsair FreeRun 200
Curved Treadmill
USER MANUAL
NOTE:
This manual should not be used to guide your purchasing decision. Your product, and the contents inside its carton, may vary
from what is listed in this manual. This manual may also be subject to updates or changes. Updated manuals are available
through our website at www.lifespanfitness.com.au

2
TABLE OF
CONTENTS
I. Important Safety Instructions . . . . . . . . . . . . . . . . . . . . . . . . . . . . . . . 03
II. Important Operating Instructions . . . . . . . . . . . . . . . . . . . . . . . . . . . 04
III. Exploded Diagram . . . . . . . . . . . . . . . . . . . . . . . . . . . . . . . . . . . . . . . . . . . 05
IV. Parts List . . . . . . . . . . . . . . . . . . . . . . . . . . . . . . . . . . . . . . . . . . . . . . . . . . . . . 07
V. Assembly Instructions . . . . . . . . . . . . . . . . . . . . . . . . . . . . . . . . . . . . . . . 12
VI. Feature and Function . . . . . . . . . . . . . . . . . . . . . . . . . . . . . . . . . . . . . . . . 15
VII. Moving the Treadmill . . . . . . . . . . . . . . . . . . . . . . . . . . . . . . . . . . . . . . . . 26
VIII. Exercise Guide . . . . . . . . . . . . . . . . . . . . . . . . . . . . . . . . . . . . . . . . . . . . . . . 27
IX. Maintenance Instructions . . . . . . . . . . . . . . . . . . . . . . . . . . . . . . . . . . . 29
X. Warranty . . . . . . . . . . . . . . . . . . . . . . . . . . . . . . . . . . . . . . . . . . . . . . . . . . . . . 30
| TABLE OF CONTENTS

3IMPORTANT SAFETY INSTRUCTIONS |
I. IMPORTANT SAFETY
INSTRUCTIONS
WARNING: Read all instructions before using this treadmill.
It is important your treadmill receives regular maintenance to prolong its useful life. Failing to
regularly maintain your treadmill may void your warranty.
• Read the entire owner’s manual before operating the unit
• Save this manual for future reference.
• Assembly of Technical Items: Assembly of the treadmill should be performed by a qualified
technician. A significant amount of technical knowledge is required for the safe and complete
assembly of the unit.
• Do not use accessory attachments that are not recommended by Lifespan Fitness. Such
attachments may cause injuries.
• Assemble and operate the treadmill on a solid, level surface.
• All warning labels attached directly to the treadmill must remain installed. If a warning label
becomes illegible or damaged, please contact Lifespan Fitness for a replacement.
• Maintain the treadmill to keep it in good working condition, as described in this manual. Inspect the
treadmill for incorrect, worn, or loose components, and then correct, replace, or tighten prior to use.
• If you plan to move the treadmill, obtain help and use proper lifting techniques.
• Do not attempt to service the treadmill yourself, except to follow the maintenance instructions in
this manual.
• Move the treadmill with 2 person and use proper lifting technique to avoid injury.

4 | IMPORTANT OPERATING INSTRUCTIONS
II. IMPORTANT OPERATING
INSTRUCTIONS
WARNING:
• The treadmill is non-motorized and means the user initiates and controls the speed of the
running belt. There is no emergency stop feature and the treadmill will slow to a stop on its own.
• The belt moves freely in only one direction. Grasp the handrails whenever mounting and
dismounting the treadmill.
• Do not use while under the influence of alcohol, drugs, or narcotics.
• Do not allow children, or people unfamiliar with the operation of this treadmill, on or near it.
Do not leave children unsupervised around the treadmill.
• Do not allow children under the age of 16 to use the treadmill.
• Do not allow animals on the treadmill.
• Examine the treadmill for loose or worn parts before each use. Tighten/replace any worn or loose
components prior to use.
• Do not use outdoors or in high humidity.
• Do not operate the treadmill without the handrail installed.
• Do not use the treadmill with walking poles or other devices not specifically approved by
Lifespan Fitness.
• Never jump onto the treadmill. Never jump from the treadmill. Never enter the treadmill from the
front. Operate treadmill only when facing forward. Never attempt to mount or dismount the treadmill
while the belt is moving.
• Hold on to the handrail with one hand whenever you operate the console keys with the other hand.
Face the console and do not lean on or pull on the console at any time.
• Never drop or insert objects into any opening.
• Keep hands away from moving parts.
• Wear proper exercise clothing and shoes for your workouts and avoid loose or dangling clothing.
Tie long hair back. Do not wear shoes with heels and check the soles of your shoes to remove any dirt
and embedded stones. The running surface is not intended for cleats or running spikes.
• Save these instructions.
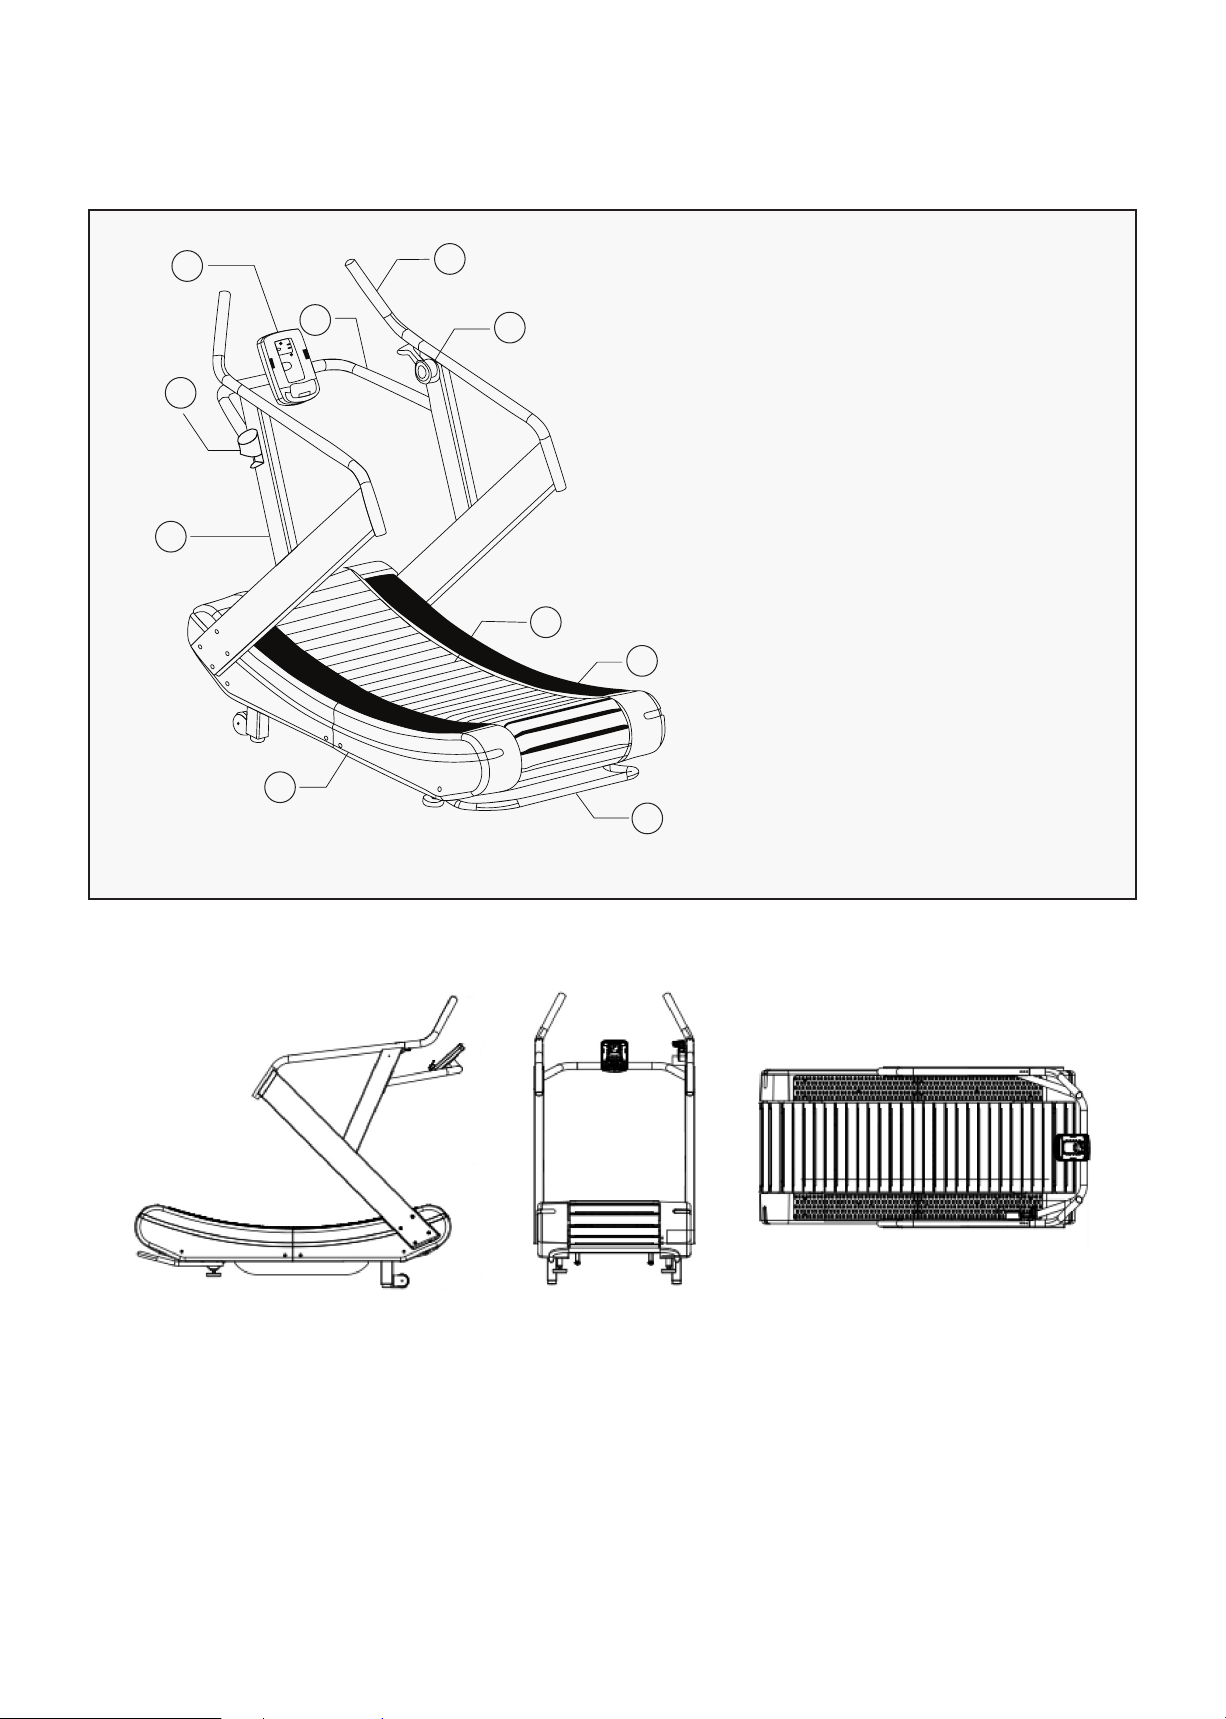
5EXPLODED DIAGRAM |
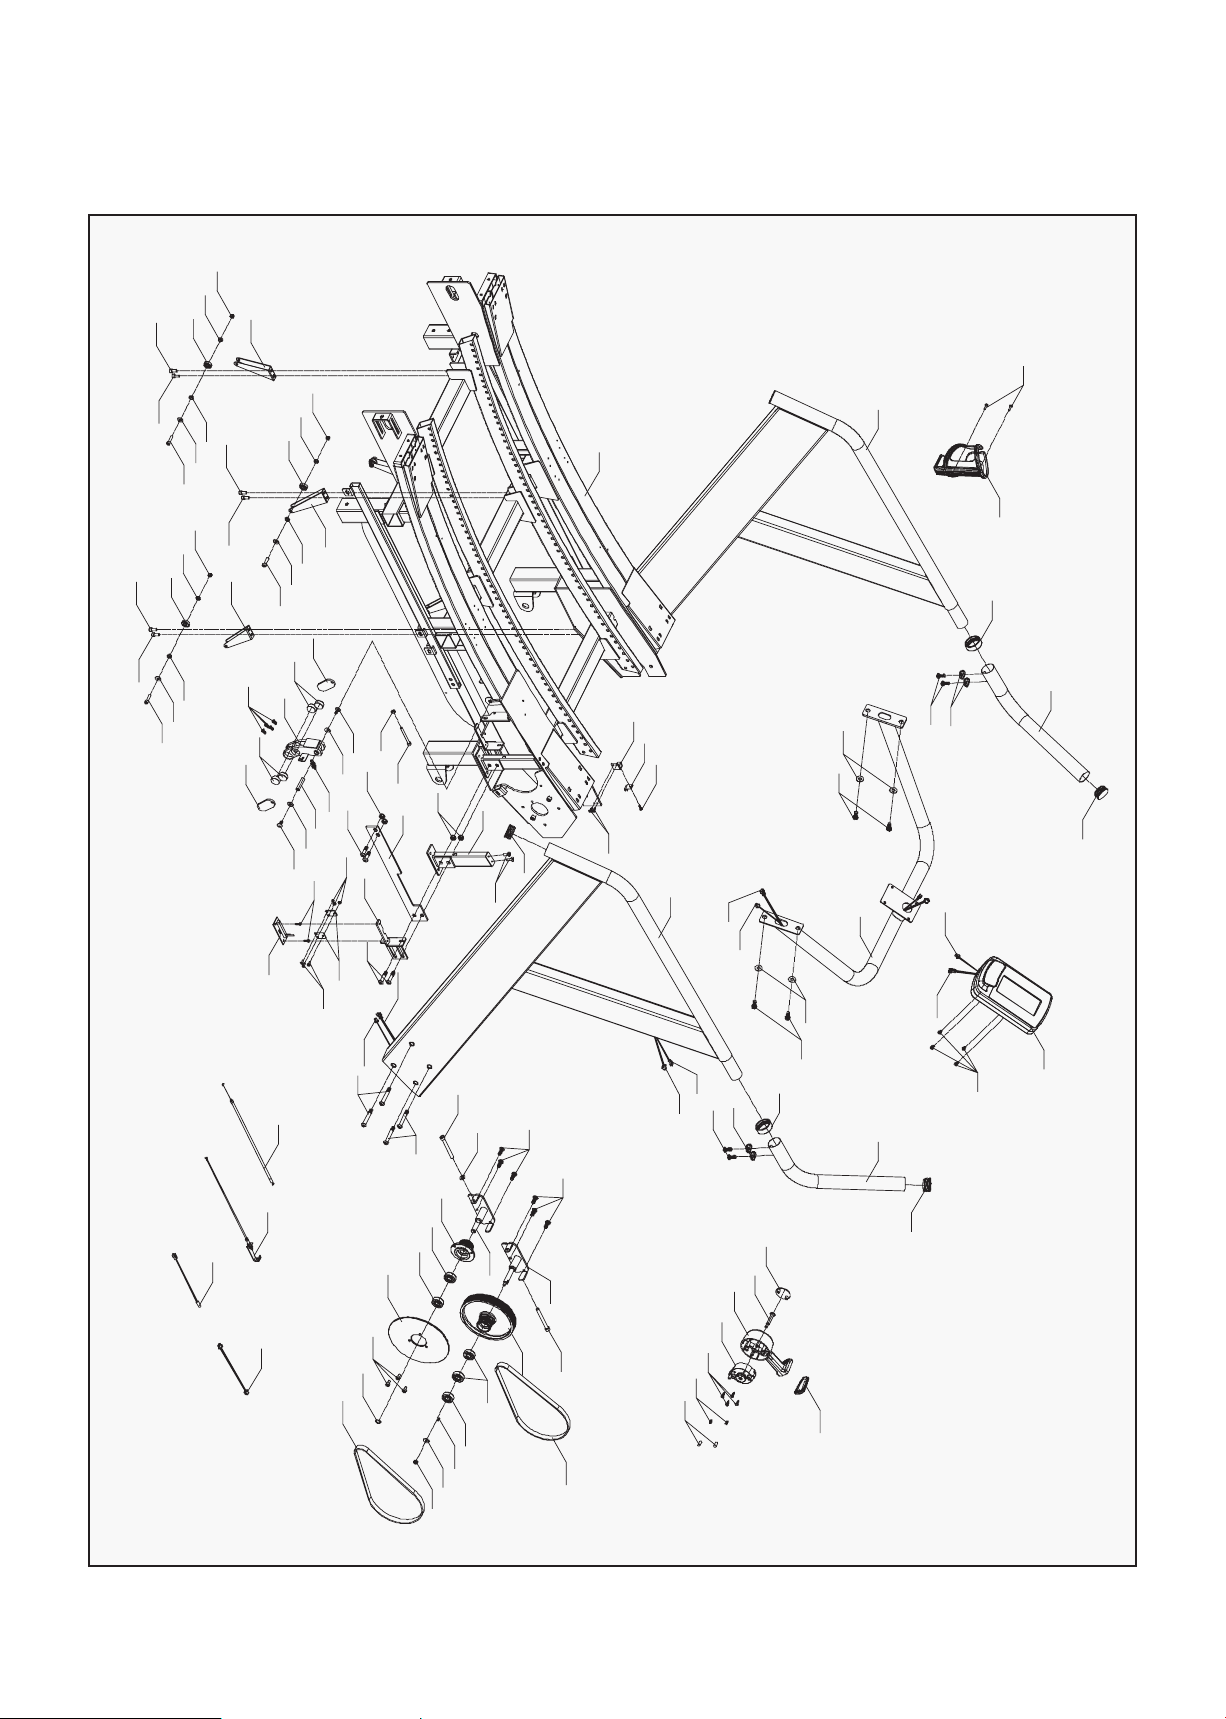
III. EXPLODED DIAGRAM
11
8
2
9
6
75
13
12
122
20
4
118 119
5
74
75
7
9
20
122
17
73
13
12
15
72
3
33
33
77
76
1
94
101
95
53
100
100
99
98
95
100
94
95
53
100
101
94
95
53
100
100
99
98
95
99
98
95
97
91
92
93
74
92
91
42
88
89
90
88
42
52
83
84
33
87
96
78
81
82
52
80
85
86
79
44
75
15.2
15.1
10
10
19
18
14
16
63
21
12
12
100
105
105
111
112
113
104
109
102
63
103
104
105
106
107
98
94
66
67
68
69
33
70
71
108
6 | EXPLODED DIAGRAM
27
23
24
25
26
23
24
25
26
22
28
29
30
29
28
33
32
36
32
32
33
32
32
34
32
33
35
32
37
32
32
38
33
39
40
41
42
42
42
43
53
55
54
50
56
55
53
55
53
59
57
58
21
52
48
49
51
21
52
21
52
48
49
120
45
46
47
45
120
48
49
121
1
48
49
60
61
12
65
12
31
63
21
64
12
62
63
21
61
60
117
116
114

7
IV. PARTS LIST
No. Description Qty
1 Main Frame (R) 1
2 Main Frame (L) 1
3 Front connecting tube 1
4 Connecting tube 2
5 Front wheel fixed tube 2
6 Upright post (R) 1
7 Upright post (L) 1
8 Handlebar (R) 1
9 Handlebar (L) 1
10 Console frame 1
11 Clamping ring
12 Bearing fixed plate (R) 1
13 Bearing fixed plate (L) 1
14 Front roller reinforcing plate 2
15 Rear roller reinforcing plate 2
16 Reinforcing plate (R) 1
17 Reinforcing plate (L) 1
18 Fixing plate 2
19 Clamping ring 1
20 Spacer 120
21 Main frame lifting handle tube 1
22 Sleeving 18
23 Sleeving 88
24 Guiding wheel 18
25 Sleeving 12
26 Bearing 172
27 Front roller 1
28 Rear roller 1
30 Aluminum chain 1 30
31 Aluminum chain 2 30
32 Running belt fixing strap 2
36 Wire L-1250mm 1
37 Washer Φ6 240
38 Wire L-900mm 1
42 Console 1
43 Front cover (L) 1
44 Front cover (R) 1
No. Description Qty
45 Rear cover (L) 1
46 Rear cover (R) 1
47 Antiskid plate 1 2
48 Antiskid plate 2 2
49 Horizontal adjustment feet pad 2
50 Wheel 2
51 Horizontal adjustment feet pad 2
53 PVC Spacer 120
53 PVC Spacer 120
54 PVC plastic strip 2
56 Hex locking nut M5 240
57 Hexagon half thread screw 88
M8*36*11
58 Hexagon half thread screw 18
M8*40*13
59 Hexagon socket head full 60
thread screw M8*48*15
60 Hex locking nut Φ8 106
61 Hexagon C.K.S full thread 30
screw M8x20
62 Hexagon C.K.S full thread 26
screw M8x20
63 Flat washer Φ8 18
64 Hex locking nut M8 14
65 Hexagon C.K.S full thread 26
screw M8x10
66 Hexagon C.K.S full thread 6
screw M10x25x15
67 Hexagon C.K.S full thread 2
screw M10x45x20
68 Flat washer Φ10 10
69 Hex locking nut M10 10
70 Hexagon full thread 2
screw M12x95
71 Hexagon C.K.S half thread 2
screw M10x55x25
72 Hexagon full thread 4
screw M8x50
73 Hex locking nut M8 4
Some items on this list may come pre-installed on your equipment. If you feel like you’re missing
anything, please double check your equipment.
PARTS LIST |

8
No. Description Qty
74 Hexagon C.K.S half thread 8
screw M8x65x20
75 Allen socket full thread 1
screw M8x75
76 Philips C.K.S. full thread 40
screw M4x15
77 Hex locking nut M6 16
78 Allen full thread screw M6x15 4
79 Allen socket full thread 6
screw M6x25
80 Philips C.K.S. full thread 4
screw M5x10
81 Philips C.K.S. full thread 12
screw M5x15
82 Philips C.K.S. full thread screw 10
83 Allen socket full thread 12
screw M4x10
84 Philips C.K.S. full thread 4
screw M5x10
85 Cover for magnet 2
86 Round magnet 4
87 Drive shaft 1
88 Allen socket full thread 6
screw M8x20
89 Deep groove ball bearing 4
90 Driving wheel 1
91 Circlip for shaft 2
92 Allen full thread screw M6x10 3
93 Aluminum plate for driving wheel 1
No. Description Qty
94 Handlebar 1
95 Allen C.K.S. half thread 1
screw M8x55x13
96 Cylindrical spiral springs 1
97 Elastic belt 2
98 Welding part for magnet set 1
99 Communication cable for 1
resistance L-1150mm
100 Philip C.K.S. self-tapping 2
screw ST4x16
101 Bottle holder 1
102 Communication cable for 1
resistance L-450mm
103 Slide rheostat 1
104 Slide rheostat fix plate 1
105 Brake line fix plate 1
107 Self-tapping screw ST3*10 2
108 VR Communication cable 1
L-950mm
109 VR Communication cable 1
L-1250mm
111 VR Communication cable 1
L-500mm
112 Fixed axle ONE 1
113 Fixed axle TWO 1
114 Single way bearing CSK12P 1
115 Tube plugΦ38 4
116 Communication cable L-550mm 1
| PARTS LIST

9
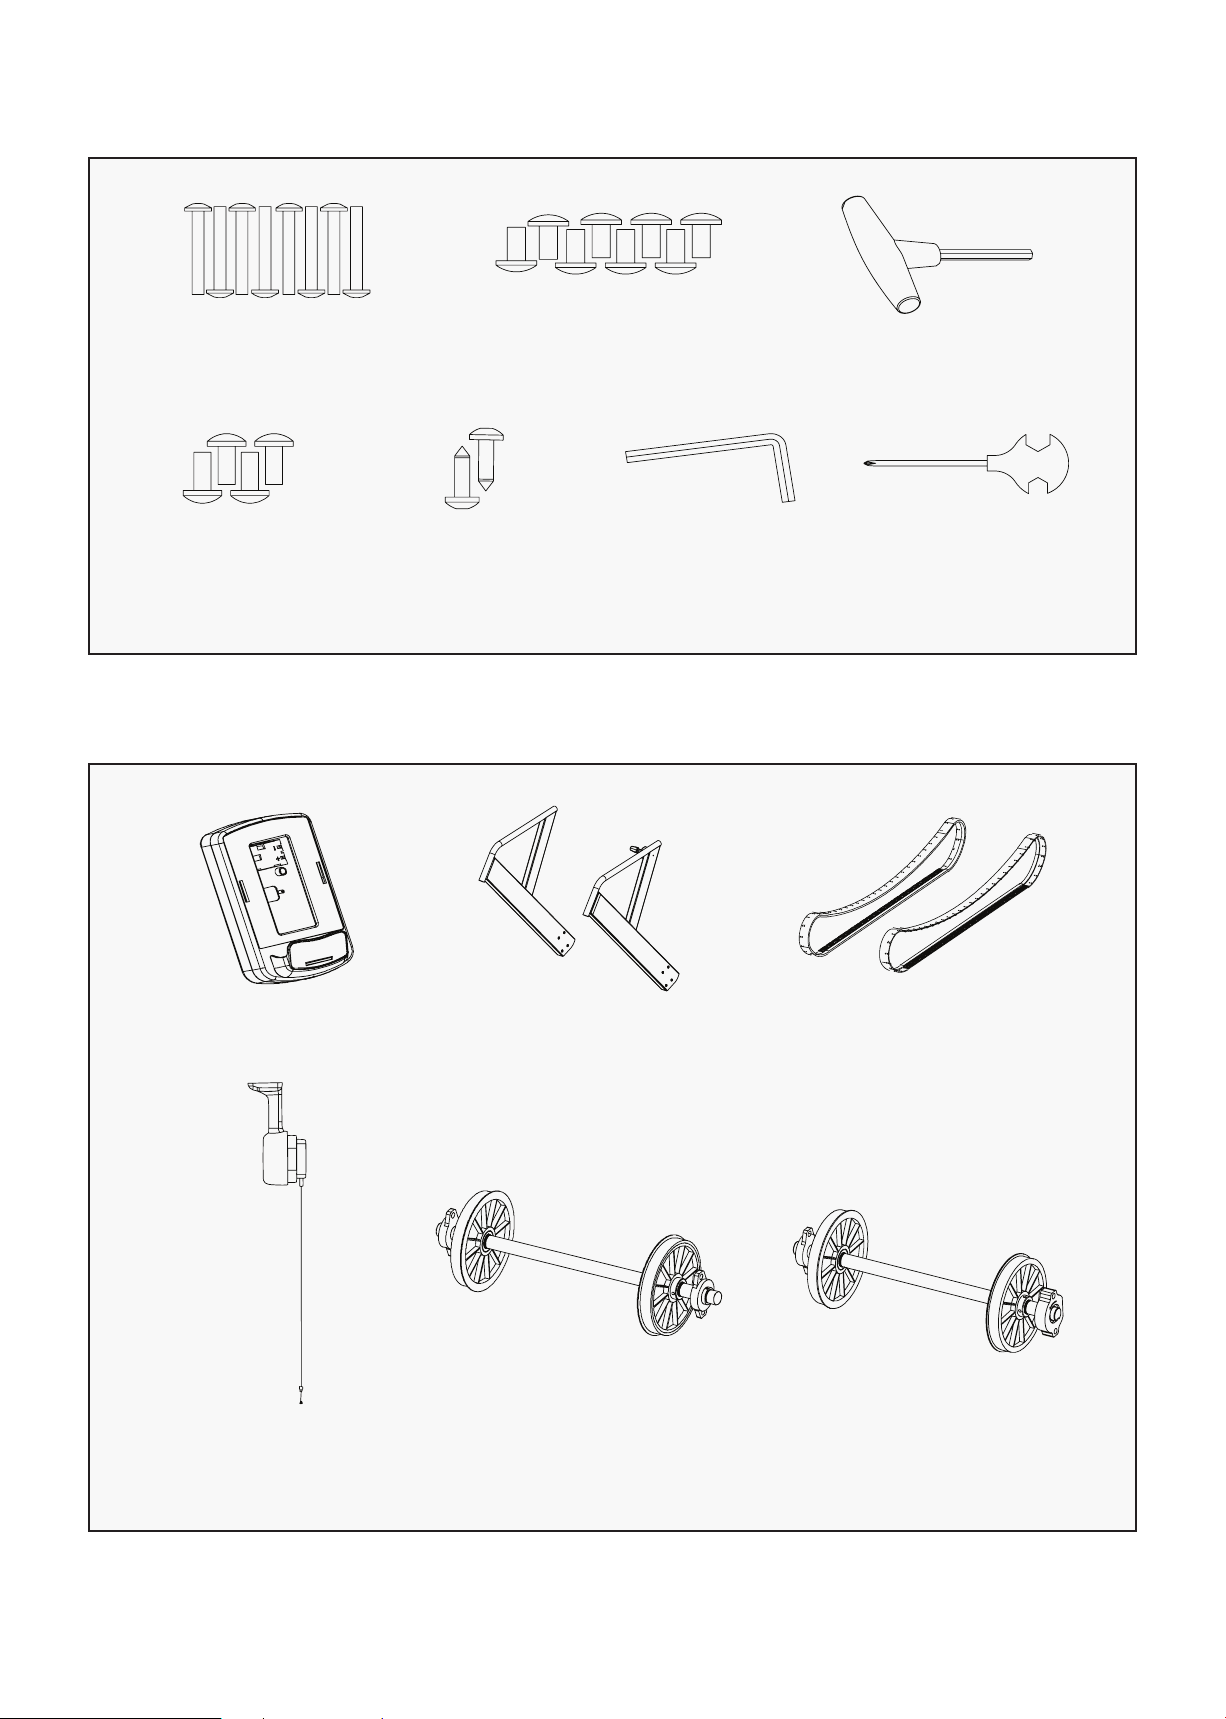
Main Body
PACKING LIST
Console
Hardware Pack Upright Post Handlebar L/R
Console Bottle Holder User Manual
USER’S MANUAL
PARTS LIST |
10
Hexagon C.K.S half thread
screw M8x65x20 8pcs
HARDWARE PACK LIST
Hexagon C.K.S half thread
screw M8*20 8pcs
T-shape spanner 6*80 1pc
Hexagon C.K.S
half thread screw
M5*10 4pcs
Self-tapping
screw ST4x16 2pcs
L-shape spanner
6*35*80 1pc
Cross spanner
14*17*75 1pc
MAIN PARTS
Console Upright Post
Handle for
resistance adjusting
Running belt
fixing strap
Front roller Rear roller
| PARTS LIST
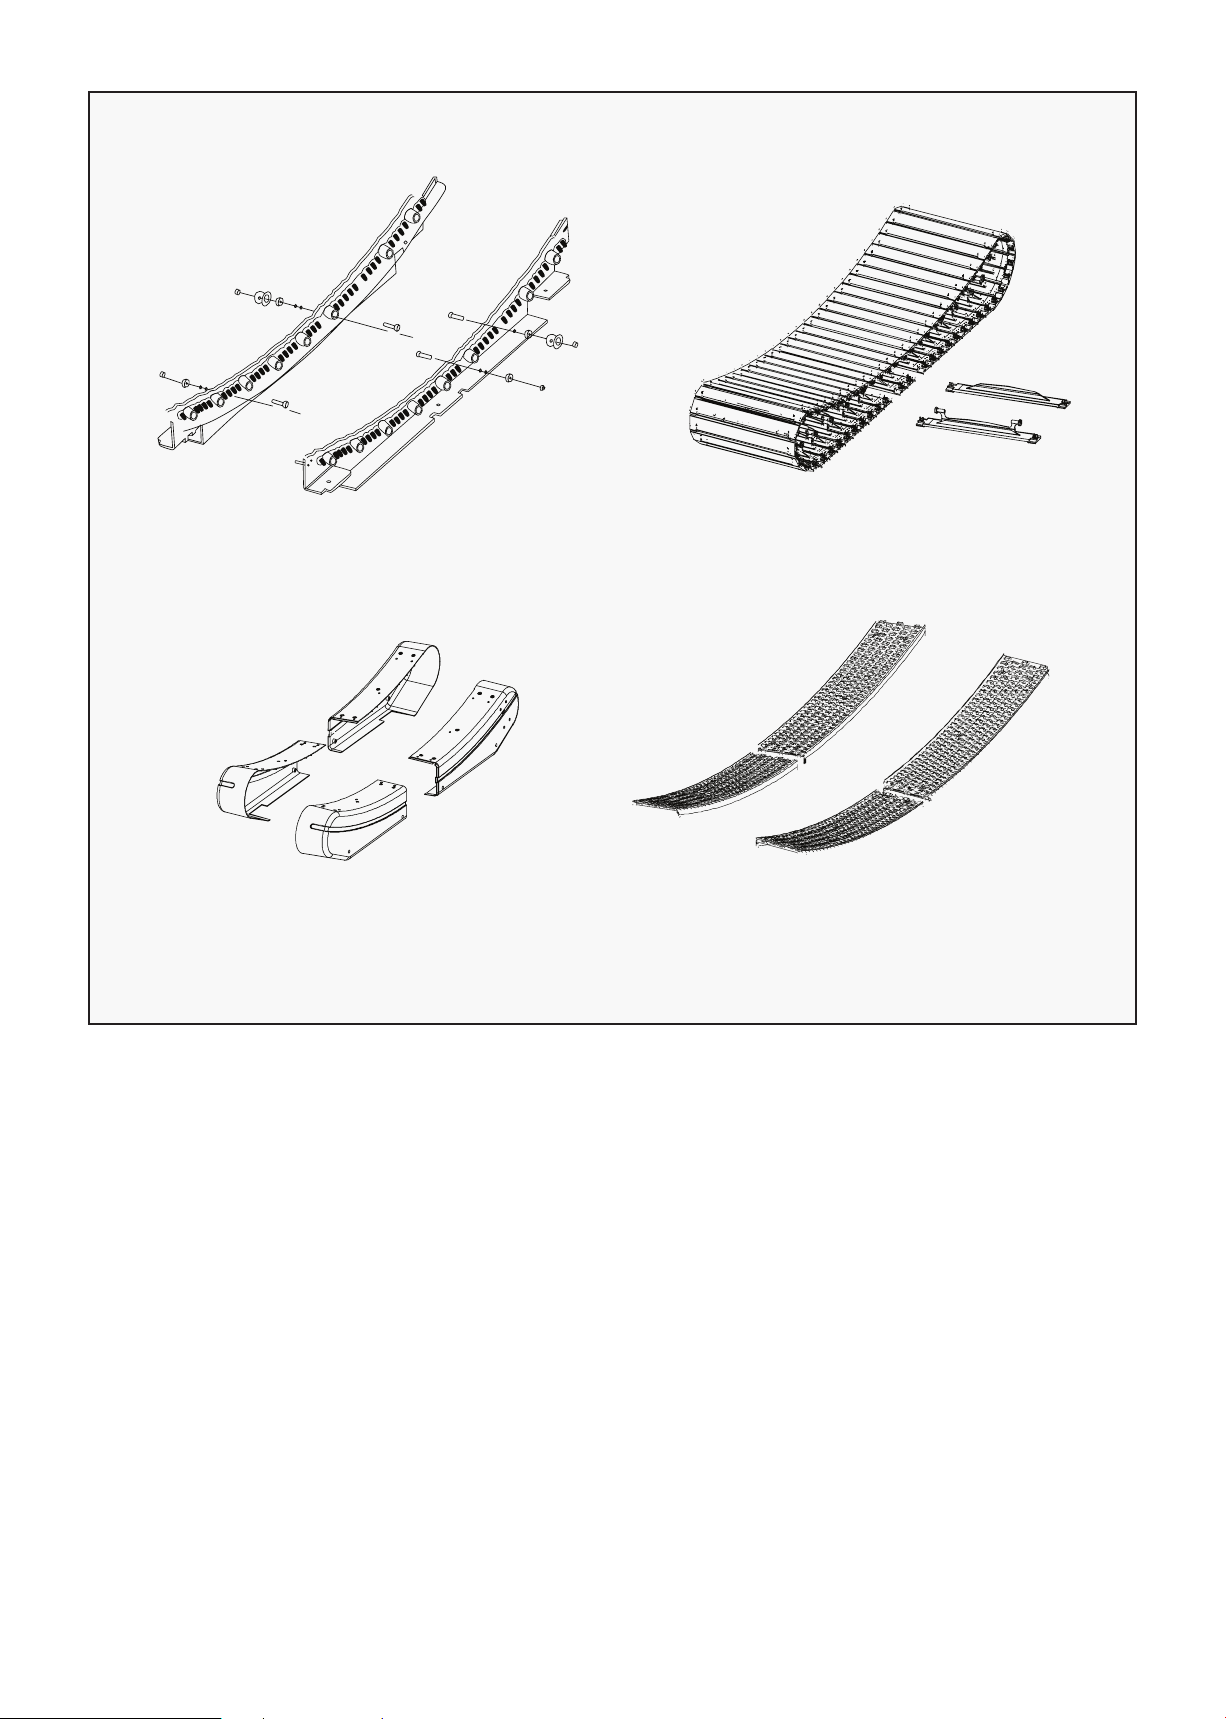
11
Bearing Fixed Set Aluminum Chain
Main Frame Cover Anti-Skate
PARTS LIST |
12
V. ASSEMBLY INSTRUCTIONS
1
2
3
4
5
6
7
8
9
10
1. Console
2. Console Frame
3. Bottle Holder
4. Handlebar
5. Handle for Resistance Adjusting
6. Upright Post
7. Cover
8. Chain Belt
9. Anti-skate plate
10. Lifting Handle
| ASSEMBLY INSTRUCTIONS
13
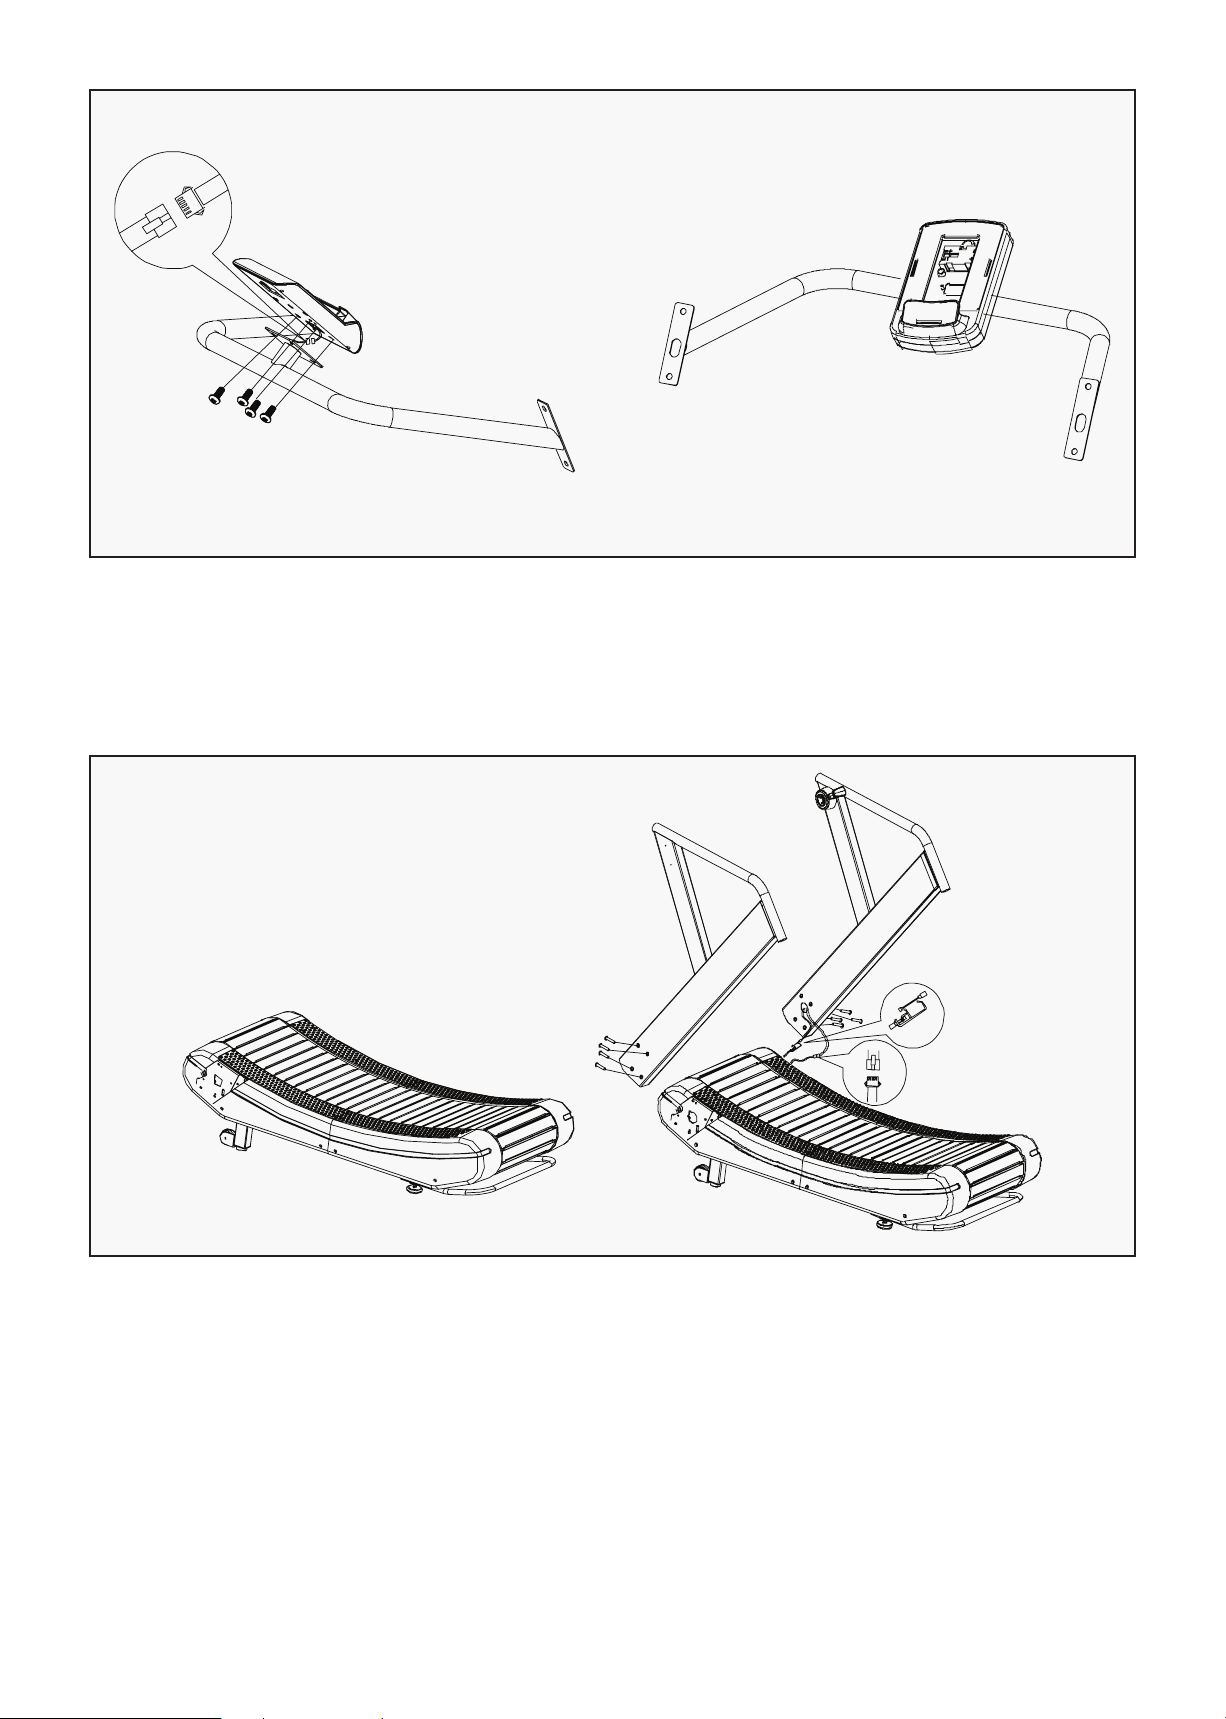
1. Take out the console frame and console from the box, connect the console communication wire
then fix on the console frame with 4PCS M5X10 screws.
STEP 1
1. Take out the machine from the box and put it on the even floor.
2. Connect the communication wire in the right upright post, then fix the upright post with 4pcs
M8x65x20 screws. Then assemble the left upright post.
STEP 2
ASSEMBLY INSTRUCTIONS |
14
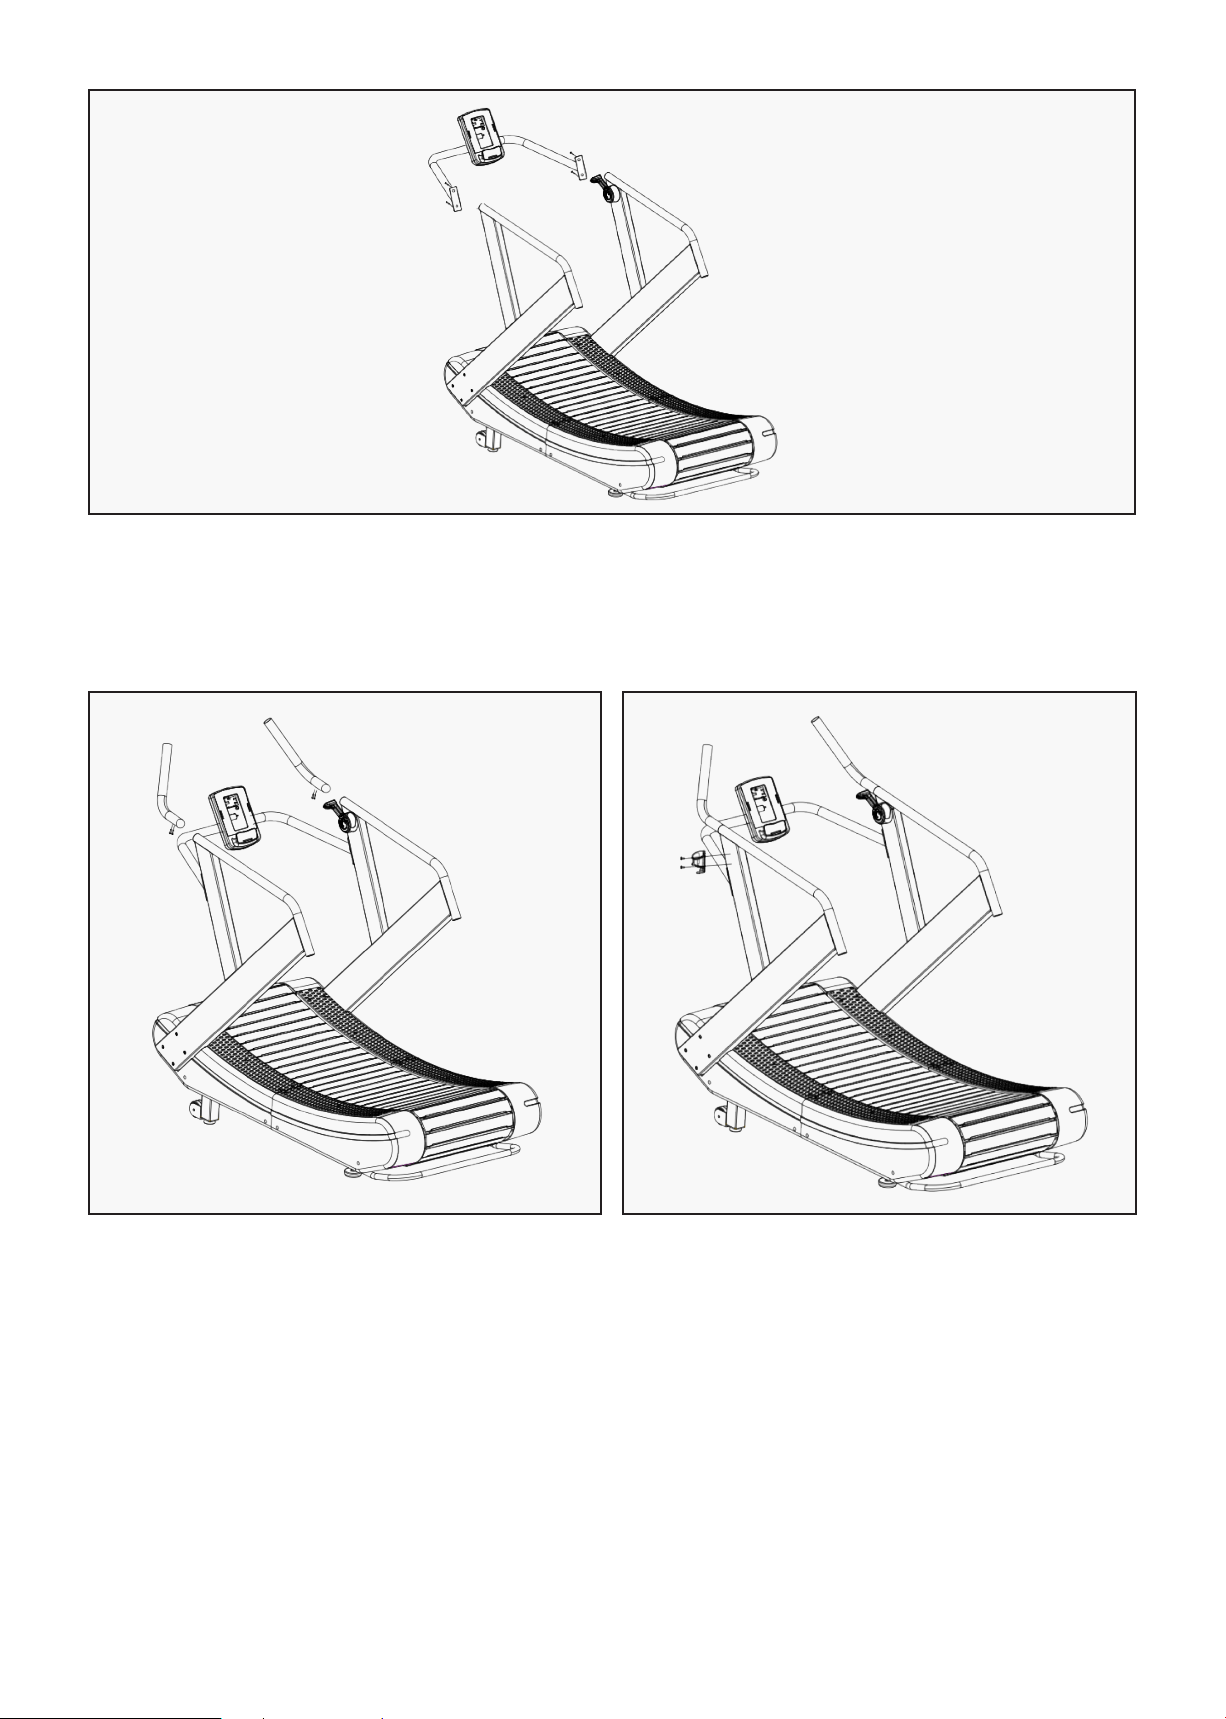
1. Connect the right handlebar and right upright post with 2pcs M8*20 screw. Fix the left handlebar in
the same way.
STEP 3
1. Connect the communication wire between
handlebar and the console frame, then fix
the console frame with 4pcs M8*20
screws, tighten all the screws. Connect the
communication wire between handlebar and
the console frame, then fix the console
frame with 4pcs M8*20 screws, tighten all
the screws.
STEP 4
1. Install the drink bottle holder.
2. Treadmill installation is finished.
STEP 5
| ASSEMBLY INSTRUCTIONS

15
VI. FEATURE AND FUNCTION
DISPLAY FUNCTIONS
Item Description
TIME Display user workout time.
Display range 0:00~1:59:00
DISTANCE Display user workout distance.
Display range 0.5~100
CALORIES Display calories consumption during workout.
Display range 0 ~ 2000
PULSE Display user heartrate during workout.
Display range 30~230
WATT Display the power consumption during training
SPEED Display current training speed
PACE Set the time to reach the target distance
Load Display LOAD resistance value for each level in WATT window
when adjust
LOAD resistance
Display range L1~L4
BUTTON FUNCTION
Item Description
Up Adjust function value up.
Down Adjust function value down.
Enter Confirm setting or selection.
Start Start work out quickly or resume workout in Stop mode.
FEATURE AND FUNCTION |
16
Item Description
Stop To stop/pause workout.
Hold on this key for 2 seconds to reboot the console.
Interval There are 3 programs: INTERVAL 10/20, INTERVAL 20/10,
Custom Interval.
Target Distance Fast access to Target Distance training mode.
Target Calories Fast access to Target Calories training mode.
Target Heartrate Fast access to Target Heart Rate training mode.
Target Time Fast access to Target Time training mode.
OPERATION PROCEDURE
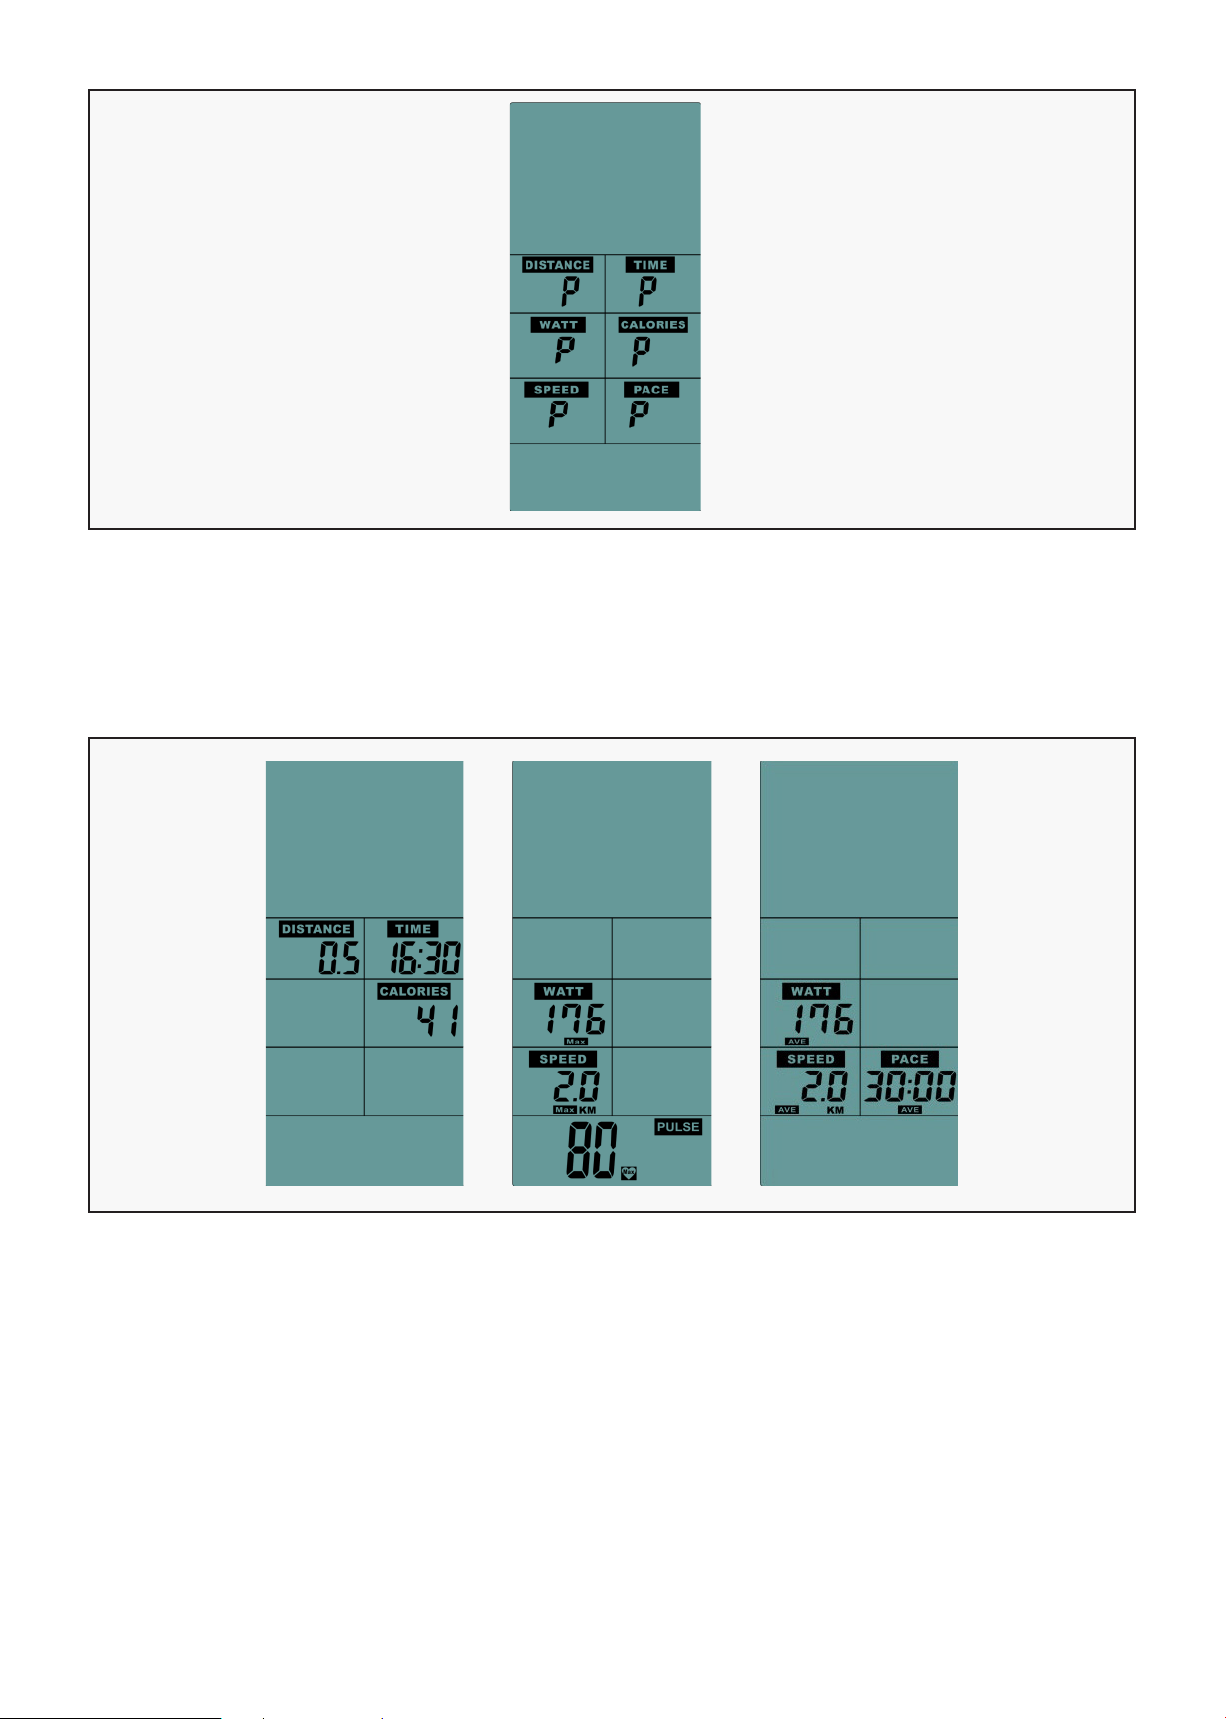
1. When POWER ON, LCD will full display 1s (FIG 1) with long beep sound, then enter display standby
mode (FIG 2), the pictures will be displayed from top ICON to bottom in sequence. Press STOP button
for 2 second, then enter standby mode.
2. If no input of key operation or RPM signal input in 4Min, LCD will go to Sleeping mode (FIG 3).
POWER ON
FIG 1 FIG 2 FIG 3
| FEATURE AND FUNCTION
17
1. When START, press "START" button one time, enter into Break mode with buzzer sound 0.5s by every
30s. Computer still display all functions ,but LCD windows display "P". Buzzer will sound for 1s and
enter into standby mode after broke with 5 Min, then press "START" to continue. (FIG 4)
BREAK MODE
FIG 5
1. Press "STOP" button with buzzer sound 0.5s, enter Stop mode. All the LCD windows no display, but
after 0.5s LCD will display TIME, DIST, CAL (display KM or ML according to the setting).
After 7s with buzzer sound 0.25s, LCD display MAX ICON, WATTS,SPEED, PULSE, also after keep shows
7s with buzzer sound 0.25s, LCD display AVE ICON WATTS, SPEED, PACE, after keep shows 7s without
display any data at the moment, then re-show the data two times and enter into standby mode.
(FIG 5)
STOP MODE
> >
FIG 5
FIG 4
FEATURE AND FUNCTION |

18
A. "PULSE" ICON: If any heart single input the "PULSE" ICON is flashing with current value, if no heart
single input LCD display "P".
B. If without any single input within 5Min, the buzzer rings for 0.5s and computer will go back to
standby mode.
C. If setting is not completed in 30 seconds, the buzzer will ring for 0.5 seconds and go back to standby
mode.
D. Press the "START" button once to enter the break mode, and press "START" to continue running.
E. Press the "STOP" button to sound the buzzer for 0.5 seconds and enter the stop mode.
F. If the result of movement is displayed, press "STOP" button to leave and return to standby mode.
G. When adjusting the adjustment button, it will display the LOAD resistance for each segment in WATT
window.
QUICK START
FIG 6
| FEATURE AND FUNCTION
19
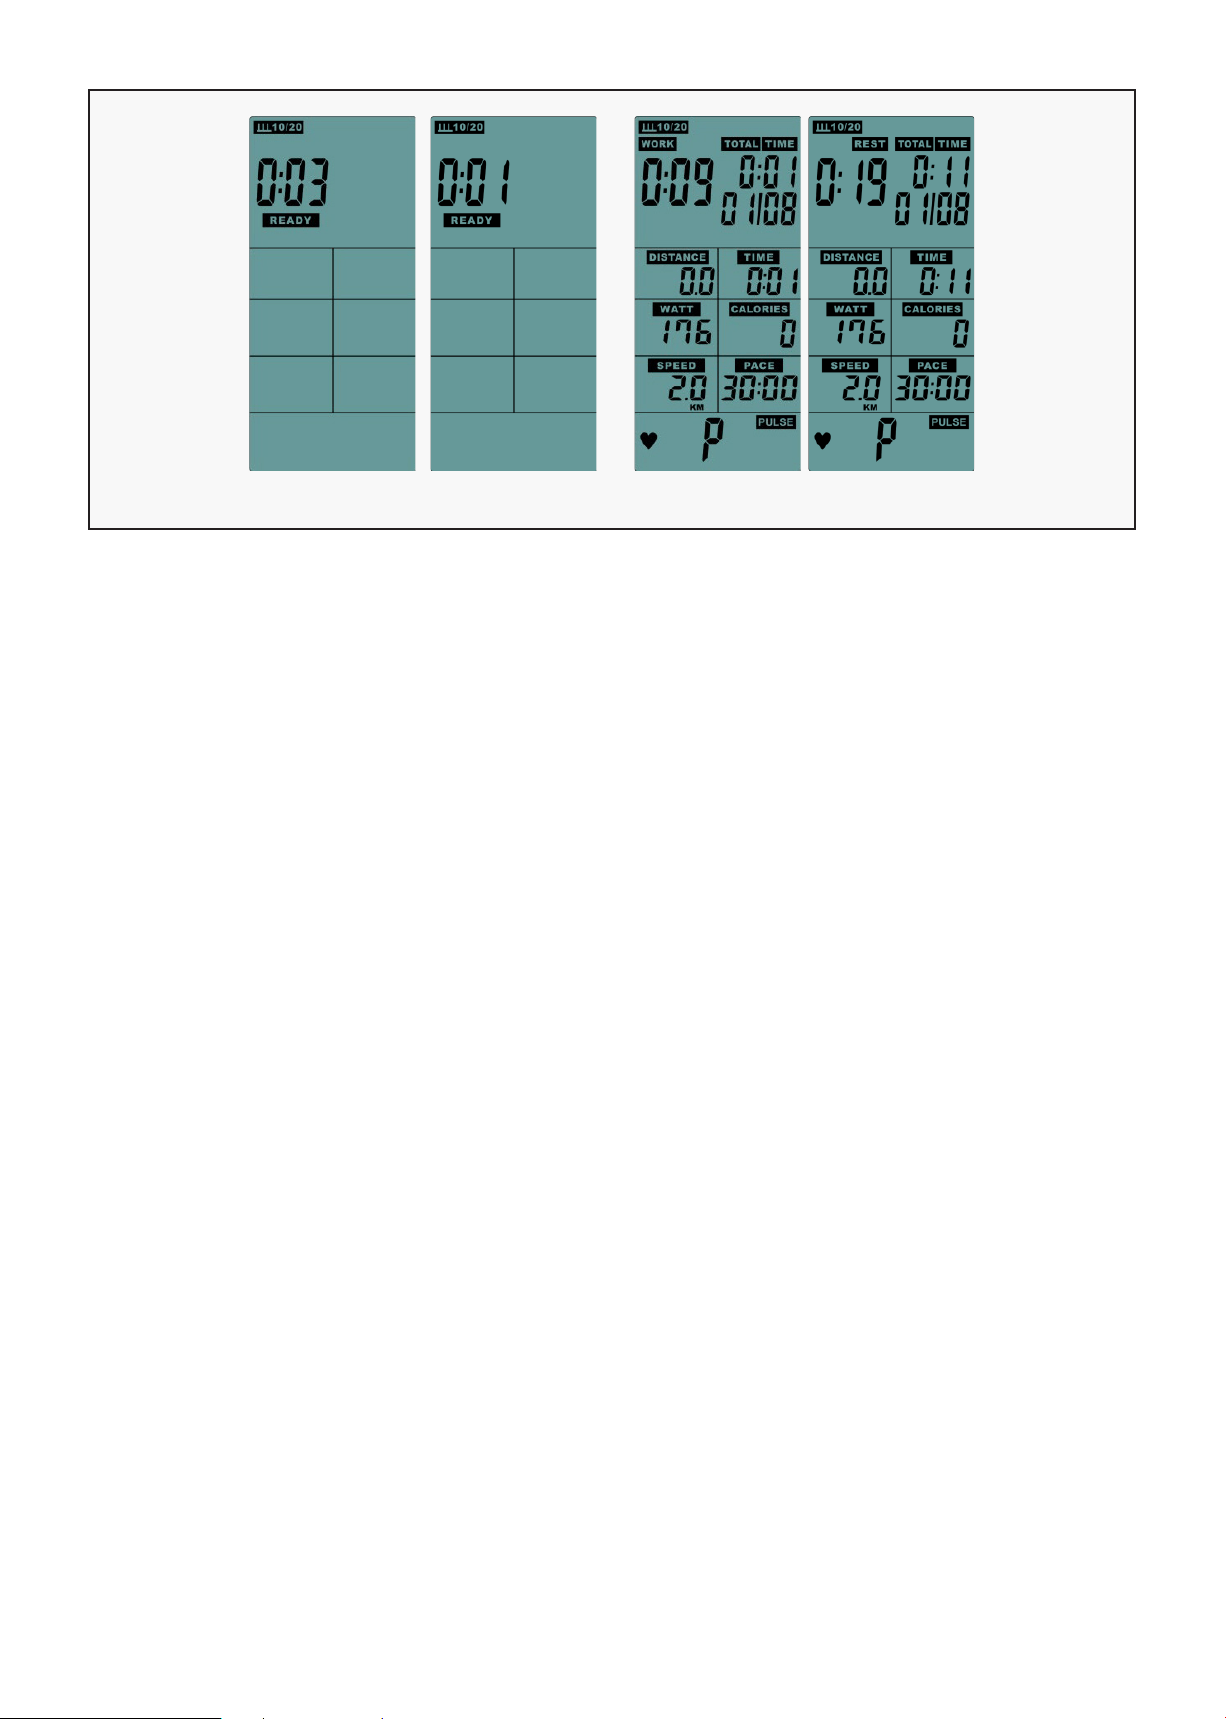
A. Press "INTERVAL10/20" button, enter to this mode, LCD display ICON, with buzzer beeps 0.5s.
B. If there is no input in 30s when setting, the computer will back to standby mode.
C. The "READY" ICON counts down from 3s to 0s, meanwhile with a short buzzer beep (FIG 7), LCD
display "01/XX" ("01" is flashing). The "WORK" ICON is flashing one time every 1s with buzzer sounds
(shining 0.75s/ put out 0.25s), "TIME" ICON counts down from 10s to 0s, DISTANCE, CALORIES, WATTS,
SPEED, RPM count-up according the operation. (FIG 8)
D. After Work 10s, LCD window display "01/08" ("01" is flashing), "REST" ICON is kept flashing, the buzzer
rings for 0.25s per 1s, TIME start to count down from 20s to 0s.
E. Work & REST display in cycle, cycle count increase 1 every time till reach to 08/08 (total cycle counts
8 times). Buzzer rings 0.5s enter to stop mode. (The average value of the sports results is only
calculated within the Work time)
F. When the last REST is reached, this mode is stop directly.
G. If no single input in 5Min, buzzer rings 0.5s enter standby mode.
H. Press the "START" button once, enter the break mode, and press "START" to continue running.
I. Press the "STOP" button to sound the buzzer for 0.5s and enter the stop mode.
J. If the result of movement is displayed, press "STOP" button to leave and return to standby mode.
INTERVAL 10/20
FIG 7 FIG 8
FEATURE AND FUNCTION |

20
A. Press "INTERVAL 20/10" button, enter to this mode, LCD display ICON (FIG 10), with buzzer
beeps 0.5s.
B. If did not input in 30s when setting, computer will back to standby mode.
C. The "READY" ICON counts down from 3s to 0s, meanwhile with a short buzzer beep (FIG 7), LCD
display "01/XX" ("01" is flashing). The "WORK" ICON is flashing one time every 1s with buzzer sounds
(shining 0.75s/ put out 0.25s), "TIME" ICON counts down from 10s to 0s, DISTANCE, CALORIES, WATTS,
SPEED, RPM count according the operation. (FIG 10).
D. After Work 10s, LCD window display "01/08" ("01" is flashing), "REST" ICON is kept flashing, the buzzer
rings for 0.25 seconds per second, TIME start to count down from 20s to 0s.
E. Work & REST display in cycle, cycle count increase 1every time till reach to 08/08(total cycle counts 8
times). Buzzer rings 0.5s enter to stop mode. (The average value of the sports results is only
calculated within the Work time)
F. When the last REST is reached, this mode is stop directly.
G. If no single input in 5Min, buzzer rings 0.5s enter standby mode.
H. Press the "START" button once to enter the break mode, and press "START" to continue running.
I. Press the "STOP" button to sound the buzzer for 0.5s and to enter the stop mode.
J. If the result of movement is displayed, press "STOP" button to leave and return to standby mode.
INTERVAL 20/10
FIG 10
| FEATURE AND FUNCTION

21
A. Press "INTERVAL CUSTOM" button, enter to this mode, LCD display ICON (FIG 13), with
buzzer beeps 0.5s.
B. LCD display the presetting value 01, press "UP, DOWN" button to setting (setting range 01~20), it is
non-recyclable (FIG 14).
C. Press "ENTER" confirmed, "WORK" ICON is flashing, LCD window "TOTAL TIME" display the presetting
value 0:30. Press "UP, DOWN" button to setting (setting range: 0:05~30:00), it is non-recyclable
(FIG 15).
D. Press "ENTER" confirmed, "REST" ICON is flashing, LCD window "TOTAL TIME" display the presetting
value 0:20. Press "UP, DOWN" button to setting (setting range:0:05~30:00), it is non-recyclable (FIG 16).
E. Press "ENTER" confirmed, meanwhile with a short buzzer rings 0.5s, LCD display "01/XX" ("01" is
flashing). The "WORK" ICON is flashing one time every 1s with buzzer sounds (shining 0.75s/ put out
0.25s), "TIME" ICON counts down from the setting value, DISTANCE, CALORIES, WATTS, SPEED, PACE
count according the operation.
F. There is set REST time, matrix displays 01/XX (part 01 is flashing), "REST" ICON keep flashing, The
buzzer rings for 0.25s every second.
G. "WORK" & "REST" display in cycle, cycle count increase 1every time till reach to 08/08(total cycle
counts 8 times). Buzzer rings 0.5s enter to stop mode. (The average value of the sports results is only
calculated within the Work time)
H. When the last REST is reached, this mode is stop directly.
I. If no single input in 5Min, buzzer rings 0.5s enter standby mode.
J. Press the "START" button once, enter the break mode, and press "START" to continue running.
K. Press the "STOP" button to sound the buzzer for 0.5 seconds and enter the stop mode.
L. If the result of movement is displayed, press "STOP" button to leave and return to standby mode.
INTERVAL CUSTOM
FIG 14 FIG 15 FIG 16
FEATURE AND FUNCTION |

22
A. Press "TARGET TIME" button to enter to this mode, LCD flashing will display TARGET & TIME.
B. LCD "TIME" window displays the presetting value1:00 or the last setting value. Press "UP, DOWN"
button to setting (setting range 1:00~1:59:00), it is non-recyclable.
C. After setting, press "ENTER" confirmed, TARGET & TIME ICON continue to flash, meanwhile start to
count down form setting value.
D. Press the "START" button once, enter the break mode, and press "START" to continue running.
E. Press the "STOP" button to sound the buzzer for 0.5s and enter the stop mode.
F. If no single input in 5Min, buzzer rings 0.5s enter standby mode.
G. If did not complete the setting in 30s, the buzzer rings for 0.5s and back to standby mode.
H. If the result of movement is displayed, press "STOP" button to leave and return to standby mode.
TARGET TIME
| FEATURE AND FUNCTION

23
A. Press "TARGETCALORIE" button, enter to this mode, LCD flashing display TARGET & CALORIE.
B. LCD "CALORIE" window display the presetting value 2:00 or the last setting value. Press "UP, DOWN"
button to setting (setting range1~2000), it is non-recyclable.
C. After setting, press "ENTER" confirmed, TARGET & CALORIE ICON continue to be flashing, meanwhile
start to count down form the setting value.
D. Press the "START" button once, to enter the break mode, and press "START" to continue running.
E. Press the "STOP" button to sound the buzzer for 0.5s and enter the stop mode.
F. If no single input in 5Min, buzzer rings 0.5s enter standby mode.
G. If did not complete the setting in 30s, the buzzer rings for 0.5s and back to standby mode.
H. If the result of movement is displayed, press "STOP" button to leave and return to standby mode.
TARGET CALORIES
FEATURE AND FUNCTION |

24
A. Press "TARGET DISTANCE" button, enter to this mode, LCD flashing display TARGET & DISTANCE.
B. LCD "DISTANCE" window display the presetting value 0.5KM/0.5Miles or the last setting value. Press
"UP, DOWN" button to setting (setting range0.5~100), it is non-recyclable.
C. After setting, press "ENTER" confirmed, TARGET & DISTANNCE continue to be flashing, meanwhile start
to count down form the setting value.
D. Press the "START" button once, enter the break mode, and press "START" to continue running.
E. Press the "STOP" button to sound the buzzer for 0.5s and enter the stop mode.
F. If no single input in 5Min, buzzer rings 0.5s enter standby mode.
G. If did not complete the setting in 30s, the buzzer rings for 0.5s and back to standby mode.
H. If the result of movement is displayed, press "STOP" button to leave and return to standby mode.
TARGET DISTANCE
| FEATURE AND FUNCTION

25
A. Press "TARGETHEART RATE" button, enter to this mode, LCD flashing display Age ICON with
presetting value 30 or the last setting value. Press "UP, DOWN" button to setting (setting range 11~99),
it is non-recyclable.
B. After setting, press "ENTER" confirmed, LCD display the presetting value 65%, press "UP, DOWN"
button to adjust to 65% or 85% & the value of Pulse, LCD will show the corresponding value.
C. If selected PULSE, LCD display the presetting value "100", press "UP, DOWN" button to setting (setting
range 30~230), it is non-recyclable.
D. Press "ENTER" button to start to count, TARGET & PULSE ICON is flashing.
E. When the heartbeat value is higher or lower than the setting value (+/-10%), the PULSE value is
displayed continuously.
F. The heartbeat value is lower than the setting value (<10%), and the PULSE window "UP ICON" flashes
to remind USER to accelerate.
G. The heartbeat value is higher than the setting value (>10%), and the PULSE window "DOWN ICON"
flashes to remind USER to slow down.
H. The heartbeat value is higher than or equal to the setting value of 100%. The buzzer rings 3 short
sounds every 1s. After 10 times, the heartbeat value is still not lower than 100%, the buzzer rings 1s and
enter the standby mode.
I. Without any heart single input in 30s, the "PULSE" LCD window display "P", buzzer rings 1s and enter
the standby mode.
J. Press the "START" button once, enter the break mode, and press "START" to continue running.
K. Press the "STOP" button to sound the buzzer for 0.5 seconds and enter the stop mode.
L. If no single input in 5Min, buzzer rings 0.5s enter standby mode.
M. If did not complete the setting in 30s, the buzzer rings for 0.5s and back to standby mode.
N. If the result of movement is displayed, press "STOP" button to leave and return to standby mode.
TARGET HEART RATE
Set Age 65% 85% PULSE START < TARGET 10% > TARGET 10%
FEATURE AND FUNCTION |
26
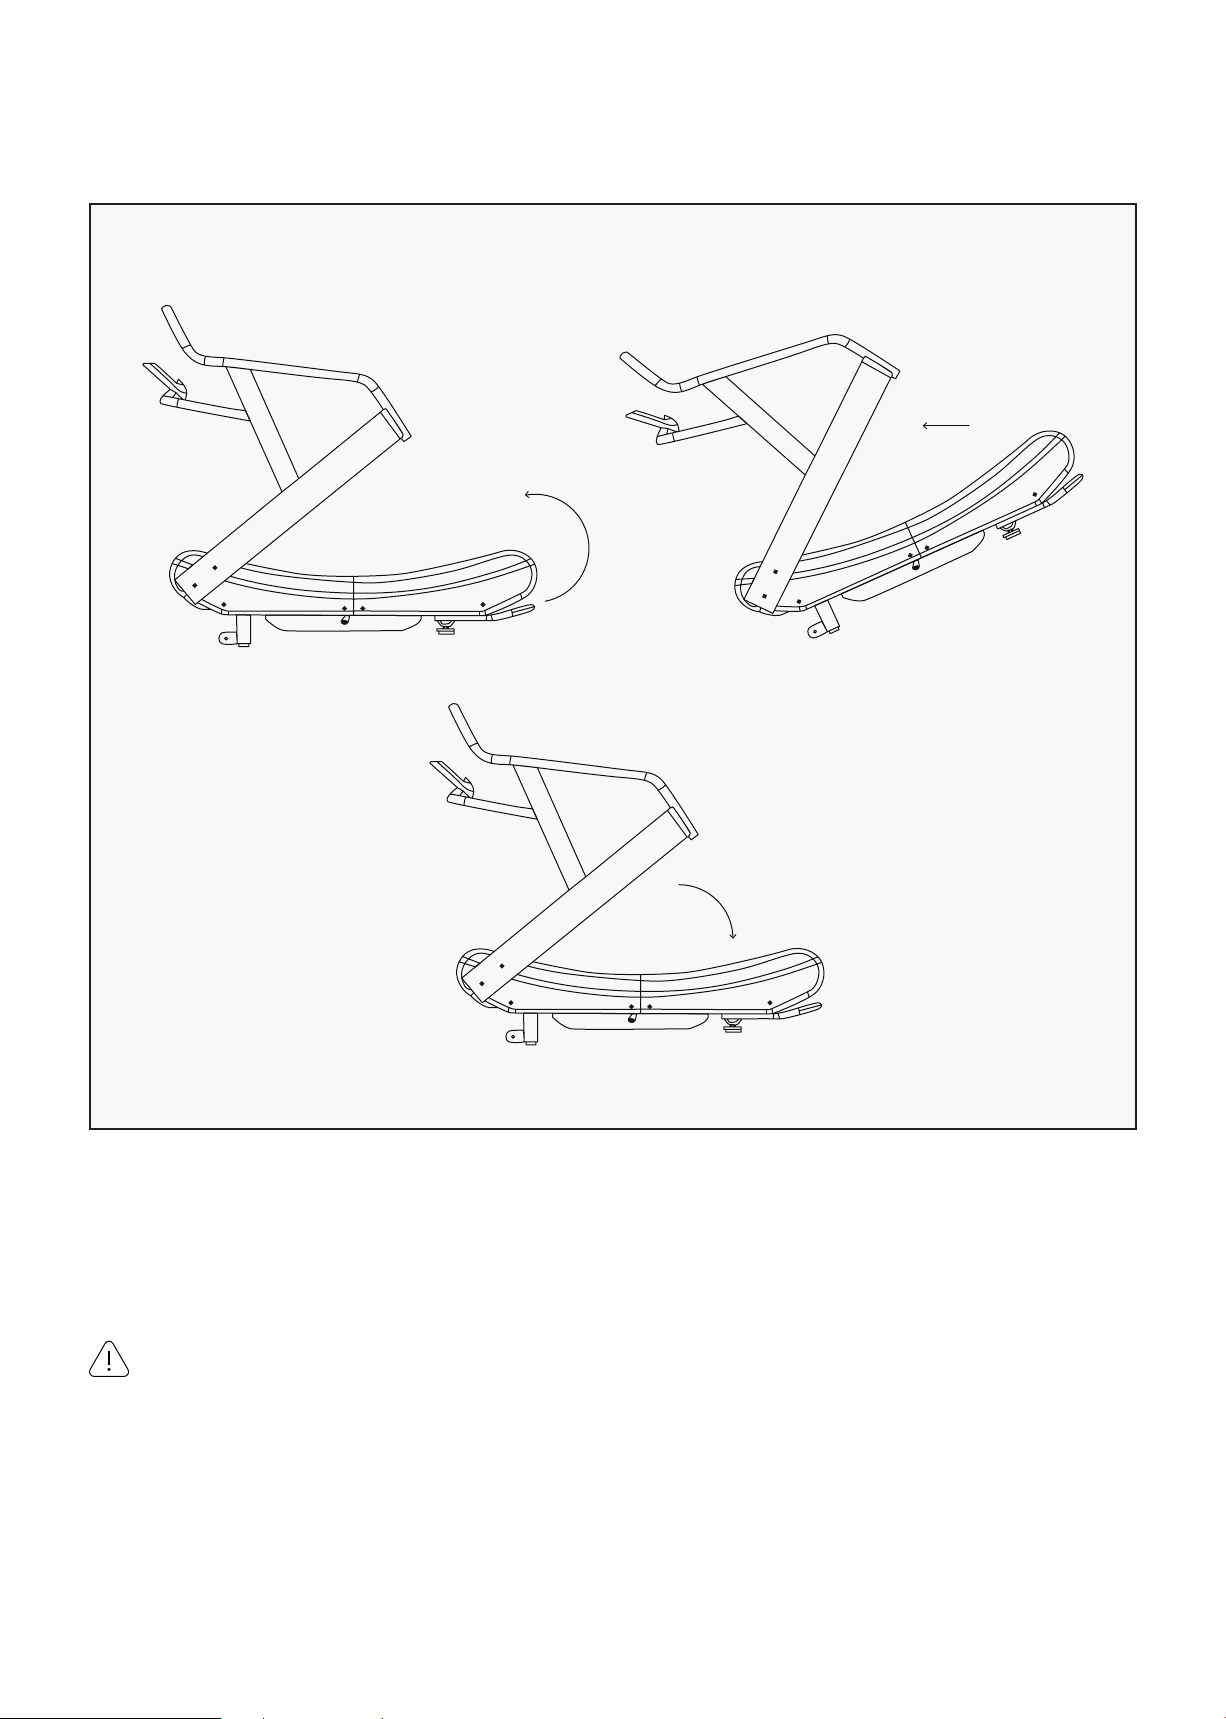
VII. MOVING THE TREADMILL
1. Hold the treadmill from the back with both hands.
2. Tilt it to the transportation wheels and move the desired location.
HOW TO MOVE TREADMILL:
CAUTION:
The machine is heavy and may need assistance to move it.
| MOVING THE TREADMILL
27
VIII. EXERCISE GUIDE
PLEASE NOTE:
Before beginning any exercise program, consult your physician. This is important especially if you are
over the age of 45 or individuals with pre-existing health problems.
The pulse sensors are not medical devices. Various factors, including the user’s movement, may
affect the accuracy of heart rate readings. The pulse sensors are intended only as an exercise aid in
determining heart rate trends in general.
Exercising is great way to control your weight, improving your fitness and reduce the effect of aging and
stress. The key to success is to make exercise a regular and enjoyable part of your everyday life.
The condition of your heart and lungs and how efficient they are in delivering oxygen via your blood to
your muscles is an important factor to your fitness. Your muscles use this oxygen to provide enough
energy for daily activity. This is called aerobic activity. When you are fit, your heart will not have to work
so hard. It will pump a lot fewer times per minute, reducing the wear and tear of your heart.
So as you can see, the fitter you are, the healthier and greater you will feel.
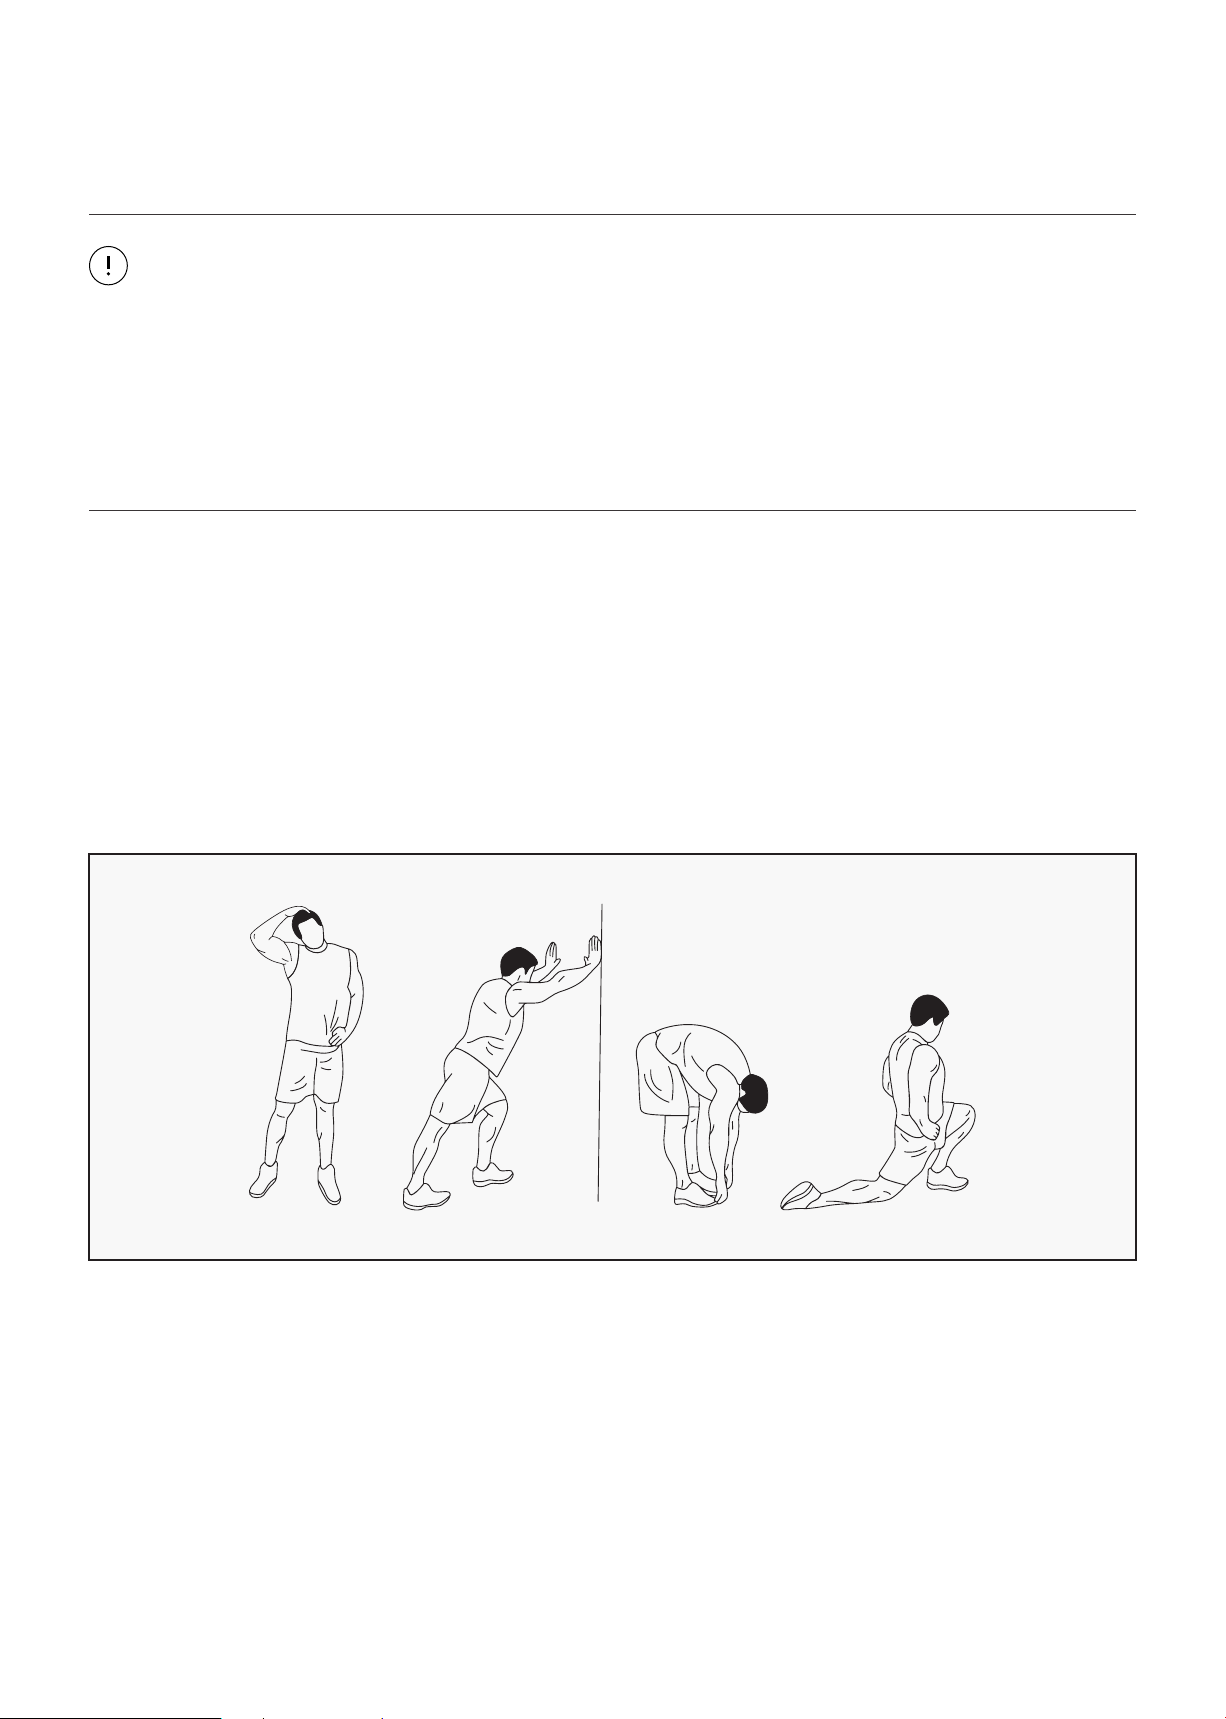
WARM UP
Start each workout with 5 to 10 minutes of stretching and some light exercises. A proper warm-up
increases your body temperature, heart rate and circulation in preparation for exercise. Ease into your
exercise.
EXERCISE GUIDE |
28
COOL DOWN
Finish each workout with a light jog or walk for at least 1 minute. Then complete 5 to 10 minutes of
stretching to cool down. This will increase the flexibility of your muscles and will help prevent post-
exercise problems.
WORKOUT GUIDELINES
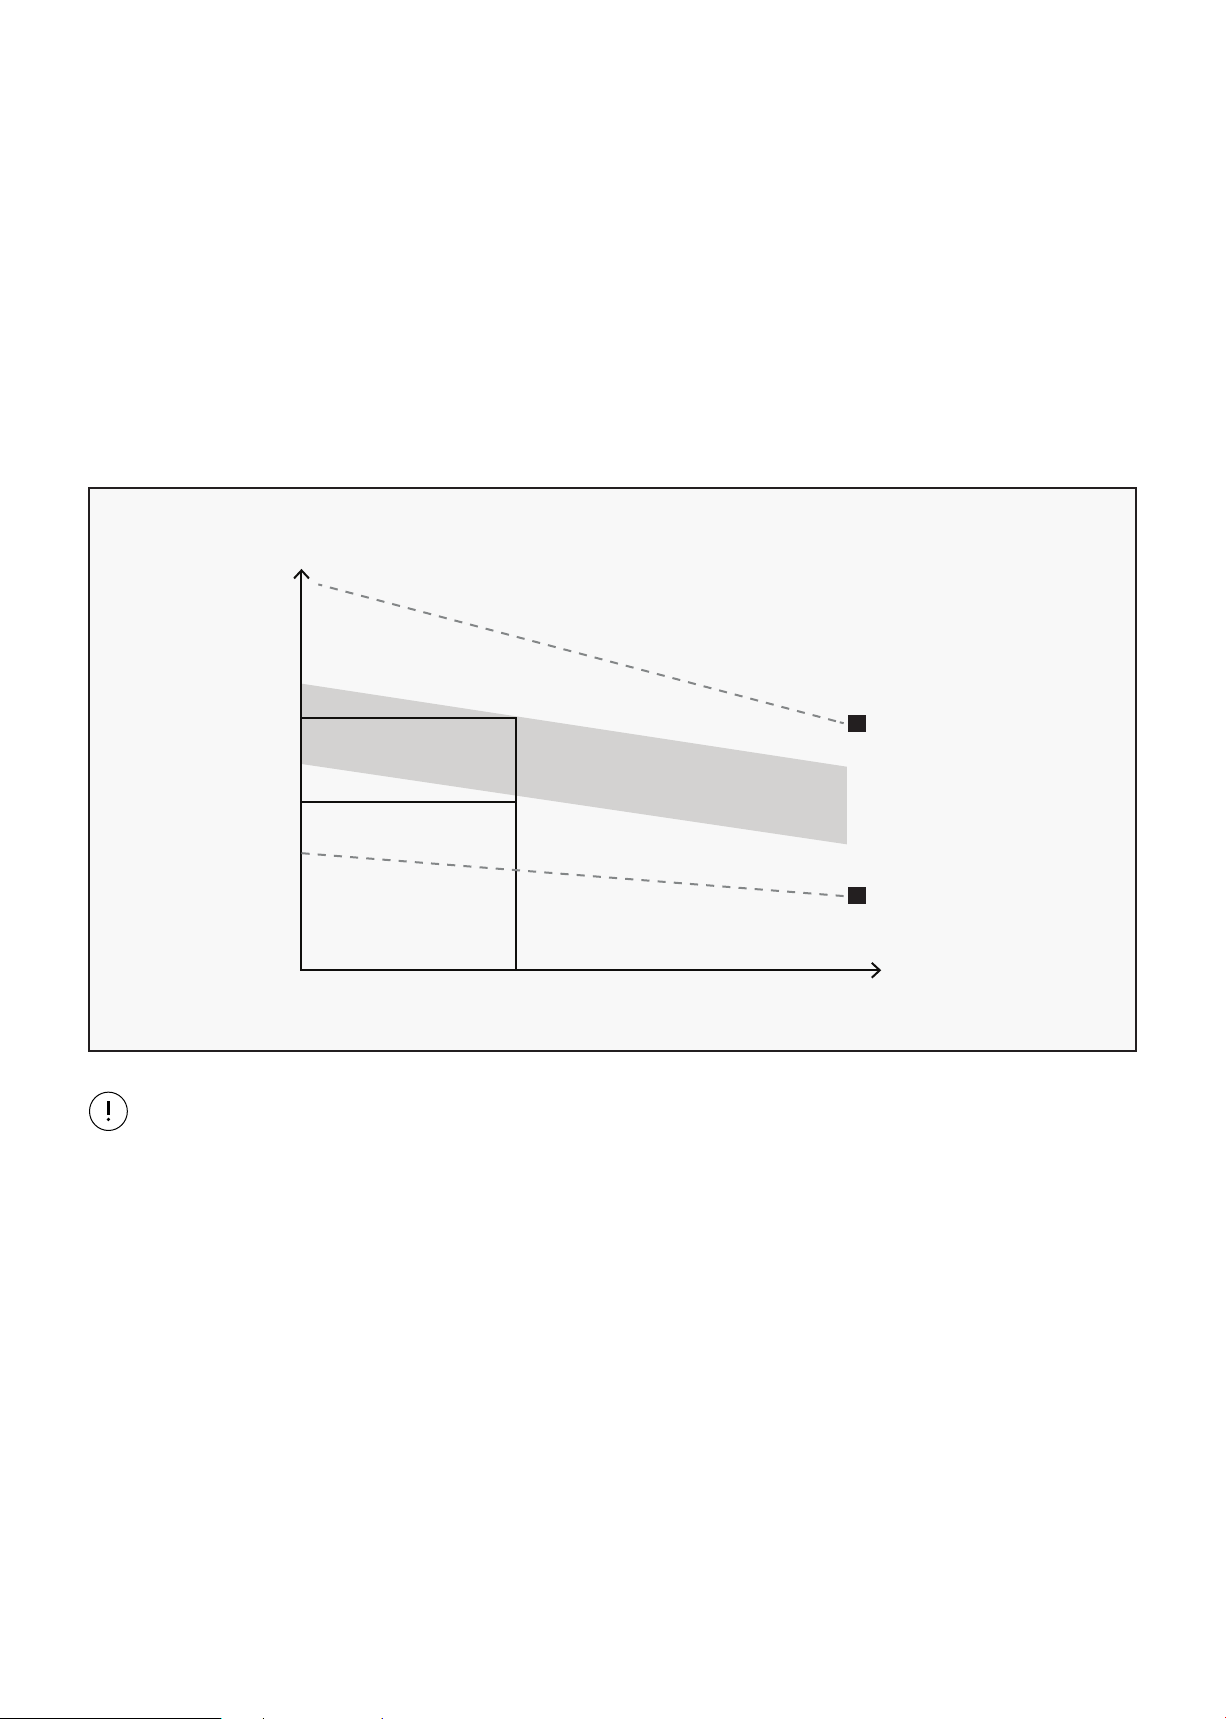
This is how your pulse should behave during general fitness exercise. Remember to warm up and
cool down for a few minutes.
TARGET ZONE
MAXIMUM
85%
70%
COOL DOWN
AGE
HEART RATE
200
180
160
140
120
100
80
20 25 30 35 40 45 50 55 60 65 70 75
The most important factor here is the amount of effort you put in. The harder and longer you work, the
more calories you will burn.
TRAINING ZONE EXERCISE
After warming up, increase the intensity to your desired exercise program. Be sure to maintain your
intensity for maximum performance. Breathe regularly and deeply as you exercise.
| EXERCISE GUIDE

29
IX. MAINTENANCE INSTRUCTIONS
Reasonable cleaning/lubricating should be made to extend the life time of this unit. Performance is
maximized when the belt and mat are kept as clean as possible.
WARNING:
• The mat/deck friction may lay a major role in the function and life of your treadmill and that is why
we recommend you constantly lubricate this friction point to prolong the useful life of your treadmill.
Failing to do this may void your warranty.
• Use a soft, damp cloth to wipe the edge of the belt and the area between the belt edge and frame. A
mild soap and water solution along with a nylon scrub brush will clean the top of the textured belt.
This task should be done once a month. Allow to dry before using.
1. GENERAL CLEANING
• Check parts for wear before use.
• Pay particular attention to the fixing knobs and make sure they are tight.
• Always replace the mat if worn and any other defective parts.
• If in doubt do not use the treadmill and contact us.
2. GENERAL CARE
Take care to protect carpets and floor in case of leakages. This product is a machine that
contains moving parts which have been greased/lubricated and could leak.
MAINTENANCE INSTRUCTIONS |

30
X. WARRANTY
| WARRANTY
AUSTRALIAN CONSUMER LAW
Many of our products come with a guarantee or warranty from the manufacturer. In addition, they come
with guarantees that cannot be excluded under the Australian Consumer Law. You are entitled to a
replacement or refund for a major failure and compensation for any other reasonably foreseeable loss
or damage.
You are entitled to have the goods repaired or replaced if the goods fail to be of acceptable quality and
the failure does not amount to a major failure. Full details of your consumer rights may be found at
www.consumerlaw.gov.au.
Please visit our website to view our full warranty terms and conditions:
http://www.lifespanfitness.com.au/warranty-repairs
WARRANTY AND SUPPORT
Any claim against this warranty must be made through your original place of purchase.
Proof of purchase is required before a warranty claim may be processed.
If you have purchased this product from the Official Lifespan Fitness website, please visit
https://lifespanfitness.com.au/warranty-form
For support outside of warranty, if you wish to purchase replacement parts or request a repair or
service, please visit https://lifespanfitness.com.au/warranty-form and fill in our Repair/Service
Request Form or Parts Purchase Form.
Scan this QR code with your device to go to lifespanfitness.com.au/warranty-form


WWW.LIFESPANFITNESS.COM.AU