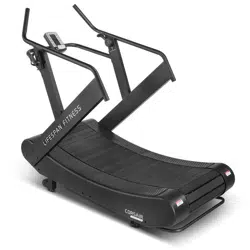
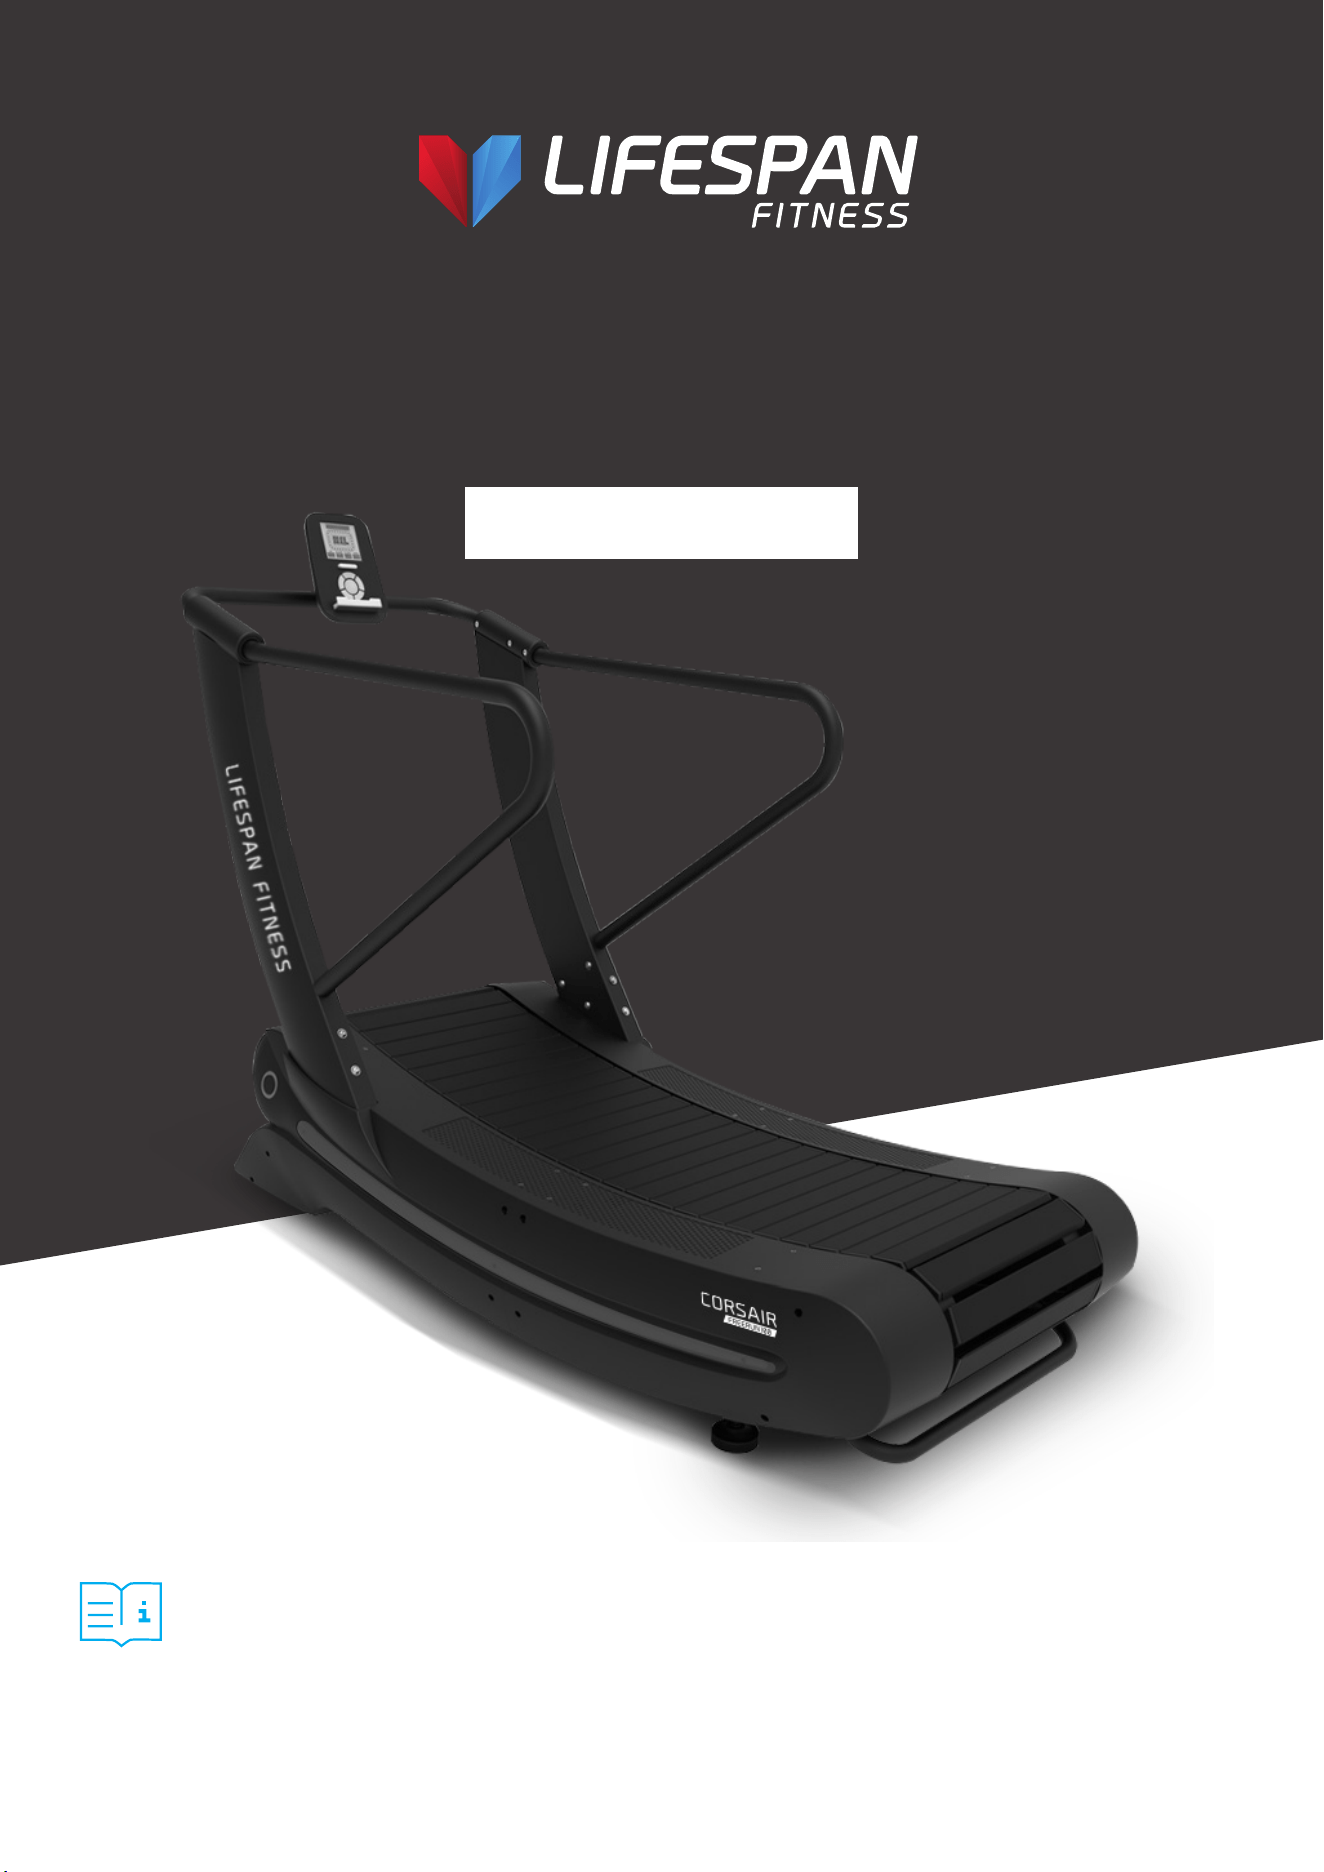
Corsair Freerun 100
Curved Treadmill
USER MANUAL
Product may vary slightly from the item pictured due to model upgrades.
Read all instructions carefully before using this product.
Retain this owner’s manual for future reference.
NOTE:
This manual should not be used to guide your purchasing decision. Your product, and the contents inside its carton, may vary
from what is listed in this manual. This manual may also be subject to updates or changes. Updated manuals are available
through our website at www.lifespanfitness.com.au

2
TABLE OF
CONTENTS
I. Important Safety Instructions . . . . . . . . . . . . . . . . . . . . . . . . . . . . . . . . 03
II. Important Operating Instructions . . . . . . . . . . . . . . . . . . . . . . . . . . . 04
III. Parts List . . . . . . . . . . . . . . . . . . . . . . . . . . . . . . . . . . . . . . . . . . . . . . . . . . . . . . 05
IV. Assembly Instructions . . . . . . . . . . . . . . . . . . . . . . . . . . . . . . . . . . . . . . 08
V. Display Instructions . . . . . . . . . . . . . . . . . . . . . . . . . . . . . . . . . . . . . . . . . . . 10
VI. Exercise Guide . . . . . . . . . . . . . . . . . . . . . . . . . . . . . . . . . . . . . . . . . . . . . . . . 11
VII. Maintenance Instructions . . . . . . . . . . . . . . . . . . . . . . . . . . . . . . . . . . . . 13
VIII. Warranty . . . . . . . . . . . . . . . . . . . . . . . . . . . . . . . . . . . . . . . . . . . . . . . . . . . . . 14
| TABLE OF CONTENTS

3
I. IMPORTANT SAFETY
INSTRUCTIONS
WARNING: Read all instructions before using this machine.
It is important your machine receives regular maintenance to prolong its useful life. Failing to
regularly maintain your machine may void your warranty.
• Read the entire owner’s manual before operating the unit.
• Save this manual for future reference.
• Assembly of Technical Items: Assembly of the treadmill should be performed by a qualified
technician. A significant amount of technical knowledge is required for the safe and
complete assembly of the unit.
• Do not use accessory attachments that are not recommended by Lifespan Fitness. Such
attachments may cause injuries.
• Assemble and operate the treadmill on a solid, level surface.
• All warning labels attached directly to the treadmill must remain installed. If a warning label
becomes illegible or damaged, please contact Lifespan Fitness for a replacement.
• Maintain the treadmill to keep it in good working condition, as described in this manual. Inspect the
treadmill for incorrect, worn, or loose components, and then correct, replace, or tighten prior to use.
• If you plan to move the treadmill, obtain help and use proper lifting techniques.
• Do not attempt to service the treadmill yourself, except to follow the maintenance instructions in
this manual.
• Move the treadmill with 2 person and use proper lifting technique to avoid injury.
IMPORTANT SAFETY INSTRUCTIONS |

4
• Do not use while under the influence of alcohol, drugs, or narcotics.
• Do not allow children, or people unfamiliar with the operation of this treadmill, on or near it. Do
not leave children unsupervised around the treadmill.
• Do not allow children under the age of 16 to use the treadmill without supervision.
• Do not allow animals on the treadmill.
• Examine the treadmill for loose or worn parts before each use. Tighten/replace any worn or loose
components prior to use.
• Do not use outdoors or in high humidity.
• Do not operate the treadmill without the handrail installed.
• Do not use the treadmill with walking poles or other devices not specifically approved by
Lifespan Fitness.
• Never jump onto the treadmill. Never jump from the treadmill. Never enter the treadmill from the
front. Operate treadmill only when facing forward. Never attempt to mount or dismount the
treadmill while the belt is moving.
• Hold on to the handrail with one hand whenever you operate the console keys with the other
hand. Face the console and do not lean on or pull on the console at any time.
• Never drop or insert objects into any opening.
• Keep hands away from moving parts.
• Wear proper exercise clothing and shoes for your workouts and avoid loose or dangling clothing.
Tie long hair back. Do not wear shoes with heels and check the soles of your shoes to remove any
dirt and embedded stones. The running surface is not intended for cleats or running spikes.
• Save these instructions.
II. IMPORTANT OPERATING
INSTRUCTIONS
WARNING: The treadmill is non-motorized and means the user initiates and controls the
speed of the running belt. There is no emergency stop feature and the treadmill will slow
to a stop on its own.
WARNING: The belt moves freely in only one direction. Grasp the handrails whenever
mounting and dismounting the treadmill.
| IMPORTANT OPERATING INSTRUCTIONS

5
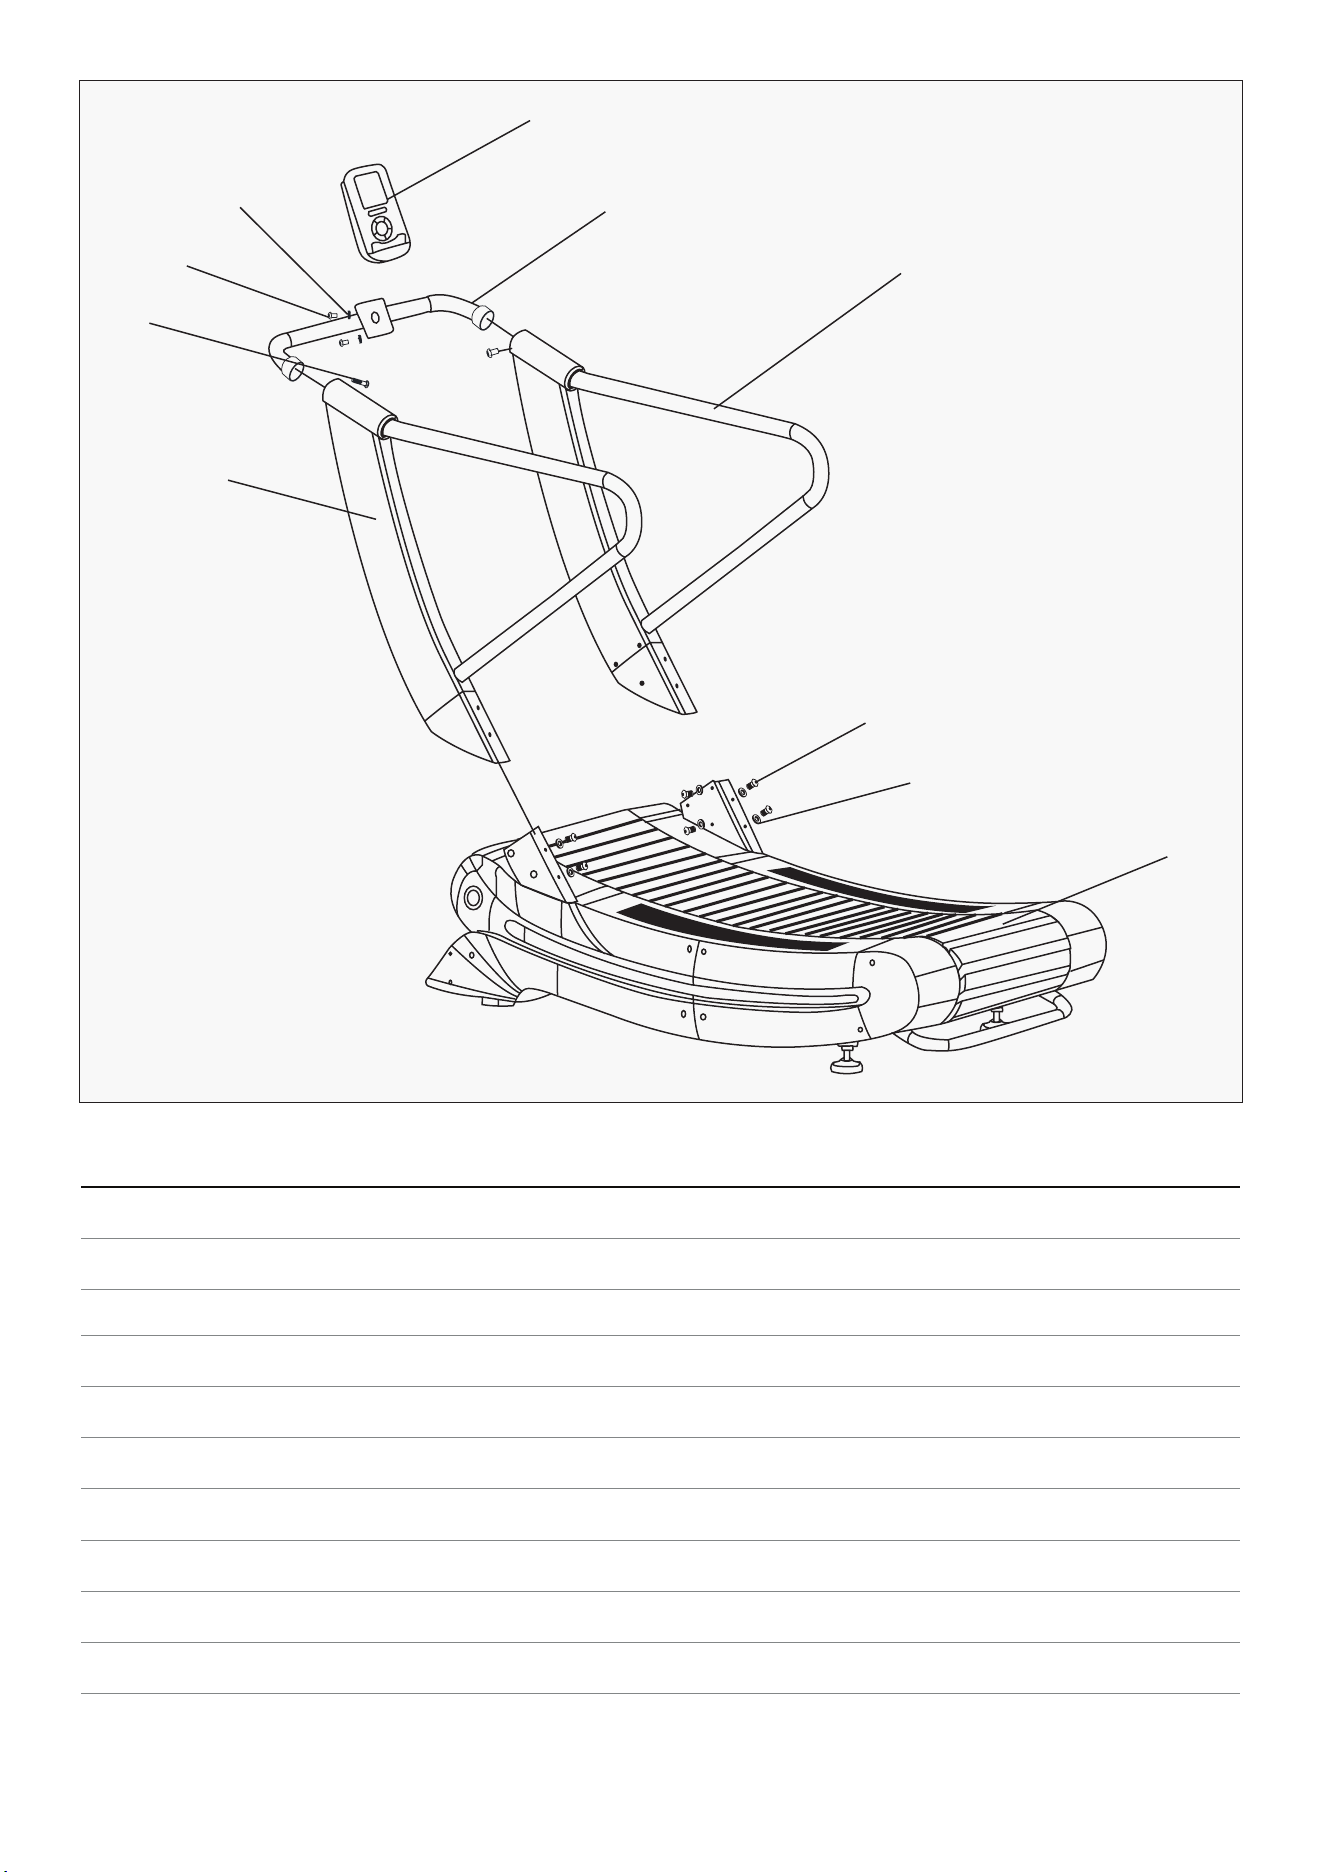
III. PARTS LIST
PARTS LIST |
Some items on this list may come pre-installed on your equipment. If you feel like you’re missing
anything, please double check your equipment.
Part No. Name
1
Screen
2
Head
3
Handle
4
Upright
5
Running Belt
6
Side Rail
7
Transport Handles
1
2
4
5
3
6
7
6 | PARTS LIST
Item Part Name Specification Qty.
1
Frame 1
2
Main handrail frame (right) 1
3
Main handrail frame (left) 1
4
TZ-04-SP03-0412 Console holder 1
5
TZ-06-SP03-0616 Console 1
6
M10X15L-N2 Hexagon socket head screw 15mm long 1
7
Spacer 2
8
M5X12l-A1 Cross head bolt 12mm long 4
9
Spacer 4
10
N10X20L-N2 Hexagon socket head screw 20mm long 10
9
1
10
2
4
5
7
8
6
3
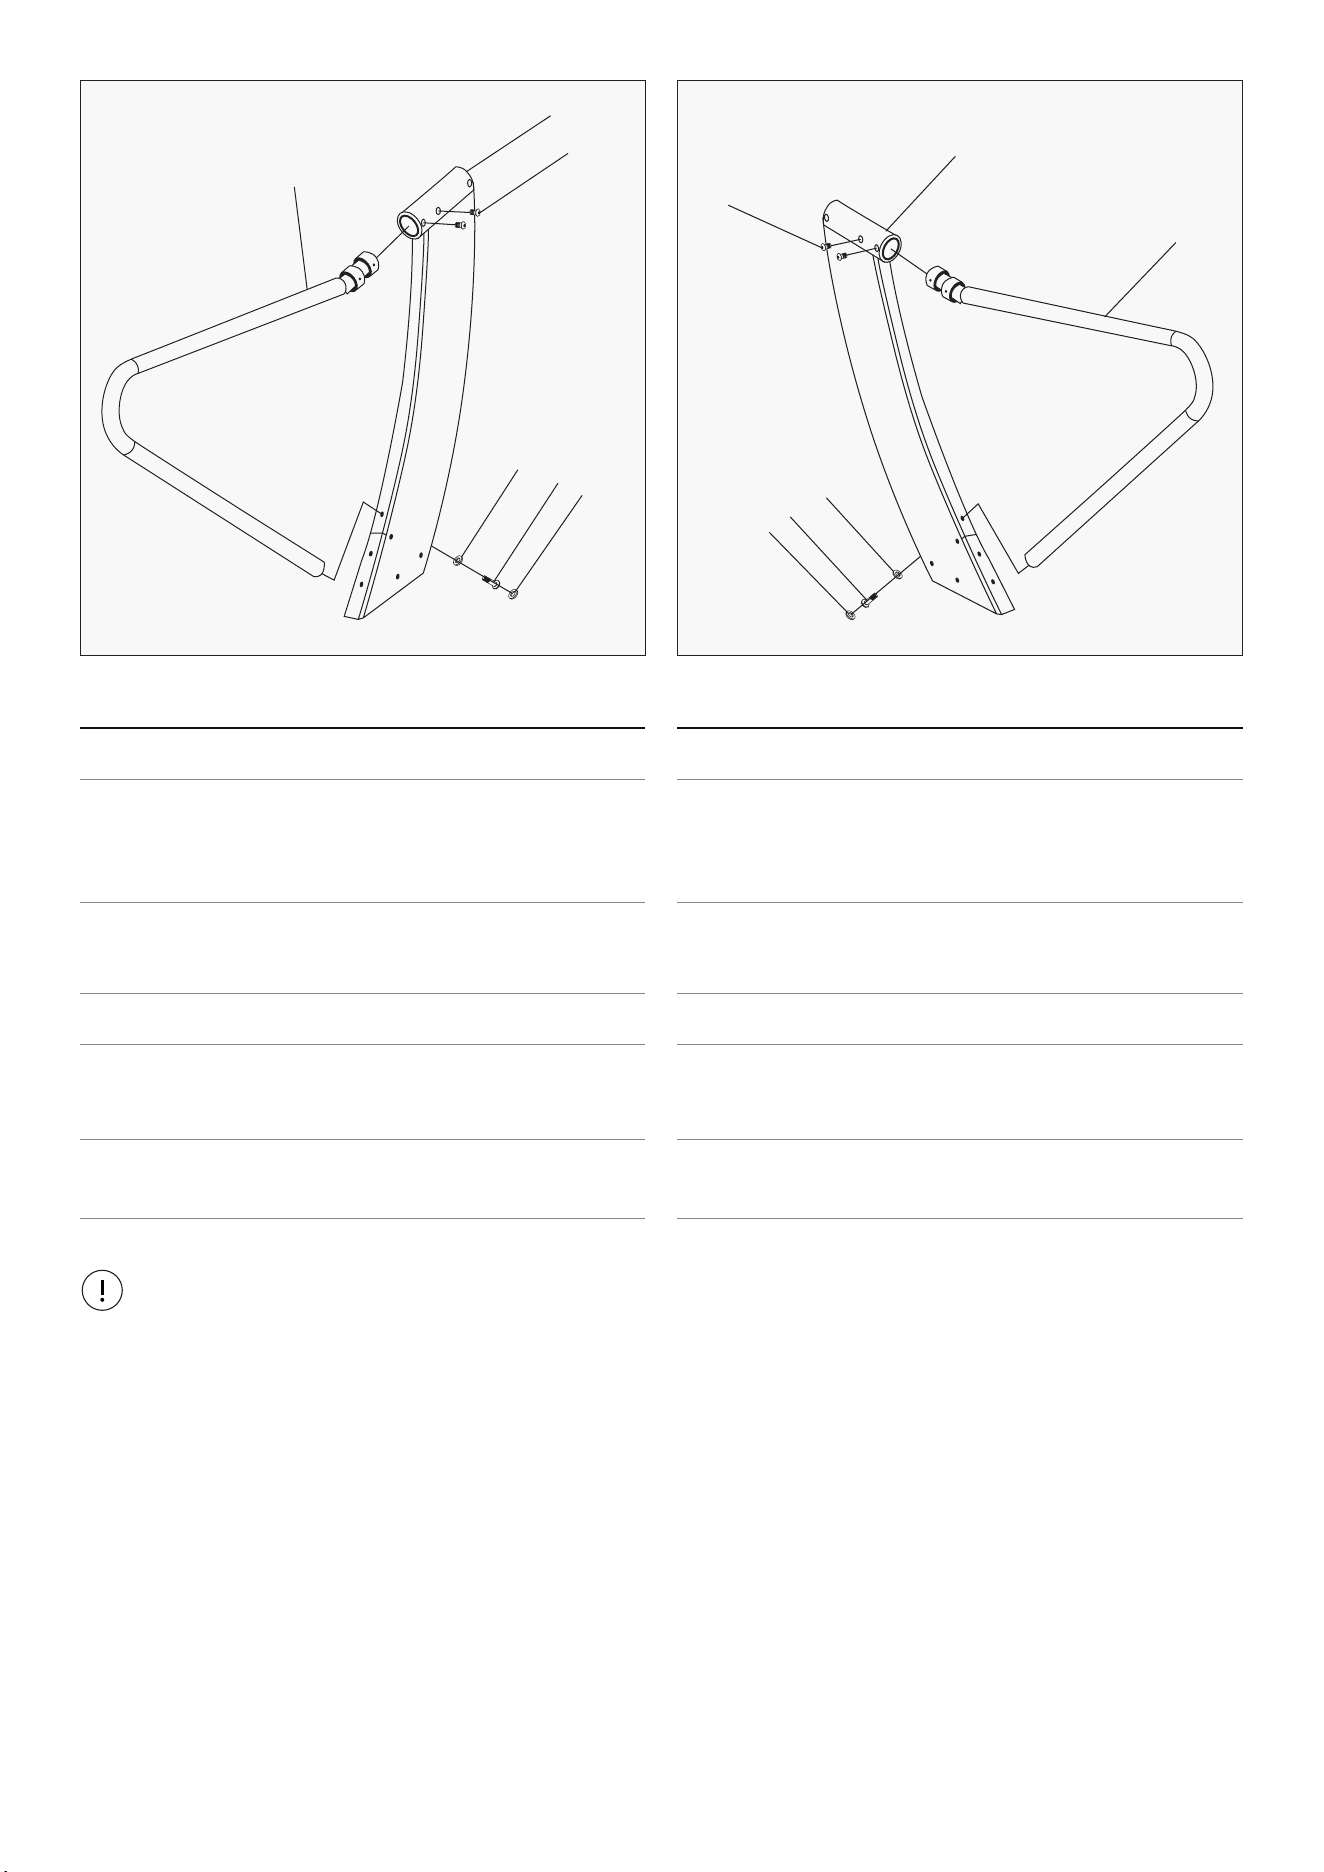
7PARTS LIST |
Item Part Name Spec. Qty.
1
Stud welding 1
2
TZ-04-SP03-0410
Handrail frame
welding set
1
3
M5X12L-A2 Hexagon
socket head screw
12mm long 2
4
Spacer 1
5
Hexagon socket cap
screws
1
6
601 Plastic cap
screws
1
Item Part Name Spec. Qty.
1
Stud welding 1
2
TZ-04-SP03-0410
Handrail frame
welding set
1
3
M5X12L-A2 Hexagon
socket head screw
12mm long 2
4
Spacer 1
5
Hexagon socket cap
screws
1
6
601 Plastic cap
screws
1
2
2
4
4
5
5
6
6
1
1
3
3
• As a result of the large size of the treadmill, please select the location where the treadmill will
be placed and ensure there is enough space around it.
• Place all parts of the treadmill in the empty area and remove all packing materials. Do not discard
the packing materials until the assembly work is completed.
• All bolts must be tightened during the assembly process unless otherwise stated, and all bolts
must be tightened when the assembly work is completed.
• When assembling the treadmill, please make sure all parts are assembled according to the
assembly drawing.
Important Note:
8 | ASSEMBLY INSTRUCTIONS
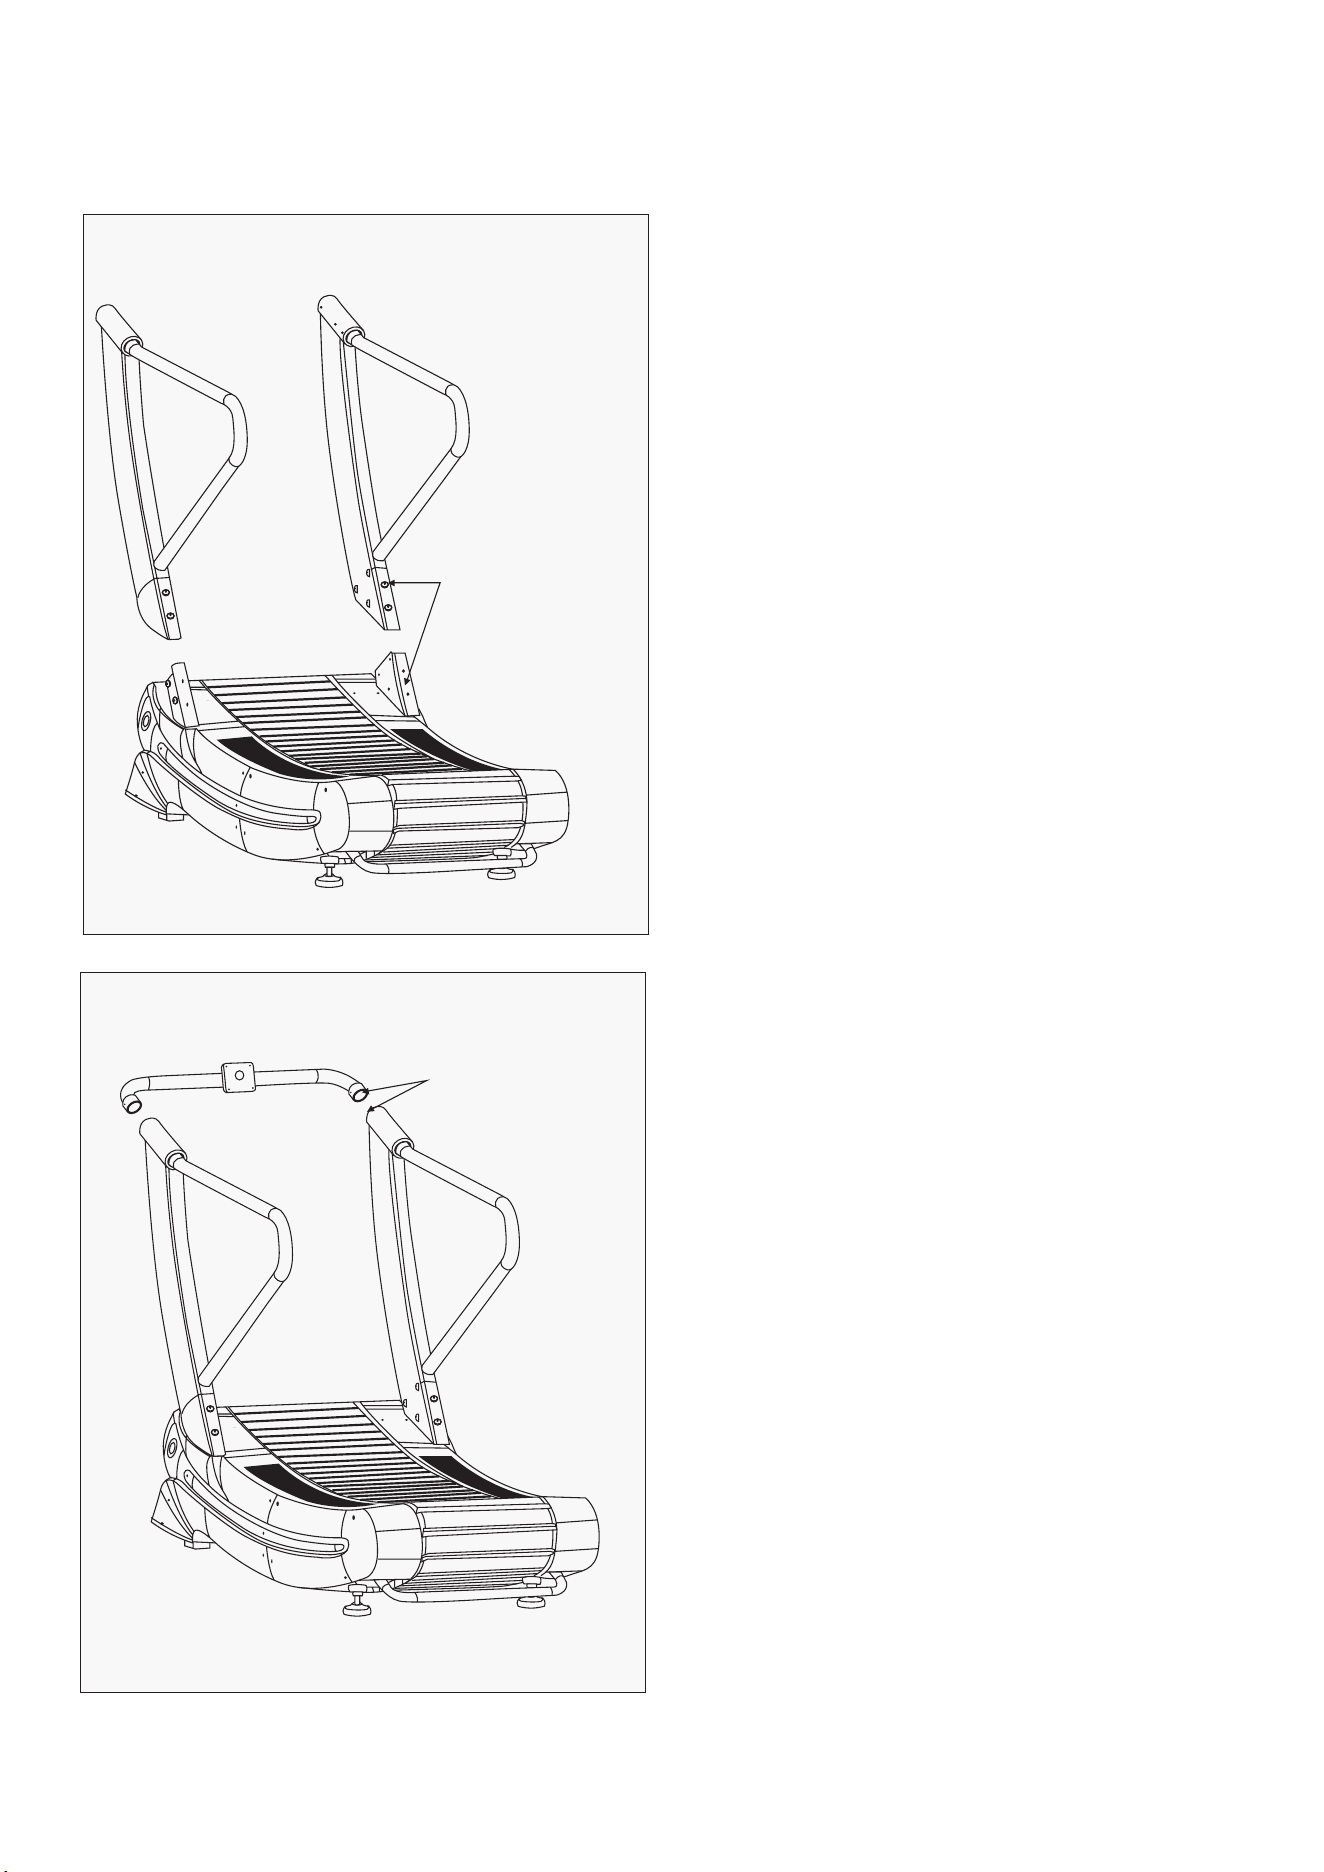
IV. ASSEMBLY INSTRUCTIONS
1. Remove the L/R columns from the packing
materials.
2. Attach the columns to the main frame as
shown in the figure.
NOTE: The magnetic wire will need to be
connected, see below where cables are located.
1. Connect the magnetic wire line for the
console holder to the magnetic wire line
of the upright.
Magnetic wire
docking (only
one wire)
Magnetic wire
connection
STEP 1
STEP 2
9ASSEMBLY INSTRUCTIONS |
Magnetic wire
connection
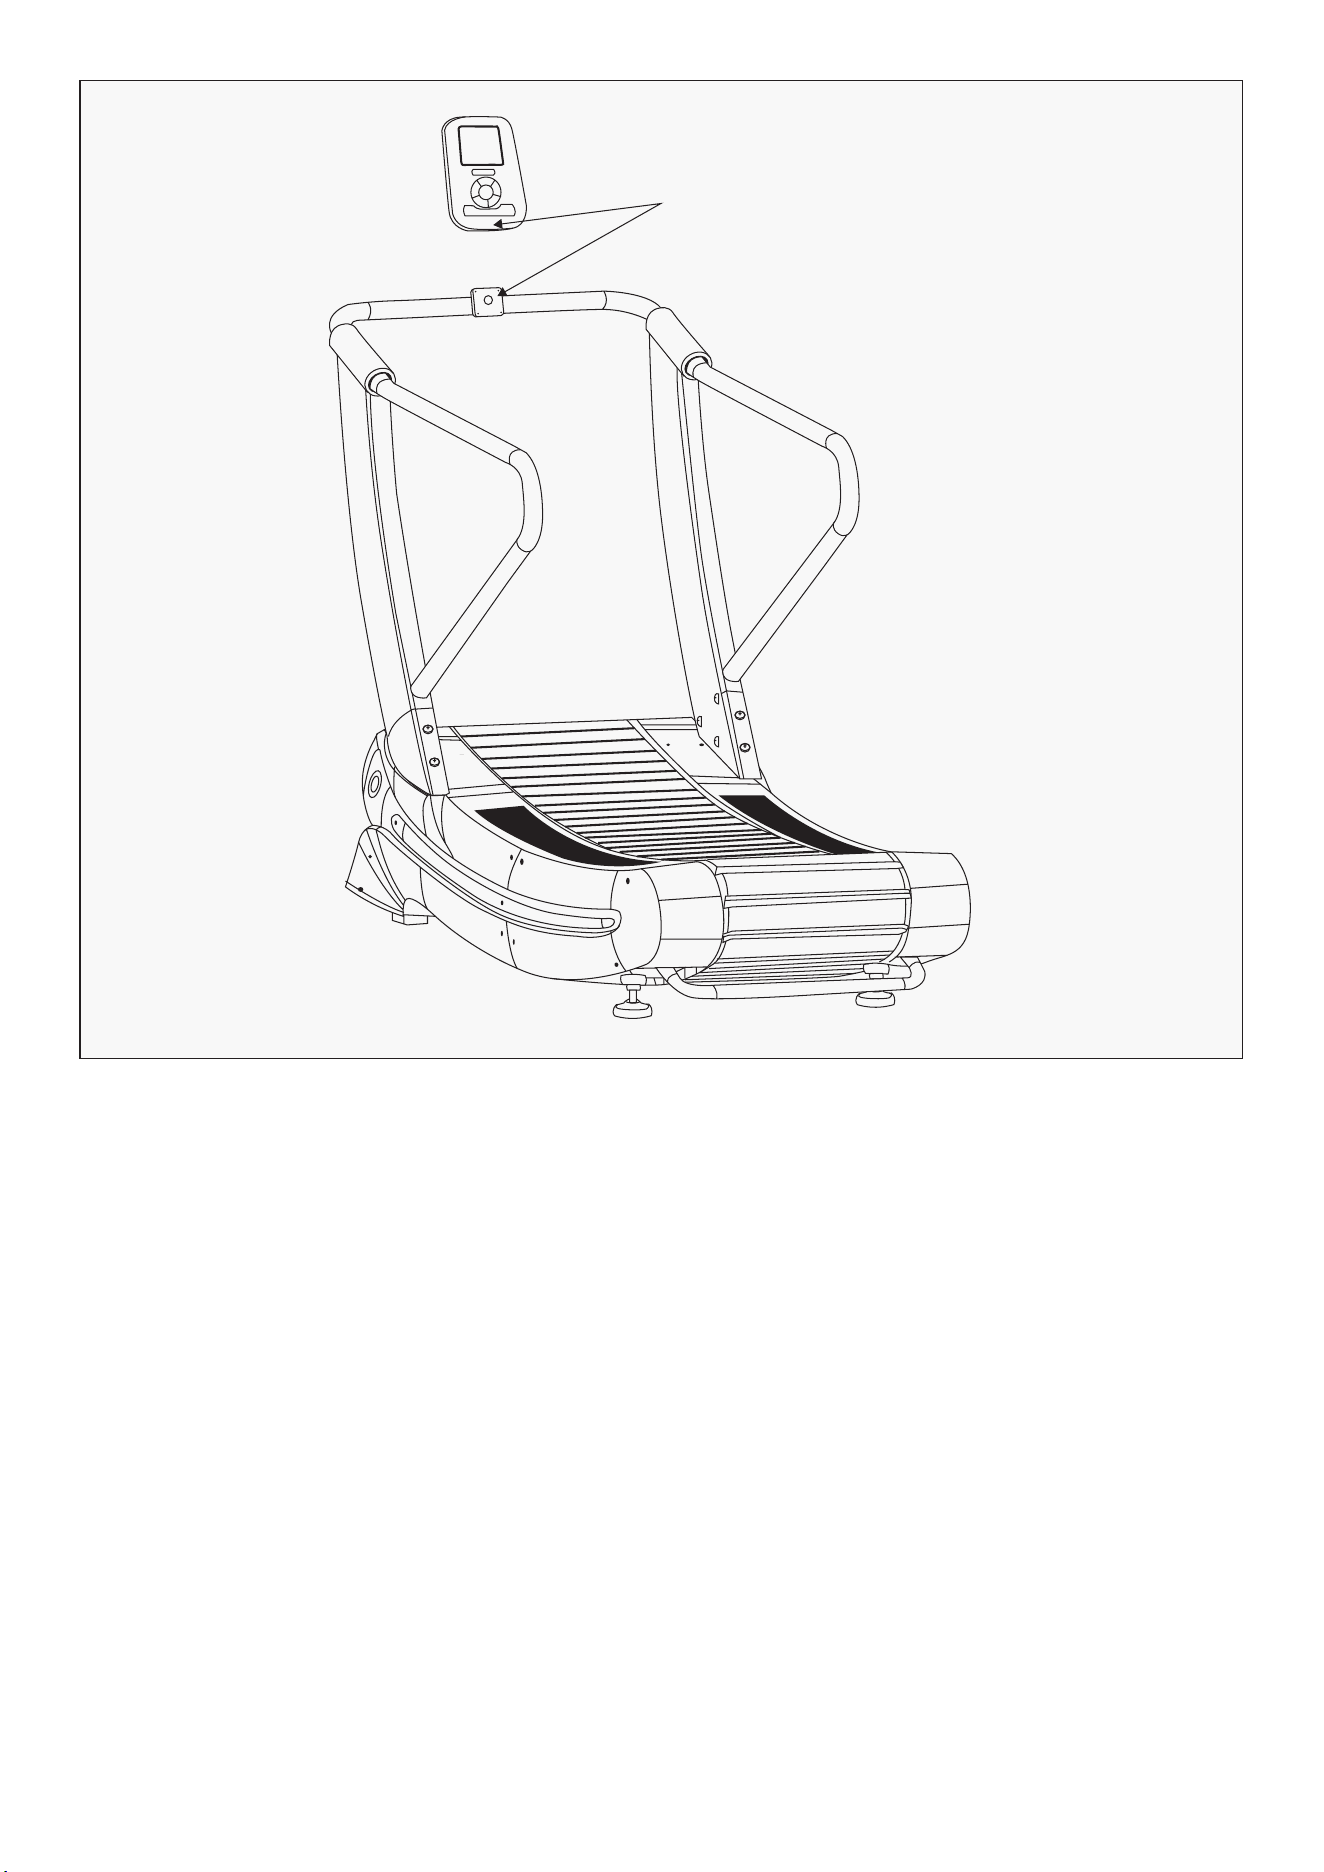
1. Connect the magnetic wire line for the console to the magnetic wire line of the console holder.
2. After connecting magnetic wire line, place the console at the joint and fasten with the bolts.
3. Check the running belt is running smoothly and turn on the display to check the data is
counting correctly.
4. Ensure all bolts are tightened properly.
1. Step on the running belt and start your exercise, e.g. walking, jogging, running. Turn on the console
by pressing the power button.
2. To stop, hold on to the handles and slow down to a walking pace. Once at a slower pace, you can
step on the side rails.
STEP 3
Using the treadmill
10 | OPERATION GUIDE
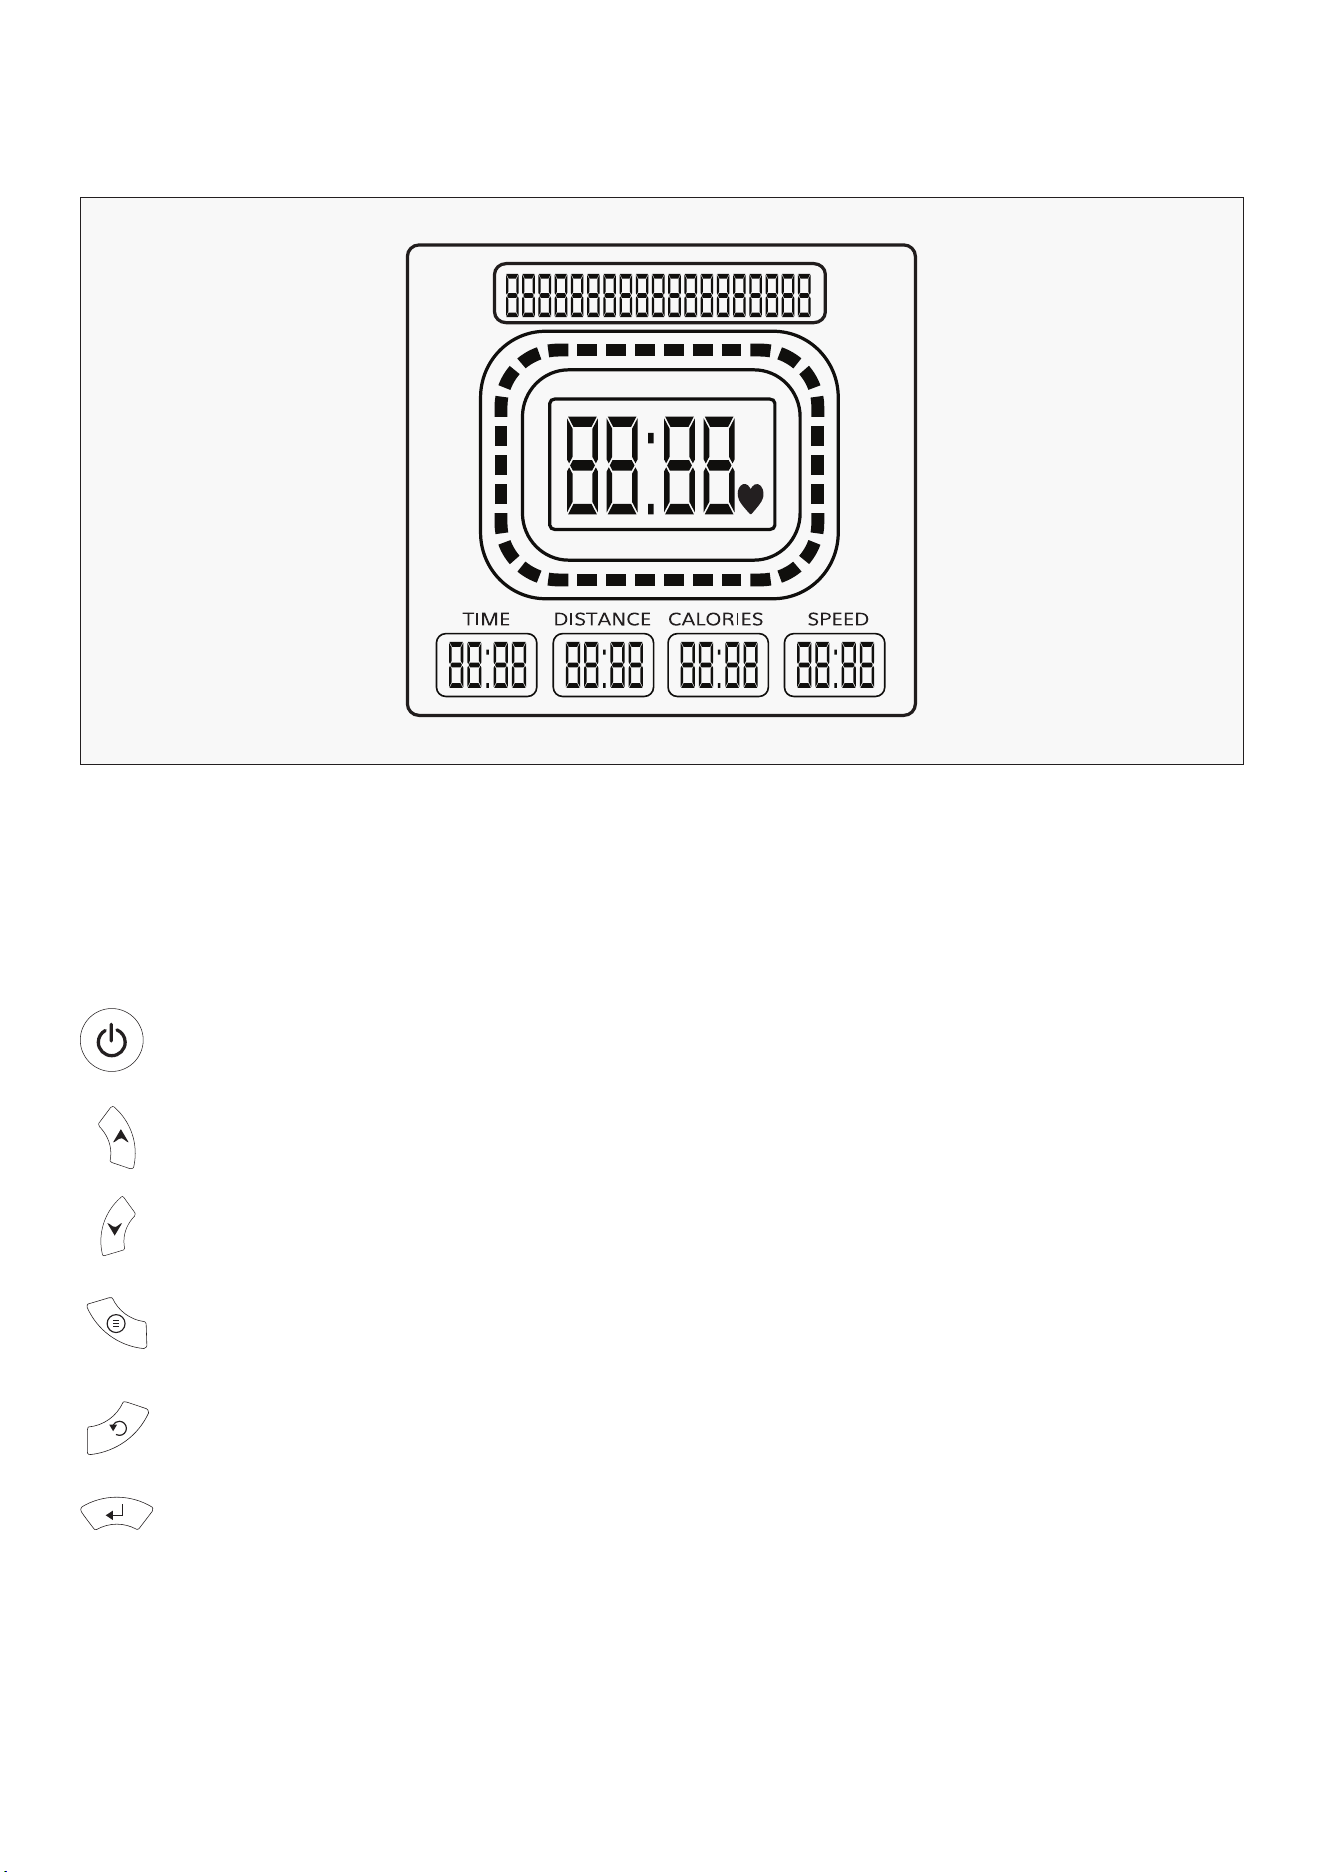
V. DISPLAY INSTRUCTIONS
1. Home page
2. Buttons
Interface displays time, distance calories and speed.
Start/Stop button: In standby mode, all numbers will start counting only when you
click the button.
Reset key: Hold button for 3 seconds to clear settings. Hold this key for more than 3 seconds
to return to initial interface – all data will be reset.
Enter key: Enter key to select data and program selection.
Numerical + key: Used to adjust the data value.
Numerical – key: Used to adjust the data value.
Program setting key: Click this key to start program settings.

11
VI. EXERCISE GUIDE
PLEASE NOTE:
Before beginning any exercise program, consult your physician. This is important especially if you are
over the age of 45 or individuals with pre-existing health problems.
The pulse sensors are not medical devices. Various factors, including the user’s movement, may
affect the accuracy of heart rate readings. The pulse sensors are intended only as an exercise aid in
determining heart rate trends in general.
Exercising is great way to control your weight, improving your fitness and reduce the effect of aging and
stress. The key to success is to make exercise a regular and enjoyable part of your everyday life.
The condition of your heart and lungs and how efficient they are in delivering oxygen via your blood to
your muscles is an important factor to your fitness. Your muscles use this oxygen to provide enough
energy for daily activity. This is called aerobic activity. When you are fit, your heart will not have to work
so hard. It will pump a lot fewer times per minute, reducing the wear and tear of your heart.
So as you can see, the fitter you are, the healthier and greater you will feel.
WARM UP
Start each workout with 5 to 10 minutes of stretching and some light exercises. A proper warm-up
increases your body temperature, heart rate and circulation in preparation for exercise. Ease into your
exercise.
After warming up, increase the intensity to your desired exercise program. Be sure to maintain your
intensity for maximum performance. Breathe regularly and deeply as you exercise.
EXERCISE GUIDE |
12
COOL DOWN
Finish each workout with a light jog or walk for at least 1 minute. Then complete 5 to 10 minutes of
stretching to cool down. This will increase the flexibility of your muscles and will help prevent post-
exercise problems.
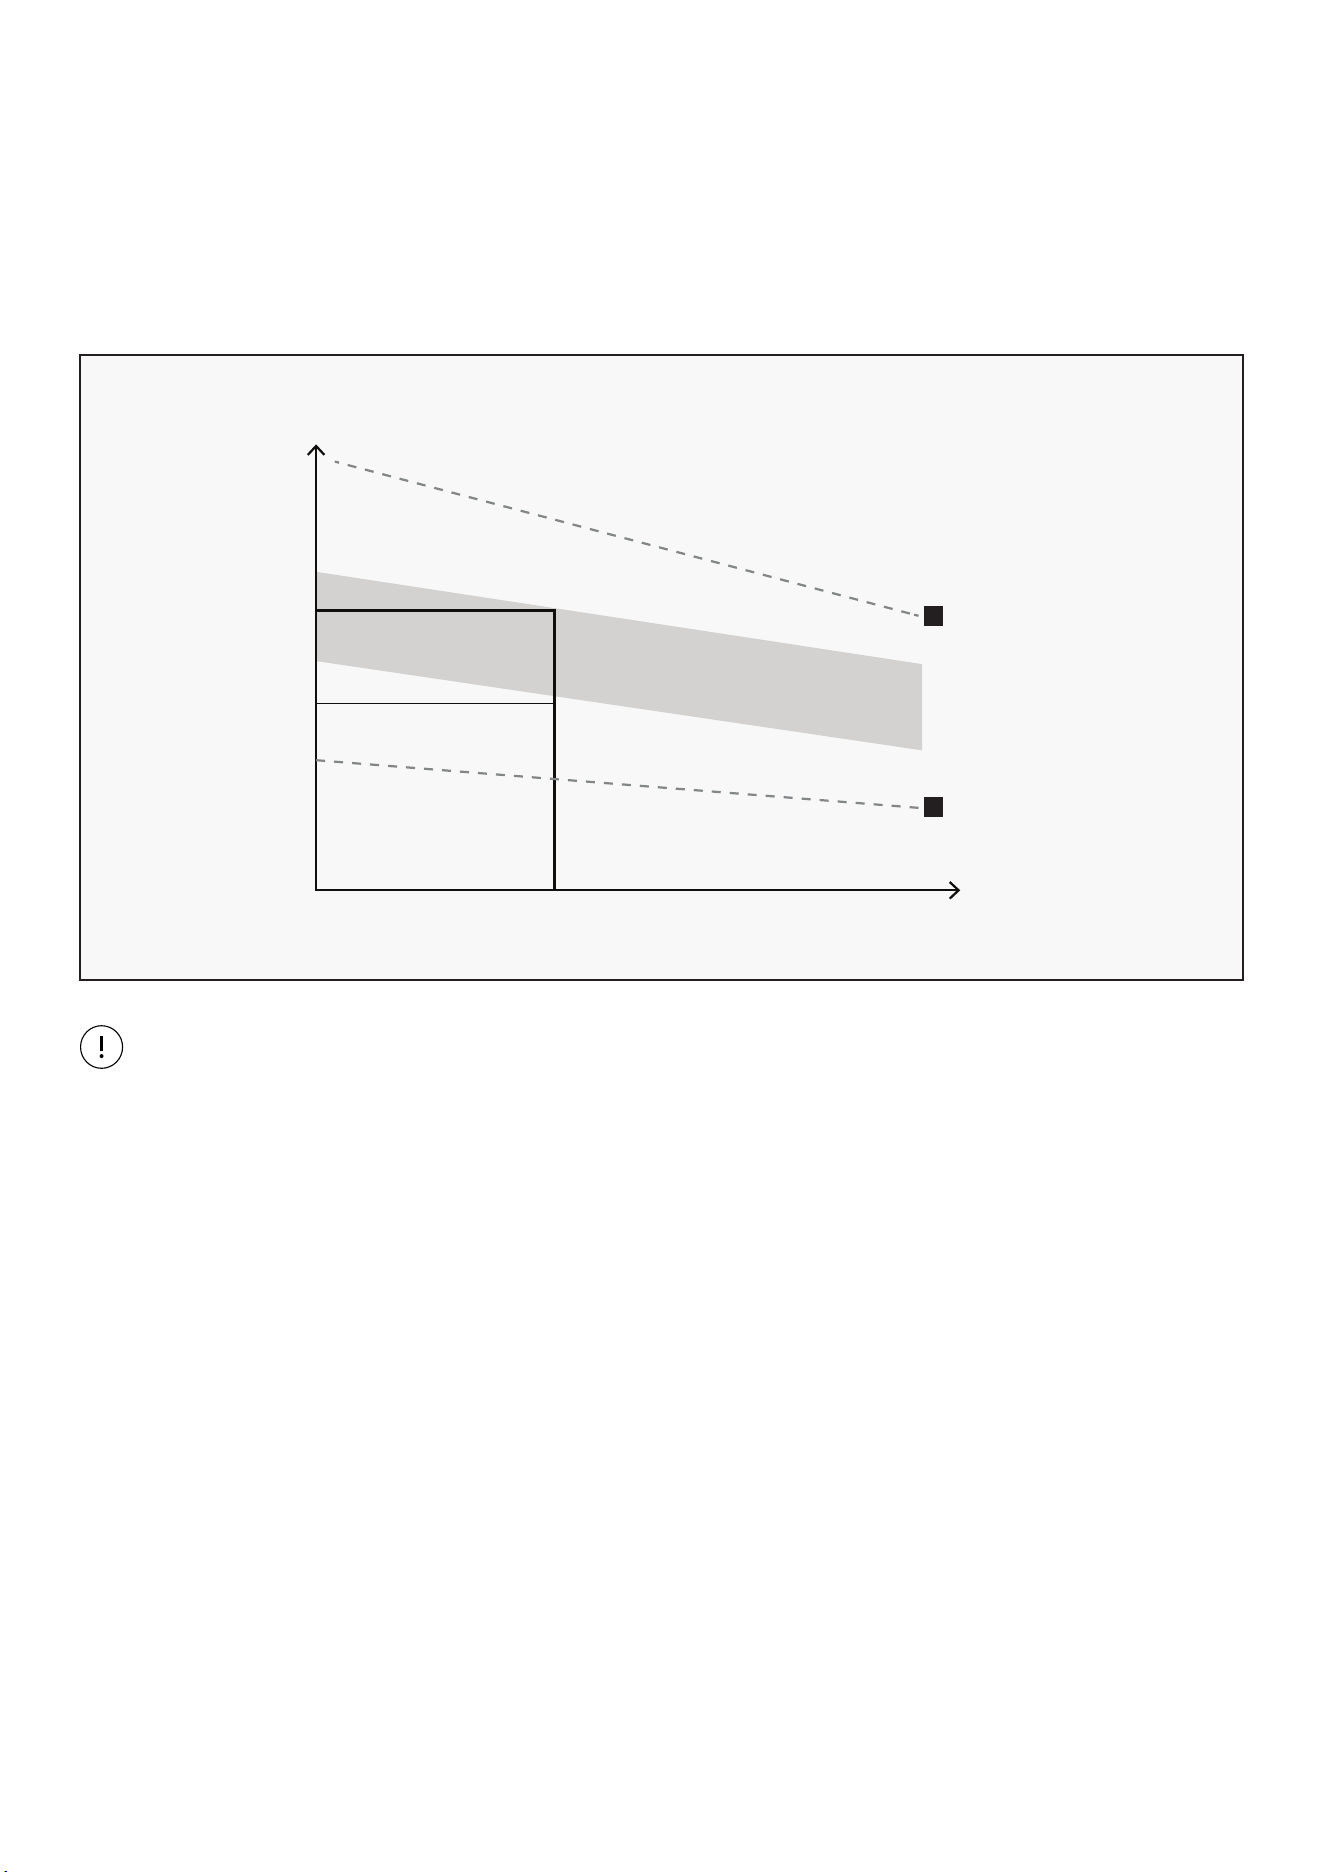
WORKOUT GUIDELINES
This is how your pulse should behave during general fitness exercise. Remember to warm up and
cool down for a few minutes.
TARGET ZONE
MAXIMUM
85%
70%
COOL DOWN
AGE
HEART RATE
200
180
160
140
120
100
80
20 25 30 35 40 45 50 55 60 65 70 75
| EXERCISE GUIDE

13
VII. MAINTENANCE INSTRUCTIONS
Reasonable cleaning/lubricating should be made to extend the lifetime of this unit. Performance is
maximized when the belt and mat are kept as clean as possible.
WARNING:
• The mat/deck friction may lay a major role in the function and life of your treadmill and that is why
we recommend you constantly lubricate this friction point to prolong the useful life of your treadmill.
Failing to do this may void your warranty.
• Use a soft, damp cloth to wipe the edge of the belt and the area between the belt edge and frame. A
mild soap and water solution along with a nylon scrub brush will clean the top of the textured belt.
This task should be done once a month. Allow to dry before using.
• Vacuum underneath the treadmill for dust and debris.
1. GENERAL CLEANING
• Check parts for wear before use.
• Pay particular attention to the fixing knobs and make sure they are tight.
• Always replace the mat if worn and any other defective parts.
• If in doubt do not use the treadmill and contact us.
2. GENERAL CARE
Take care to protect carpets and floor in case of leakages. This product is a machine that
contains moving parts which have been greased/lubricated and could leak.
MAINTENANCE INSTRUCTIONS |

14
IX. WARRANTY
| WARRANTY
AUSTRALIAN CONSUMER LAW
Many of our products come with a guarantee or warranty from the manufacturer. In addition, they come
with guarantees that cannot be excluded under the Australian Consumer Law. You are entitled to a
replacement or refund for a major failure and compensation for any other reasonably foreseeable loss
or damage.
You are entitled to have the goods repaired or replaced if the goods fail to be of acceptable quality and
the failure does not amount to a major failure. Full details of your consumer rights may be found at
www.consumerlaw.gov.au.
Please visit our website to view our full warranty terms and conditions:
http://www.lifespanfitness.com.au/warranty-repairs
WARRANTY AND SUPPORT
Any claim against this warranty must be made through your original place of purchase.
Proof of purchase is required before a warranty claim may be processed.
If you have purchased this product from the Official Lifespan Fitness website, please visit
https://lifespanfitness.com.au/warranty-form
For support outside of warranty, if you wish to purchase replacement parts or request a repair or
service, please visit https://lifespanfitness.com.au/warranty-form and fill in our Repair/Service
Request Form or Parts Purchase Form.
Scan this QR code with your device to go to lifespanfitness.com.au/warranty-form

15

WWW.LIFESPANFITNESS.COM.AU