Loading ...
Loading ...
Loading ...
17
• Press the Digit 0 button on your
remote control to confirm selection.
• You can also choose to input text for
the selected channel. Press Digit 5 on
your remote control to use keyboard
• Use the < > < > buttons to
navigate and select the character and
press Digit 0 to input text. Repeat
step until you have completed your
input of text.
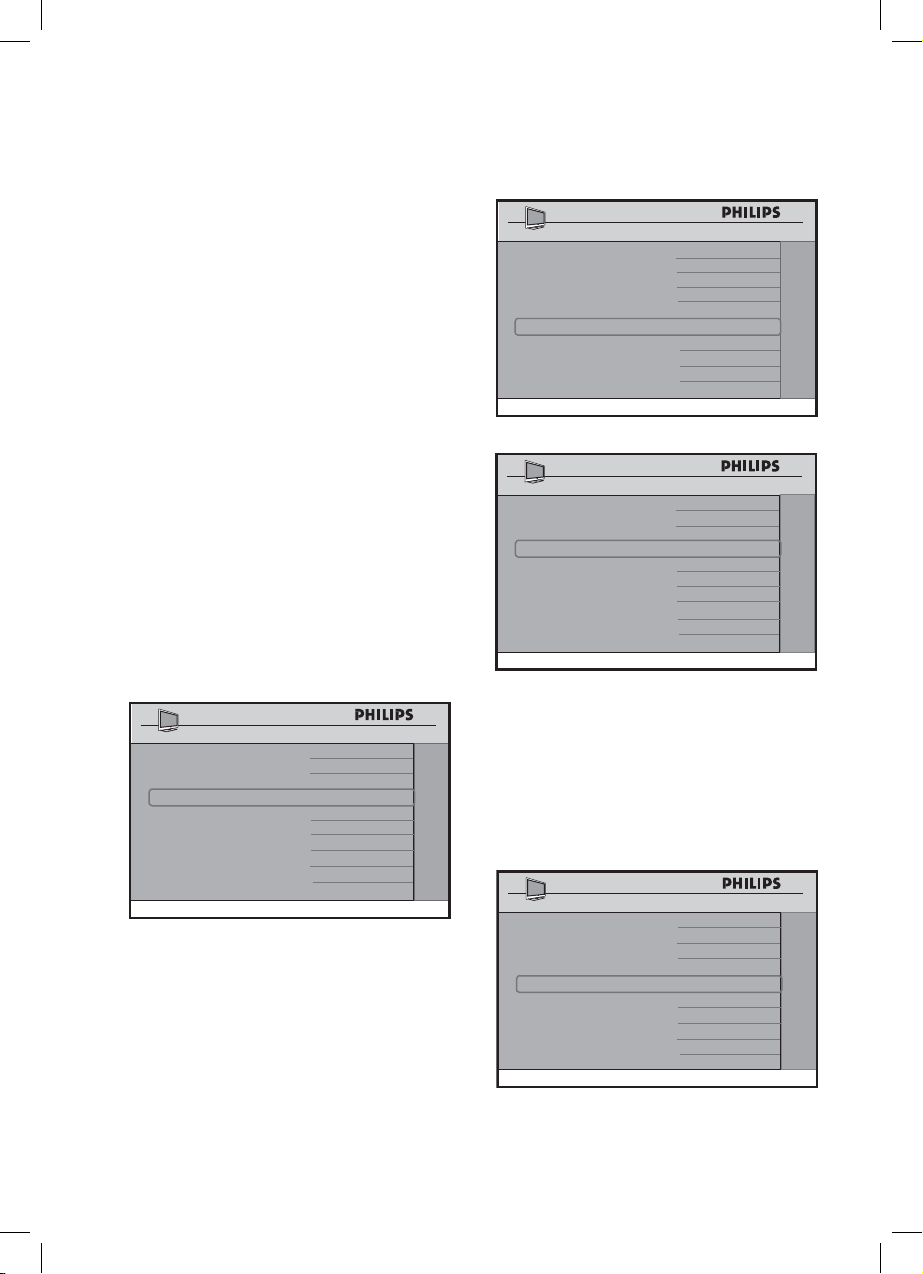
Selecting Digital Channel Options
• If the current channel you are mapping
is a digital or high definition channel,
use the < > buttons to select YES.
Selecting NO will remove the
DIGITAL CH SCROLL, DIGITAL
MAJOR CH and DIGITAL MINOR
CH. Since the channel is not digital,
these options will not appear in the
menu.
CHANNEL INSTALL
CHANNEL TV 2
INPUT TUNER
CHANNEL LOGO >
DIGITAL YES
DIGITAL CH SCROLL >
DIGITAL MAJOR CH 1
DIGITAL MINOR CH 0
RINGS (1 ) (2 ) (3 ) (4 )
LABEL ( ) >
MUTE NONE
CHANNEL INSTALL
• If NO is selected in the USE
CHANNEL TABLE (see page 19),
the options for DIGITAL MAJOR
CH and DIGITAL MINOR CH.
are replaced with the options of
RF CHANNEL NUMBER and
MPEG PROGRAM NUMBER.
5.
CHANNEL INSTALL
SETUP
LANGUAGE ENGLISH
COMMUNICATION >
CHANNEL INSTALL >
AUTO INSTALL TV >
CABLE TUNING YES
USE CHANNEL TABLE NO
CURRENT RING RING1
DIGITAL SETUP >
CONFIGURATION >
CHANNEL INSTALL
CHANNEL TV 2
INPUT TUNER
CHANNEL LOGO >
DIGITAL YES
DIGITAL CH SCROLL >
RF CHANNEL NUMBER 8
MPEG PROGRAMME NUMBER 2
RINGS (1 ) (2 ) (3 ) (4 )
LABEL ( ) >
MUTE NONE
CHANNEL INSTALL
Scrolling the Digital Channels
• If NO is selected, press the < >
buttons to go the previous or next
digital channel.
CHANNEL INSTALL
CHANNEL TV 2
INPUT TUNER
CHANNEL LOGO >
DIGITAL YES
DIGITAL CH SCROLL >
DIGITAL MAJOR CH 1
DIGITAL MINOR CH 0
RINGS (1 ) (2 ) (3 ) (4 )
LABEL ( ) >
MUTE NONE
CHANNEL INSTALL
6.
Installation
Loading ...
Loading ...
Loading ...