Loading ...
Loading ...
Loading ...

Page 8
Unpacking & Installation
CLEARANCE AND VENTILATION
Improper ventilation can result in personal injury or death. Ventilation that does not properly
remove ue products can cause headaches, drowsiness, nausea, or could result in death.
It is recommended that a canopy extend 6’’ past the appliance and the bottom edge be located 6’6’’ from the oor.
Filters should be installed at an angel of 45º or more from the horizontal. This position prevents dripping of grease
and facilitates collecting the run-off grease in a drip pan, unusually installed with a lter. A strong exhaust fan tends
to create a vacuum in the room and may interfere with burner performance or may extinguish the pilot ames. Fresh
air openings approximately equal to the fan area will relieve such a vacuum. In case of unsatisfactory performance
on any appliance, check the appliance with the exhaust fan in the “OFF” position. Do this only long enough to check
equipment performance, then turn hood back on and let it run to remove any exhaust that may have accumulated
during the test. Equipment must be installed under proper ventilation as required per local code.
The exhaust fan should be installed at least 2 feet above the vent opening at the top of the fryer.
Unit is not intended to be connected directly to an outside ue.
1. THESE UNITS ARE SUITABLE FOR INSTALLATION ON NON-COMBUSTIBLE SURFACES ONLY. Non-
combustible clearances: 6” sides (152 mm) 6” rear (152 mm) 4” oor (102 mm)
2. Do not obstruct the ow of combustion and ventilation air, under the unit by the legs or behind the unit by the ue.
Do not place objects between the bottom of the unit and the oor.
3. There must be adequate clearance for removal of the front panel. All major parts, except the burners, are
removable through the front if the gas line is disconnected.
GAS CONNECTION
NOTICE: Local codes regarding installation and ventilation vary greatly by area. Unit installation must conform with
the National Fuel Gas Code, ANSI Z223.1/NFPA 54, the National Gas Installation Code, CSA-B149.1, or the Propane
Installation Code, CSA-B149.2 as applicable and in accordance with local codes.
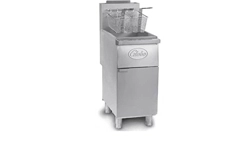
A 3/4'' male NPT line for the gas connection is located near the lower right rear corner of
the fryer. See Figure 8-1.
The data plate, located on the inside of the front door assembly of the fryer indicates the
type of gas the unit is equipped to burn (natural gas or liquid propane). The fryer should
be connected ONLY to the type of gas for which it is equipped.
The fryer orice sizes are for units installed at alitudes between 0 and 2000 feet
above sea level. Contact Globe or your Globe representative for units installed
above 2000 feet sea level.
All Globe equipment is adjusted at the factory; however, the pilot height should be
checked at installation and adjusted, if necessary.
A sufcient gas supply is necessary. Undersized or low pressure lines will restrict the
volume of gas necessary for satisfactory performance. A safety control valve and pressure regulator, which is
provided with each unit, is set to maintain a 4” W.C. manifold pressure for natural gas or 10.0” W.C. manifold pressure
for propane gas. However, to maintain these conditions the pressure on the supply line, when all units are operating
simultaneously, should not drop below 7” W.C. for natural gas or 11” W.C. for propane gas. Fluctuations of more than
25% on natural gas or 10% on propane gas will create problems and affect burner operating characteristics. A 1/8”
tap to measure the manifold pressure is located on the safety control valve, which is on the burner manifold located
directly below the burners inside the cabinet.
1. Purge the supply line to clean out dust, dirt, or other foreign objects before connecting the supply line to the fryer.
2. It is recommended that an individual manual shutoff valve be installed in the gas supply line to the unit.
3. Connect the gas supply directly to the 3/4'' male NPT line located near the lower right rear corner of the fryer. See
Figure 9-1.
4. Use a wrench to securely hold the 3/4’’ male NPT line that is attached to the fryer. Tighten the gas supply pipe.
Figure 8-1
3/4’’ male
NPT line
Loading ...
Loading ...
Loading ...