Loading ...
Loading ...
Loading ...
Page 7
Unpacking & Installation
LEG INSTALLATION
1. Open the fryer door assembly.
2. Remove 16 screws and 16 nuts from the four base plates attached to the bottom of the oor yer.
3. Raise the fryer to allow access for the four legs to be screwed into the four base plates.
4. Attach leg or caster (4) to base plate (4) with four screws and four nuts.
NOTE: Install the screws from the bottom side of the fryer. Make sure that the nuts are installed on the inside of
the oor yer cabinet. Use a wrench to tighten the nuts from the inside of the fryer cabinet.
5. Lower the fryer, careful not to drop or allow the fryer to fall.
6. Use a level to make sure that the fryer is level.
NOTE: Each leg can be screwed in or out to lower or raise each corner of the fryer.
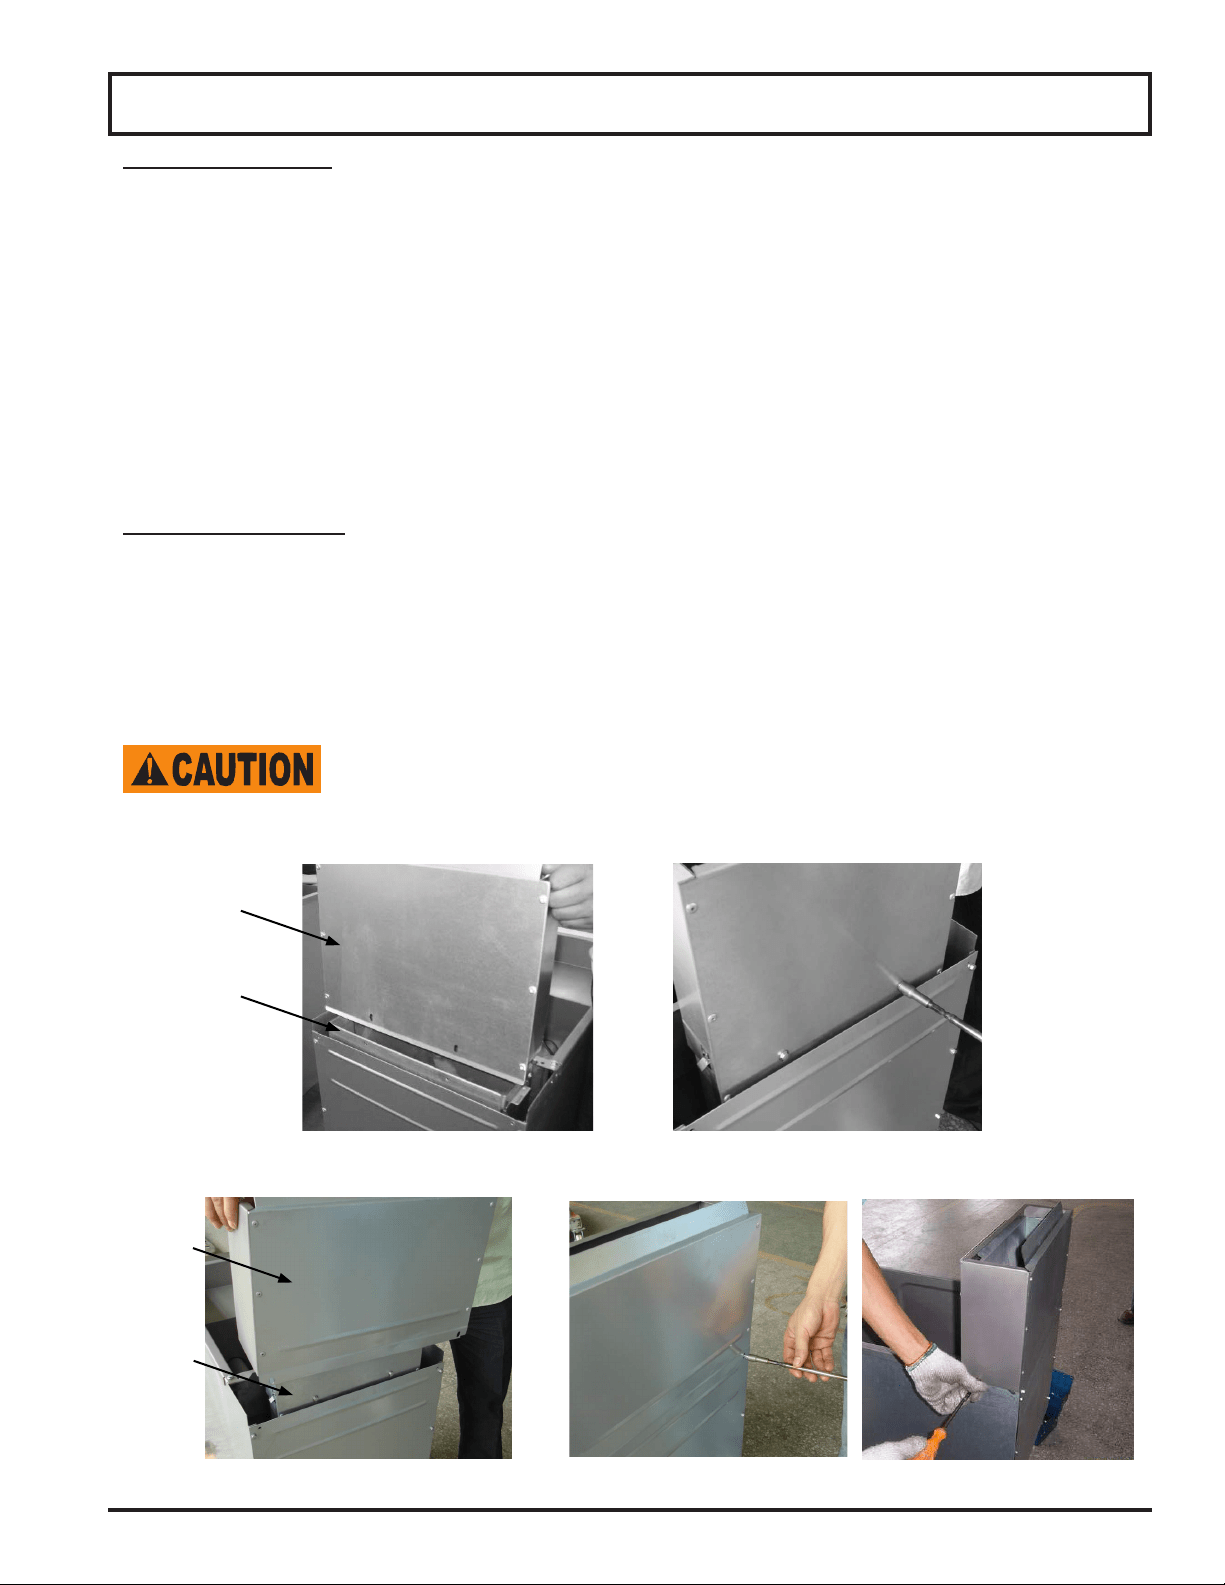
FLUE INSTALLATION
1. Position the ue top on the oil tank. See Figure 7-1.
2. Use a 5/16'' socket and the two self-tapping screws that are provided to secure the ue top to the oil tank. See
Figure 7-2.
3. Slide the ue wrap over the ue top. See Figure 7-3.
4. Use a 5/16’’ socket and four self-tapping screws that are provided to secure the ue wrap to the back and sides
of fryer. See Figure 7-4.
The fryer must be level for maximum performance. Incorrect leveling, can void warranty.
Flue top
Oil Tank
Flue
wrap
Flue top
Figure 7-3 Figure 7-4
Figure 7-1 Figure 7-2
Loading ...
Loading ...
Loading ...