Before using the appliance for the first time, wash the interior and all internal accessories with lukewarm water and some neutral soap so as to remove the typical smell of a brand new product, then dry thoroughly.
Important! Do not use detergents or abrasive powders, as these will damage the finish.
Important! It is necessary to have good ventilation around the refrigerator to allow for the dissipation of heat, high efficiency, and low power consumption.For this reason, sufficiently cleared space should be available around the refrigerator. It is advisable for there to be 75 mm / 3 inches separating the back of the refrigerator to the wall at least 100 mm / 4 inches of space on its two sides, a height of over 100 mm / 4 inches from its top and a clear space in front to allow the doors to open 180°.
Appliances must not be exposed to rain. Sufficient air must be allowed to circulate in the low rear section of the appliance, as poor air circulation can affect performance. Appliances should be positioned away from heat sources such as heaters and direct sunlight.
Installation Positioning
Warning! Before installing, read the instruction carefully for your safety and correct operation of the appliance.
This appliance performs well within the Ambient temperature from 55 deg F / 12.8℃ to 110 deg F / 43.3℃.
It may not work properly if being left at a temperature above or below the indicated range for a long period.
Stand your appliance in a dry place to avoid high mosture.
Keep the appliance out of direct sunlight rain or frost. Stand the appliance away from heat sources such as stoves, fires or heaters.
Installing the rubber anti-tip pad
If there is a rubber anti-tip pad and a screw provided in a plastic bag with your appliance ,you must install these accessories according to the following procedure.
Note: There is no need to install these accessories under normal usage, Only under the extreme circumstance, cabinet empy while load on door with local mass of 10 kg / 22 pounds and opening the door about 90 degree, this refrigerator may take risk of tipping, Then anti-tip should be fastened to the lower base cover to steady this appliance.
1.Tilt appliance to find screw hole on the left of lower base cover.
2.Put screw into the hole of rubber supporting pad.
3.Make screw in alignment with the hole on lower base cover . Fasten rubber supporting pad to the base cover firmly by a phillips screw driver (not included).
Leveling
The appliance should be level in order to eliminate vibration. To make the appliance level, it should be upright and both adjusters should be in firm contact with the floor. You can adjust the level by screwing in or out to the appropriate level from the front (use your fingers or a suitable spanner).
Electrical connection
Caution! Any electrical work required to install this appliance should be carried out by a qualified or competent person.
Warning! This appliance must be grounded. The manufacture declines any liability should these safety measures not be observe.
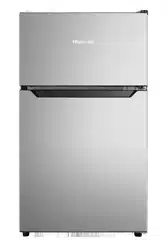
Description of the appliance
Cabinet
Removable shelf
Crisper box cover part
lower door bin
Refrigerator door
Temperature regurator
Operation
CAUTION: Wait for 4 hours with the unit upright, before connecting the appliance to allow the refrigerant to flow back into the compressor.
Starting up and temperature regulation
Insert the plug into the electrical outlet with earth ground. The temperature selector knob is located on the side of the chiller compartment.
Setting "0" means no cooling
Turning the temperature control to "0" position stops the cooling cycle, but does not shut off the power to the refrigerator.
Turning clockwise in direction turns the cooling cycle on. If the unit is unplugged, power lost, or turned off, you must wait 3 to 5 minutes before restarting the unit. If you attempt to restart before this time delay, the refrigerator will not start.
Setting "8" (end-stop)
Setting "8" is the coolest possible temperature setting.
Important!
Normally we advise you select setting of 3 or 4, if you want the temperature warmer or colder please turn the knob to lower or higher setting accordingly.
Raising the temperature setting can lead to the more energy efficiency. As the temperature setting is decreased, it's likely that more energy will be consumed.
Important!
High ambient temperatures (e.g. on hot summer days) and a colder setting (position 6 to 8) on the temperature regulator can cause the compressor to run continuously or even non-stop! Reason: when the ambient temperature is high, the compressor must run continuously to maintain the low temperature in the appliance.
Warning: For safe food preservation, a temperature of 39 deg F or less must be maintained in the refrigerator
Remove and install the door shelf
Warning:The door shelf must not removed and installed by the user! If the door shelf is damaged ,contact the customer helpline for assistance .To replace the door shelf, the below steps can be followed:
Press the right side of the door shelf inwardly,while holding the left side . When the notch of the shelf has been detachesd from the refrigerator door, remove the rack obliquely upwardly.
Firstly tilt the left side of the door shelf, and make sure the notch has been fastened to the door.Then press the right side inwardly, pushing it down into place.
Using your appliance
Your appliance has the features shown below, which are described in the "Description" section of this manual. Please note these usage tips and instructions.
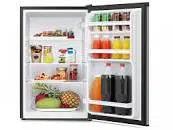
Door bins
Suitable for the storage of canned liquid, bottled drinks and packaged food, etc. Do not place too many heavy things in the bins.
Shelf in Refrigerator compartment
There are shelves in the refrigerator compartment and they can be taken out to be cleaned.
Chiller compartment
This is a low temperature compartment intended specifically for the temporary storage of frozen items.
Helpful hints and tips
Energy saving tips
We recommend that you follow the tips below to save energy.
Try to avoid keeping the door open for
long periods in order to conserve energy.
Ensure the appliance is away from any sources of heat (Direct sunlight, electric oven or cooker etc).
Don’t set the temperature colder than necessary.
Don’t store warm food or evaporating liquid in the appliance.
Place the appliance in a well ventilated, humidity free, room. Please refer to the instructions on installing your new appliance.
The diagram shows the correct combination for the shelves, designed to be the most energy efficient configuration.
Hints for fresh food refrigeration
Do not place hot food directly into the refrigerator or Chiller compartment, as the internal temperature will increase resulting in the compressor having to work harder and will consume more energy.
Cover or wrap the food particularly if it has a strong flavor.
Place food properly so that air can circulate freely around it.
Hints for refrigeration
Meat (All Types) Wrap-ped in PVDC (plastic) wrap: Wrap and place on the shelf. Always follow food storage times and use by dates suggested by manufacturers.
Cooked food, cold dishes, etc.: Dishes should be covered and may be placed on any shelf.
Fruit and vegetables: Fruit and vegetables should be wrapped and stored under the Crisper box cover part.
Butter and cheese: Be wrap in airtight foil or plastic film wrap.
Milk bottles: Bottles should have a lid and be stored in the door racks.
Hints for the storage of frozen food
Only store frozen items temporarily in the Chiller compartment. This compartment is not intended for freezing, or long term storage of frozen items.
Once defrosted, food will deteriorate rapidly and should not be re-frozen. Do not exceed the storage period indicated by the food manufacturer.
Switching off your appliance
If the appliance needs to be switched off for an extended period, the following steps should be taken prevent mould on the appliance.
1.Remove all food.
2.Remove the plug from the electrical outlet.
3.Clean and dry the interior thoroughly.
4.Ensure that all the doors are wedged open slightly to allow air to circulate.
Cleaning and care
Cleaning and Care
The appliance interior, including interior accessories, should be cleaned regularly.
The refrigerator should be cleaned and maintained at least every two months.
Warning! Danger of electrical shock! The appliance should not be connected to the power supply during cleaning. Before cleaning, switch the appliance off and remove the plug from the electrical outlet, or switch off or turn out the circuit circuit breaker or fuse.
Important!
Remove the food from the appliance before cleaning. Store in a cool place, well covered.
Never clean the appliance with a steam cleaner. Moisture could accumulate in electrical components,
Hot vapors can lead to the damage of plastic parts.
Ethereal oils and organic solvents can attack plastic parts, e.g. lemon juice or the juice from orange peel, butyric acid, cleanser that contain acetic acid.Do not allow such substances to come into contact with appliance parts.
Do not use any abrasive cleansers.
Clean the appliance and the interior accessories with a cloth and lukewarm water. Commercially available dish washing detergents may also be used.
After cleaning wipe with fresh water and clean dish cloth.
After everything is dry place appliance back into service.
Defrosting Why defrosting
A frost layer may form inside the refrigerator after continuous usage. If the frost is more than 10mm (3/8 inches) thick, you should defrost.
Defrosting
Defrosting is operated manually.Before defrosting, take the food out; take the ice tray out or put it into the refrigerator chamber temporarily, then set the knob of the temperature regulator to position “0”(where the compressor will stop working) , leave the door of the refrigerator open until ice and frost dissolves thoroughly, and accumulates in the drip tray. Wipe off the water with soft cloth. To speed up the process of defrosting, you may put a bowl of warm water (about 50 deg C / 120 deg F ) into the Chiller compartment, and scrape away the ice and frost with a defrosting spatula. After doing so, be sure to set the knob of the temperature regulator to the original position.
It is not advisable to heat the Chiller compartment directly with hot water or a hair dryer while defrosting to avoid deformation of the inner case.
It is also not advisable to scrape off ice and frost or separate food from the containers which have been congealed together with the food with sharp tools or wooden bars, so as not to damage the inner casing.
Reversing the door
The side at which the door opens can be changed from the right side (as supplied) to the left side, if the installation site requires.
Tools you will need:
1. 8mm socket driver.
2.Phillips screwdriver.
3.Putty knife or thin-blade screwdriver.
Before you start, lay the refrigerator on it’s back in order to gain access to the base. You should rest it on soft foam packaging or similar material to avoid damaging the cooling pipes at the rear of the refrigerator.
1.Remove the upper hinge core, transfer it to left side and tighten securely, then put the screw covers in a safe place.
2. Remove both adjustable feet 、 the bottom hinge bracket and the rubber supporting pad by unscrewing the bolts. Then re-attach them according to the following pictures.
3. Replace the door by fitting the upper hinge core into the upper door's hole, securing it with the 2 screws. Replace the screw covers.
Warning!
When changing the side at which the door opens, the appliance must not be connected to electrical power. Remove plug from the power outlet beforehand.
Troubleshooting
If you experience a problem with your appliance or are concerned that the appliance is not functioning correctly, you can carry out some easy checks before calling Hisense Customer Service per below.
Warning! Don't try to repair the appliance yourself. If the problem persists after you have made the checks mentioned below, contact an authorized Hisense servicer.
Problem
Possible cause
Solution
Appliance does not work.
Appliance is not switched on.
Switch on the appliance.
Electrial plug is not plugged in or is loose.
Insert electrial plug.
Fuse has blown or is defective.
Check fuse, replace if necessary.
Socket is defective.
Must be corrected by an electrician.
The food is too warm.
Temperature is not properly adjusted.
Please look in the “initial Start Up” section.
Door was open for an extended period.
Open the door only as long as necessary.
A large quantity of warm food was placed in the appliance within the last 24 hours.
Turn the temperature regulation to a colder setting temporarily.
The appliance is near a heat source.
Please look in the “installation location” section.
Heavy build-up of frost, possibly also on the door seal.
Door seal is not air-tight (possibly after reversing the door).
Carefully warm the leaking sections of the door seal with a hair dryer(on a cool setting). At the same time shape the warmed, adjust the door seal by hand such that it sit.s correctly.
Unusual noises.
Appliance is not level.
Readjust the feet.
The appliance is touching the wall or other objects.
Move the appliance slightly.
A component, e.g. a pipe, on the rear of the appliance is touching another part of the appliance or the wall.
If necessary, carefully bend the component out of the way.
The compressor does not start immediately after changing the temperature setting.
This is normal, no error has occurred.
The compressor starts after a period of time.
Water on the floor or storage shelves.
Check that the Drip tray is housed properly. Drip tray is full of water.
See the “cleaning and care” section.
Disposal of the appliance
It is prohibited to dispose of this appliance as household waste.
Dispose of this appliance in accordance with Federal and Local regulations. Refrigerants must be evacuated before disposal.
Before disposal of the appliance
1.Pull out the electrial plug from the mains socket.
2.Cut off the power cord and discard together with the electrial plug.
Warning! Refrigerators contain refrigerant and gases in the insulation. Refrigerant and gases must be disposed of professionally as they may cause eye injuries or ignition. Ensure that tubing of the refrigerant circuit is not damage prior to proper disposal.
Correct Disposal of this product
This symbol on the product or in its packing indicates that this product may not be treated as household waste. Instead, it should be taken to the appropriate waste collection point for the recycling of electrical and electronic equipment. By ensuring this product is disposed of correctly, you will help prevent potential negative consequences for the environment and human health, which could otherwise be caused by the inappropriate waste handling of this product. For more detailed information about the recycling of this product, please contact your local council your household waste disposal service, or the shop where you purchased the product.