Loading ...
Loading ...
Loading ...
10
USING THE SLICING DISC (GREEN)
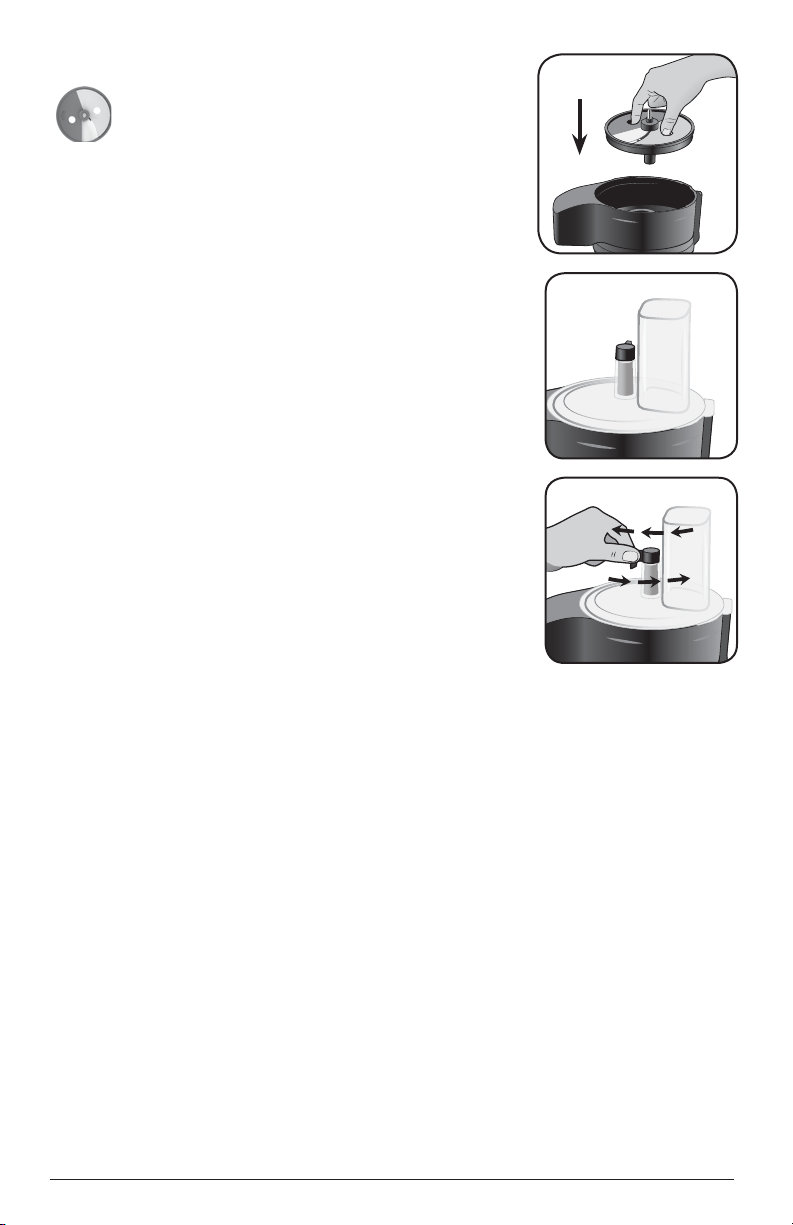
1. Lock the processing basin onto the base.
2. Place the slicing disc in the processing basin
over the center coupling. (K)
Note: Position slicing disc just to the right of the
feed chute. This allows the blade a full rotation
before contacting the food.
Important: Ensure that the adjustable slicing lever is
set to thin/minimum before assembling the lid. (L)
3. Place lid onto processing basin and lock into
place by rotating counterclockwise.
4. To adjust slicing thickness, move the lever
at the base of the feed chute forward and
backward to desired thickness (1-5 mm). Turn
the lever counterclockwise towards the front of
the appliance for thicker slices and clockwise
towards the back of the appliance for thinner
slices. Slice thickness may be adjusted while the
appliance is running. (M)
5. Turn appliance on; press firmly, but do not force,
food pusher to guide food through the slicing disc.
Note: Heavy pressure on the pusher does not speed
the work; use the pusher only as a guide. Let the
appliance do the work. Pushing too hard may result in inconsistent slicing
thickness.
Note: Slight variances in slice thickness may occur due to the pressure
applied to food when guiding it through the feed chute.
Note: Changing thickness settings with other discs or blades installed will
have no effect on the operation.
6. When finished, turn the appliance off and allow the disc to stop revolving
completely. Unplug the appliance and remove the lid.
7. Carefully remove the slicing disc using the two finger holes to lift the disc
straight up and out of the processing basin.
8. Unlock the processing basin by turning it clockwise and lift off the base.
L
M
K
Loading ...
Loading ...
Loading ...