Loading ...
Loading ...
Loading ...
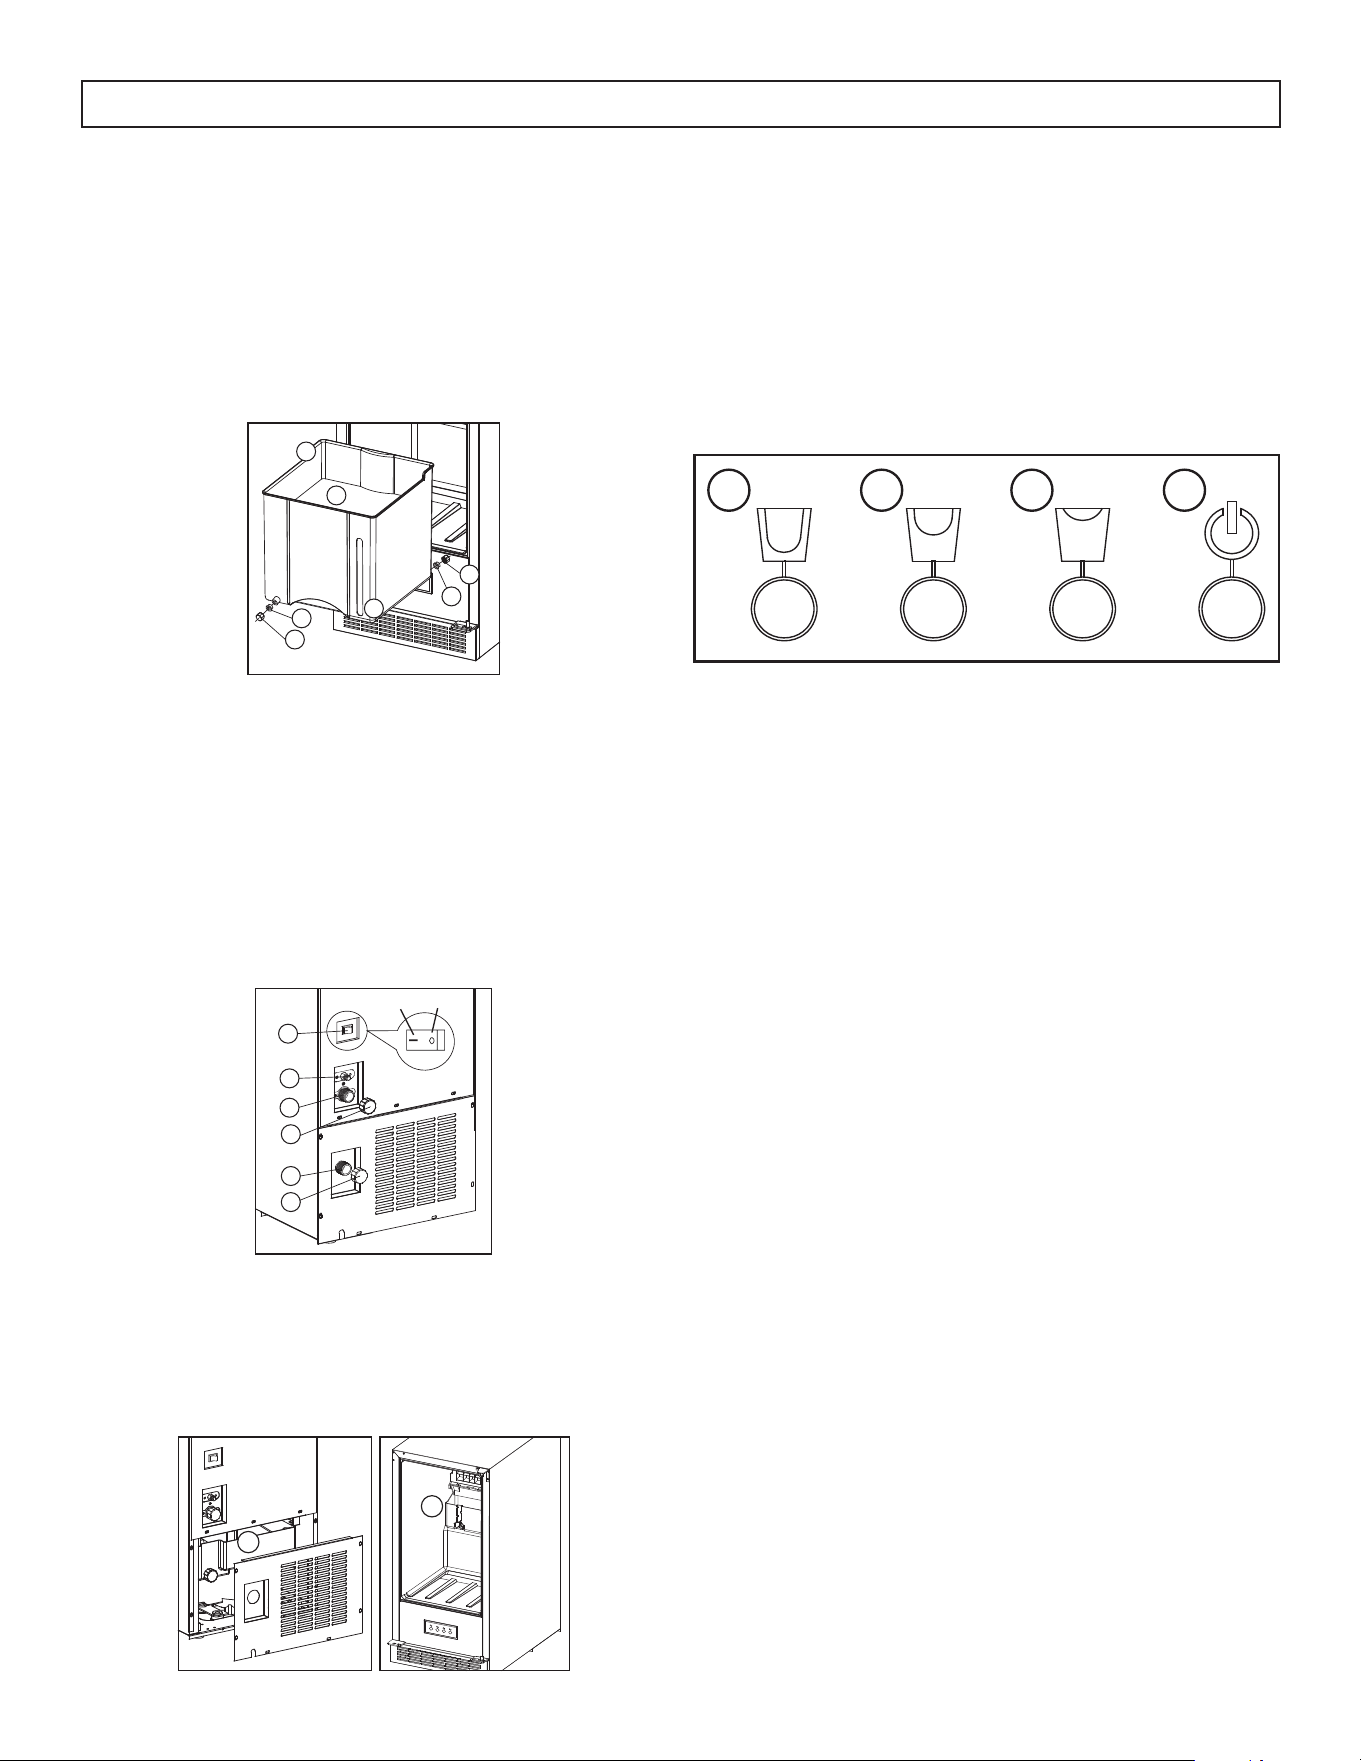
Drain Type Drain Drain Height Operation Instructions
Manual Drain
Mode
When water
reaches the
tray in the ice
bucket, remove
ice bucket and
drain the water
(to reduce the
ice from stick-
ing together).
• Manually drain
the water from
the ice bucket
• There is no drain hole
in the room
Reference Fig. B, C and D
Drain nut and drain pump switch Condi-
tion
Drain nut (front) (3) + drain seal (front) (4) Closed
Drain nut (back) (7) + drain seal (back) (6) Closed
Drain cap (11) Closed
Drain cap (12) Closed
Drain pump switch (8) OFF
1. Ensure the screw nut and switch are in the
above condition to avoid water leakage.
2. Periodically check the ice bucket (1) and
water level sight (5). If the water level
exceeds the sight water level, drain off
unnecessary water.
3. When draining off the water, you can re-
move the ice bucket (1), drain nut (front) (3)
and drain seal (front) (4). Use the ice tray to
take out the unnecessary water, then tight-
en the above screw and seal washer.
NOTE: When pushing the unit into place, make sure the water line and drain lines are not kinked. The lines
should not be left in such a way that they may rattle against the unit.
To view our online installation video, visit: www.silhouetteappliances.com
INSTALLATION INSTRUCTIONS
CONNECTING ICE MAKER TO DRAIN
7
Loading ...
Loading ...
Loading ...