Loading ...
Loading ...
Loading ...
7
Cleaning the Oven (Cont.)
Troubleshooting
Accessories
Self Clean Mode
Read Self-Cleaning Oven Safety Instructions at the
beginning of this manual before using Self Clean Mode.
Self-clean (black) racks may remain in the oven. Close
the door. If the oven is too hot, you will not be able to start
self- clean. Press the Self Clean pad. Use the number
pads to enter any clean time between 3 and 5 hours and
press start. The oven door will lock. For a moderately
soiled oven, run a 3 hour self-clean cycle. For a heavily
soiled oven, run a 5 hour self-clean cycle. The oven will
turn off when the self-clean cycle is complete. The door will
not unlock until the oven has cooled below the unlocking
temperatures. After the oven has cooled down wipe ash
out of the oven.
For additional troubleshooting tips, see the full owner’s manual at www.GEAppliances.com.
Looking For Something More?
GE Appliances offers a variety of accessories to improve your cooking and
maintenance experiences!
To place an order visit us online at:
www.GEAppliances.ca (Canada)
1.800.661.1616 (Canada)
The following products and more are available at extra cost: Broiler Pan, Oven Racks and Cleaning Supplies
Steam Clean Mode
The Steam Clean feature is for cleaning light soils. To use
the Steam Clean feature, wipe grease and soils from the
oven. Pour one cup of water into the bottom of the oven.
Close the door. Press Steam Clean then press Start. The
oven door will lock. You cannot open the door during the
30 minute steam clean. When the cycle completes, soak
up remaining water and wipe the oven walls and door.
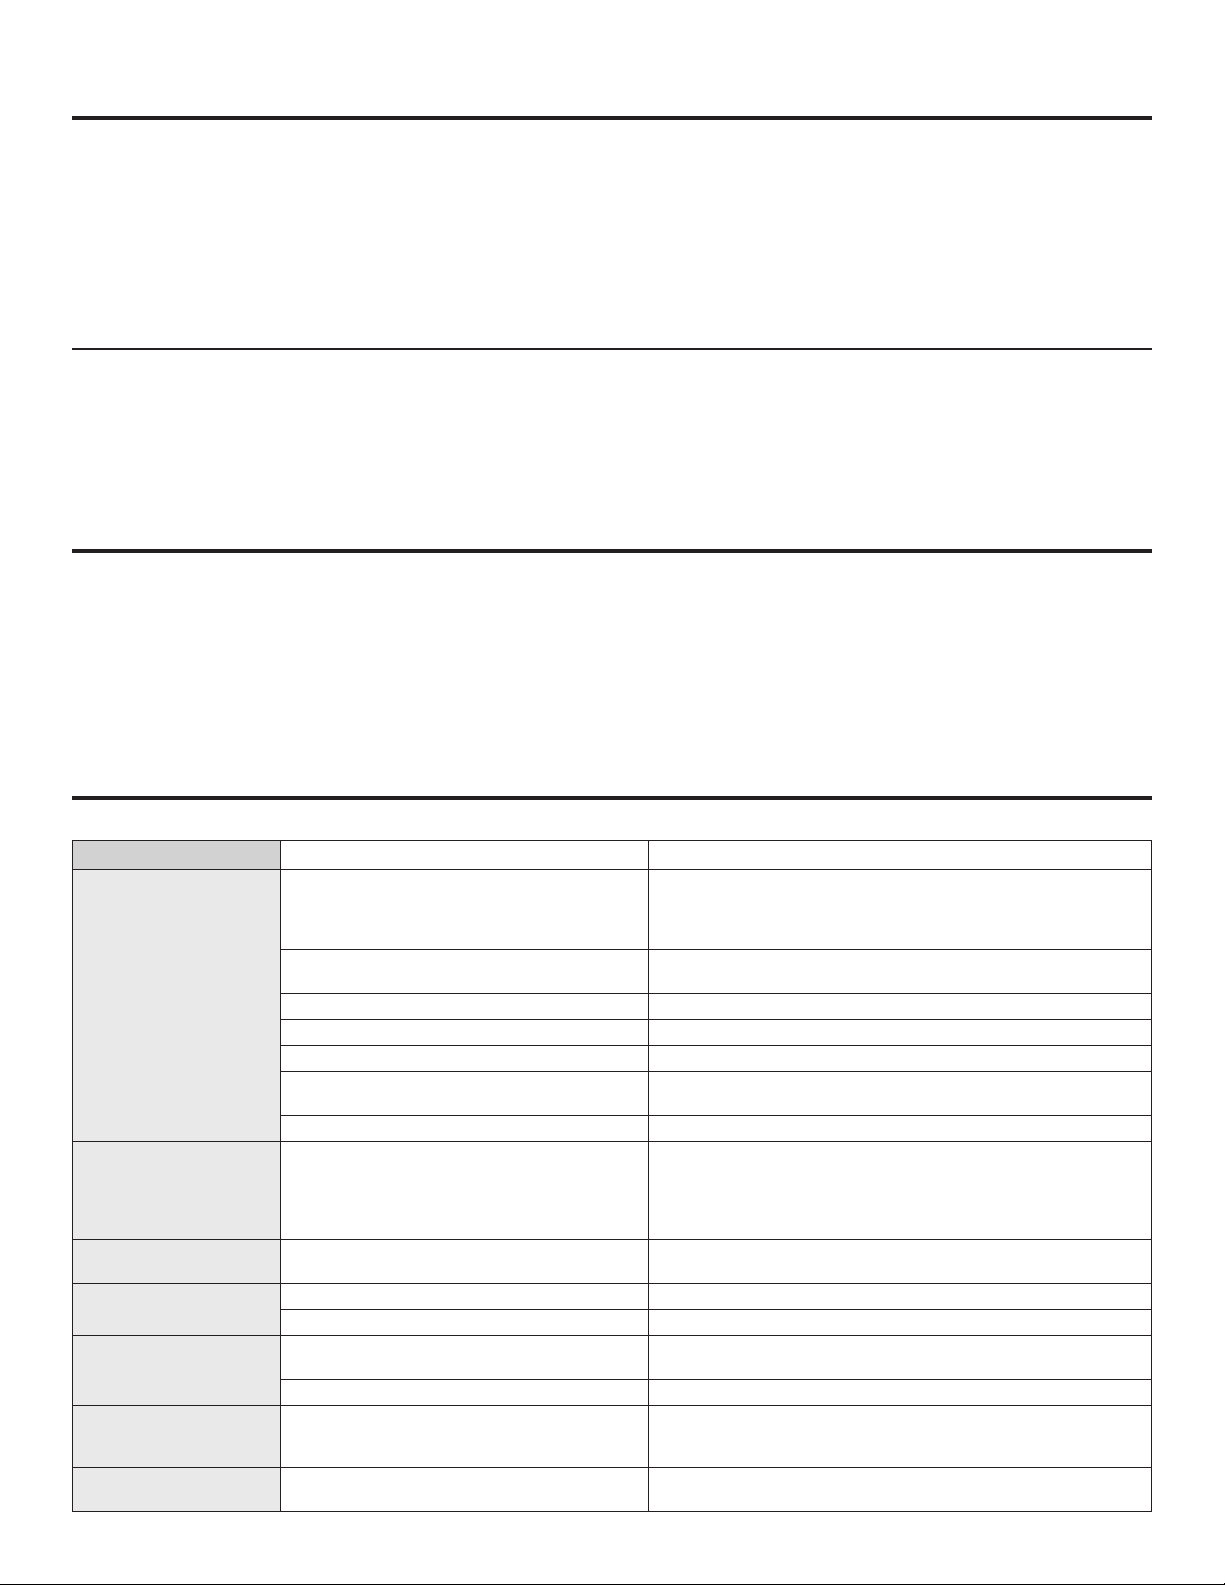
Problem Possible Cause What To Do
Surface units do not
work properly or
flashing power setting.
Improper cookware being used. Wrong pan type. Use a magnet to check that cookware is
induction-compatible. Use a flat induction-capable pan that meets
the minimum size for the element being used. See the Pan Size
and Shape section in full owner's manual.
Pan is too small. Pan size is below the minimum size for the element. See the Pan
Size and Shape section in full owner's manual. Use smaller element.
Pan not positioned correctly. Center the pan in the cooking zone.
Pan is not in full contact with glass surface. Pan must be flat.
In some areas, the power (voltage) may be low.
Cover pan with a lid until desired heat is obtained.
A fuse in your home may be blown or the
circuit breaker tripped.
Replace the fuse or reset the circuit breaker.
Cooktop controls improperly set. Check to see that the control is set properly.
My new oven doesn't
cook like my old one.
Is
something wrong
with the temperature
settings?
Your new oven has a different cooking
system from your old oven and therefore
may cook differently than your old oven.
For the first few uses, follow your recipe times and temperatures
carefully. If you still think your new oven is too hot or too cold, you
can adjust the temperature yourself to meet your specific cooking
preference. NOTE: This adjustment affects Bake temperatures; it
will not affect Broil or Clean.
Oven temperature too
hot or too cold
Oven temperature needs adjustment. See the Special Features section.
Oven light does not
work
Light bulb is loose or defective. Tighten or replace bulb.
Pad operating light is broken. Call for service.
Oven will not self-clean The temperature is too high to set a
self-clean operation.
Allow the oven to cool and reset the controls.
Oven controls improperly set. See the Cleaning the Oven section.
Excessive smoking
during clean cycle
Excessive soil or grease. Press the Cancel/Off pad. Open the windows to rid the room of
smoke. Wait until the LOCKED light goes off. Wipe up the excess
soil and reset the clean cycle.
Oven door will not open
after a clean cycle
Oven too hot. Allow the oven to cool below locking
temperature.
Loading ...
Loading ...
Loading ...