Loading ...
Loading ...
Loading ...
5
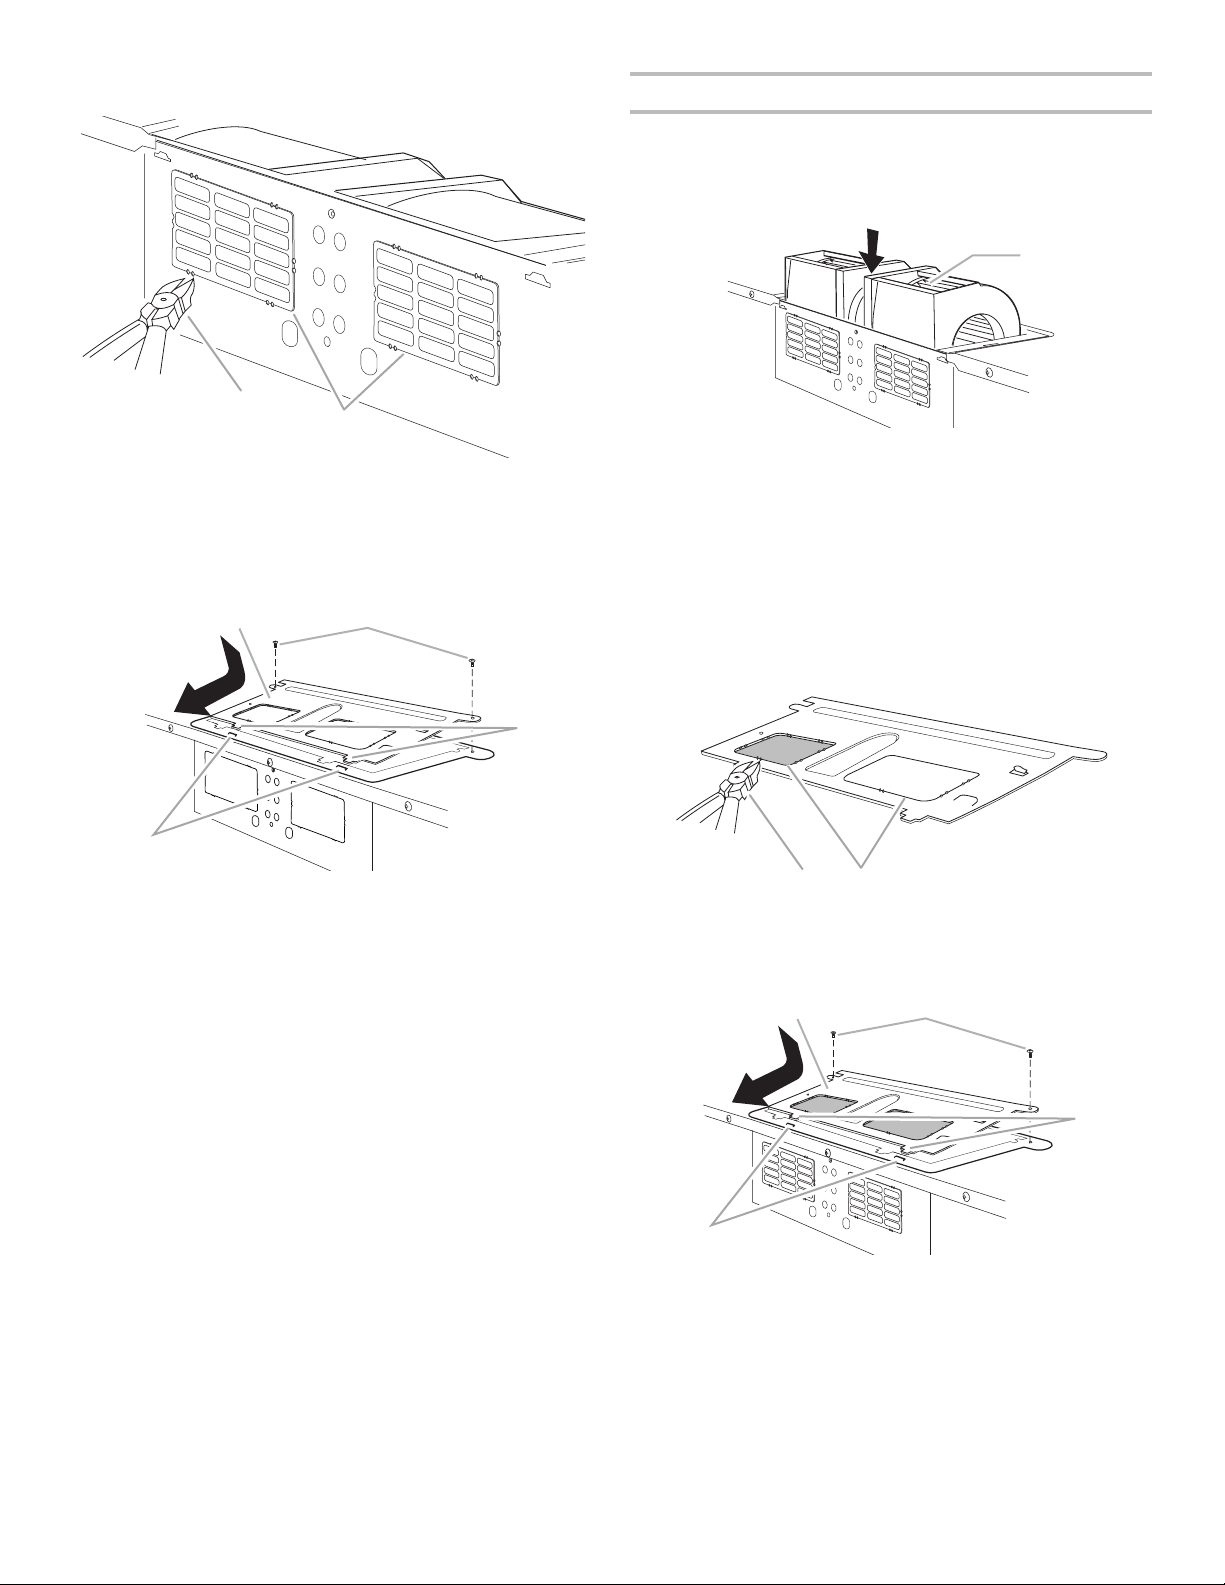
6. Using diagonal wire cutting pliers, gently snip out the
rectangular damper vent covers at the perforations.
7. Reattach blower motor to back of microwave oven
with 2 screws removed in Step 3.
8. Reattach damper plate. Make sure damper plate tabs are
inserted into the slots in the top of the microwave oven.
9. Secure damper plate with 2 screws removed in Step 1.
Roof Venting Installation Only
1. Repeat steps 1 to 4 from “Wall Venting Installation Only.”
2. Rotate blower motor so that exhaust ports face the top
of microwave oven and flat sides of blower motor face
back of microwave oven. Lower blower motor back into
microwave oven.
IMPORTANT: If blower motor is not positioned with flat sides
facing the back of the microwave oven (as shown), performance
will be poor.
3. Reattach blower motor to back of microwave oven with
2 screws removed in Step 3 of “Wall Venting Installation
Only.” Securely tighten screws.
NOTE: If blower motor is not correctly oriented, the 2 screws
removed in Step 3 cannot be reattached to the microwave oven.
4. Using diagonal wire cutting pliers, gently snip out the
rectangular vent covers on the damper plate removed
in Step 1 at the perforations.
5. Reattach damper plate. Make sure damper plate tabs are
inserted into the slots in the top of the microwave oven.
6. Secure damper plate with 2 screws removed in Step 1
of “Wall Venting Installation Only.”
B
A
A. Diagonal wire cutting pliers
B. Damper vent covers
A
B
C
D
A. Damper plate
B. Screws
C. Damper plate tabs
D. Slots
A
A. Exhaust port
B
A
A. Diagonal wire cutting pliers
B. Rectangular vent covers
A
B
C
D
A. Damper plate
B. Screws
C. Damper plate tabs
D. Slots
Loading ...
Loading ...
Loading ...