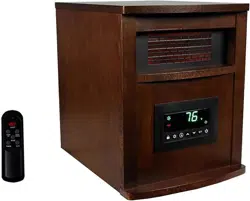
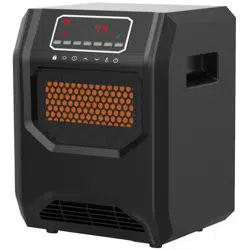
OWNER'S MANUAL QUARTZ INFRARED HEATER WITH 2 USB PORTS
IMPORTANT INSTRUCTIONS
When using this electric unit, basic safety precautions should always be followed to reduce the risk of fire, electric shock, and injury to persons, including the following:
Read ALL instructions before using this unit.
CAUTION: Risk of Electric Shock. DO NOT open or try to repair the heater yourself.
This heater may get hot when in use. To avoid burns. DO NOT let bare skin touch hot surfaces. If provided, use handles when moving this heater.
Keep combustible materials, such as furniture, pillows, bedding, paper, clothes, and curtains at least 3 ft. from the front of the heater and keep them away from the sides, top and rear. DO NOT place towels or other objects on the heater.
Extreme caution is necessary when any heater is used by or near children or the disabled. or any time the heater is operating.
Do not operate this heater unattended or while sleeping.
DO NOT operate any heater with a damaged cord or in case the heater malfunctions, has been dropped or damaged in any manner. Return heater to authorized service facility for examination, electrical or mechanical adjustment, or repair,
This heater is not intended for use in bathrooms, laundry areas and similar indoor locations. NEVER locate heater where it may fall into a bathtub or other water container. To protect against electrical hazards. DO NOT immerse in water or other liquids.
DO NOT touch the control panel or plug with a wet hand.
DO NOT run cord under carpeting. DO NOT cover cord with throw rugs, runners, or similar coverings. Arrange cord away from traffic area and where it will not be tripped over.
DO NOT insert or allow foreign objects to enter any ventilation or exhaust opening as this may cause an electric shock or fire, or damage the heater.
To prevent a possible fire. DO NOT block the air intakes or exhaust in any manner. DO NOT use on soft surfaces, like a bed, where openings may become blocked.
A heater has hot and arcing or sparking parts inside. DO NOT use in areas where gasoline, paint, explosive and/or flammable liquids are used or stored. Keep unit away from heated surfaces and open flames.
Always plug heaters directly into a wall outlet/receptacle. Never use with an extension cord or relocatable power tap (outlet/power strip).
To avoid fire or shock hazard, plug the unit directly into a 120V AC electrical outlet.
To disconnect heater, turn controls to OFF, then remove plug from outlet. Pull firmly on the plug. DO NOT unplug by pulling on the cord.
Always unplug the unit before moving or cleaning, or whenever the heater is not in use.
Use only for intended household use as described in this manual. Any other use not recommended by the manufacturer may cause fire, electric shock, or injury to persons. The use of attachments not recommended or sold by unauthorized dealers may cause hazards.
Always use ona dry, level surface. Use on floor only.
DO NOT use outdoors.
WARNING: To reduce the risk of fire or electric shock. DO NOT use this unit with any solid state speed control device.
DO NOT attempt to repair or adjust any electrical or mechanical functions on this unit. Doing so will void your warranty. The inside of the unit contains no user serviceable parts. Qualified personnel should perform all servicing only.
Connect to properly grounded outlets only.
PET OWNERS NOTE: The health of birds and some small pets are extremely sensitive to the fumes given off during the initial use of many appliances. Although these fumes are not harmful to humans, it is recommended that this heater not be used around birds and small pets during its initial use until the manufacturing corrosion coatings burn off.
SAFETY FEATURES
Tip-Over Safety Feature
This heater is equipped with a tip-over safety feature. Once the heater is tipped over, an internal switch will automatically shut the heater off. Once the heater is restored to an upright position. the heater will reset. To continue operation, turn on the heater using the supplied remote control or the control panel on the heater.
Overheat Safety Feature
This heater is equipped with a overheat safety feature. When the heater’s internal components reach a certain temperature that could cause overheat and possible fire. the heater will automatically shut off. To reset, turn heater off and switch master power switch on the rear of the unit to off position. Unplug the heater and let it cool down for around 20 minutes. Plug the heater back into the wall outlet and turn master switch and on/off switch to on.
WARNING: This heater has a voltage rating of 120 volts. The cord has a plug as shown in (A). An adapter as shown in (C) is available for connecting three-blade grounding-type plugs to two-slot receptacles (B). The grounding lug extending from the adapter must be connected to a permanent ground such as a properly grounded outlet box. The adapter should not be used if a three-slot grounded receptacle is available.
DO NOT DEFEAT THE SAFETY PURPOSE OF THE GROUNDED PLUG.
WARNING: It is normal for the power cord to feel warm to the touch; however, a loose fit between the outlet and the plug may cause overheating of the plug. If the plug is loose, do not use this outlet. If the plug is loose, try inserting the plug into a different outlet. Contact a qualified electrician to inspect the original outlet.
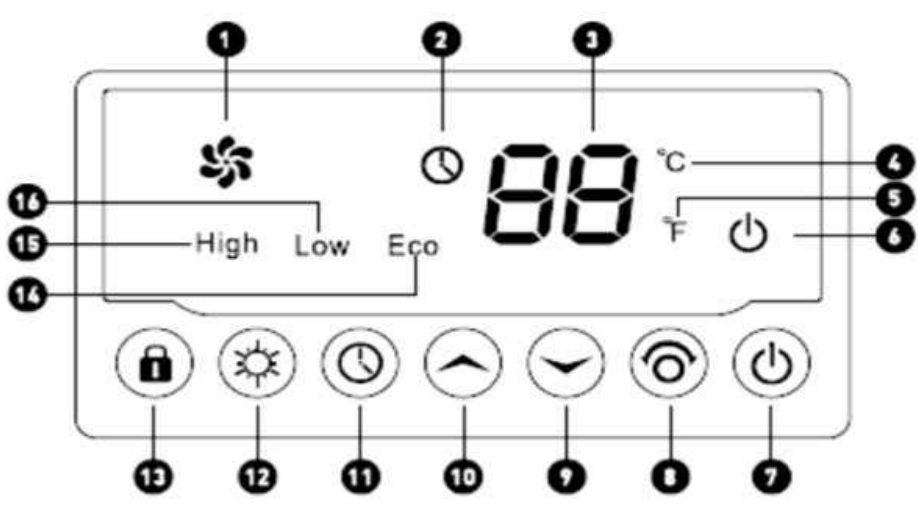
CONTROL PANEL
PART
NAME
DESCRIPTION
1
Fan Indicator Light
Indicates when the Fan is on
2
Timer Indicator Light
Indicates when the timer function is active
3
Digital Display
Readout of the set room temperature or timer value
4
Celsius Indicator Light
Indicates that the temperature is being displayed in Celsius
5
Fahrenheit Indicator Light
Indicates that the temperature is being displayed in Fahrenheit
6
Power Indicator Light
Indicates when the unit is receiving power from the wall outlet
7
Power Switch Button
Powers the heater ON or OFF
8
Oscillation Buton
Powers the oscillation function On/Off
Press and hold for 5 seconds to switch °C/ °F
9
Temp-Down Button
Decreases the set temperature
10
Temp-Up Button
Increases the set temperature
11
Timer Button
Engages the on/off timer function
Press and hold 5 seconds to show ambient temperature.
12
Heater Mode Button
Toggles between Hi / Low/ Eco Modes
13
Safety Lock Button
Hold to Lock / Unlock heater’s control panel
14
Energy Saving Indicator
Indicates when energy-saving mode is on
15
High Heat Indicator
Indicates when High Heat mode is on
16
Low Heat Indicator
Indicates when Low Heat mode is on
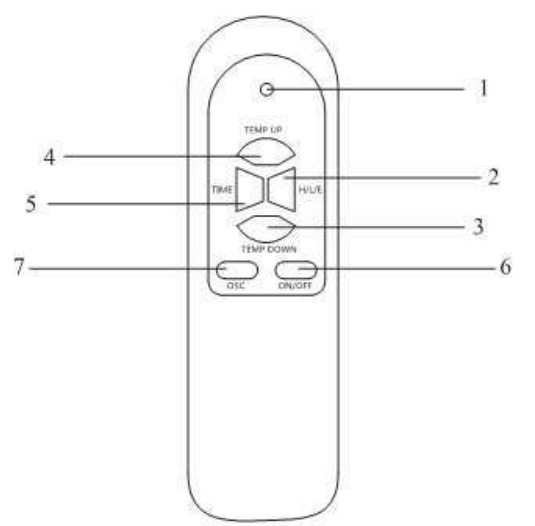
Remote Control:
PART
NAME
DESCRIPTION
1
LED Indicator Light
Illuminates when remote button is pressed, indicating sent signal
2
Mode Button
Toggles between the three modes available
3
Temp Down Button
Decreases the set temperature
4
Temp Up Button
Increases the set temperature
5
Timer Power Button
Engages the on/off timer functions
6
ON/OFF Button
Powers the heater on or off
7
Oscillation Buton
Oscillation function on or off
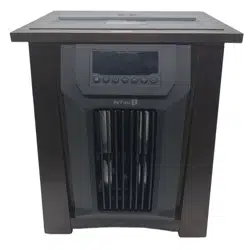
PREPARATION
Place the heater on a firm, level surface and plug into a grounded 120V 60Hz power outlet and turn on the power switch in the rear of the unit. Only operate heater in upright position.
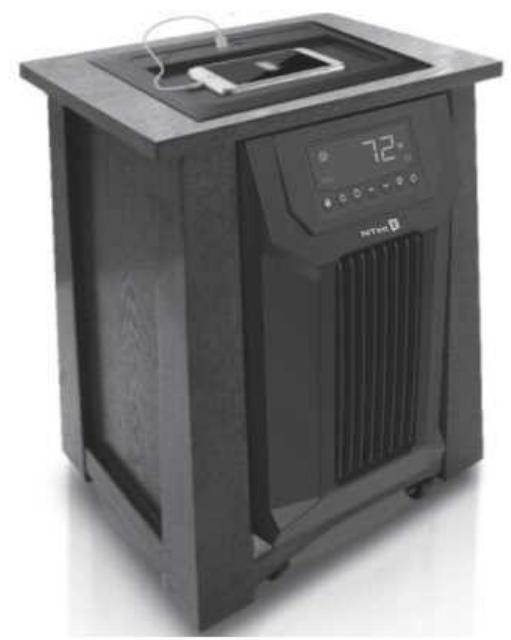
USB CHARGING PORTS
This heater model LCHT0016USB with 2 USB charging ports with the total output of 2.1A. Our Intelligent chip will automatically recognize your device and deliver fastest possible charging speed. All 2 USB ports are protected by our intelligent chip; specifically designed to protect your device from over current, short circuit and over voltage. Charge your devices with complete peace of mind.
The recessed surface design on the upside of the heater could place the appliances need to be charged and prevent which fall from the surface. By the delicately design that the surface on the upside of the heater with the cool body would not affect your device when charging on it.
USB ports have power when the heater is plugged in and the master power switch is on with the unit in any mode.
Note: Once the output exceeding 2.1A. all the USB ports would be protected by the inside components and will shut the USB power. To reset just unplug all of your devices from the ports and wait for about 5 minutes then the power will recover back.
OPERATING INSTRUCTIONS
1. Start and select working mode
Once the power is off, heating elements will stop working first. The fan will continue working for up to 90 seconds to dispense residual heat inside the heater. This is a normal function.
Select a heat setting.
Press the MODE button to toggle between the three heat settings.
High Mode uses 1500W; Low Mode uses 750W. ECO mode is an Economic Energy Saving Function. When ECO mode is chosen, the heater will set the temperature automatically to 68°F (20°C) under this mode.
2. Setting room temperature
Adjust the thermostat by pressing the arrows on the control panel or remote control.
Set temperature indication varies from 50°F to 90°F or from 10°C to 32°C. Once you have chosen the desired temperature. the heater will remain on until the room temperature increases to the temperature on the digital display. The heater will cycle on and off to maintain the desired room temperature.
Press and hold Oscillation button for 5 seconds to switch °C/°F
When Fahrenheit indicating light is on, digital display indicates Fahrenheit value.
When Celsius indicating light is on, digital display indicates Celsius value.
3. Setting timer-power-off
Note: ONLY under power-on mode can you set timer-power-off function. Timer function not an excuse to leave heater unattended.
After starting the unit, press the timer button on the control panel or remote control.
Digital display changes from set temperature to time value for the timer. Each press of the timer button will aa a ie increase the timer length by 1 hour up to 12 hours.
To cancel the timer, cycle through the lengths until the value is “00”
The timer light is on when timer-power-off is set.
4. Setting timer-power-on
Note: ONLY under power-off mode can you set timer-power-on function. Main power switch must be on. Timer function not an excuse to leave heater unattended.
Under power-off mode, press the timer button on the control panel or remote control.
Digital display will indicate the time value for the timer. Each press of the timer button will increase the timer length by | hour up to 12 hours. To cancel the timer, cycle through the lengths until the value is “00”
The light is on when timer-power-on is set.
5. Setting electro-lock
Electro-lock can avoid unwanted use by children. Electro-lock can be set in both power-on and power-off modes. Lock function not an excuse to leave heater unattended.
Press LOCK button on control panel for 5 seconds. Locking is confirmed when a tone is heard. When locked, control panel and remote control will not function. A tone will be heard when buttons are pressed but they will not function.
To unlock the locked control panel, press LOCK button on control panel for 5 seconds. Unlock is confirmed when a tone is heard. Control panel and remote control return to normal functions.
6. Wide Oscillation
Powers the Oscillation function ON/OFF
MAINTENANCE
1. Turn off the power switch in the rear of the unit.
2. Unplug the unit and let it cool completely.
3. To keep the heater clean, the outer shell may be cleaned with a soft, damp cloth. You may use a mild detergent if necessary. After cleaning, dry the unit with a soft cloth. CAUTION: DO NOT let liquid enter the heater.
4. DO NOT use alcohol, gasoline, abrasive powders, furniture polish, or rough brushes to clean the heater. This may cause damage or deterioration to the surface of the heater.
5. DO NOT immerse the heater in water.
6. Wait until the unit is completely dry before use.
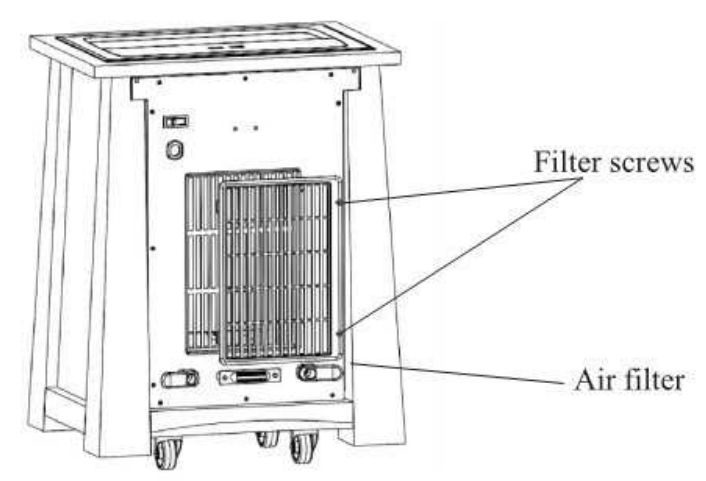
7. Air filter should be cleaned after 3 months use, when it appears dirty or looks like it is blocking air flow. With heater unplugged. remove 4 assembly screws as illustrated below. With filter assembly removed. clean all parts of filter assembly. Allow parts to completely dry before reinstalling onto the heater.
8. Reassemble filter and then attach to heater. WARNING: Do not use heater without filter assembly in place or with a filter that is not completely dry.
9. If you don’t plan to use the heater for a long time, take battery out of remote control before unit is stored away.
STORAGE
Store the heater in a cool, dry location when not in use. To prevent dust and dirt build-up, use the original packaging to repack the unit.
TROUBLESHOOTING
If the heater will not operate, please check the following before seeking repair of service:
Check if the power cord is plugged into an electrical outlet, if not, plug in.
Check if electricity to the main fuse is working.
Be sure master power switch on the rear of the unit is on.
Check if the battery in remote control is not dead and if the polarity of the battery is correct.
If the heater displays an error code "E1", the heater is overheated. Unplug the heater from the wall for a few second then plug the power cord back in. Check if the air filter is clogged.
If the heater displays an error code "E3", the heater is tipover, check if the heater is operated on a flat surface.
NOTE: The heater may not be operating if the thermostat is set lower than the room temperature. To begin operation, increase the thermostat temperature for a higher heat setting.
FREQUENTLY ASKED QUESTIONS
My heater emits a strange odor when | first open the box and when I turn the heater on for the first time. Why is this happening?
This is normal. This heater is treated with a special heat safe/resistant coating. This odor will sometimes be present when the box is opened. When the coating is exposed to heat, it produces this particular odor during the first few hours of operation. This will dissipate after the break-in period. If you are sensitive to odors, you may want to pre-burn the unit in a garage with the door open until the initial odor dissipates.
If my heater runs on its max wattage setting, how many BTUs is that?
This heater is intended to be used as supplemental heat in areas most needed. It may take several minutes to several hours to heat your area, depending on various factors. The below chart provides BTU translations for different wattages.
WATTAGE
BTUS
1,500
5,118
1,000
3,412
750
2,559
500
1,706
Heater designed for 1500 Watt, 144 SQ FT room, using heater in much larger room, heater may not shut down, because it will not reach set temperature. Heater also may not reach set room temperature.