Loading ...
Loading ...
Loading ...

USA
6
AFTER SALES SUPPORT
Operating Instructions
BEFORE USING FOR THE FIRST TIME
1. Carefully unpack the panini maker and remove all labels, packaging and
materials.
2. Before using your panini maker for the first time, wipe the cooking plates with a
damp cloth to remove all dust, and then dry.
WARNING: Never use metal scouring pads, harsh or abrasive cleaners on any
part of the panini maker.
3. Wipe outer surfaces with a slightly damp, soft cloth or sponge.
4. For best results, pour a teaspoon of vegetable oil onto an absorbent kitchen
towel. Spread onto the non-stick grill plates. Wipe off any excess oiI.
CAUTION: Take care to prevent water from running into the appliance.
NEVER IMMERSE THE PANINI MAKER IN WATER OR ANY OTHER LIQUIDS.
5. Slide the removable drip tray into the bottom front of the unit. Push firmly to
ensure the drip tray is securely installed.
6. Set the appliance on a dry, clean and flat surface. Keep the panini maker closed
untiI use.
OPERATING INSTRUCTIONS
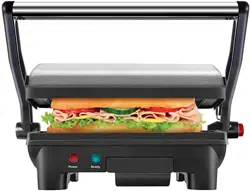
The panini maker can be used in the open position to grill burgers, thin boneless
pieces of meat, fish, fruits, and vegetables easily. Use the panini maker in the
closed position to make grilled pressed sandwiches.
IMPORTANT: Always preheat the panini maker closed.
1. Optional: Before using the panini maker, use a pastry brush to lightly coat the top
and bottom grilling plates with vegetable oil.
IMPORTANT: Do not use non-stick sprays as they can cause build-up on the
cooking plate.
2. IMPORTANT: Make sure removable drip tray is in the position before use.
3. Use the tilt-up feet to raise the front two legs of the cooking plate. That will
allow the grease to run to the drain at the back of the closed panini maker.
4. Turn the panini maker over to the underside. The feet will be in the lowered
(flat) position.
5. Press the center tab of each of the feet. Lift each foot upwards to the raised
position. With the front part raised, turn the panini maker over and replace onto
the work area.
6. Use the handle to lower the top grill plate.
Loading ...
Loading ...
Loading ...
