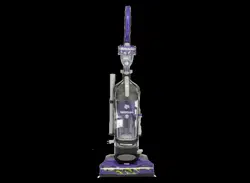
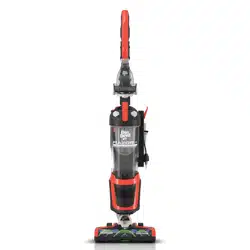
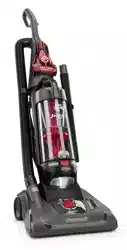
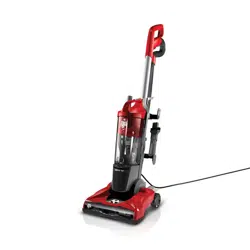
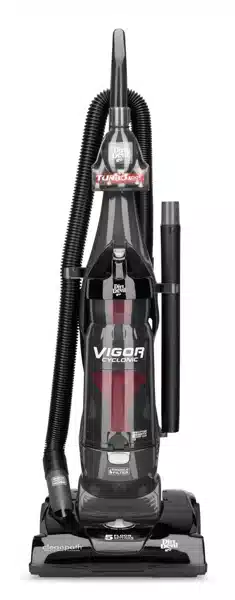
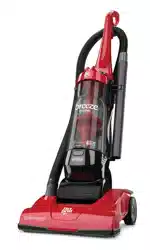
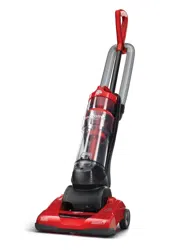
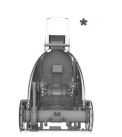
User Manual
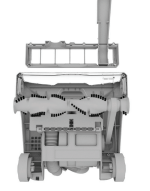
QUICK START
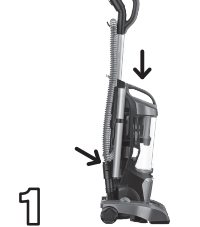
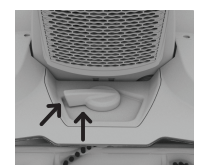
INSERT HANDLE WAND INTO TOP OF VAC. SECURE YOUR HOSE HERE.
NOW, WRAP THE CORD AROUND CORD HOOKS! *
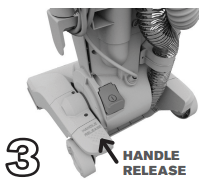
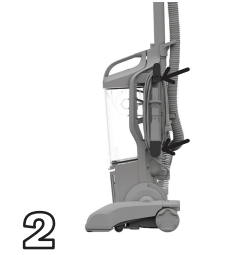
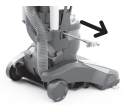
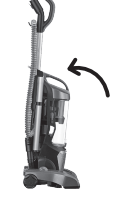
PUSH HERE AND PULL HANDLE BACKWARDS TO RECLINE.
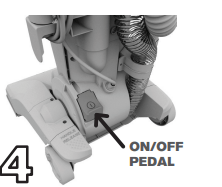
PLUG IN THE CORD AND PRESS HERE TO POWER UP.
Height Adjust
THE FOLLOWING HEIGHT SETTINGS ARE RECOMMENDED FOR MAXIMUM CLEANING PERFORMANCE.
1. Low Settings - Two Positions: Great for tile, hardwood, linoleum and low pile carpets.
2. High Settings - Two Positions: Great for plush and shag carpets.
Cord Release
Prior to using, grasp the end of the plug and pull to release the cord from the cord reel until red tape is reached.
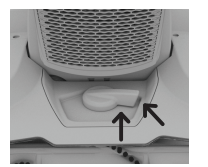
To return cord for storage, hold plug and press down Cord Release Pedal on side of cord reel.
IMPORTANT When pulling on the cord, yellow tape will identify when the cord is almost fully extended. When red tape is visible on the cord, the cord has reached its full length. (Do not pull the cord past the red tape.)
QUICK RELEASE CLEANING WAND
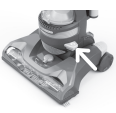
1. Press the wand release button.
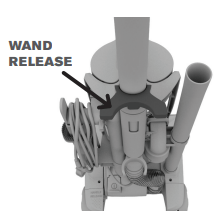
2. Pull wand up & out and insert hose to wand
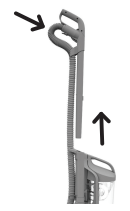
3. Push the tools on the wand* for convenient cleaning. When you’re done, twist & pull to take them off.
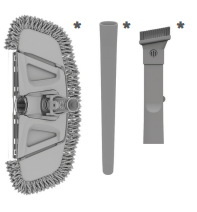
COMPLETE ON-BOARD TOOLKIT
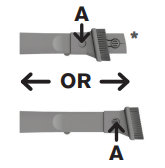
2-IN-1 COMBO TOOL: Use the Crevice Tool for tight spaces, corners and along stair edges and baseboards. Try the Dusting Brush for furniture, table tops, lamps, blinds and more.Press the lock button (A) down and slide to switch between modes.
EXTENSION WAND: Attach to cleaning wand for longer reach on above and hard floor cleaning.

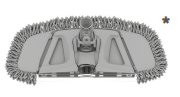
VAC+DUST FLOOR TOOL WITH SWIPES™*: Vacuum and dust most hard floor surfaces.
TURBO TOOL®: For upholstered furniture, draperies, mattresses and stairs.
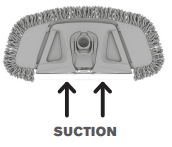
HARD FLOOR CLEANING WITH SWIPES *
Vac+Dust Floor Tool with SWIPES™ Washable Microfiber Dusting Pad picks up dirt, dust, debris & pet hair. Your Featherlite® will get the rest.
1. Slide one side in pocket and then the other.
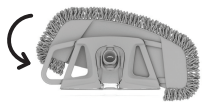
2. The vacuum picks up dirt and debris from your hard floors while the Microfiber SWIPES™ pad picks up the rest
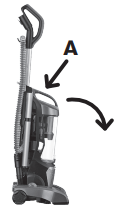
ABOVE FLOOR CLEANING
1. Remove Quick Release Cleaning Handle Wand for convenient above floor cleaning.
2. Insert hose into handle wand.
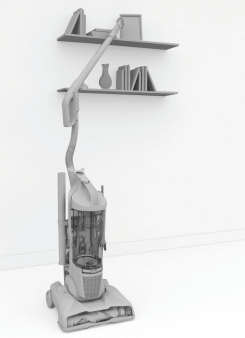
3. Attach extension wand and 2-in-1 tool for improved cleaning.
CAUTION Use extra care when cleaning on stairs. To avoid personal injury or damage, and to prevent the cleaner from falling, always place cleaner at bottom of stairs or on floor. Do not place cleaner on stairs or furniture, as it may result in injury or damage. When using tools, always ensure handle is in upright position.
HOW TO
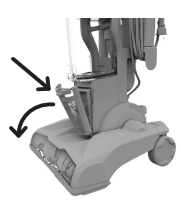
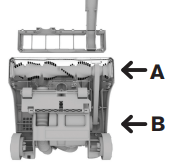
EMPTY THE DIRT CUP
1. Dump the dirt when it's full.
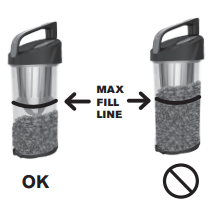
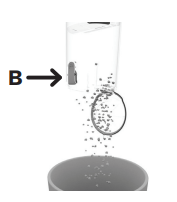
2. Push the release button (A) then pull out the dirt cup.
3. Now ditch the dirt by pushing the lower button (B). Give it a wipe to remove dust.
4. Place back in bottom first. Push the top of the cup against the back panel and it'll click into place.
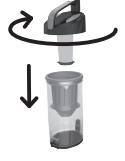
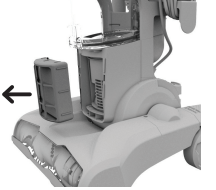
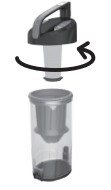
CLEAN THE RINSABLE FILTER
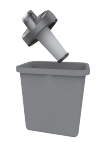
1. Remove the dirt cup. Twist the handle to remove the top from the dirt cup. Gently remove the filter from the the handle.
2. Tap clean into a trashcan.
3. All pieces are rinsable. Allow to dry 24 hours before using
4. TWIST the filter back into the handle, place the handle back on the dirt cup and twist to close. Replace the dirt cup into the vacuum.
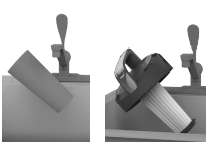
CLEAN THE EXHAUST FILTER
1. Push the tab on the front of the cover to pivot out.
2. Pull out the filter, rinse dirt from both sides, and let air dry for 24 hours before reinstalling or until dry.
3. Put the dry filter back. Now line up the filter cover with the bottom tabs first and then snap back into place.
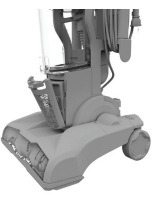
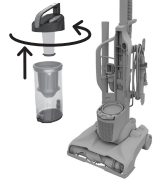
CLEAN THE CYCLONIC ASSEMBLY
1. Twist counter-clockwise to open the dirt cup. Pull cyclonic assembly out of dirt cup.
2. Use the Dusting Tool to clean the cyclonic assembly.

CLEAN THE BRUSHROLL
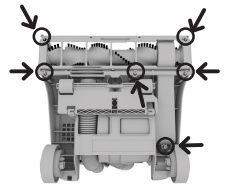
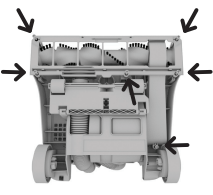
1. Turn your vacuum over. Use a Phillips screwdriver to take off the 6 screws. Remove the bottom plate.
2. Clean the brushroll.
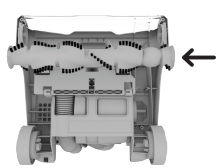
3. Slide on belt with the lettering on the outside.
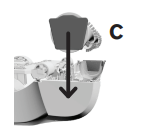
REPLACE THE BELT
1. Turn your vacuum over. Use a Phillips screwdriver to take off the 6 screws. Remove the bottom plate.
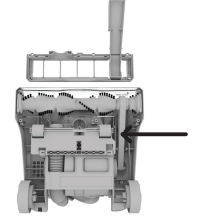
2. Then take off that old belt. Slide on a new belt with the lettering on the outside.
3. Slip belt around the brushroll in area without bristles (A) and metal pin (B). Each end of the brushroll will fit into pockets on each side of the nozzle (C). Put the plate back on and screw together.
LUBRICATION: The motor and brushroll are equipped with bearings which contain sufficient lubrication for their lifetime. The addition of lubricant could cause damage. Do not add lubricant to motor or brushroll.
NOTE: Any other servicing should be done by an authorized service representative. If appliance is not working as it should, has been dropped, damaged, left outdoors or dropped into water, take it to a service center prior to continuing use.
TROUBLESHOOTING
Any other servicing should be done by an authorized service representative. If appliance is not working as it should, has been dropped, damaged, left outdoors, or dropped into water, take it to a service center prior to continuing use.
Vacuum won’t run
- Power cord not firmly plugged into outlet.
- No voltage in wall plug.
- Check fuse or breaker in home.
- Blown fuse or tripped breaker.
- Replace fuse/reset breaker in home.
- Thermal Protector activated.
- Unplug and allow vacuum to cool for 30min. (This willl reset the thermal protector)
Dust escaping from vacuum
- Dirt cup full.
- Dirt cup not installed correctly.
- Review Dirt Cup removal & replacement.
- Hose not installed correctly.
- Review Hose installation.
- Rinsable and/ or Filter made with HEPA media not installed completely.
- Review Filter Removal and Cleaning.
Smoky/burning smell detected
- Belt broken or stretched.
- Brushroll is clogged.
- Clear/remove debris from brushroll.
Vacuum tools won’t pick-up
- Hose clogged
- Remove hose and tools; remove obstruction.
- Dirt cup full
- One or both filters are clogged.
- Remove both filters and clean.
- Vacuum not picking up debris.
- Brushroll could be turned off or the belt could be broken.
Cord rewind does not work
- Cord reel des not retract.
- Call 1-800-321-1134 for the nearest authorized service representative.
WARRANTY
2 YEAR LIMITED WARRANTY
WHAT THIS WARRANTY COVERS
When used and maintained in normal household use and in accordance with the Owner’s Manual, your Dirt Devil® product is warranted against original defects in material and workmanship. During the Warranty Period, We will provide labor and parts, at no cost to you, to correct any such defect in products purchased in the United States, U.S. Military Exchanges and Canada.
HOW TO MAKE A WARRANTY CLAIM
If this product is not as warranted, take or send the product to a Dirt Devil® Authorized Warranty Service Dealer along with proof of purchase. For an automated referral to authorized service outlets in the U.S.A., phone: 1-800-321-1134 OR visit Dirt Devil® online at www.DirtDevil.com. For additional assistance or information concerning this Warranty or the availability of warranty service outlets, phone the Dirt Devil® Consumer Response Center, Phone 1-800-321-1134, Mon-Fri 8am-7pm EST.
WHAT THIS WARRANTY DOES NOT COVER
This Warranty does not cover: use of the product in a commercial operation (such as maid, janitorial and equipment rental services), brushroll, belt, bags, filters, improper maintenance of the product, damage due to misuse, acts of
God, nature, vandalism or other acts beyond the control of Royal Appliance Mfg. Co. (“Royal”, “we”), owner’s acts or omissions, use outside the country in which the product was initially purchased and resales of the product by the original owner. This warranty does not cover pick up, delivery, transportation or house calls.
This warranty does not apply to products purchased outside the United States, including its territories and possessions, outside a U.S. Military Exchange and outside of Canada. This warranty does not cover products purchased from a party that is not an authorized retailer, dealer, or distributor of Royal products.
OTHER IMPORTANT TERMS
This Warranty is not transferable and may not be assigned. This Warranty shall be governed and construed under the laws of the state of Ohio. The Warranty Period will not be extended by any replacement or repair performed under this Warranty. THIS WARRANTY IS THE EXCLUSIVE WARRANTY AND REMEDY PROVIDED BY ROYAL. ALL OTHER WARRANTIES, EXPRESSED OR IMPLIED, INCLUDING WARRANTIES OF MERCHANTABILITY OR FITNESS FOR PARTICULAR PURPOSE, ARE DISCLAIMED. IN NO EVENT WILL ROYAL BE LIABLE FOR ANY SPECIAL, INDIRECT, INCIDENTAL OR CONSEQUENTIAL DAMAGES OF ANY KIND OR NATURE TO OWNER OR ANY PARTY CLAIMING THROUGH OWNER, WHETHER BASED IN CONTRACT, NEGLIGENCE, TORT OR STRICT PRODUCTS LIABILITY OR ARISING FROM ANY CAUSE WHATSOEVER. Some states do not allow the exclusion of consequential damages, so the above exclusion may not apply to you. This warranty gives you specific rights; you may also have others that vary from state to state.