Loading ...
Loading ...
Loading ...
9 Water connection*
WARNING
Electrical Shock Hazard!
u
Do not make the water connection while the appliance
is connected to an electrical outlet.
u
Disconnect the water supply before connecting the
water lines for the IceMaker.
u
The connection to the water supply may only be made
by a trained and licensed plumber.
WARNING
Poisoning Hazard!
u
The water quality must comply with the drinking water
regulations for the geographical area where the appli-
ance is located.
u
Connect to potable water supply only.
u
The IceMaker is designed exclusively to make ice
cubes in quantities needed by a household and must
only be operated with water appropriate for this
purpose.
Water pressure:
psi MPa (bars)
21.76 to 87.02 0.15 to 0.6 (1.5 to 6)
- Water must be supplied to the appliance through a cold
water pipe that complies with hygiene standards and
can withstand the operating pressure.
- All devices and equipment used to supply water must
comply with the regulations in force in the respective
country.
- The solenoid valve is located at the bottom of the back
of the appliance. It has a metric R3/4 connecting
thread.
- Use a 1/4"-OD copper wire to connect the water
supply with the solenoid valve. This is not supplied
with the appliance.
- If your model has an IceMaker, a coupler is supplied
between the metric R3/4 connection thread and the
1/4"-OD copper wire.
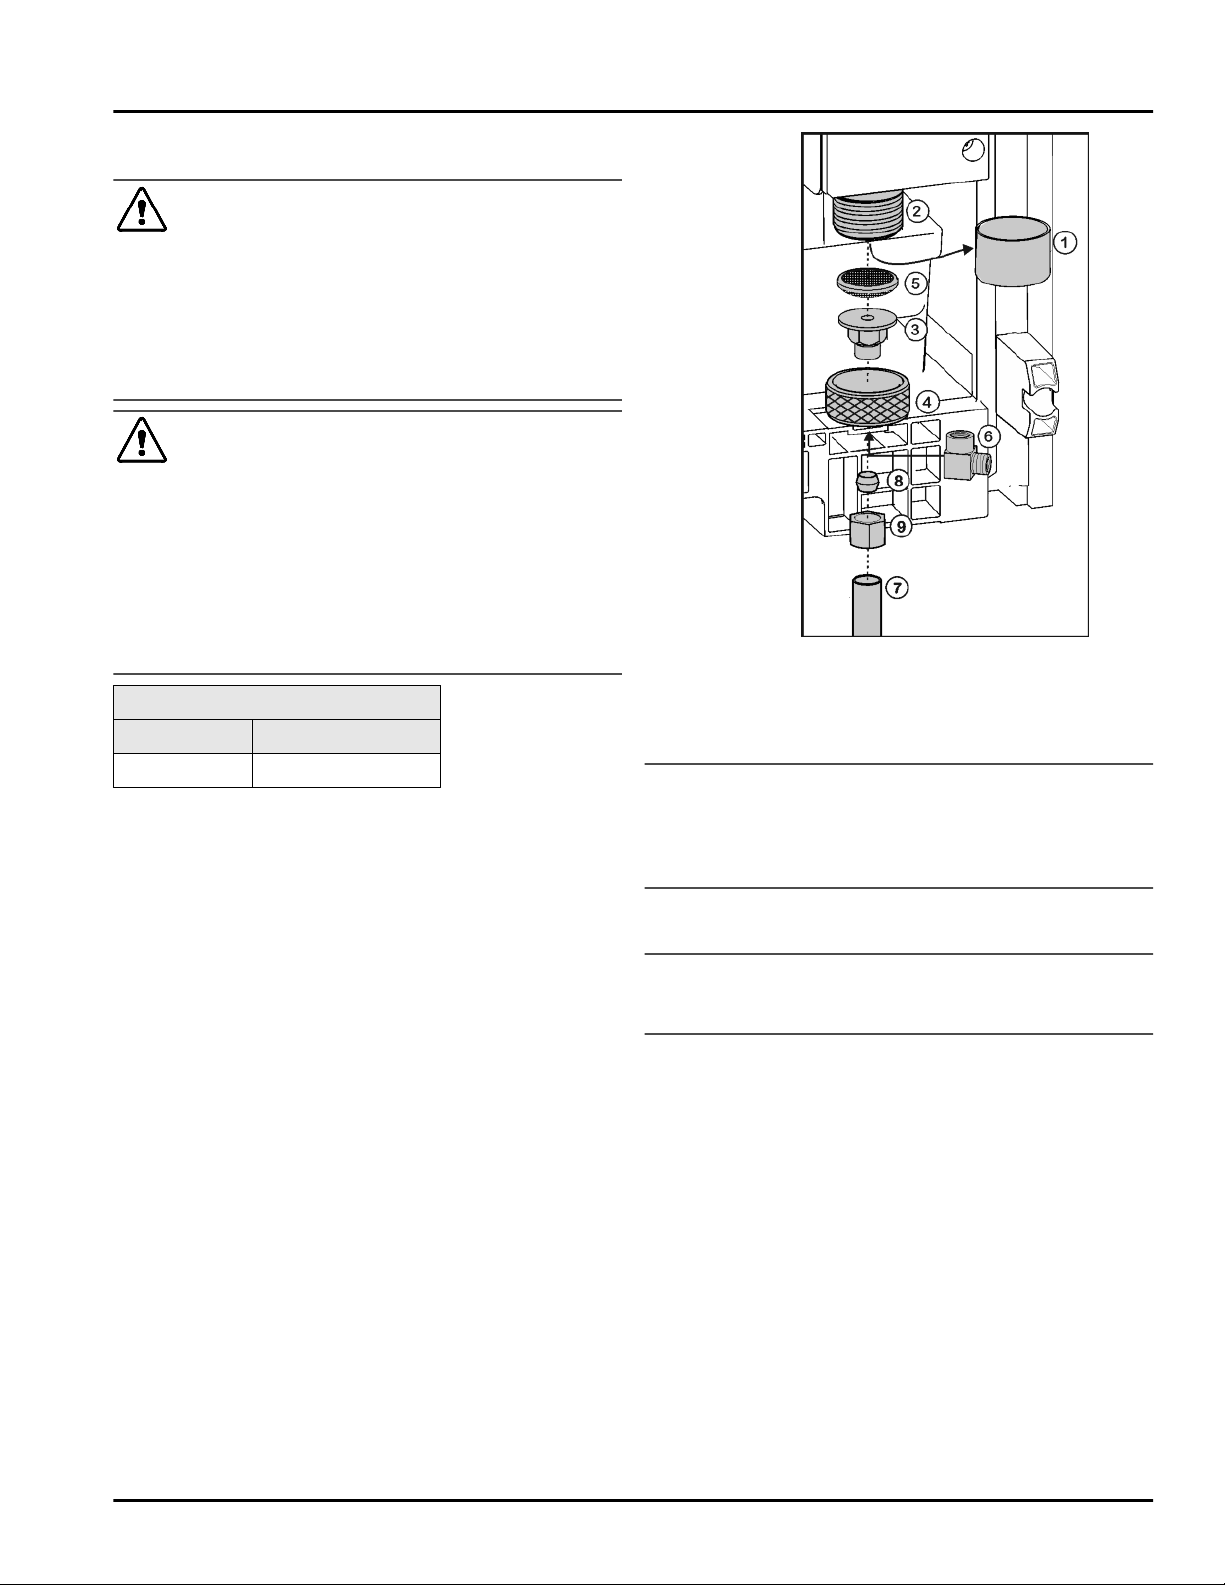
Fig. 18
u
Remove the cap
Fig. 18 (1)
from the solenoid valve
Fig. 18 (2)
.
u
Insert the coupler
Fig. 18 (3)
in theunion nut
Fig. 18 (4)
.
u
Insert the water filter
Fig. 18 (5)
with the recess pointing
down towards the coupler
Fig. 18 (3)
.
NOTICE
Risk of damage to the water filter!
If you insert the filter incorrectly you could damage it.
u
Insert the filter with the recess pointing towards the
coupler.
u
Lock the union nut
Fig. 18 (4)
onto the solenoid valve
Fig. 18 (2)
and tighten.
NOTICE
Risk of damage to the thread!
u
Do not overtighten the union nut.
u
To turn the water connection 90°, tighten the elbow
connector
Fig. 18 (6)
if necessary.
u
Connect the water supply
Fig. 18 (7)
(e.g. copper) with
the aid of the clamp ring
Fig. 18 (8)
and nut
Fig. 18 (9)
to
the coupler
Fig. 18 (3)
or elbow connector
Fig. 18 (6)
.
Water connection*
12 * Depending on model and options
Loading ...
Loading ...
Loading ...