Loading ...
Loading ...
Loading ...
6
RJ46
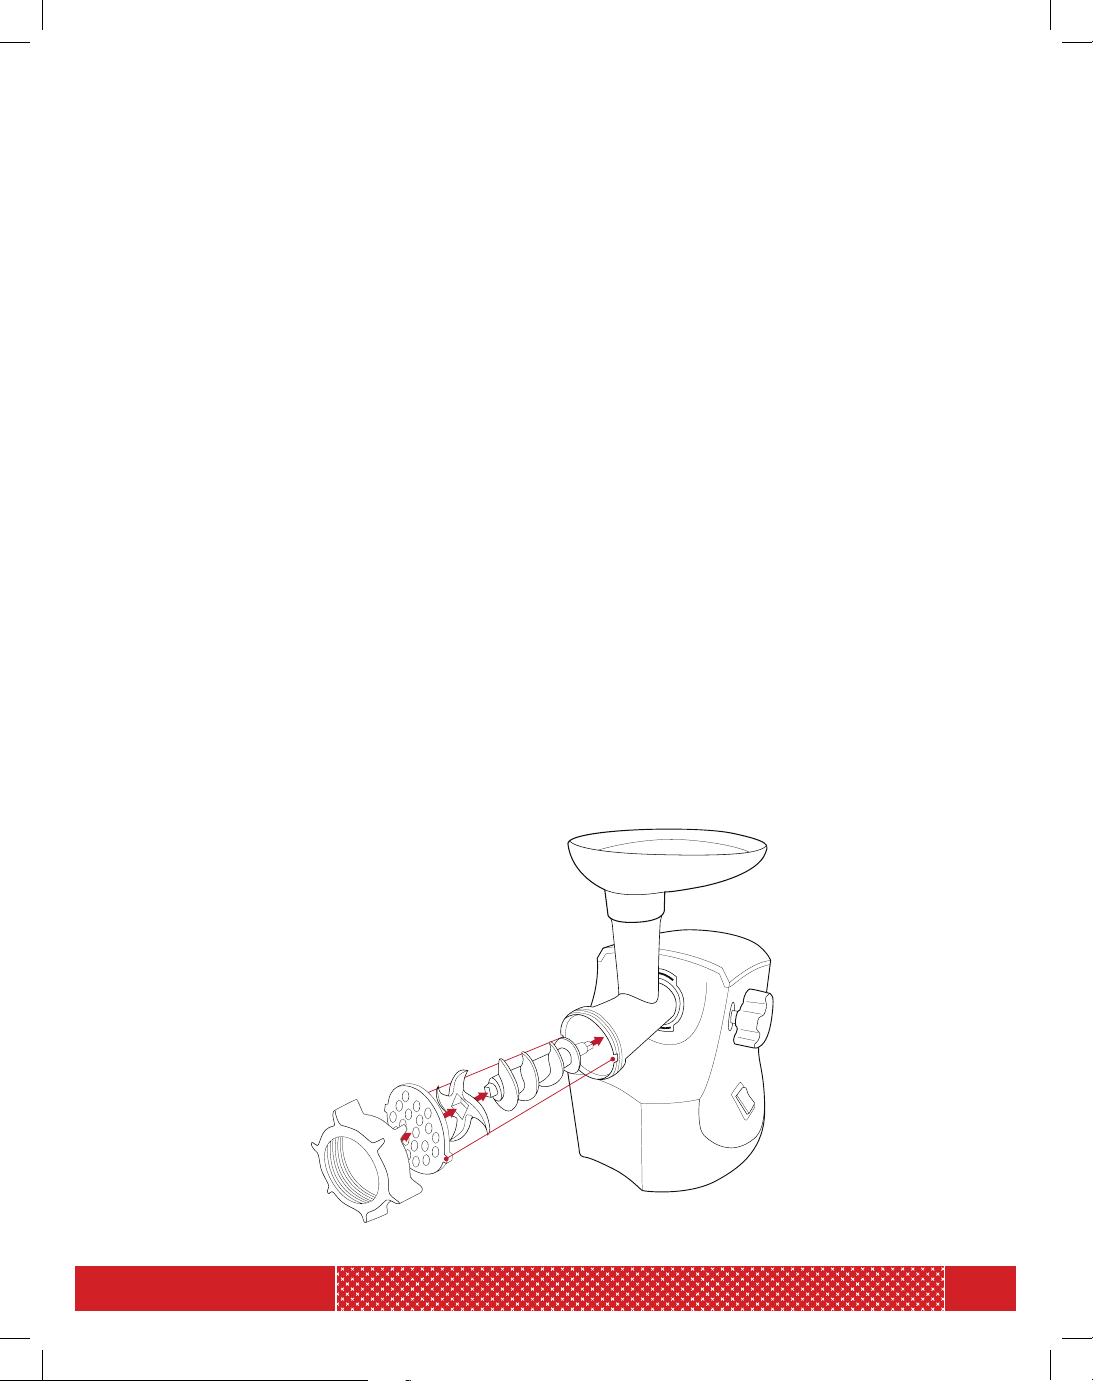
8. Place the desired Grinding Plate on the pin in front of the Blade. Ensure the rivets on the
Grinding Plate fit into the Chute’s divots. (Refer to Figure 1 for correct assembly.)
9. Hold the Grinding Plate in place and attach the Fastening Ring over it. Turn the Fastening Ring
clockwise to secure.
10. Place the Loading Tray on top of the Chute.
11. Position the Collection Tray or a bowl or dish in front of the Meat Grinder to catch the ground
meat as it exits the grinder.
12. Make sure that both switches are turned to “Off.” Then, plug in the Meat Grinder.
13. Load cut and chilled meat cubes into the Loading Tray.
14. Switch the Back switch to "On" and then, when ready to grind, switch the Side switch to "On.".
15. Use the Food Pusher to gently push meat into the Chute through the hole on the Loading
Tray. Note: Do NOT use the Food Pusher to forcefully push meat through the Chute. This will
jam the Meat Grinder.
16. If meat is jammed or grinding significantly slows down, use the Reverse function.
• Turn both switches to “Off,” then wait 30 seconds. Then turn the Back switch to
“Reverse,” and then the Side switch to “Reverse.” Pieces that are jammed will reverse
out back into the Chute.
17. Allow the Meat Grinder to grind for at least an additional 30 seconds to 1 minute after the last
piece of meat has been grinded. This will ensure all meat has been grinded and helps protect
the motor.
18. Switch the Meat Grinder off using both switches.
Figure 1.
OPERATING INSTRUCTIONS
Loading ...
Loading ...
Loading ...