Loading ...
Loading ...
Loading ...
9
English
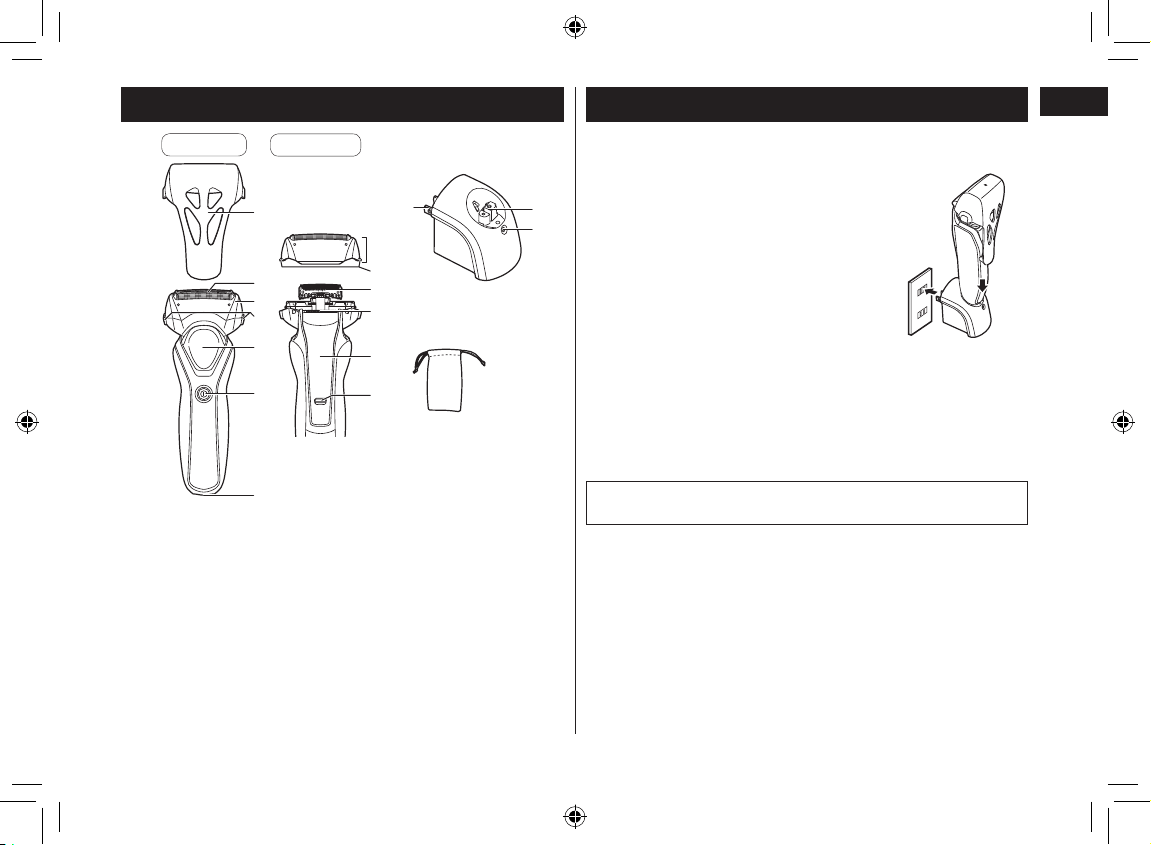
Parts identification
Front
Back
A Main body
1 Protective cap
2 System outer foil
3 Foil frame
4 Foil frame release buttons
5 Thumb rest
6 Power switch
7 Appliance socket
Outer foil section
9 System outer foil release
buttons
: Inner blades
; Trimmer
< Trimmer handle
= Lock release button
B AC adaptor (RE7-93)
> Power plug
? Charging plug
@ Charge indicator lamp
Accessory
C Travel pouch
Charging the shaver
• Turn the shaver off.
• Wipe off any water droplets on the appliance socket.
1
1
Place the shaver on the AC
adaptor.
2
2
Plug in the AC adaptor into a
household outlet.
• Check that the charge indicator lamp
glows.
• Charging is completed after approx.
8 hours.
2
1
3
3
Disconnect the AC adaptor after charging is
completed.
• The charge indicator lamp continues to glow after charging
is complete. There is no indication to show that “charging is
complete”.
• Charging the battery for more than 8 hours will not affect
battery performance.
Note
You cannot operate the shaver while charging.
• When charging the shaver for the first time or when it has not
been in use for more than 6 months, the charge indicator lamp
may not glow for a few minutes, or the operating time may shorten.
Please charge it for more than 16 hours in such cases.
• Recommended ambient temperature for charging is 0 °C – 35 °C
(32 °F – 95 °F). Battery performance may decrease outside of
the recommended temperature.
ES-RT17_US.indb 9 2016/03/24 14:02:14
Loading ...
Loading ...
Loading ...