➔
➔
➔
➔
Stealthbox
®
INSTALLATION GUIDE
SB-H-ELMNT/10W3v2/BK, JL AUDIO, Inc 2003
Sheet SKU#011183 Revision 01/15/2004 Page 1
for the
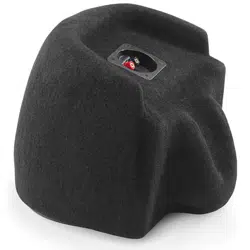
SB-H-ELMNT/10W3v2/BK
(2003-Up Honda Element)
This Stealthbox is a product which
requires professional installation skills and
tools.
Please read this installation guide thor-
oughly before beginning the project. It
will guide you step by step through the
installation. Several of the steps in this
process may require two people to
accomplish.
It is absolutely vital that the enclosure
be properly mounted to the vehicle
according to these instructions. Failure
to mount the enclosure properly pres-
ents two problems: 1) The sub-bass
performance will suffer due to the
movement of the enclosure caused by
the force exerted by the woofer(s) and
2) A loose enclosure presents a serious
safety hazard in the event of a collision
or sudden deceleration.
Please enjoy your JL Audio Stealthbox
responsibly.
STEP 1:
Remove the front passenger’s plas-
tic seat rail cover, located under and rear of
the seat. Remove the rear mounting bolts,
using a 14mm socket.
STEP 2:
With a 14mm socket, remove the
front mounting bolts and tilt the seat to the
back.
There will be enough slack in the wire, so you
do not have to disconnect it.
STEP 3:
Remove the OEM plastic woofer
cover, by pulling out plastic push clips that are
located on each side.
STEP 4:
With a 10mm socket, remove the
four bolts (two on each side) that secure the
OEM woofer enclosure to the under dash.
STEP 5:
On the driver’s side, disconnect the
gray plug.
STEP 6:
Locate the bracket that is mounted
to the floor with a pair of bolts. Use the mid-
dle non-used hole as a drilling guide.
With a1/2” drill bit, drill through floor.
START
HERE
Continued on Next Page ➔
www.jlaudio.com
➔
➔
➔
Loading ...
Loading ...
