
Loading ...
Loading ...
Loading ...
6
AIR650 AIRBIKE Pro
Stabilizers
Console Base
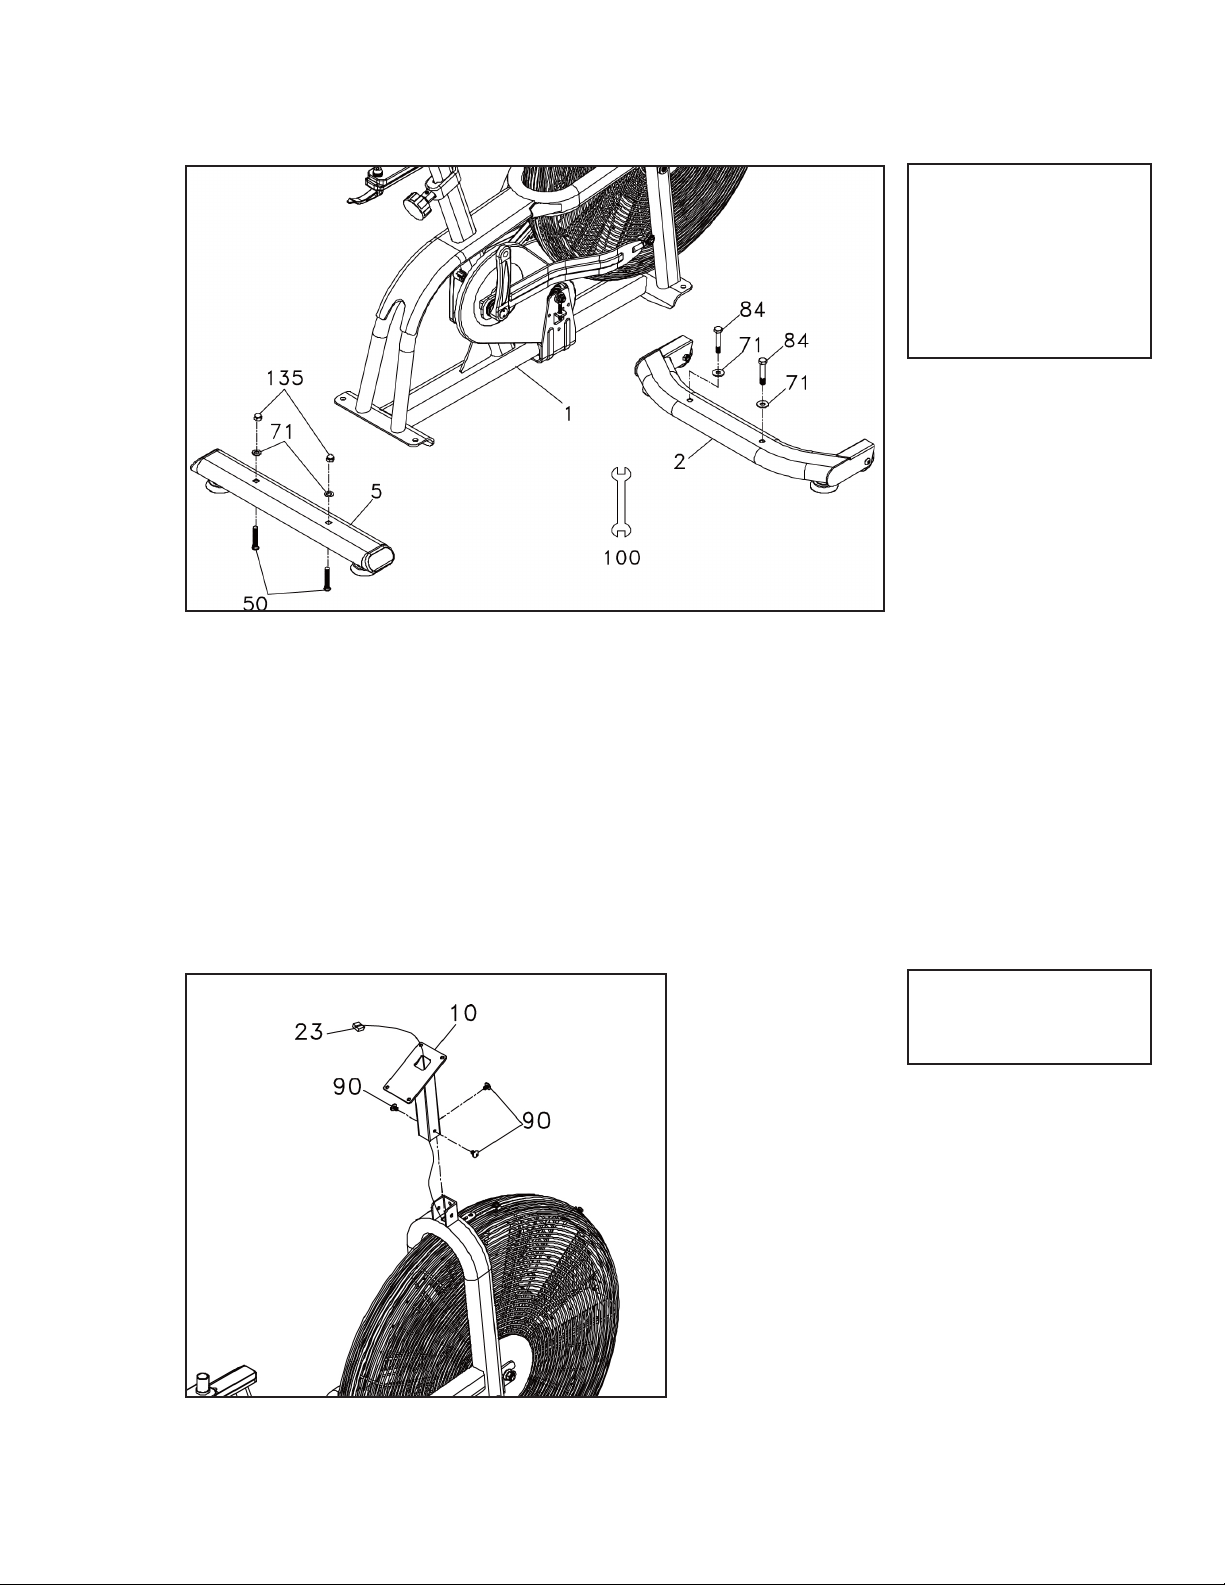
1
2
Hardware Step 1
Hardware Step 2
#84. Hex Head Bolts (2 pcs)
#50. Carriage Bolts (2 pcs)
#71. Flat Washers (4 pcs)
#135. Cap Nuts (2 pcs)
#90. Phillips Head Screws
(3pcs)
1. Using the 14/15mm wrench (100) fasten the front stabilizer (2) onto the main frame (1) with two sets of
hex head bolts (84) and at washers (71). Slide a washer onto the bolt and place it through the aligned
holes in the front stabilizer. Only tighten slightly until you are able to make sure that both bolts t into
place, then you may fully tighten.
2. Use the same wrench to fasten the rear stabilizer (5) onto the main frame (1) with two sets of carriage
bolts (50), at washers (71), and cap nuts (135). Align the holes on the rear stabilizer, slide a bolt through
the holes from the bottom. Then add a washer and the cap nut. You may need to press against the bolt if
there is any slippage.
1. Above the ywheel is a computer cable (23),
feed the cable carefully through the console
base (10). Be careful to not pinch or break the
wire as it controls the console input.
2. Use the screw driver (93) to fasten the console
base(10) onto the main frame (1) with three
phillips head screws(90).
You may nd it helpful to gently pull the cable to
one of the corners of the base so it does not get
pinched in-between the screws.
Loading ...
Loading ...
Loading ...