Loading ...
8. Stopping your sprinkler
When your sprinkler rides over the shut-off
ramp, the stopper is pushed up, shutting the
sprinkler off. To reposition your hose and
sprinkler for another part of your yard, first turn
off the water. (You will find it very difficult to
pull the stopper down if the hose is still
pressurized.) Bleed some water pressure from
your hose. Then, pull the stopper out to reset it
and proceed to lay out a new hose pattern on
the unwatered portion of your lawn.
9. Maintaining your sprinkler
Follow these tips to keep your sprinkler
working at peak performance: Keep the filter
washer at the hose coupling clean. If the water
flow through the spray arms seems a little
sluggish, check to be sure that nothing is
obstructing the filter washer. If that does not
solve the problem, clean out the spray arms.
Do not drop the sprinkler; this may cause
damage. Always drain the sprinkler after using
it and before storing it away for the winter
(freezing water inside the motor can damage
it). To drain, stand the sprinkler on its back end
and tilt it against a wall; let stand for 5 minutes
so all the water runs out. Note: if you have
model with shut-off ramp make sure stopper is
pulled out so the water can drain.
10. To prevent stripping the gears
Do not push or pull unit while it is operating.
Do not let the sprinkler bog down in mud, wet
grass, or low spots so that the wheels
keep turning without sprinkler moving. The
tough wheel spikes are made to pull across
grass. Never try to operate your sprinkler on
sidewalks or driveways. Severe damage to the
motor can result from such misuse.
11. Repair Instructions
TOOLS NEEDED TO COMPLETE RAINTRAIN
REPAIR: screwdriver, vise grips, channel lock
pliers, 3/8 inch allen wrench, 5/16 nut driver and
light grease
BODY/MOTOR: Using screwdriver or 5/16 nut
driver, remove 5 screws holding body to motor
assembly.
SELECTOR ASSEMBLY: Use screwdriver or
5/16 nut driver to loosen screw that holds down
selector assembly.
HUBS/WHEELS: Vise grips are used to remove
silver hub from wheel. Lock on hub and rock back
and forth until hub comes off. Remove the left
hand side wheel to replace gears on drive axle.
Make sure that the hose coupling fitting is pointed
towards you. This will determine your left side.
MOTOR TEE: Channel locks are used for holding
worm bearing assembly where the tee screws in.
Hold worm bearing and remove tee.
WORM BEARING ASSEMBLY: 3/8 inch allen
wrench is used to remove the worm bearing
assembly. The allen wrench is placed in the same
hole where the tee is located. Removing the
worm bearing assembly allows you to separate
the upper motor housing from the lower housing.
CAUTION: When screwing worm bearing
assembly into the lower motor housing, you are
screwing brass into plastic. If over tightened,
the housing will split. Rule of thumb: tighten
until it feels snug then go a 1/4 of a turn.
GEARS: Make sure all gears are put on as
shown in the Parts List section. Gear shaft
assembly No. 8 has a slot in axle that must fit
into the housing slotted side.
AXLE BEARING: Axle bearings have a line
pattern on them. This pattern must fit into the
corresponding housing pattern. Otherwise
housing will not fit properly and gears will not
mesh together correctly.
LIGHT NON-PETROLIUM BASED GREASE
should be applied to all gears and worm
bearing.
WE AT NELSON HOPE THESE INSTRUCTIONS
WILL PROVE TO BE BENEFICIAL TO YOU. IF
AFTER FOLLOWING THESE INSTRUCTIONS
YOU STILL HAVE QUESTIONS OR NEED SOME
ONE TO WALK YOU THROUGH YOUR REPAIR,
FEEL FREE TO GIVE US A CALL AT
1-800-635-7668.
3
3. Laying out the hose
Lay out the path you want your sprinkler to
follow. 5/8" hose is recommended.
(1/2" hose can be used, but because of the
smaller diameter, there is a slight possibility the
sprinkler will jump the hose track and travel in
a wrong
direction.) This
sprinkler is
intended for
watering
established
lawns. For
newly-seeded
lawns, please
use a Nelson
stationary
sprinkler.
4. Setting up the shut-off ramp
Snap the shut-off ramp to the hose where you
want the sprinkler to stop. (Make sure there is
5'of straight hose on both sides of the ramp.)
If you are using 1/2" hose, you will need to flip
out the spike
from beneath
the ramp to
anchor it to
the ground.
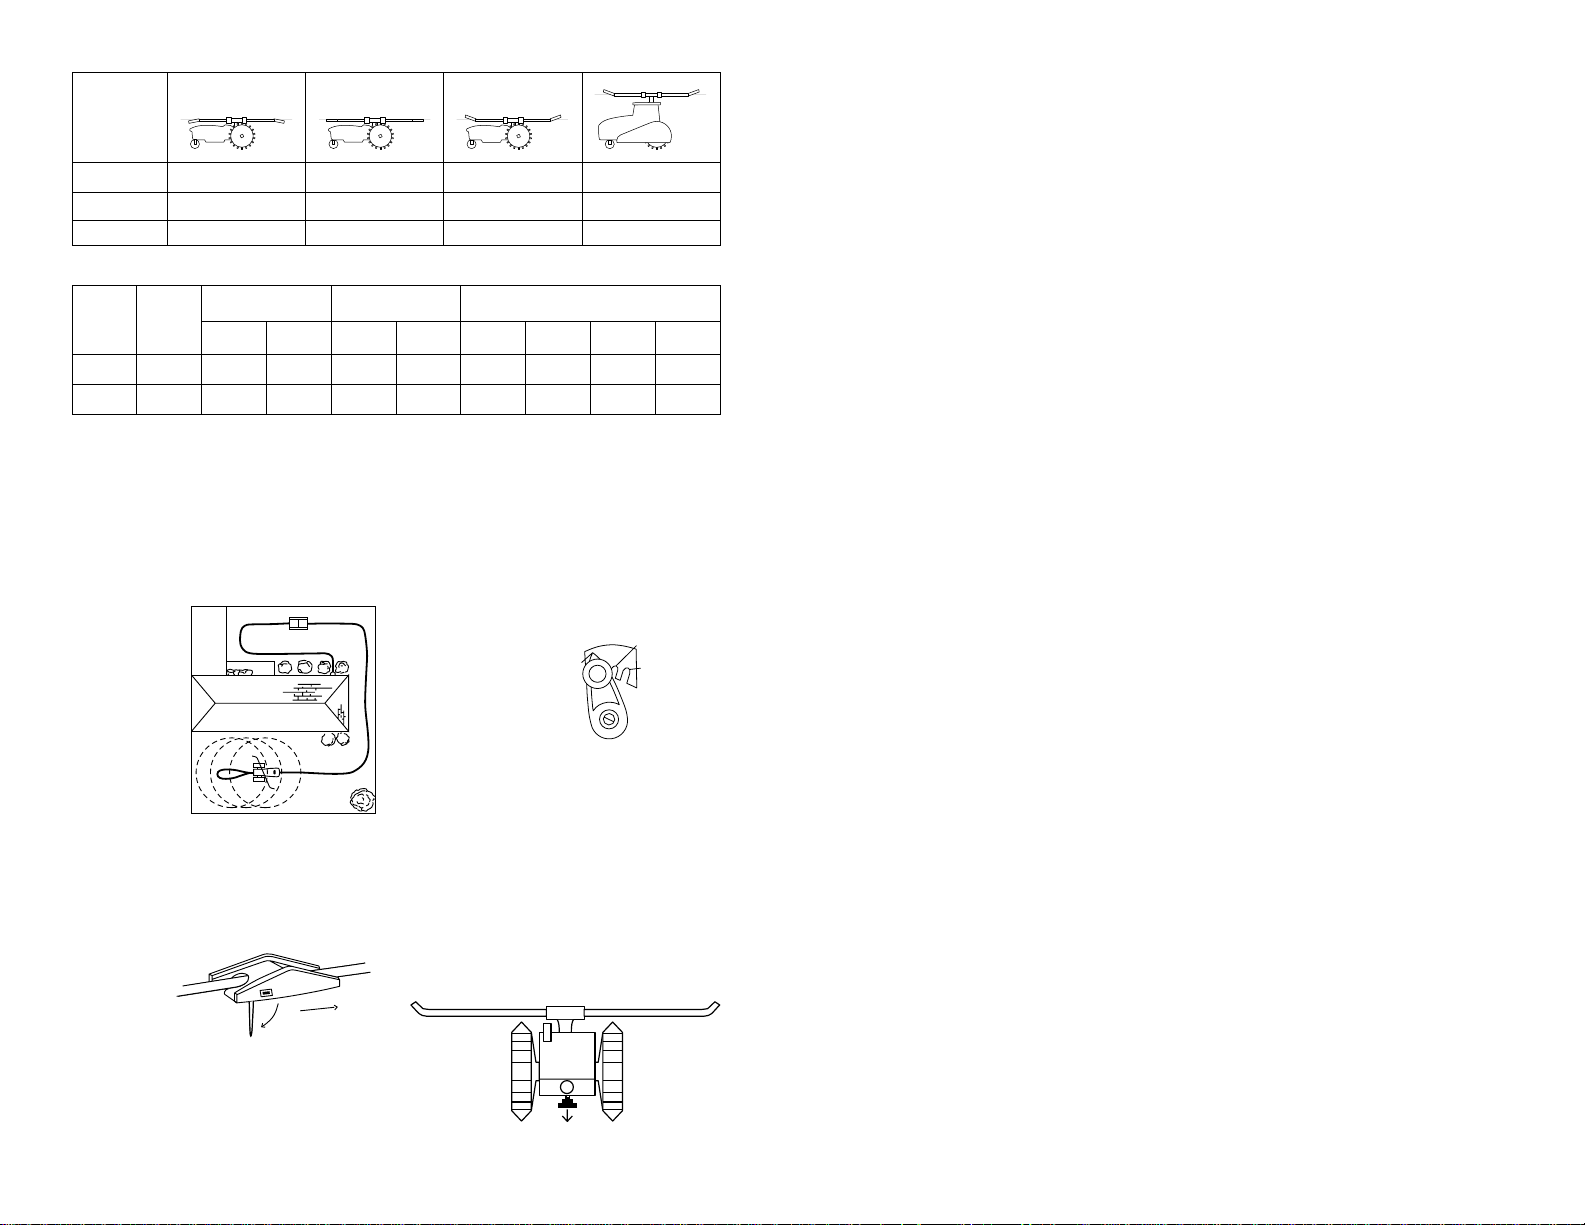
5. Connecting the sprinkler
Place the small front wheels directly over the
hose with the large black wheels straddling the
hose.
6. Setting the speed
Your traveling sprinkler will travel 0 to 60 feet
per hour depending on what speed you select:
high or low. Pull up on the speed selector knob
and move to high for light watering. If the knob
is in the low position, the sprinkler will travel
slower and, therefore, spray more water in a
given area.
If you want the
sprinkler to sit in
one place and
water a specific
area, switch to
neutral.
7. Starting your sprinkler
To start your sprinkler, make sure the stopper
that is located on the underside of the sprinkler
between the large back wheels is pulled out
(found on models with shut-off ramp). Then,
turn on your faucet and watch the sprinkler
move through your yard along the pattern you
have set with the hose. Note: If the sprinkler
stops just after turning the water on, turn off
the water, pull out the stopper again, and
slowly turn the water on.
2
direction of travel
HIGH
NEUTRAL
LOW
5/8"Hose
diameter
Maximum
travel
length
Average travel speed
feet per hour
High
gear max.
LOW
gear min.
High
gear
Low
gear
Maximum
width
Maximum
sq.ft.
Effective
width
Effective
sq. ft.
Approximate
water application
Standard
Traveler
CAT
Traveler
210' 37 21 1/4" 1/2" 60' 15,000 54'
200' 37 21 1/4" 1/2" 56' 13,600 54'
11,900
11,900
Distance may vary depending on hose weight.
Area coverage
Arm
Position
Path
15' Wide 30' Wide 45' Wide 60' Wide
2/3"
1/3" 3/4" 1/4" 1/2"1"
Speed High Low High Low High Low
3/16" 1/4"
High Low
Chart calculated using 5/8" hose up to 200' (210' for CAT sprinkler) long with average water pressure of 40 psi.
Inches
of Water
Loading ...
Loading ...
Loading ...