Loading ...
Loading ...
Loading ...
9
AUTO INSTALL
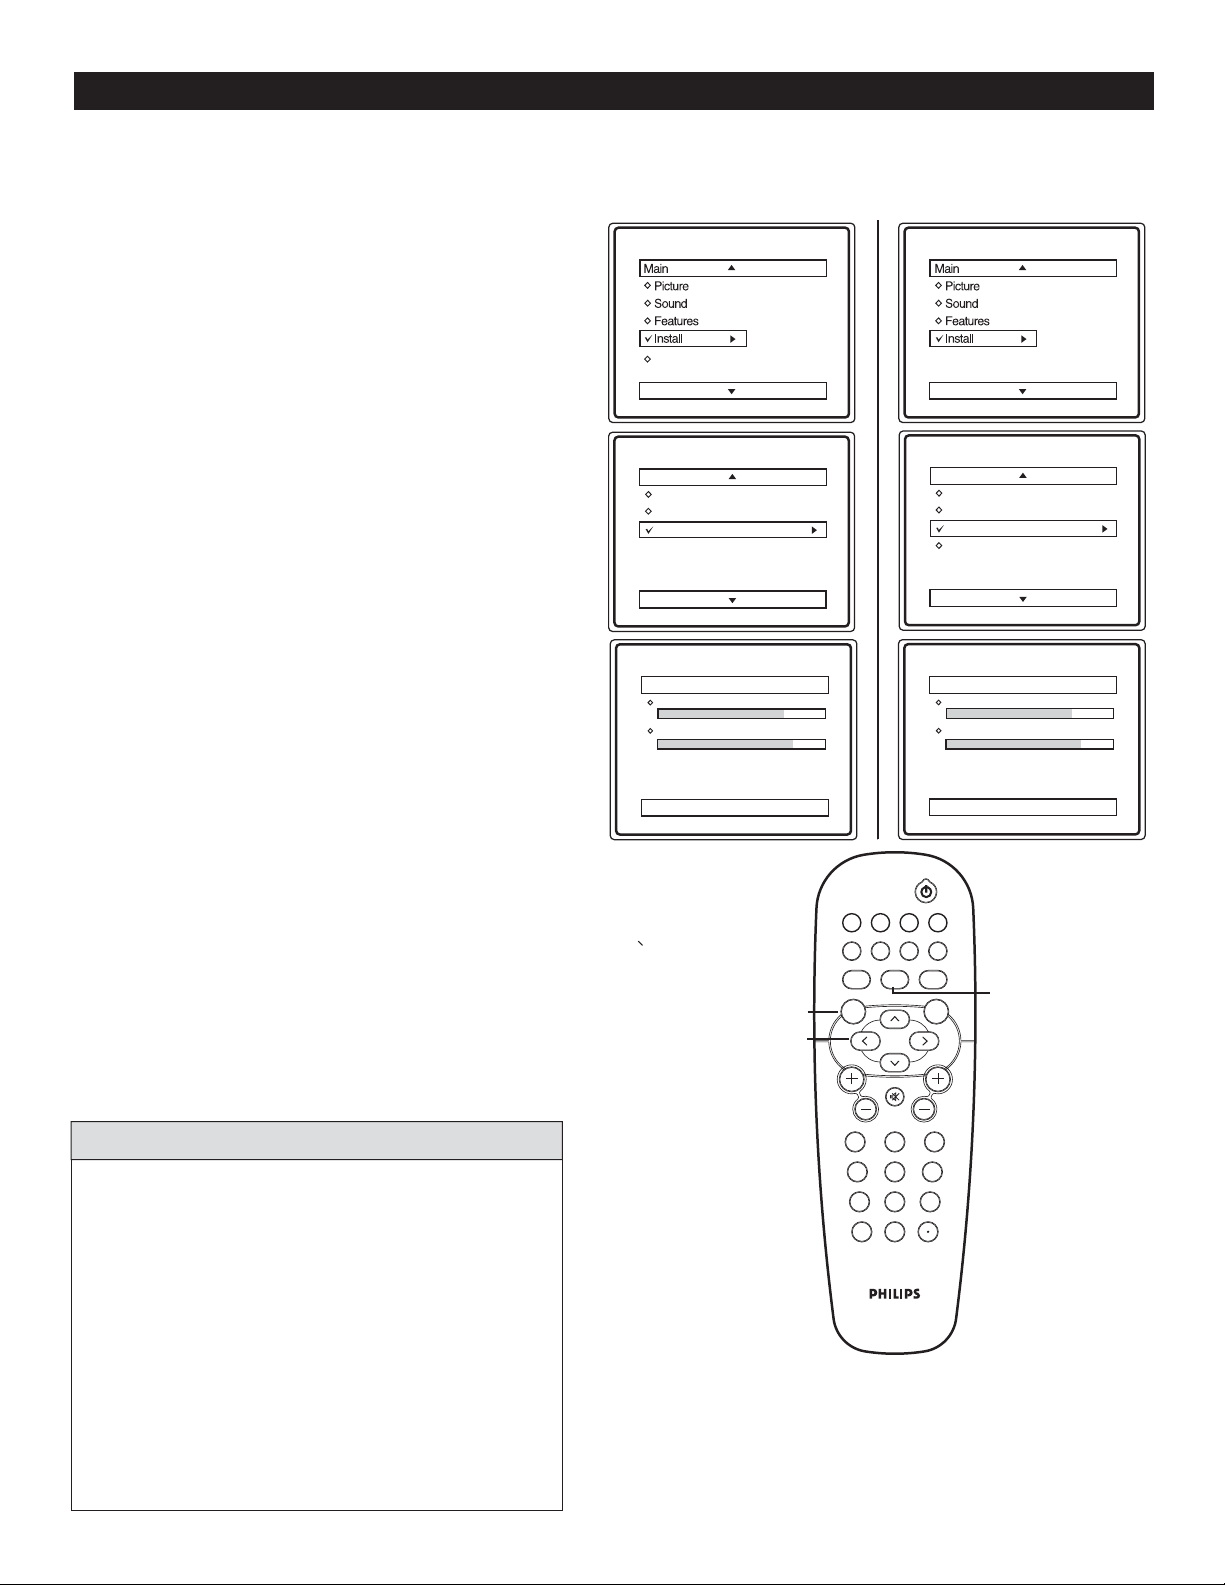
1
Complete the antenna or cable signal connection
before activating AUTO INSTALL. See How to
make the best connection guide for details.
2
Press MENU button on the remote control to
display the onscreen menu.
3
Press CURSOR < or > to scroll through the
onscreen menu until you see Install highlighted.
4
Press CURSOR > to display the Install menu
features.
5
Press CURSOR < or > to scroll through the
Install features until you see Auto Install highlighted.
6
Press CURSOR > to start Auto Installation.
7
Auto Install
will begin. This may take 20 to 40
minutes depending on the number
of channels available.
8
When finished, press MENU button on the remote
control twice to exit the menu display from
the TV screen.
Y
ou can auto install programs on your TV. This makes it easy for you to select only the TV stations in your area
when the CHANNEL (+), (–) buttons are pressed.
Follow these steps for Digital Mode and Analog Mode
When CABLE is selected, channels 1 to 135 are available
in Digital Mode and Channels 1 to 125 are available in
Analog Mode.
When ANTENNA is selected, channels 2 to 69 are
available for both Digital and Analog Modes.
When you are in Digital Mode, channel numbers will be
displayed as 23-1, or 100-2 etc.
When you install in either Digital or Analog mode,
both Digital and Analog channels will be installed.
HELPFUL HINTS
Digital Mode Analog Mode
DTV Setup
Auto Install
Analog channels 39
Digital Channels 45
Auto Install
Analog channels 39
Digital Channels 45
Language
Tuner Mode
Auto Install
Language
Tuner Mode
Auto Install
Channel Edit
Language
Tuner Mode
Auto Install
Install
Language
Tuner Mode
Auto Install
Channel Edit
Install
123
456
789
0
VOL CH
MENU OK
MUTE
AUTO
PICTURE
AUTO
SOUND
A/D
FORMAT CLOCK SLEEP GUIDE
POWER
AV SAP
A/CH
CC INFO
>
>
< >
MENU
A/D
toggles between
digital and analog
mode
Loading ...
Loading ...
Loading ...