Loading ...
Loading ...
Loading ...
18
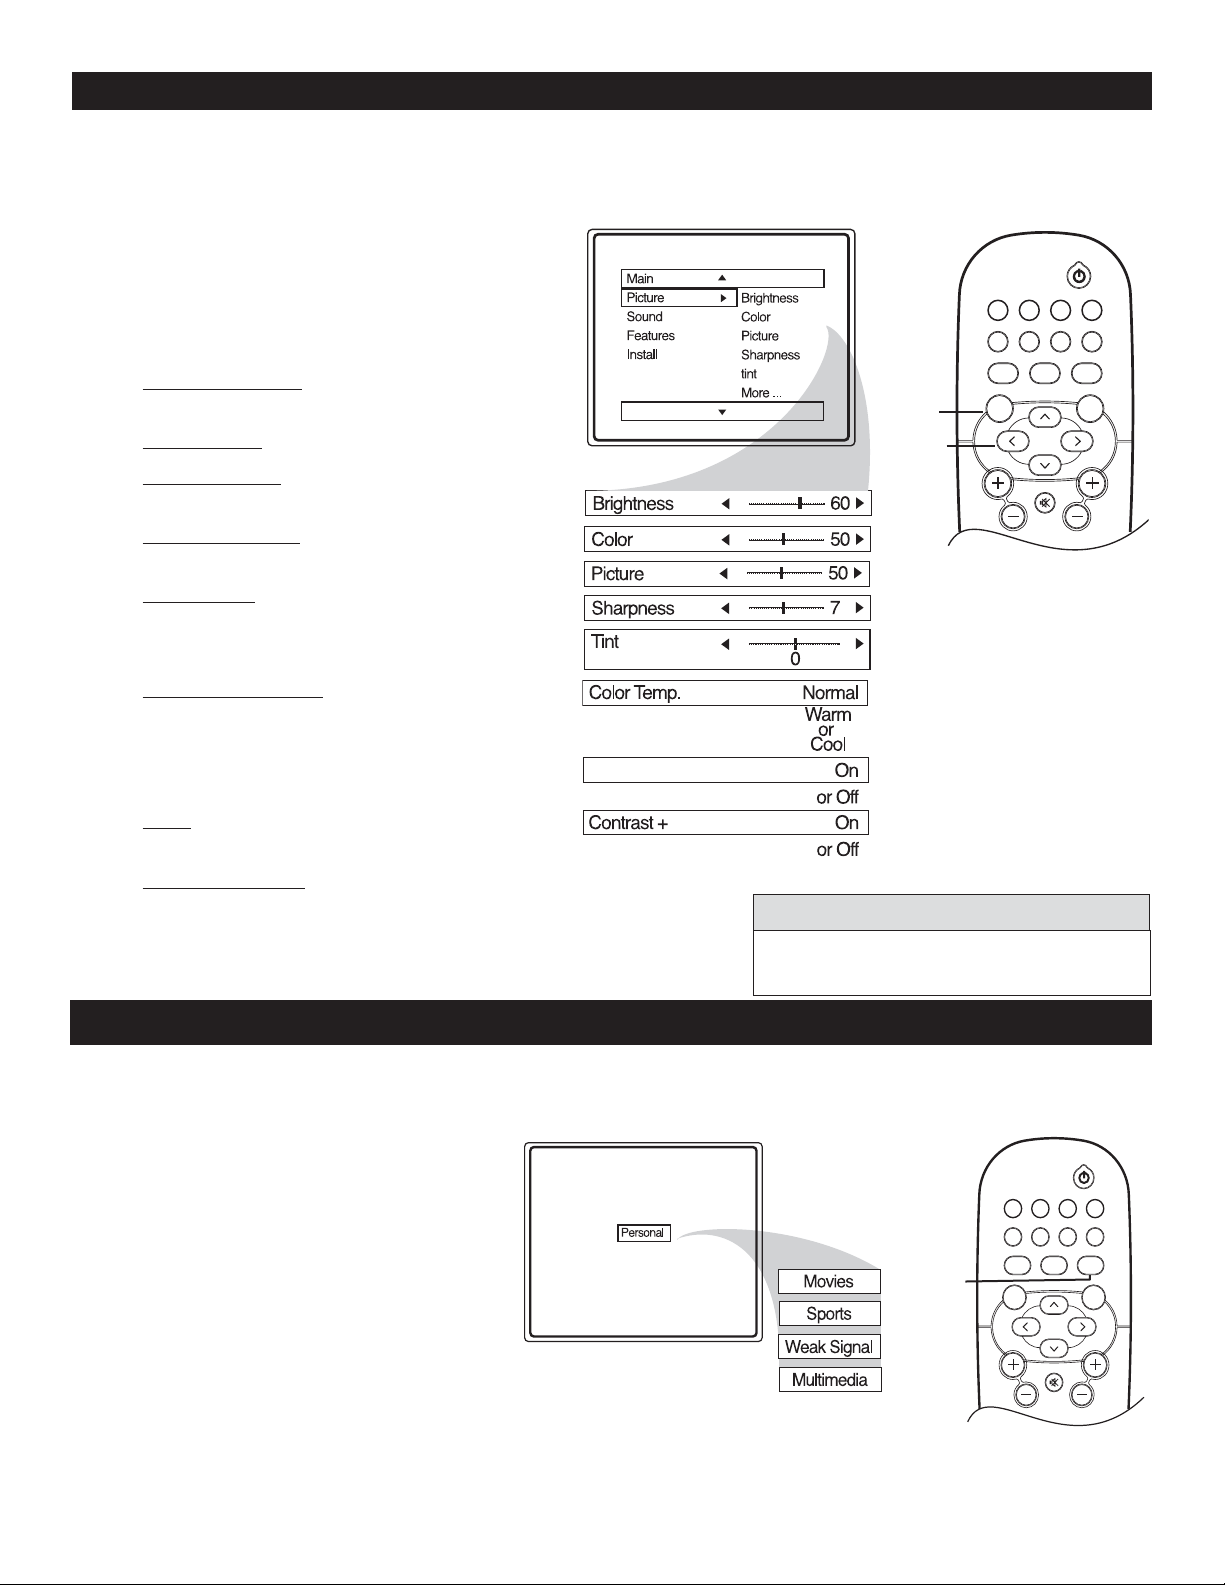
PICTURE MENU CONTROLS
1
-
Press MENU button on the remote control to
display the onscreen menu.
2
Press CURSOR < or > to until the Picture
menu feature is highlighted.
3
Press
CURSOR > or < to adjust
Brightness Control - until the darkest parts of the
picture are as bright as you want.
Color Control - to add or remove color.
Picture Control - until the lightest parts of the
picture show good detail.
Sharpness Control -
to improve sharpness in the
picture.
Tint Control - adjust natural skin tones in the
picture quality.
Note : Tint is not available in Digital Mode
Color Temp Control - to select Normal, Cool,
or Warm picture preferences. For Normal, whites
will mainain their whiteness;
Cool will make the whites bluish; and Warm will
make the whites reddish.
DNR - When set to On Dynamic Noise Reduction
helps to eliminate "noise" from the picture.
Contrast + Control -
when set to On, the
Contrast + control helps to “sharpen” the
picture quality. The black portions of the picture
become richer in darkness and the whites become
brighter.
VOL CH
MENU OK
MUTE
AUTO
PICTURE
AUTO
SOUND
A/D
FORMAT CLOCK SLEEP GUIDE
POWER
AV SAP CC INFO
DNR
>
>
< >
MENU
Digital and Analog Mode
T
o adjust your TV picture controls, select a channel and use the Picture Menu Controls listed below. Your selection is
stored as Personal.
AUTO PICTURE
1
Press AUTO PICTURE button on the
remote control. The current Auto Picture
setting will display on the screen.
2
Press AUTO PICTURE repeatedly to
select either Personal, Movies, Sports,
Weak Signal or Multimedia picture
settings.
NOTE: The way you choose to set the Picture Menu
Controls will become your Personal setting.
W
hether you’re watching a movie or a sporting event, your TV has automatic video control settings to enhance
your current program source or content.
VOL CH
MENU OK
MUTE
AUTO
PICTURE
AUTO
SOUND
A/D
FORMAT CLOCK SLEEP GUIDE
POWER
AV SAP CC INFO
AUTO
PICTURE
Press A/D button on the remote control to toggle
between Digital and Analog Mode.
HELPFUL HINTS
Loading ...
Loading ...
Loading ...