Loading ...
Loading ...
Loading ...
8
5. Adjust pedestal position, aim at bottom hole. Take out three ST4.2 self-tapping screws in accessories bag. Insert them into the
plastic expansion bolt bottom hole and fix the pedestal on installation surface.
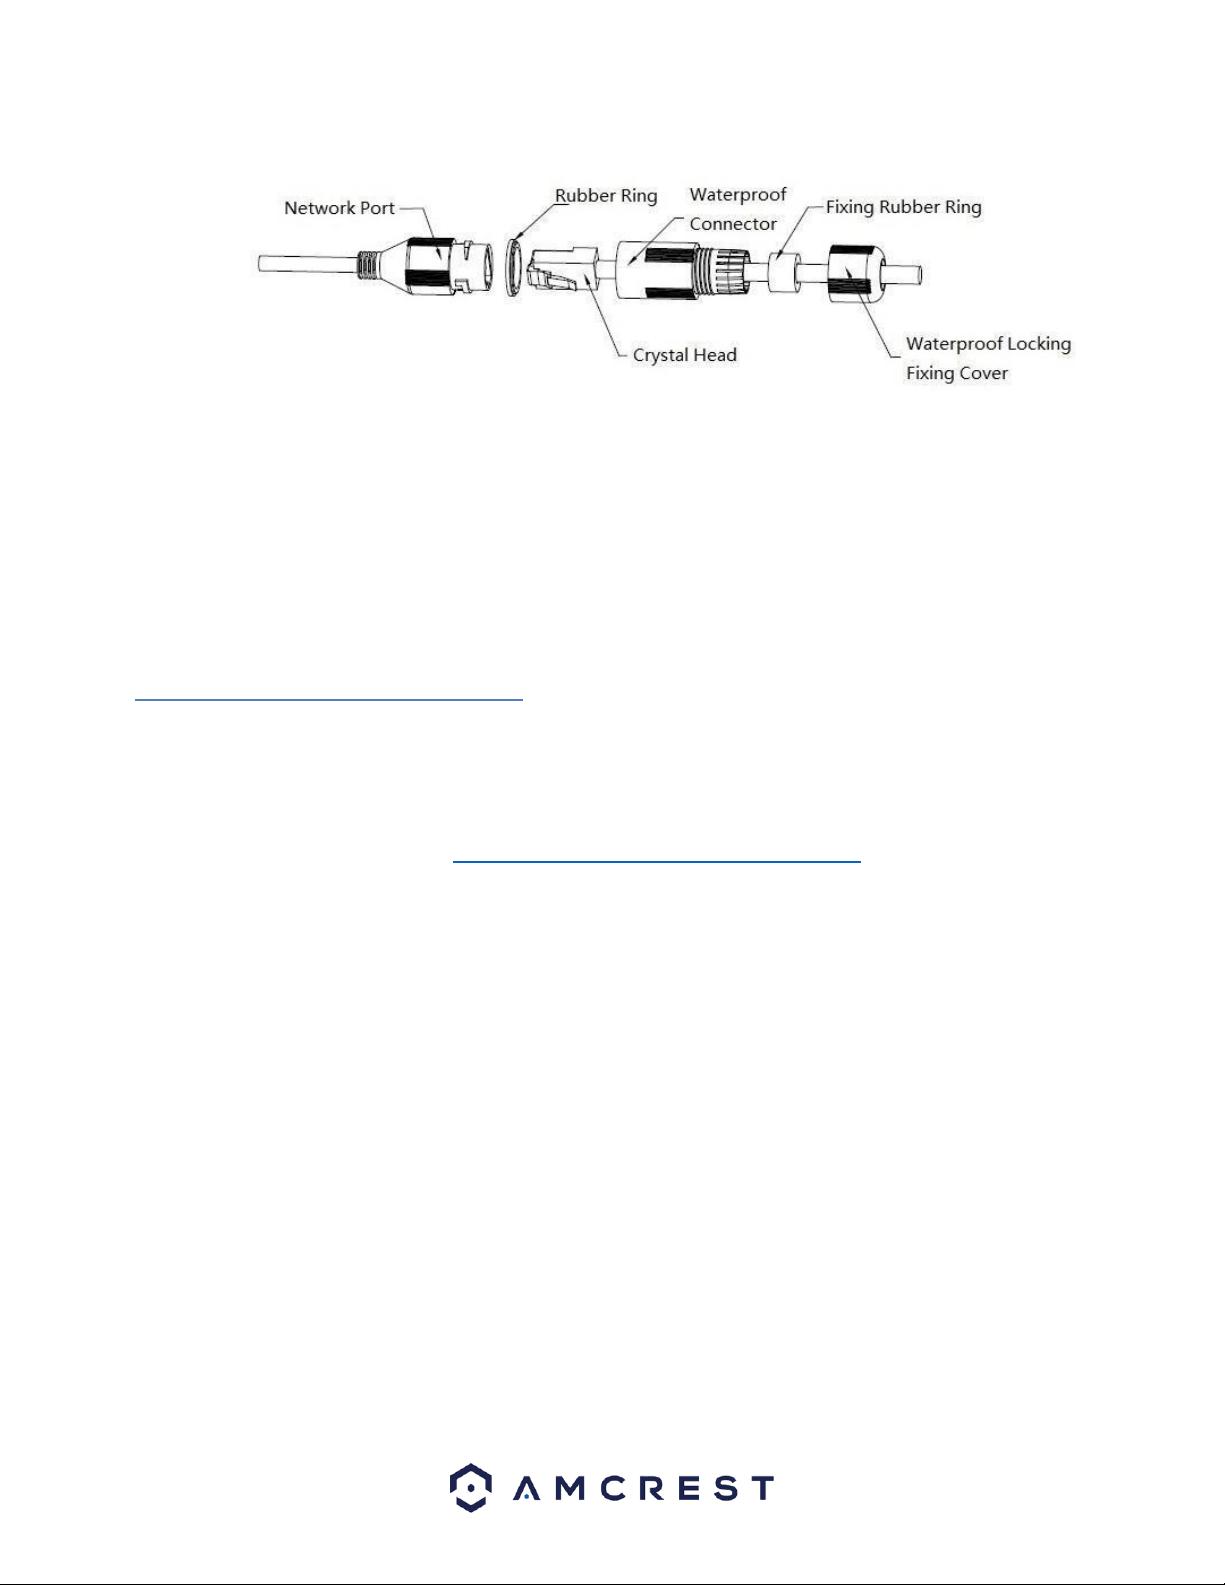
6. Waterproof connector installation for network port; see Figure 2-6 for more details.
Figure 2-6
1. Keep the convex groove outward and install the rubber ring into the network port, keep the smaller hole of the rubber ring
outward and install the fixing rubber ring into the main body of the waterproof connector.
2. Pull the network cable without crystal head through main body of waterproof connector, fixing rubber ring and waterproof
locking cover, make the crystal head of network cable, and then insert it into the network cable.
3. Put the main body of waterproof connector on the network port and rotate it clockwise to lock the network port and
waterproof connector firmly.
Put the waterproof locking cover on the main body of waterproof connector and rotate it clockwise to lock the waterproof
connector and waterproof locking cover firmly.
3.2 MicroSD Card Installation
Before inserting a microSD card into your camera, please make sure the camera is unplugged from power. For weatherproof
reasons, the microSD card slot is located inside the camera body. This requires disassembly of the camera to access it. For more
information on how to access the microSD card slot, follow the instructions provided below.
Note: You will need a Phillips head screwdriver and the included star tool to complete the process.
For a detailed instructional video, visit: https://www.youtube.com/watch?v=E2SKIGZg5tE
1: Using the provided star tool, loosen the locking pin of the housing and remove the camera. Only 2 - 3 turns are needed as the
screw will come out if loosened all the way. Remove the housing from the base ring and slide the base ring down to remove the
camera.
2: Using a Phillips head screwdriver, remove the 3 screws on the back of the camera.
3: Using a smaller screwdriver, remove the 2 black screws holding the motherboard of the camera to the body of the camera.
4: The microSD card slot if located on the front of the motherboard as shown in the image below. Make sure not to touch the lens
of the camera to avoid smudges or dirt from impairing the lens. The microSD card slot if located on the front of the motherboard.
5: Open the clasp of the microSD card by carefully sliding the clasp forward.
6: Place a microSD card (no larger than 128GB) into the microSD card tray of the camera and align the gold pins of the clasp with
the pins of the card. Carefully place the clasp onto the microSD card and lightly push the clasp backward to secure the card to the
slot.
7: Place the motherboard back onto the body of the camera and secure the bracket onto the body of the camera.
8: Close the camera by aligning the two protruding screw openings on the back side with the two recessed counterbore holes on
the front side. Ensure the heat conductive pad makes contact with the metal body. Then insert and tighten the 3 screws onto the
back of the camera.
9: Run the cable of the camera through the base ring and place the camera body onto the base ring. Place the housing frame over
the camera body and against the base ring. Use the star tool to secure the housing back onto the base ring.
Note: When securing the base ring, do not turn the locking screw more than 2 – 3 times. Too much pressure to the base may
result in the housing not securing properly to the base ring.
Loading ...
Loading ...
Loading ...