
Loading ...
Loading ...
Loading ...
75BDL3000U
25
Speciccommandstocontrolmonitorsaredenedinaseparate
MonitorControlCommandSet(MCCS)standard.
DDC/CImonitorsaresometimessuppliedwithanexternalcolorsensor
toallowautomaticcalibrationofthemonitor’scolorbalance.Sometilting
DDC/CImonitorssupportanautopivotfunction,wherearotation
sensorinthemonitorenablestheoperatingsystemtokeepthedisplay
uprightasthemonitorismovedbetweenitsportraitandlandscape
positions.
ThefollowingDDC/CIcommandsshouldbesupportedviacommand
line:
No. Commands No. Commands
1 SetBrightness 6 GetBrightness
2 SetContrast 7 GetContrast
3 SetRedGain 8 GetRedGain
4 SetGreenGain 9 GetGreenGain
5 SetBlueGain 10 GetBlueGain
HDMI with One Wire
CECcontrol.
• {Off} -DisableCEC.(Default)
• {On}-EnableCEC.
Auto signal detection
Choosetoletthedisplaydetectanddisplayavailablesignalsources
automatically.
• {Off}-Onceasignalisconnected,itcanonlybeselectedmanually.
Iftheselectedinputisnosignal,setthedisplaytodisplaytheimage
automaticallyaccordingtothesearchorderofeachoption.
Theoptionsare:{All} / {PC source only} / {Video source only} /
{Failover}
• {All}:DP / HDMI1 / HDMI2 / HDMI3 / DVI / VGA / Component /
OPS.
• {PC source only}:DP / DVI / VGA / CardOPS.
• {Video source only}:HDMI1 / HDMI2 / HDMI3 / Component.
• {Failover}
- Failover1-12:User-denedsetting.Default:HDMI.
OPS settings
SettheOPScongurationundereachpowercondition.
• {Auto}-Afterselecting{Card OPS}forvideosourceinput,theOPS
willbesettooffwhenthedisplaypowerissettooff,orsettoon
whenthedisplaypowerissettoon.Whensettoothervideosource
inputs,theOPSwillalwaysbesettoon.
• {Always off}-TheOPSwillalwaysbesettooff.
• {Always on}-TheOPSwillalwaysbesettoon.
Language
SelectthelanguageusedintheOSDmenu.
Theoptionsare:{ }/{ }/{
简体中文
}/{ }/{
}/{ }/{ }/{ }/{ }/{
繁體中文
}/{
日本語
}
/{Português}.
Advanced option reset
Resetallsettingsexcept{Date and Time}intheAdvanced optionmenu
tofactorypresetvalues.
1. Press[OK]or[ ]buttontoenterthesubmenu.
2. Press[ ]
or[ ]buttontoselect{Reset}andpressthe[OK]
buttontorestoresettingstofactorypresetvalues.
3.
Pressthe[ ]buttonorselect{Cancel}andpressthe[OK]button
tocancelandthenreturntothepreviousmenu.
APM
Powersavesetting.
• Off (TCP off/WOL off)-notsupportWOL/notsupportwakeup
onTCPsocket/notsupportwakeuponwebpage.
• Mode 1 (TCP off/WOL on)-supportWOL/notsupportwakeup
onTCPsocket/notsupportwakeuponwebpage.
• Mode 2 (TCP on/WOL off)-notsupportWOL/supportwakeup
onTCPsocket/supportwakeuponwebpage.
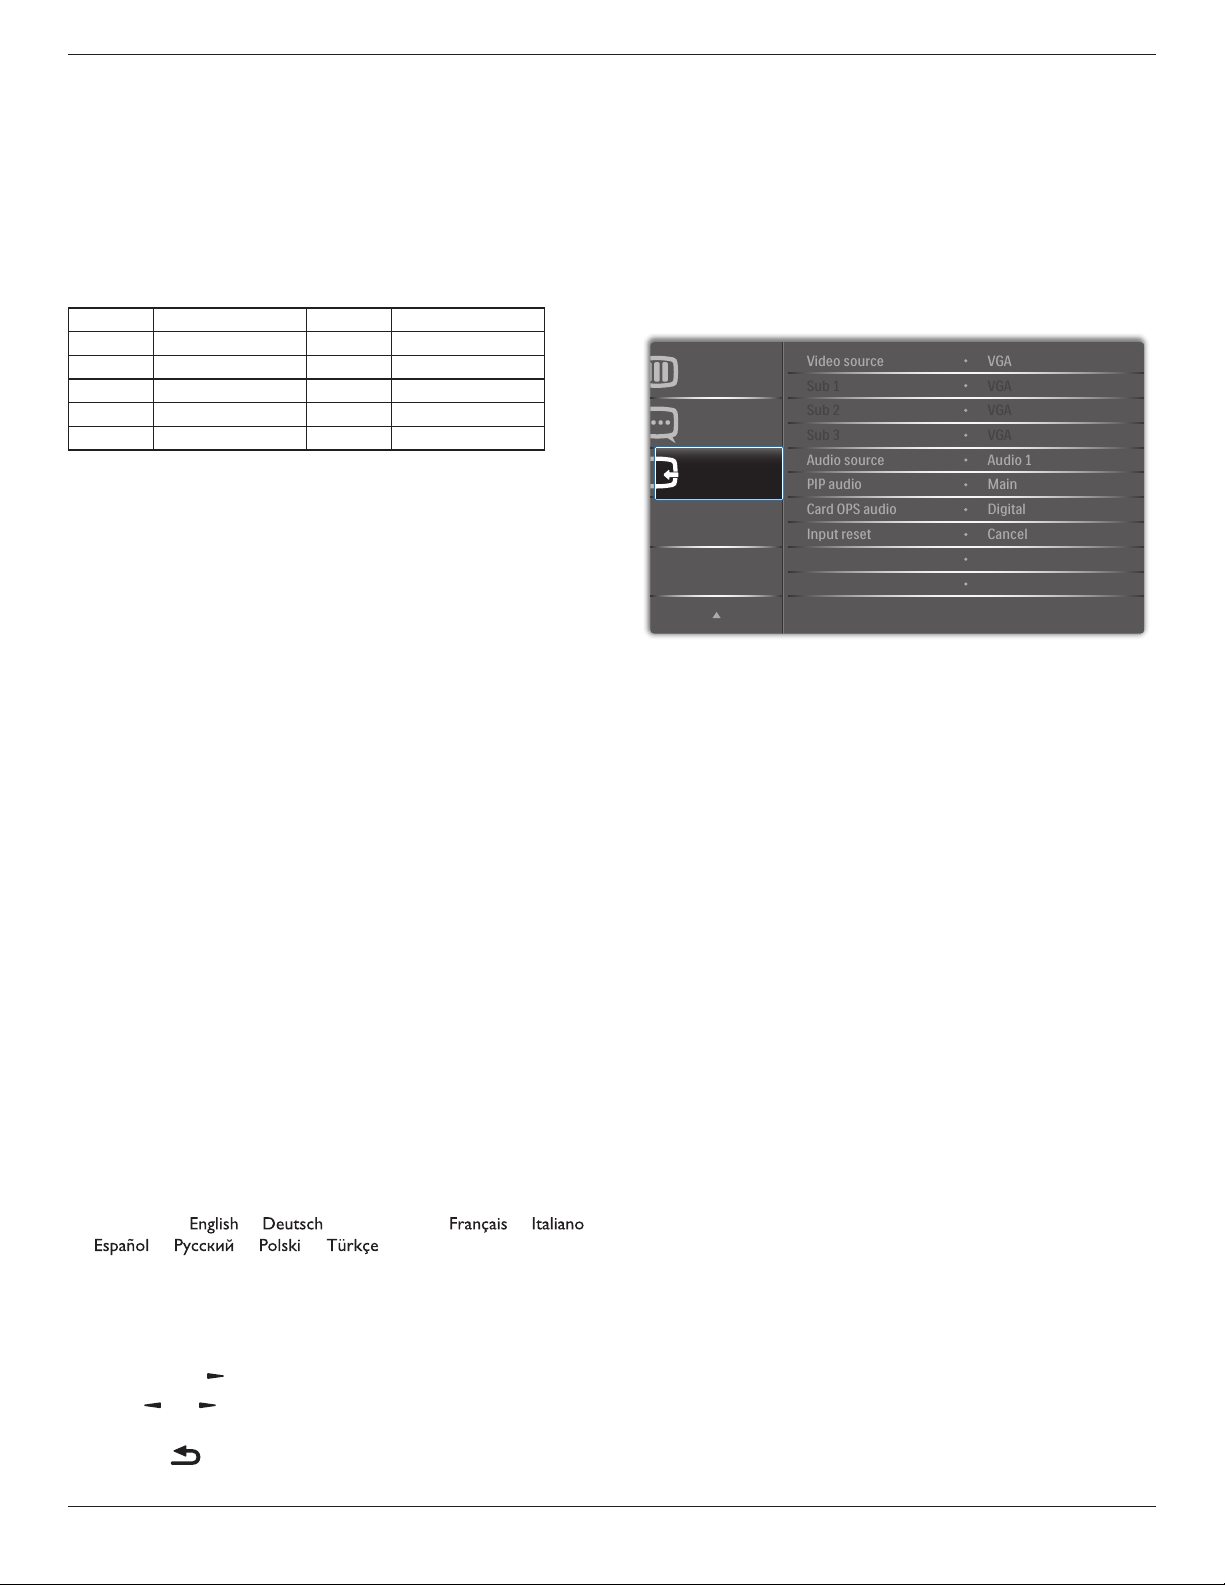
5.2.8. Input menu
Input
Advanced option
Configuration 2
Sub 1
Sub 2
Audio source
PIP audio
Video source
Sub 3
Card OPS audio
Input reset
VGA
VGA
VGA
VGA
Digital
Cancel
Audio 1
Main
Video source
Selectavideoinputsource.
Choosefrom:{Displayport}/{DVI-D}/{VGA}/{HDMI1}/{HDMI2}/
{HDMI3}/{Component}/{Video}/{USB}/{BROWSER}/{SmartCMS}
/{Card OPS}.
Sub 1
SelecttheinputsignalforthesubWin1picture.
Choosefrom:{Displayport}/{DVI-D}/{VGA}/{HDMI1}/{HDMI2}/
{HDMI3}/{Component}/{Video}/{USB}/{BROWSER}/{SmartCMS}
/{Card OPS}.
Sub 2
SelecttheinputsignalforthesubWin2picture.
Choosefrom:{Displayport}/{DVI-D}/{VGA}/{HDMI1}/{HDMI2}/
{HDMI3}/{Component}/{Video}/{USB}/{BROWSER}/{SmartCMS}
/{Card OPS}.
Sub 3
SelecttheinputsignalforthesubWin3picture.
Choosefrom:{Displayport}/{DVI-D}/{VGA}/{HDMI1}/{HDMI2}/
{HDMI3}/{Component}/{Video}/{USB}/{BROWSER}/{SmartCMS}
/{Card OPS}.
Audio source
Selecttheaudioinputsourceaccordingtotheaudiosignalsource
connectedtotheaudioinputandHDMIsocketsonthedisplay.
Choosefrom:{Analog}/{Displayport}/{Audio1}/{Audio2}/{Media}.
PIP audio
SelecttheaudiosourcethePIP(Picture-in-Picture)mode.
• {Main}-Selectaudiofromthemainpicture
• {Sub 1}-Selectaudiofromthesub1picture.
• {Sub 2}-Selectaudiofromthesub2picture.
• {Sub 3}-Selectaudiofromthesub3picture.
Loading ...
Loading ...
Loading ...