User Manual for Washing Machine
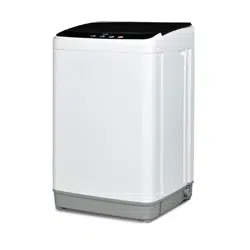
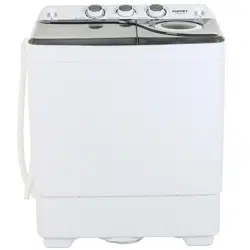
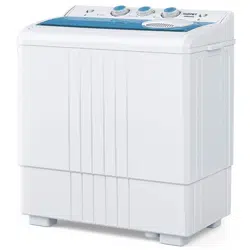
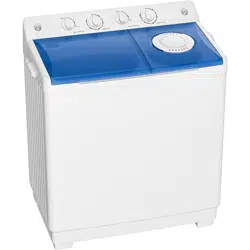
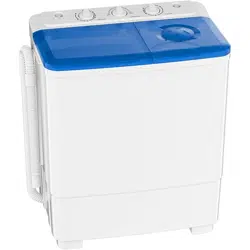
NAME OF PARTS
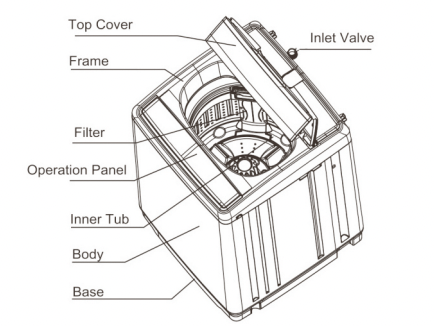
Note: All the drawing in the manual is schematic diagram. Due to the product improvement, the product you get and their accessories may be not same as this manuahplease understand.
Marks Instruction
|
Warning Sign

|
All with this symbol.you should have to operate strictly according to instruction. If not,it may cause damage to washing machine and even endanger the user’s life. |
|
Forbiding Sign

|
All with this symbol,there is something we are forbidden to do in any way,if not,may cause damage to washing machine and even endanger the user’s life. |
- Please check the power socket carefully and make sure the ground wire is connected for safety operation.
- Power supply is 110V/60 Hz.
INSTALLATION & ADJUSTMENT
For users to use the machine safely and correctly,please install and adjust the machine according to this instruction.
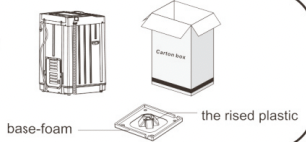
Remove Package
1 .Open and remove carton box,take the rat-proof board out
2.Open top cover of washing machine,take out the accessories from the tub.
3.Remove other packages including the base foam in the used plastic
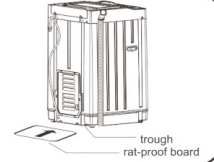
Fix the rat-proof board
Tilt the back of machine a little. Put Rat-proof board up and follow the arrow direction to insert the board on the bottom of the machine and fix it well.
Adjustment
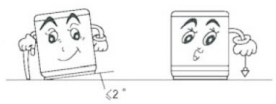
Keep the machine away from the wall more than 20mm.The maximum allowance inclination angle between the ground and palm is 2 .Uneven or tilted ground may cause the machine uneven running or stop working. Please adjustthe machine as following:
• Level
Hang a rope with tied hammer to confirm whether the machine is in the level line.
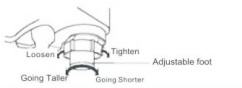
• Adjust
Adjust the adjustable feet by slightly up rotate the feet until arrive the level line.
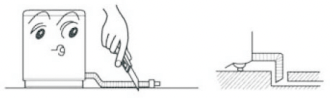
USAGE OF DRAIN HOSE
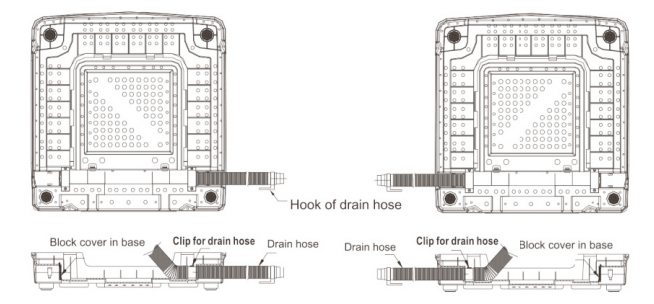
1 . Unload the screws of the back covers by screwdriver. Remove the back cover and unload the clips
2. Take the hook of drain hose and put the drain hose out from the base.
3. Unload the block cover from base, and put it back to another hole of base
4. Put the drain hose through the opposite side of hole for drain hose. Fix the drain hose well.
5. Put the drain hook onto the drain hose.
6. Put back the back cover onto the machine and fix well.
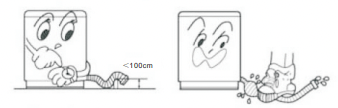
Keep the drain hose drain smoothly.
1. The height of drain hose should be less than 100cm. Otherwise, it will cause draining not smooth,even the machine will stop working if it take long time to drain water.
2. Do not stampede or press the drain hose.
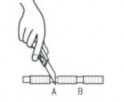
3. If the drain hose is too long, it can be cut to shorter. In order to have better water flowing, please cut the hose obliquely.
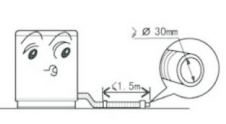
4.If you need to have longer drain hose, please buy the drain hose separately and add in.The dia of drain hose should be same or over than 30mm dia.and the length should be less than 1,5m.
5.When adding the drain hose, please cut from A or B.
INSTALLATION OF INLET HOSE
Note carefully:
1. Please use new water inlet hose assembly from the package.The old water inlet hose assembly should not be reused
2.Allowed input water pressure: 0.03-1.OOMPa
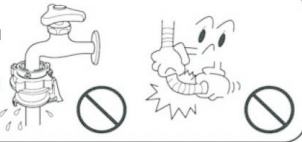
Correct Faucet
Usable faucet
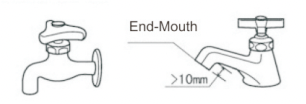
Unusable faucet
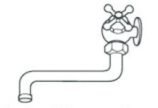
The depth of end mouth should be more than 10mm.The end mouth should be smooth. Please use file to polish to avoid leakage
Connect the inlet hose to faucet
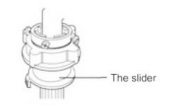
1 . Slide down the slider to unload the inlet-water connection from the inlet-water assembly. (See picture 1)
2. Make sure the exposed thread is 4mm(see picture 6).If the exposed thread less than 4mm,please loosen the nut and make the exposed thread is 4mm.
3. Loosen the inlet water screws to apporiate position and connect to the faucet,see picture 2. (If the mouth dia. of faucet is too big, the inlet water hose cannot connect with faucet, please loosen the 4 screws and unload the bush,see picture 3
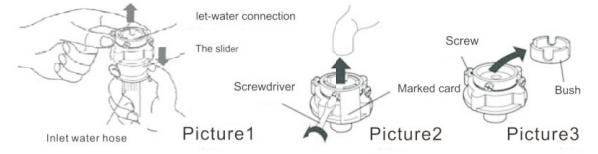
4. Tighten the screw equally,see picture 4
5.Fasten the nut,see picture S.The length of exposed thread after tightened should be less than 2mm,see picture 6

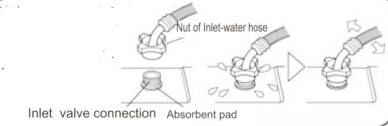
Connect inlet water hose to washing machine
1 .Must not remove the absorbent pad. Please check the absorbent pad every time before using to make sure it is in good condition.
2.Connect the inlet hose to the inlet valve connection.
3. Fasten the nut and make sure it is fixed well.
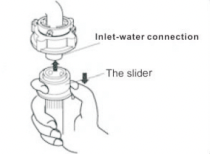
Connection of inlet water hose
1.Press down the slider, insert the hose into the connection.
2.Loose the slider until hearing the CLICK sound
Check the connection
1 .Pull the inlet hose slightly to confirm it fixed well
2.Open the faucet to check the leakage
3.Do not bend the hose with strong force
4.Please check the connections and keep it fixed well every time before using
Unload the inlet hose
1 .Close the faucet.
2.Press down shder to take the hose down
There is no need to unload the inlet hose if you use the washing machine over 1 time per week.
PREPARATION BEFORE WASHING
|

Note : Water temperature SHOULD NOT over 50* C.
|
|
Preparation before wash
1 .Fix the inlet hose well to faucet,open the faucet.
2.Make sure the socket is ground-connected before you make the plug in power. The ground-connected should not be connected to any of gas pipeline and water pipeline
3.Put the drain hose down

4.Place the washing machine in level
|
Check the laundry before wash
1 . Check and make sure the laundry is fit for wash in washing machine,suitable for washing in water to avoid clothing deformed.
2. Do not wash decolorizated clothings together with normal clothings
3. Make sure the laundry have no coins ,clips ,buttons ,needles ,etc
4. Fasten the buttons,zipper of the clothings. And turn them inside before wash.
5. Put the floating clothings down to the bottom before washing.If the clothing float on the surface of water. Please press “Pause/Start" button to stop washing and press the clothing down to bottom and Poess “Pause/Start" button to restart washing again
6. Do not wash water-proof laundry such as shower curtain, raincoat, etc. Do not wash carpet and electric blanket to avoid abnormal vibration and accident.
7. Put the underwear,panty,bra,clothing with lace,nylon and thin fibre into special washing net before washing.
8.Do not wash the clothes with volatile stain.
9.Do not over wash.Please put the demin jeans and large clothes loosely into the tub.
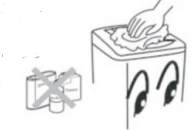
 Do not wash carpet and electric blanket!
Do not spin the worsted wool fabric clothes to avoid clothes shrinkage and deformation
Do not spin the down clothes and waterproof clothings to avoid dangerous!
PUT IN WASHING AND DETERGENT
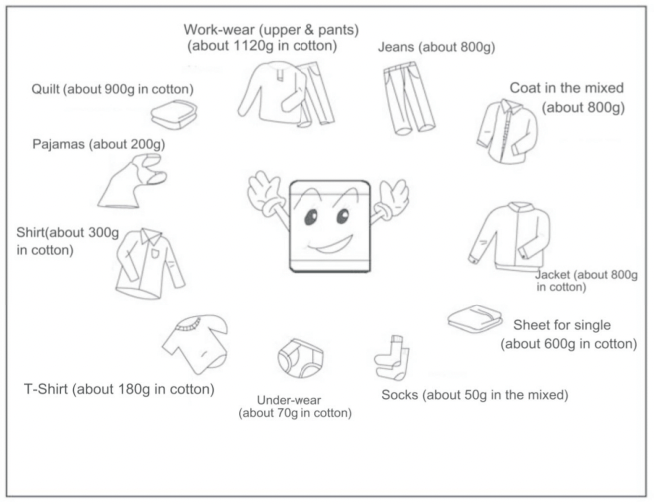
- The capacity is the allowed maximum standard weight of dry laundry in one operation.
- Laundry thickness,sizettype,etc.will affact the actual washing capacity. It is better to put the appropriate laundry into the washing machine.
- Put in detergent in tub.
Weight of laundry for reference
PROGRAM OPERATION

1. Process/preset button
10 different washing procedures
01 Common , 02 Normal, 03 Quick, 04 Blanket, 05 Air-dry (Push button LEVEL/Air-dry could choose dry time), 06 Soak , 07 Wash , 08 Spin , 09 Wash and Rinses , 10 Rinses and Spin.
Under initial state press this button for 3 seconds enter appointment with 0-24h adjustable .
2.Start / Pause Button
Powered on , press this button to launch machine
During runtime , press to pause . Then press again to start
3.'Power' Button
Press 'power' to connect the power. Switch on the power button to cut off the power
MAINTENANCE
• Please keep clean and clear away the scraps and debris.
• Please cut off power supply when cleaning and clearing the scraps and debris.
The usage of filter
- Must use filter during washing.
- User should have to clean the filter after finish washing
- Installation and remove ment of filter
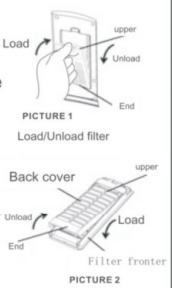
1 .Press down the elastic plate in the upperof filter.then pull out the filter.see picture 1
2.Pull out the back cover of filter by pulling the end of back cover see picture 2
3.Clean the filter.
4.Put the upper back cover into the upper filter, press the end of back cover into front filter,see picture 2
5 . Put the end filter into filter box. Press the upper filter into the box.
6.Make sure the filter is fixed well to avoid loose when washing
Filter in inlet valve could be blocked easily. User should use brush to clean it in very 2 months
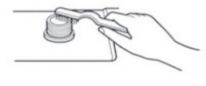
when the body is dirty, please clean it by wet wipes
- Do not wash with spray water.
- Clean with neutral detergent.
- Never use or apply alcohol thinner, gasoline,kerosene and the fike.This will damage the machine.
Note:
1 .When finish washing,please turn off water supply(if necessary,unload the water inlet hose).
2.Please do not leave water in tub over a long time.Dram the water everytime when finish washing
3.Please remove the plug from socket before maintenance.
4.Hang the plug and dram hose well
5.Use the clean and soft wipes to clean the machine.Open the cover for about 1 hour until it is dry, then close the cover
TROUBLESHOOTING
Before you call for technician or send your machine for repair, please check from this troubleshooting list:
*Do not attempt to repair the machine by yourself
| Phenomenon |
Possible Causes |
Resolvement |
The light would not light.The machine does not work.
|
1 .The plug is not connected well to the power outlet. |
1 .Connect the plug well to the power outlet. |
| 2.There is no power in the power outlet. |
2.Check the power outlet or connect to another power outlet._ |
| 3.The'Power’is not pressed down to offer power. |
3.Press down the "power" |
| 4. There is no power supply at all. |
4.Start again when supplying power |
Water inlet hose in leakage
|
1 The Inlet hose is not fixed well to the faucet. |
1. Fix the inlet hose well to the faucet again. |
| 2.The inlet hose is not fixed well to the washing machine. |
2.Fix the inlet hose well to the washing machine. |
Unable to drain
|
1. The level of draining mouth is too high or the drain hose is not put down. |
1. Put the drain hose down |
| 2.The drain hose is bended or blocked |
2.Put the drain hose well,resolve the blocked. |
Unable to input water
|
1. There is no water supply. |
1 .Start again when supplying water |
| 2. The faucet is not open. |
2.Open the faucet |
| 3.The inlet is blocked. |
3.Clean the inlet. |
| Stopped during spinning |
The spinning laundry are not balanced |
The machine itself would automatically correct the imbalance by adding water. |
Unable to spin
|
1 .The top cover is open after drainning |
1 .Close top cover well. |
| 2.Reopen the top cover when spinning |
2 .Close top cover well. |
| Spin intermittently when spinning |
It is for better spin resutt. |
It is normal.Don't worry |
| There is some water in drain hose when first use |
ft is the little water left in the machine when testing in factory. |
It is normal.Don't worry |