Loading ...
Loading ...
Loading ...
18
4 Switch this product to HDMI ARC
source (press HDMI ARC).
5 On the remote control, within
6 seconds press
twice then
Volume + once, and then hold
down MOVIE.
» “UPGRADE” (upgrade) is
displayed briey, then upgrade
progress is indicated.
» If a USB ash drive is not
connected or invalid upgrade
le is found, "ERROR" (error) is
displayed on the display panel.
6 Wait until the upgrade is completed.
» If the upgrade is complete, this
product automatically turns o
and on again.
Note
•
The upgrade time may take around
8 minutes.
6 Wall mount
Note
•
Before wall mounting, make sure the wall
can support the weight of this product.
• For wall mounting, this product must be
securely attached to the wall in accordance
with the installation instructions. Improper
wall mounting may result in accident, injury
or damage. If you have any query, contact
Consumer Care in your country.
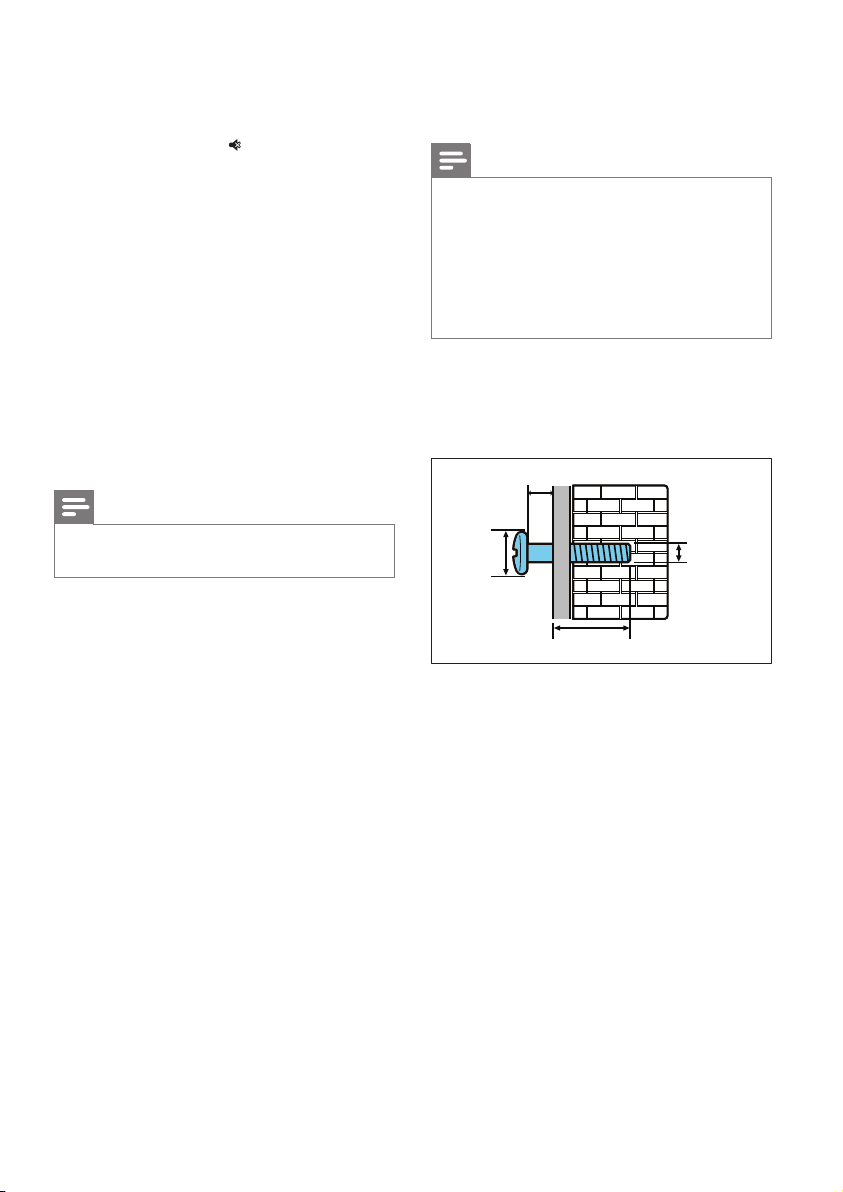
Screw length/diameter
Depending on the type of wall mounting
this product, make sure that you use
screws of a suitable length and diameter.
See the illustration in the quick start guide
on how to wall mount this product.
1) Use the supplied paper template to
mark two holes on the wall, then secure
two suitable screws in the holes.
2) Fix the two supplied wall brackets on
this product.
3) Hang this product on the wall.
2.2-2.5 mm
8-9.5 mm
3.5-4 mm
>25 mm
EN
Loading ...
Loading ...
Loading ...