Loading ...
Loading ...
Loading ...
Brakes
Servicing Your Honda 75
Refer to
Sa
fety Precautions on page19.
Both the front and rear brakes are the hydraulic
disc type. As the brake pads wear, the brake fluid
level will drop. A leak in the system will also cause
the level to drop.
Frequently inspect the system to ensure there are
no fluid leaks. Periodically inspect the brake fluid
level and the brake pads for wear.
If the front brake lever or rear brake pedal freeplay
does not feel within the normal range while riding,
check the brake pads. If they are not worn beyond
the recommended
limit (page 78), there is
probably air in the brake system. Refer to the
Honda Service Manual or see your dealer to have
the air bled from the system.
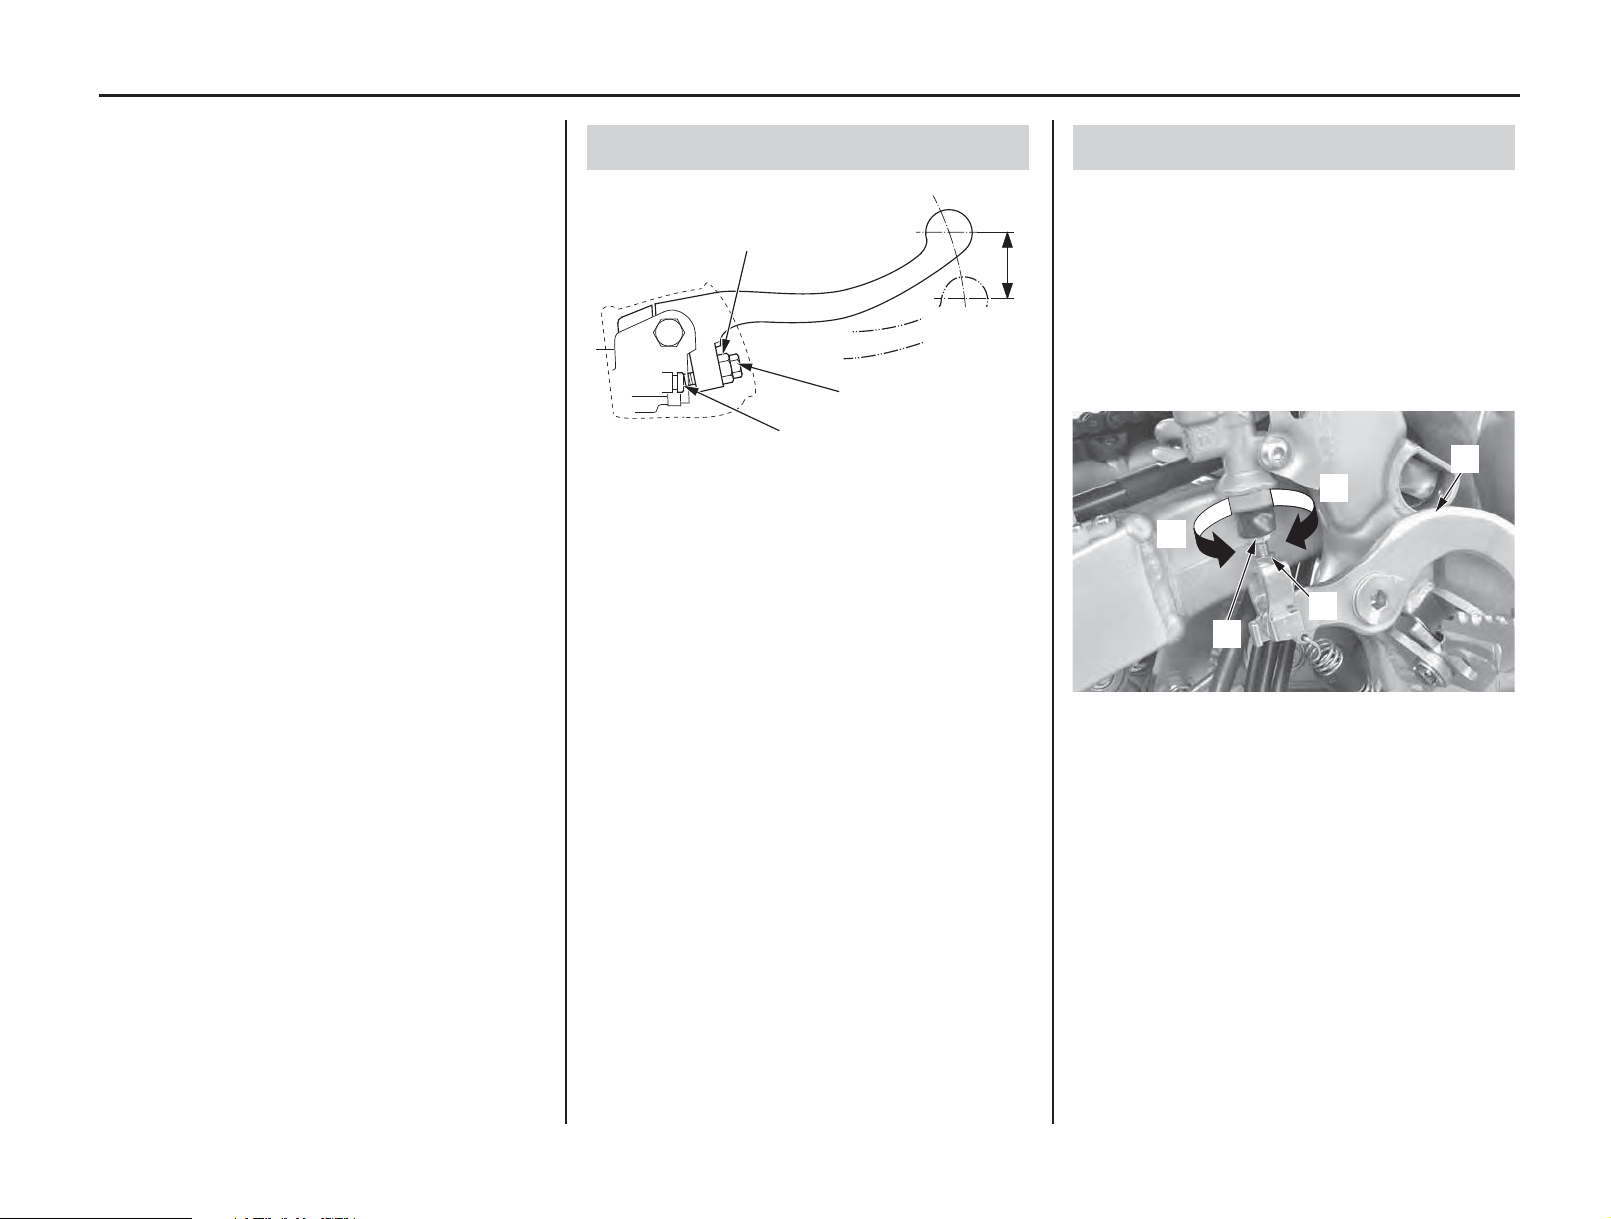
1. Loosen the lock nut (1).
2. To position the brake lever farther away from
the handgrip, turn the adjuster (2) clockwise.
To position the brake lever closer to the
handgrip, turn the adjuster counterclockwise.
3. While holding the adjuster, tighten the lock nut
to the specified torque:
4.4 lbf·ft (5.9 N·m, 0.6 kgf·m)
4. Apply the brake, release it, then spin the wheel
and check that it rotates freely. Repeat this
procedure several times.
5. Check freeplay by pulling in slowly on the
front brake lever until the brake starts to
engage.
Freeplay: LESS THAN 13/16 in (20 mm)
6. Apply silicone grease to the contacting faces of
the adjuster and piston (3).
The brake pedal height should be approximately
level with the right footpeg.
1. Loosen the lock nut (1) and turn the adjusting
bolt (2) in direction (+) to raise the rear brake
pedal (3) or in direction (–) to lower it.
2. Tighten the lock nut to the specified torque at
the desired pedal height:
4.4 lbf·ft (5.9 N·m, 0.6 kgf·m)
Front Brake Lever Adjustment
(1) lock nut (3) piston
(2) adjuster
(1)
(2)
(3)
LESS
THAN
13/16 in
(20 mm)
Rear Brake Pedal Height
(1) lock nut (+) raise the pedal height
(2) adjusting bolt (–) lower the pedal height
(3) rear brake pedal
(3)
(1)
(2)
(+)
(–)
Loading ...
Loading ...
Loading ...