360 Smart S7 Pro Robot Vacuum and Mop
Product's Documents
Below are documents related to this product, you can read online or download:
- Owner's manual - (English) Read Online | Download pdf

Owner Manual Vacuum Cleaner
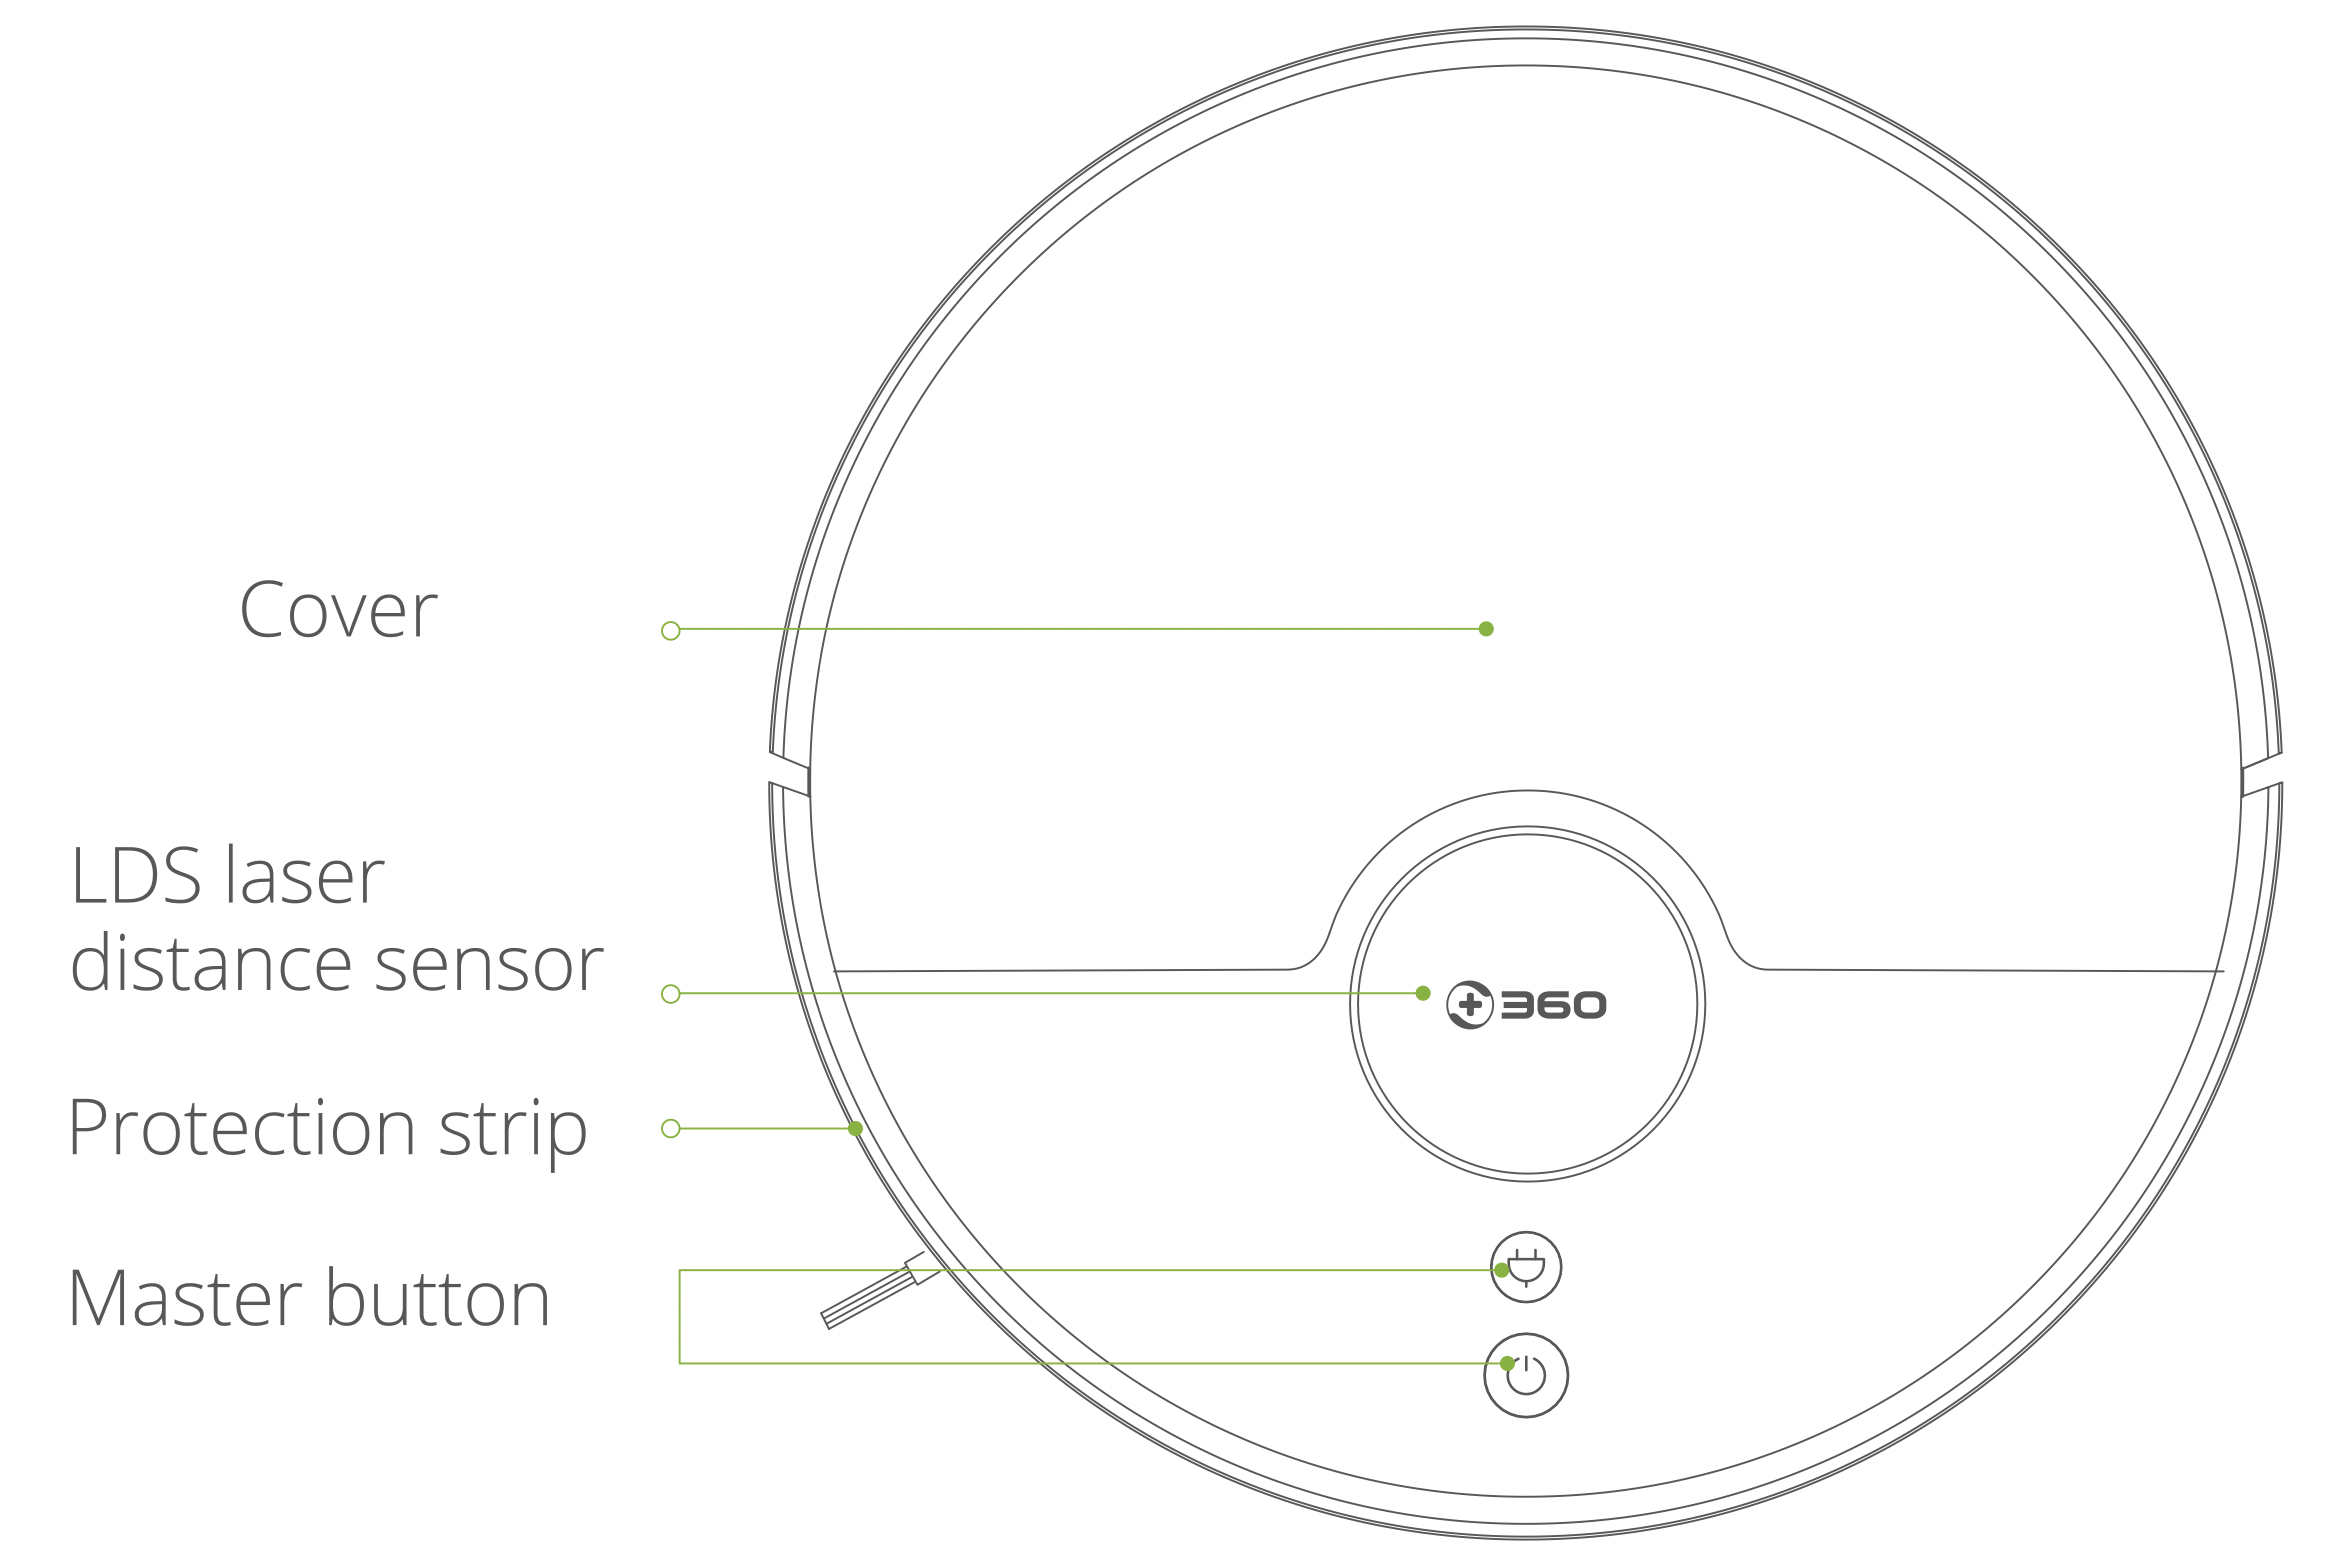
Main Unit
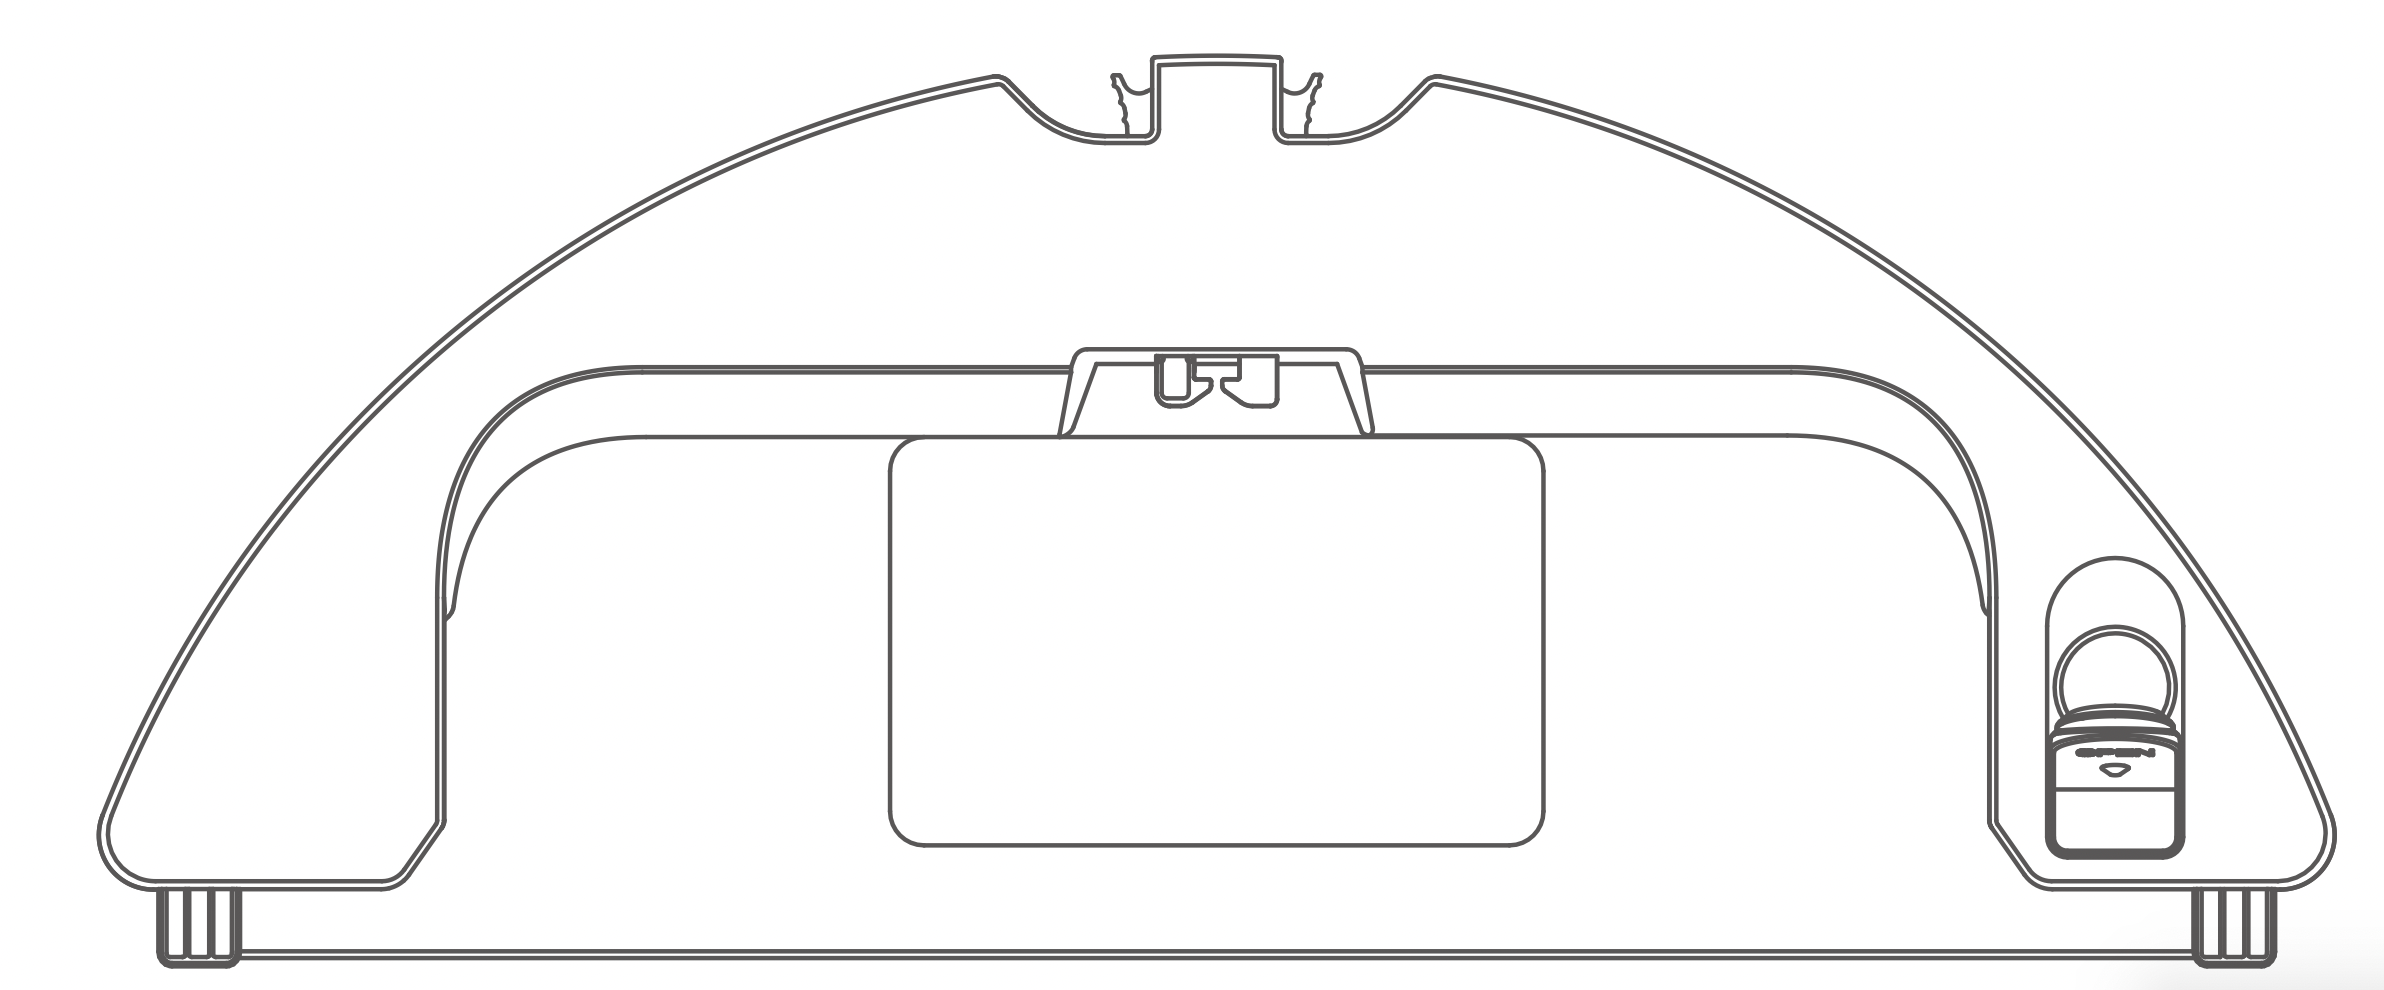
Charging dock x1
Water tank x1
Mopping cloth x1
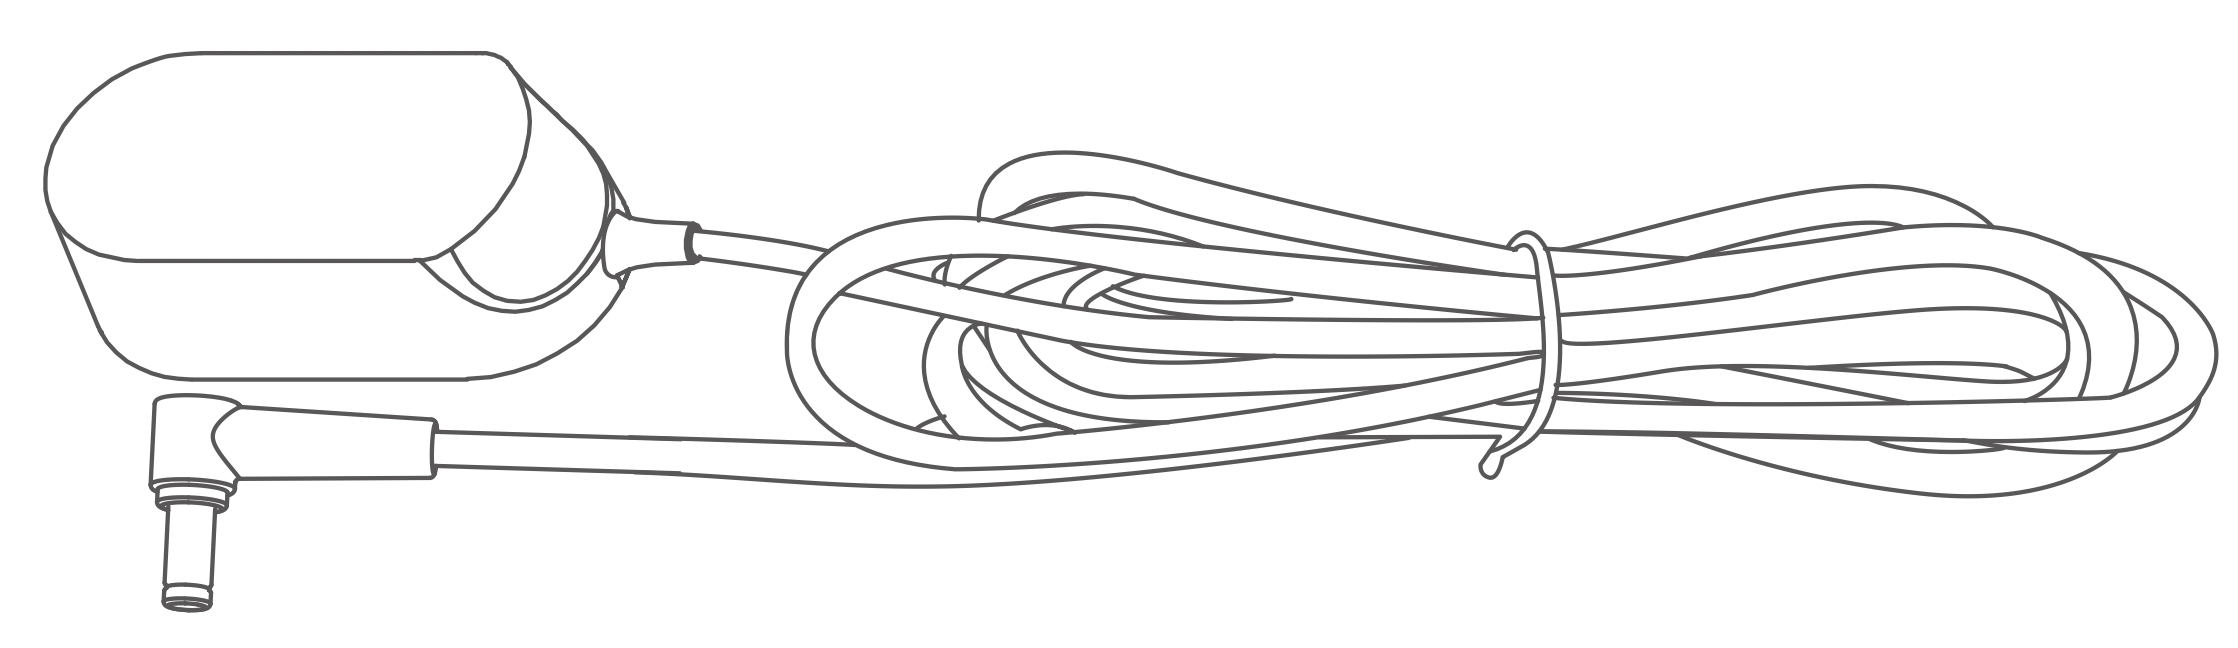
Power Adapter x1
User manual x1
Cleaning tools x1
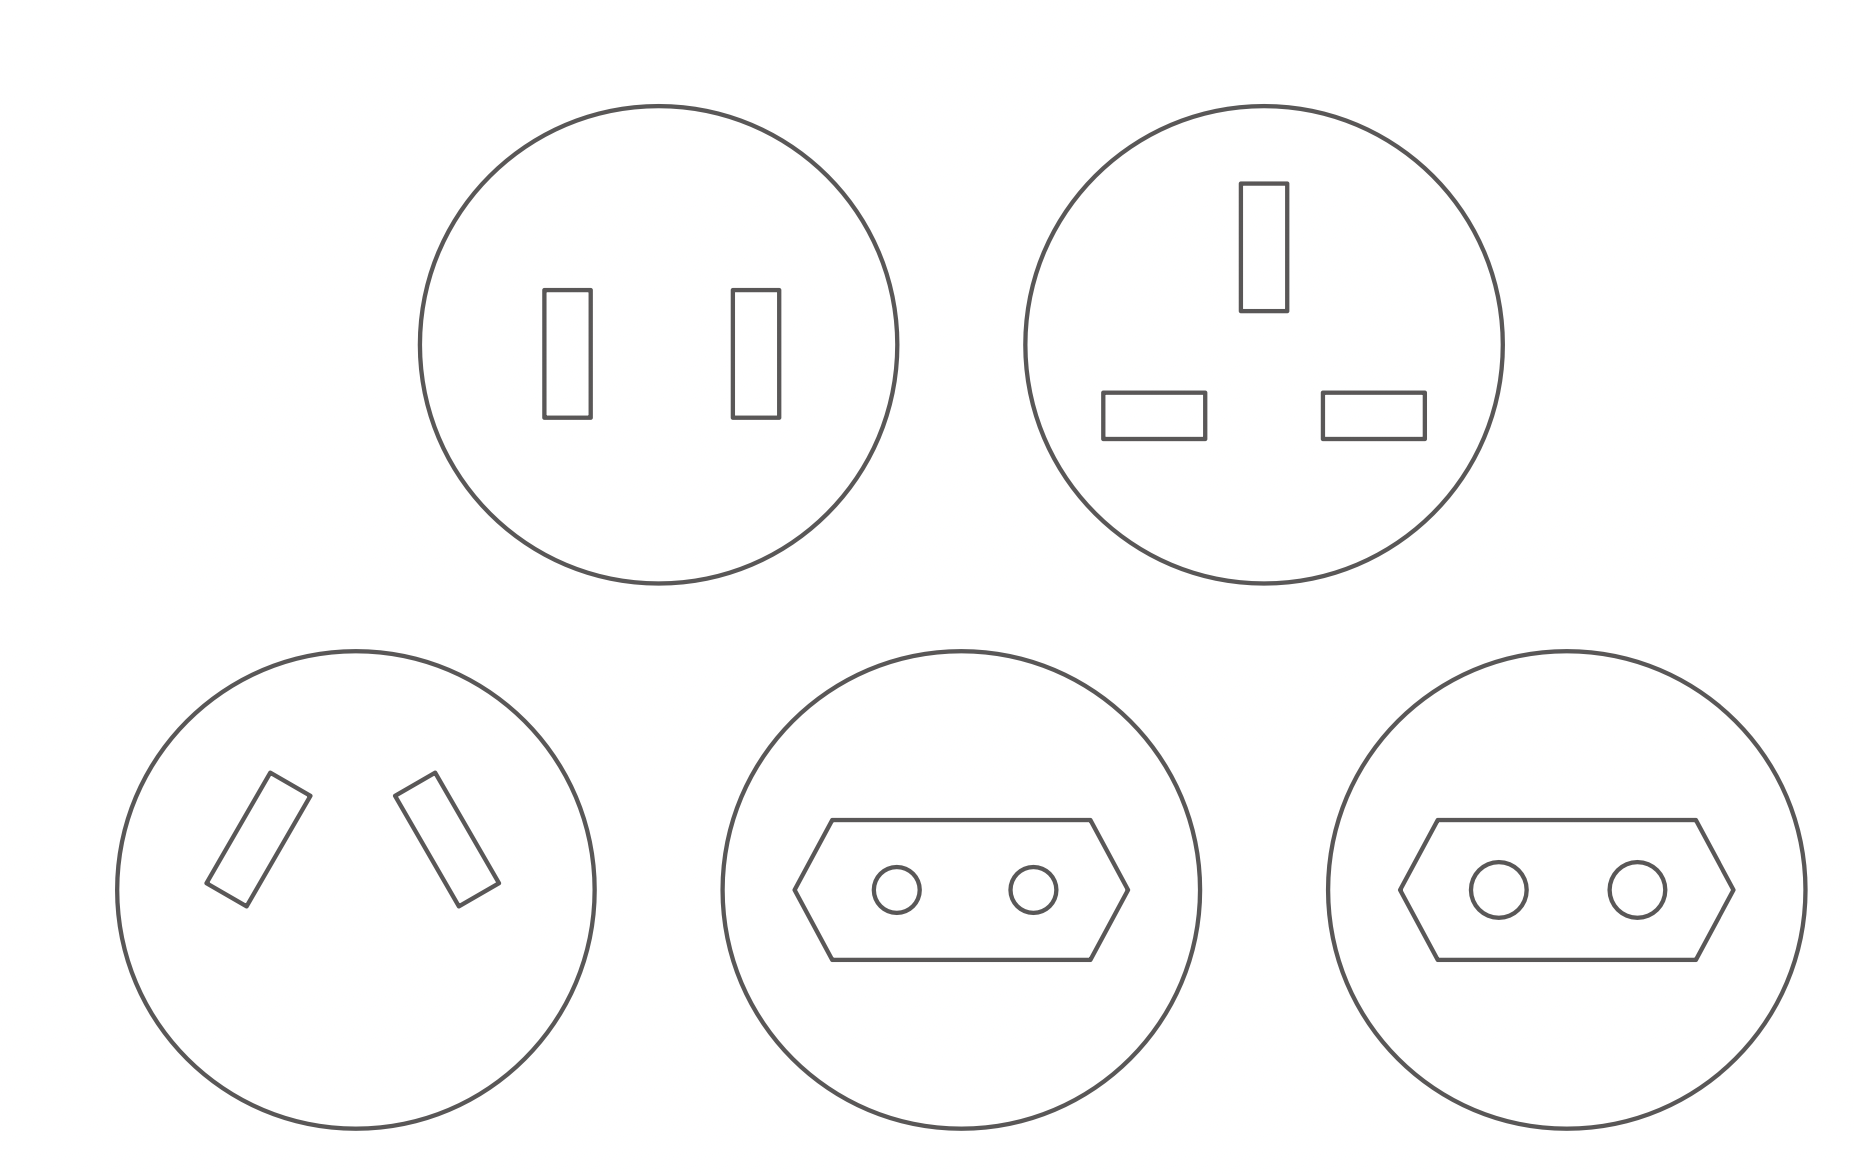
Universal Plugs x5 (Optional)
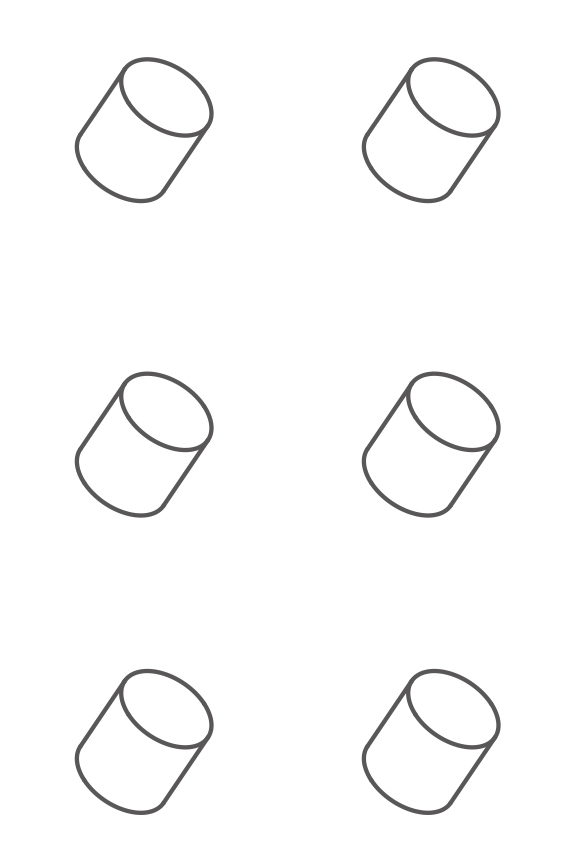
Water tank filter elements x6
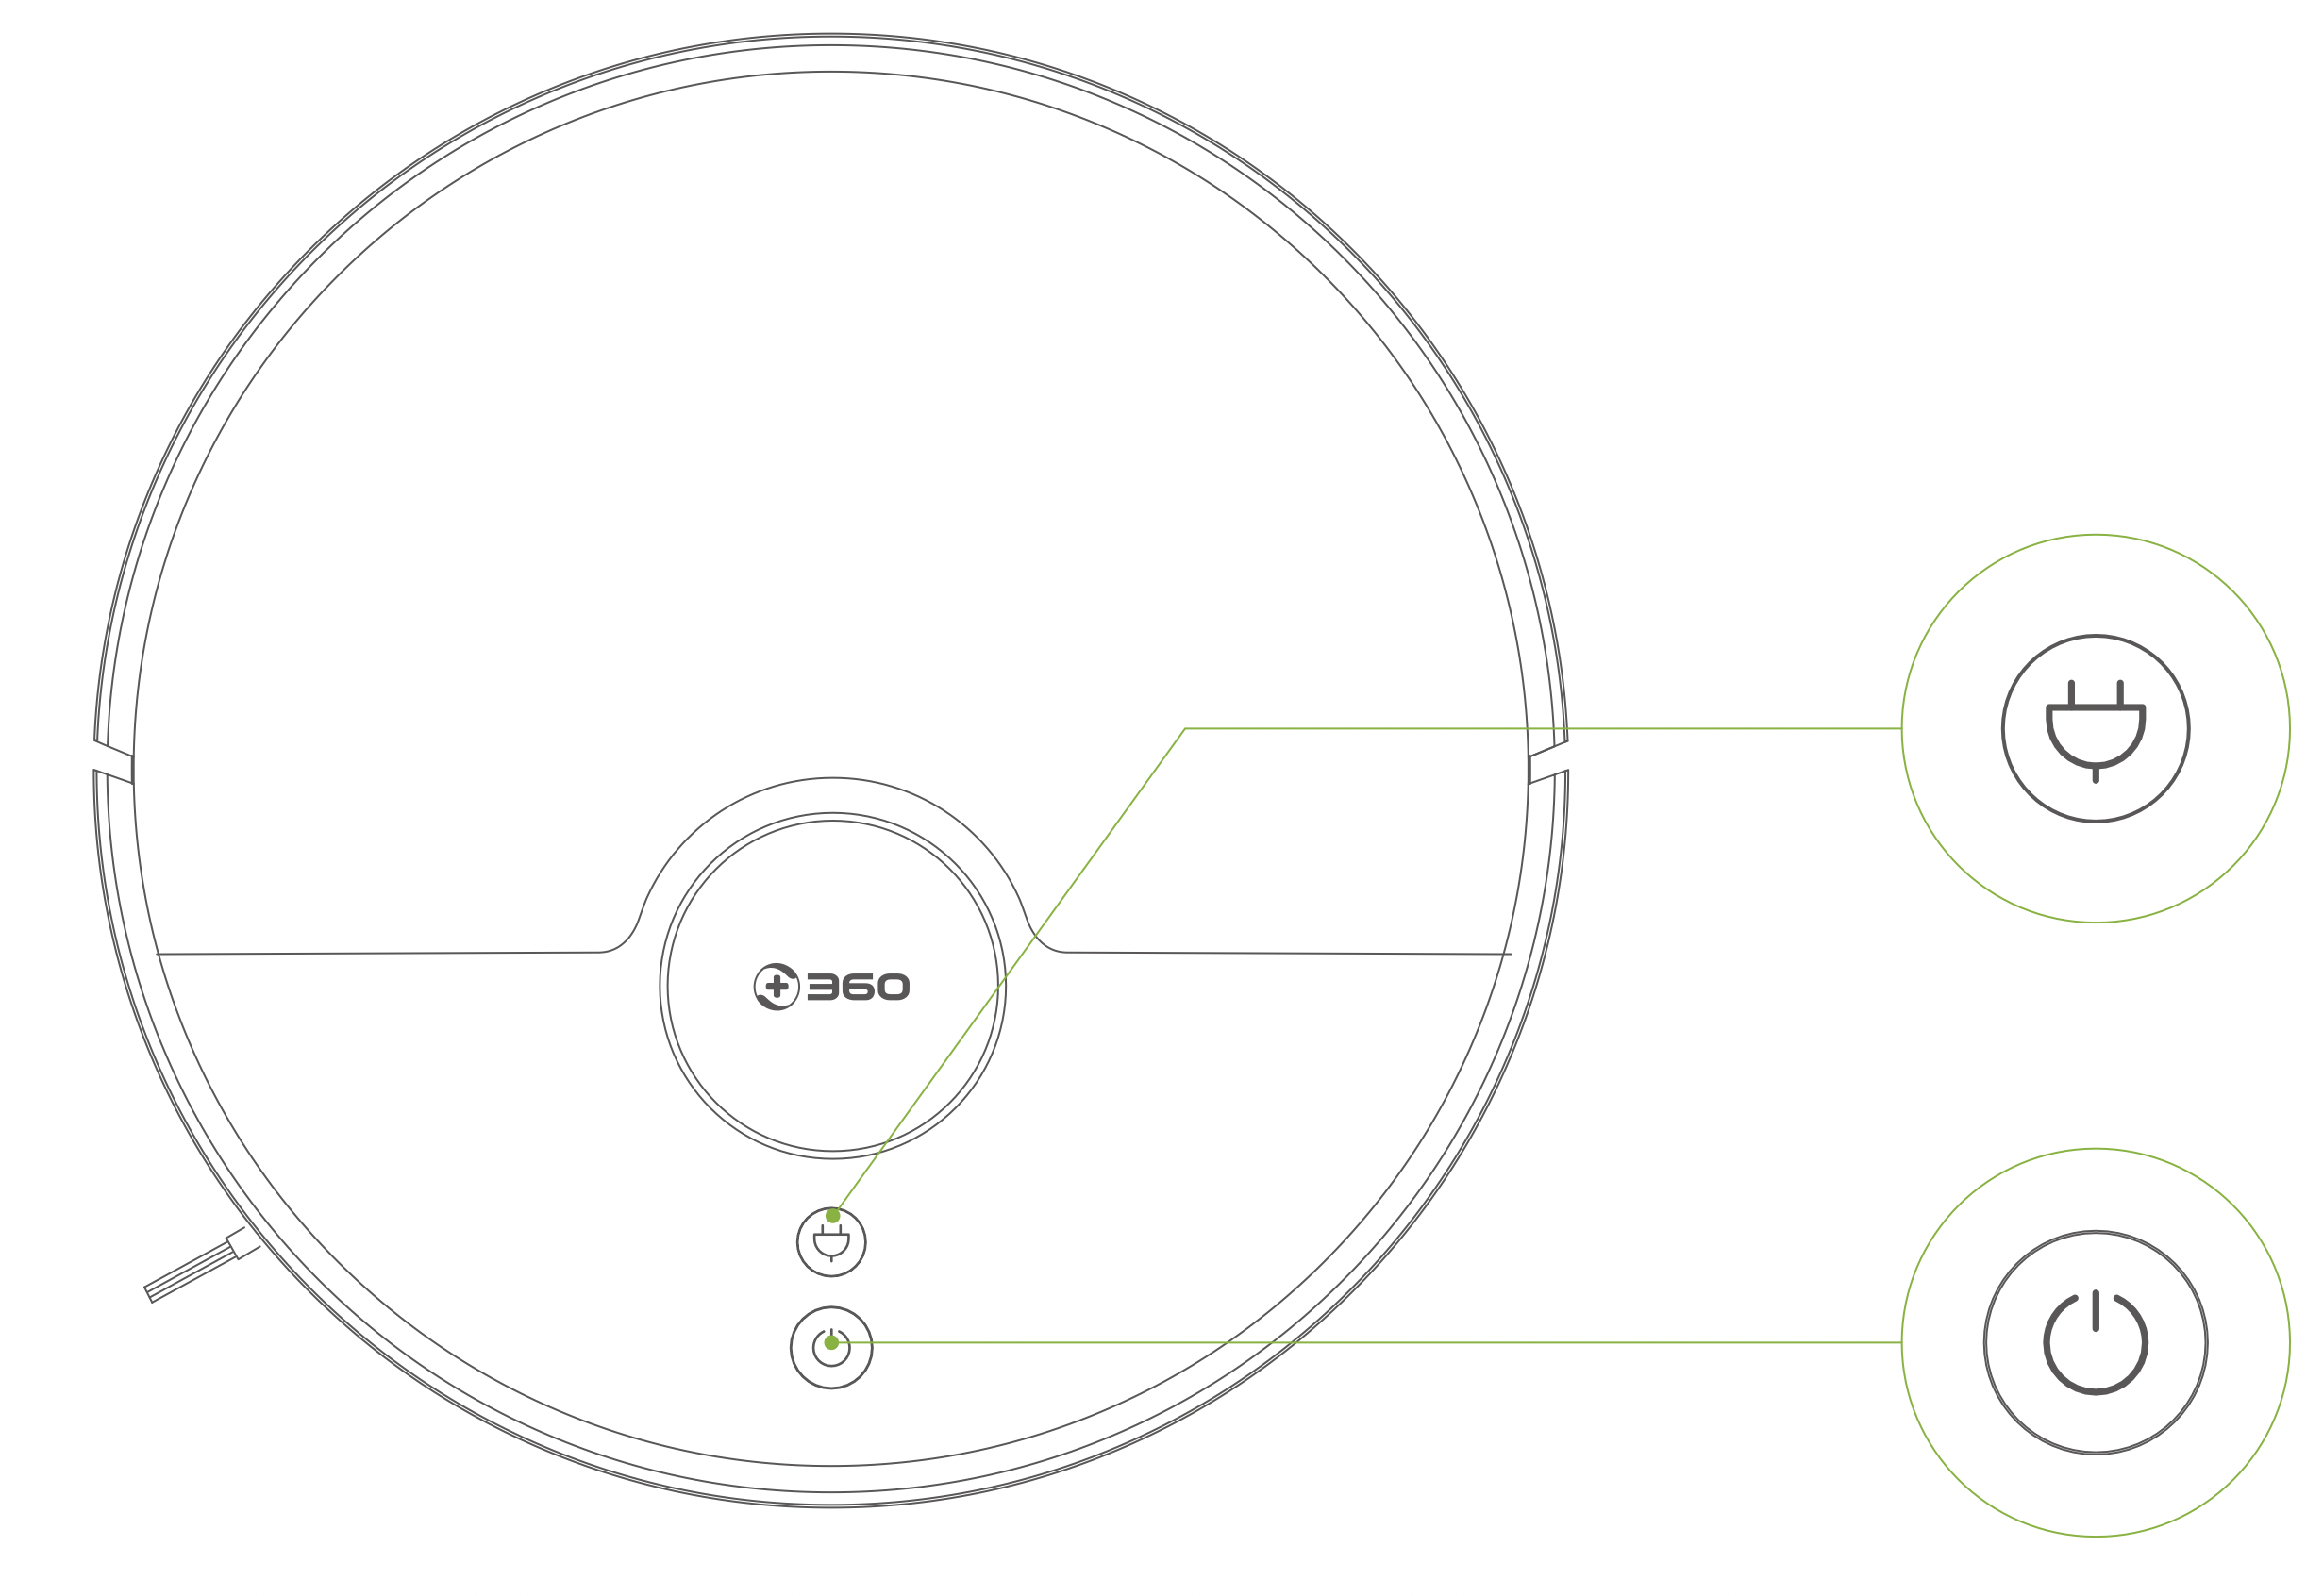
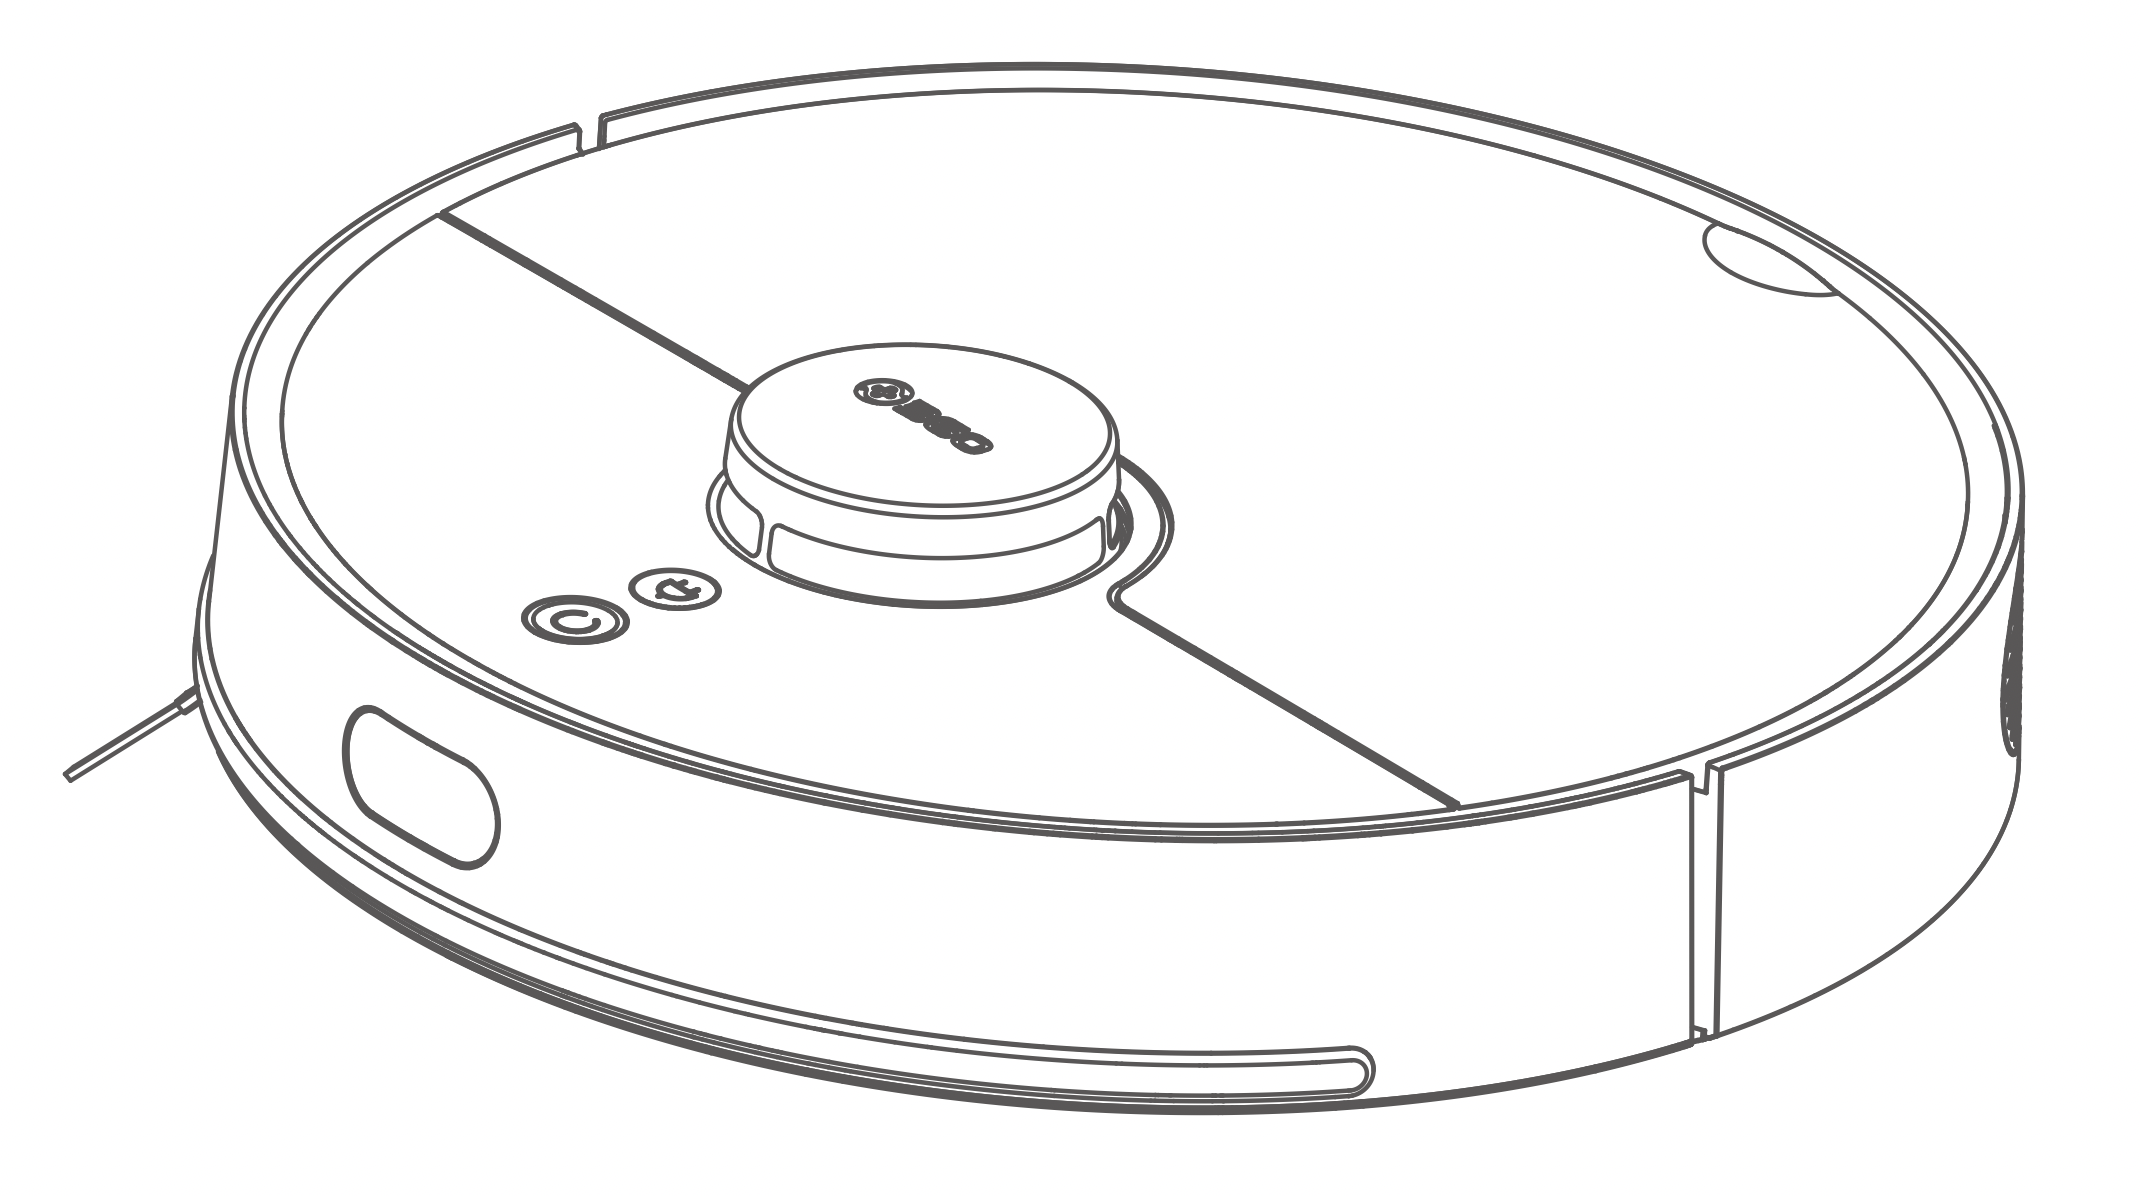
Recharge/regional cleaning
Cleaning/power on or off machine
Note:

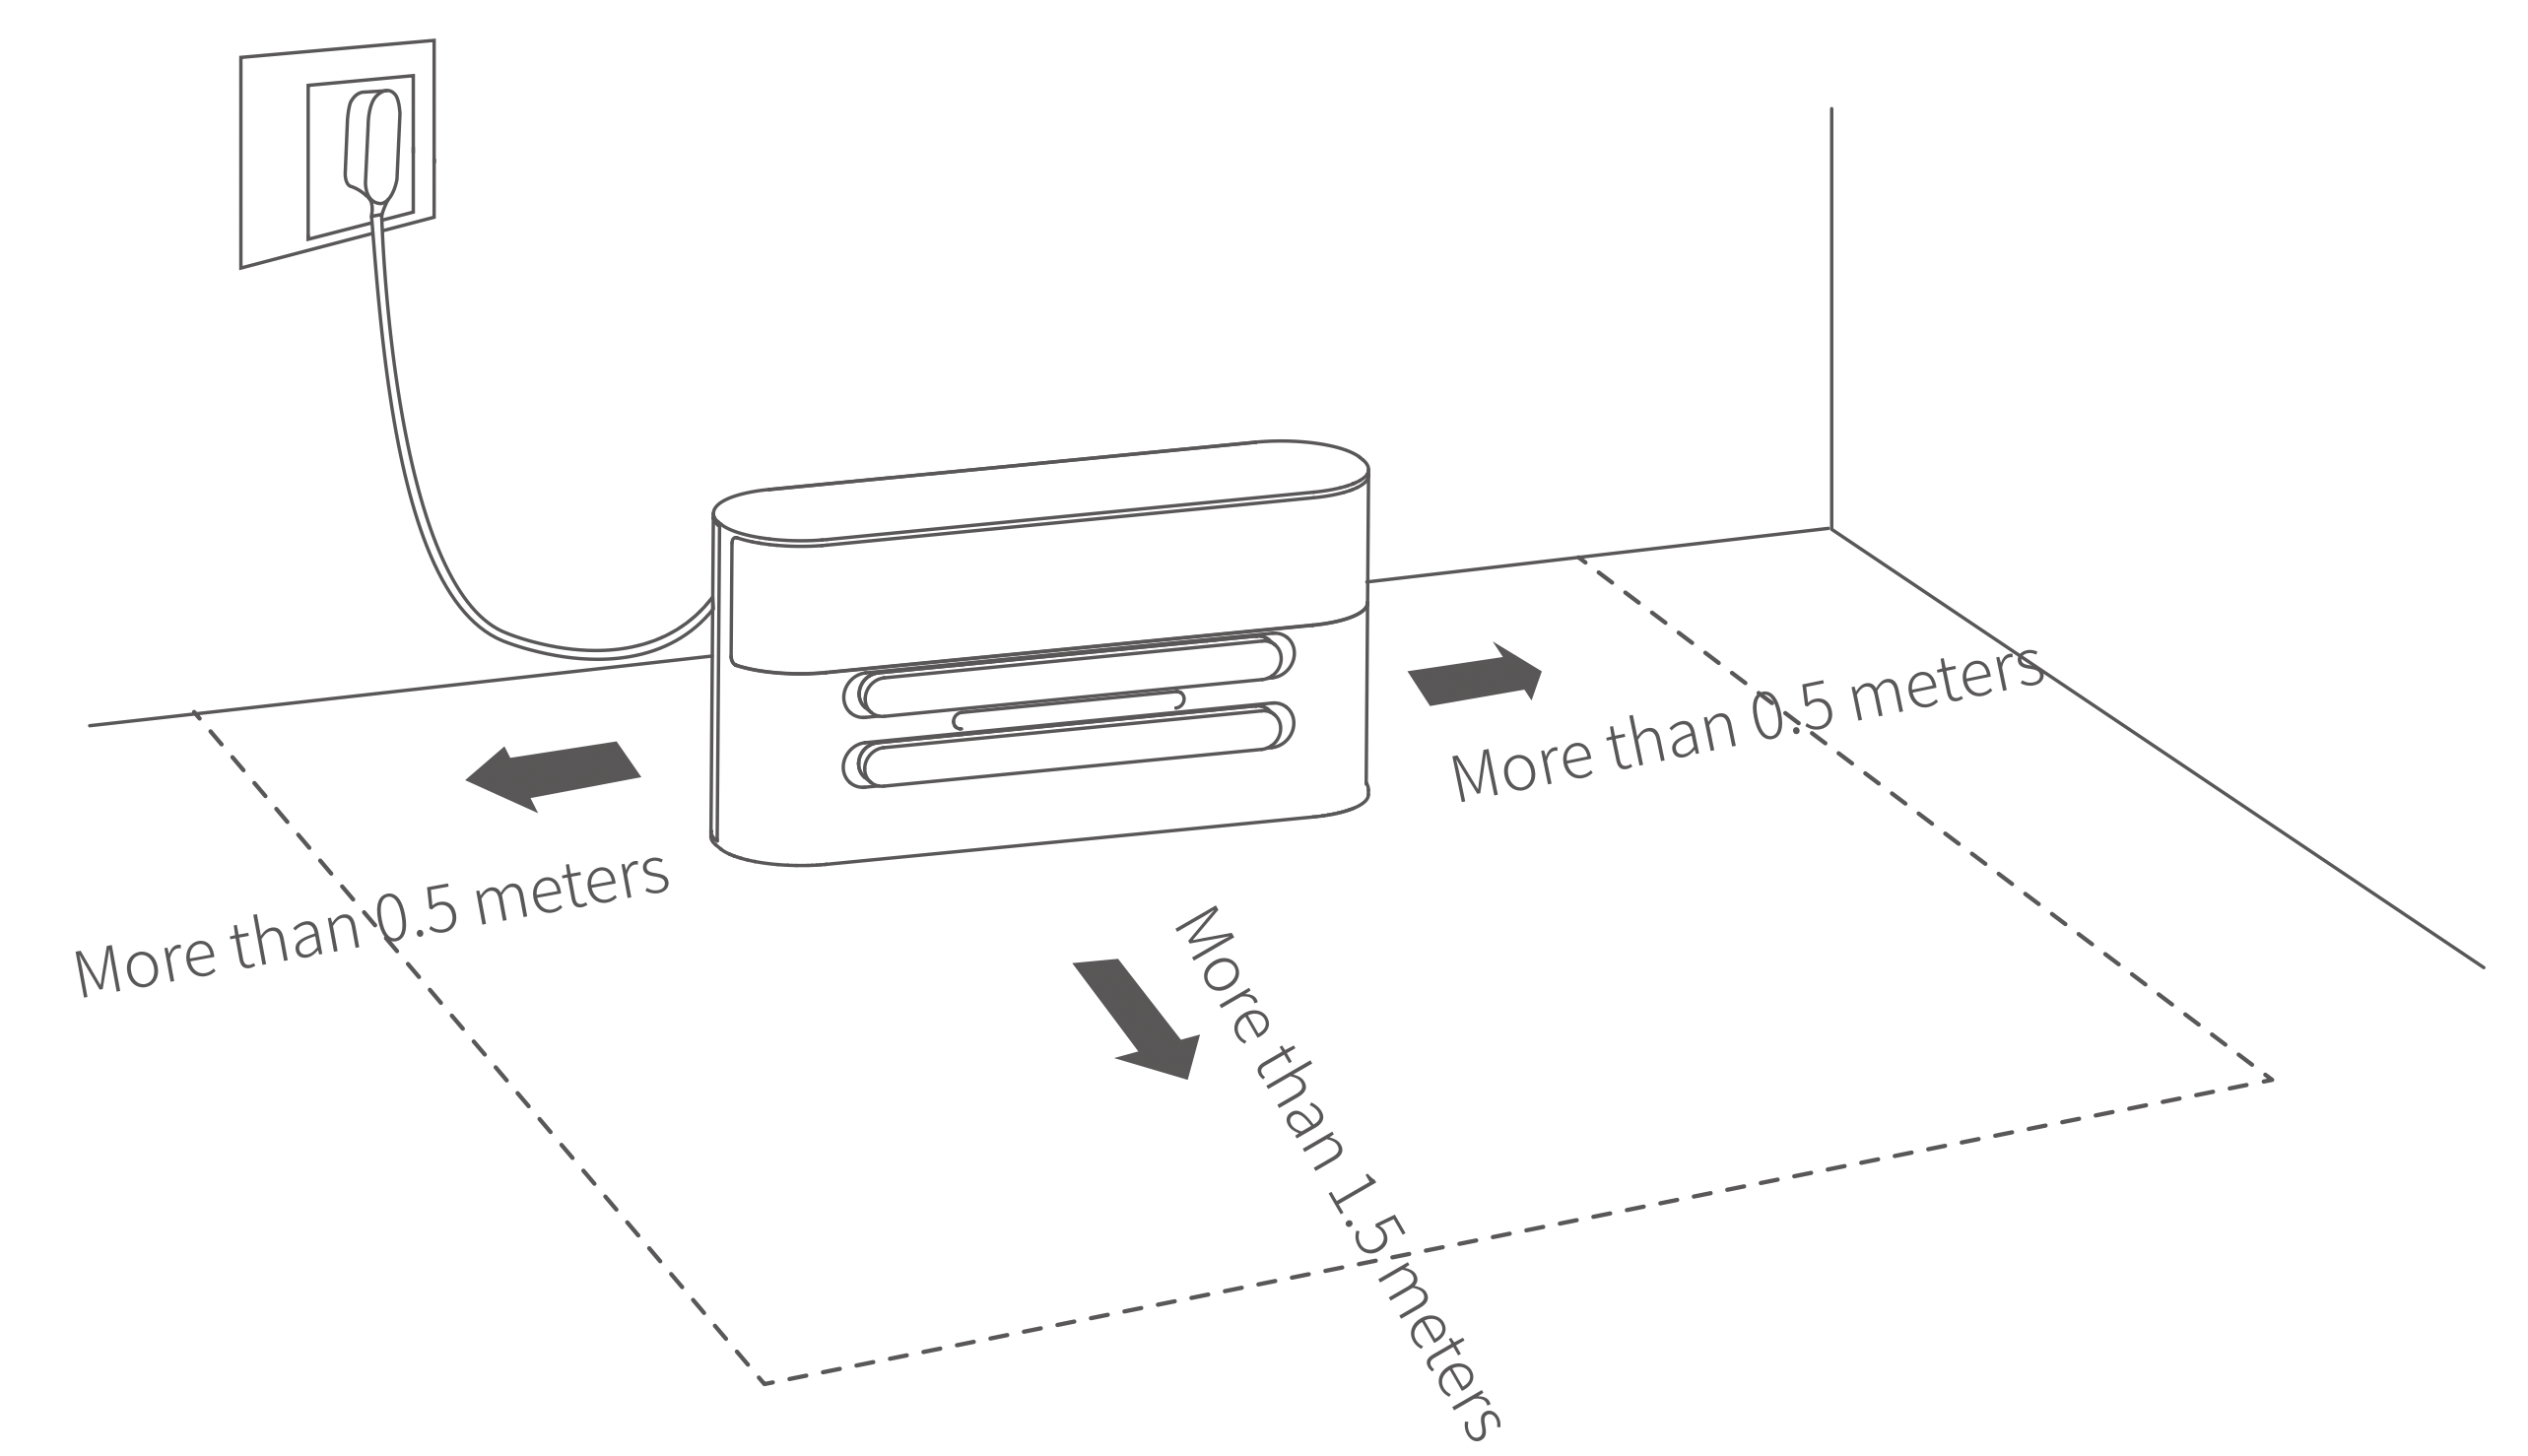
 key to power on, wait for the ring indicator to light up and place the main unit within one meter of the charging dock. By tapping the charging
  button, the device will automatically search for the charging dock and go to charging.
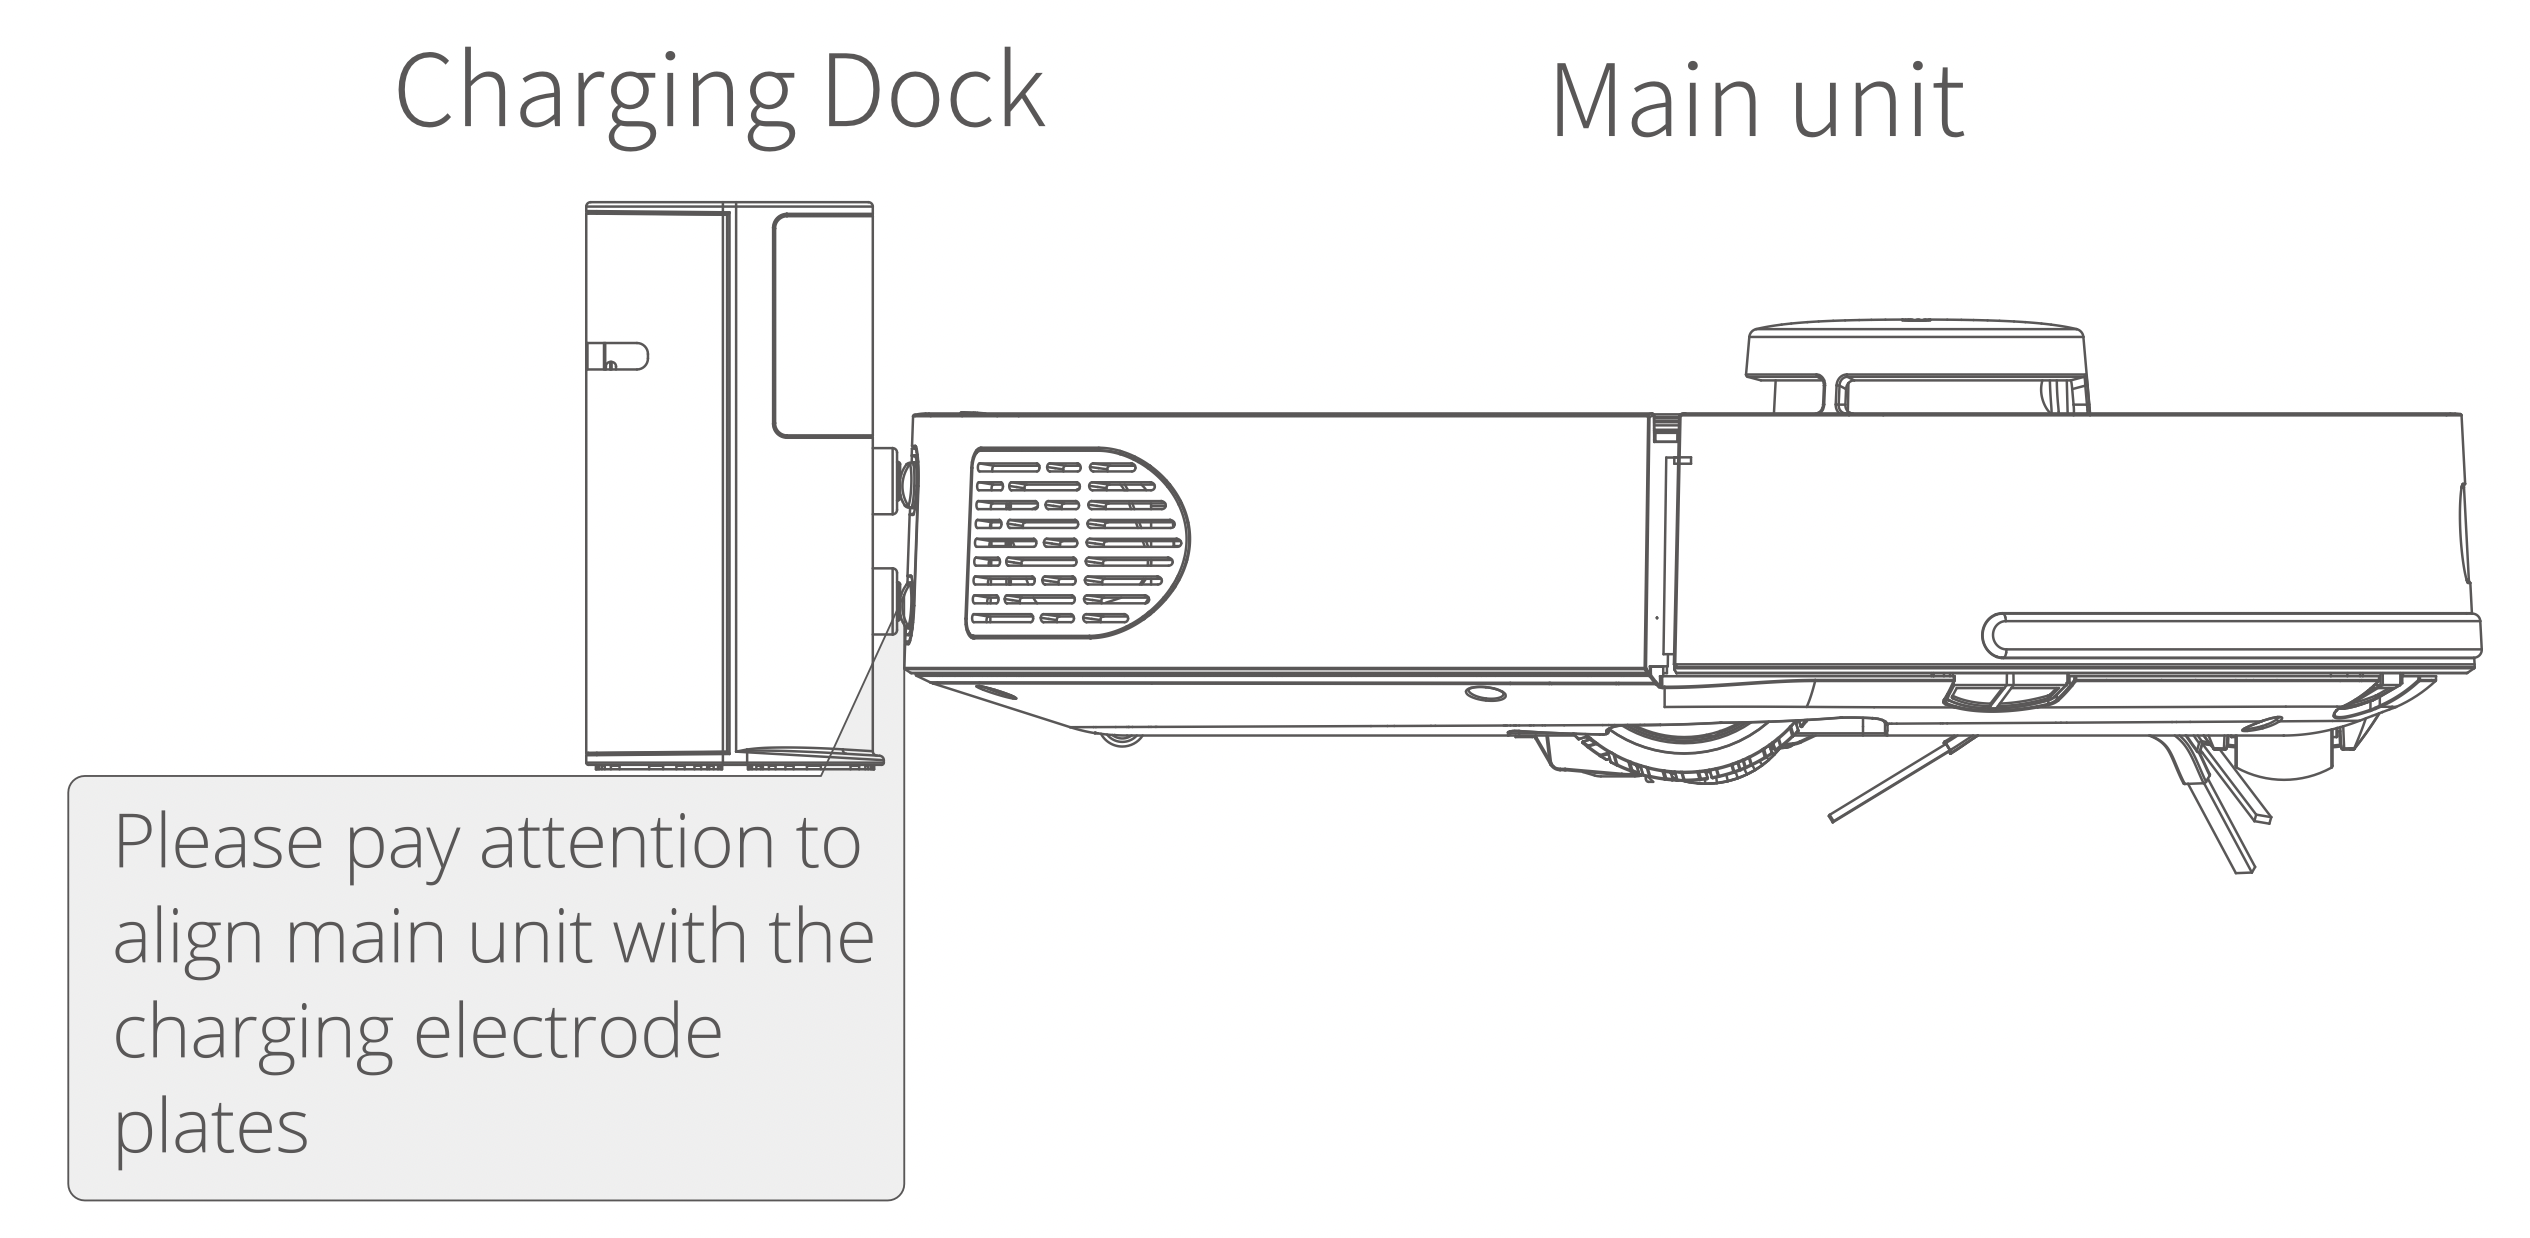

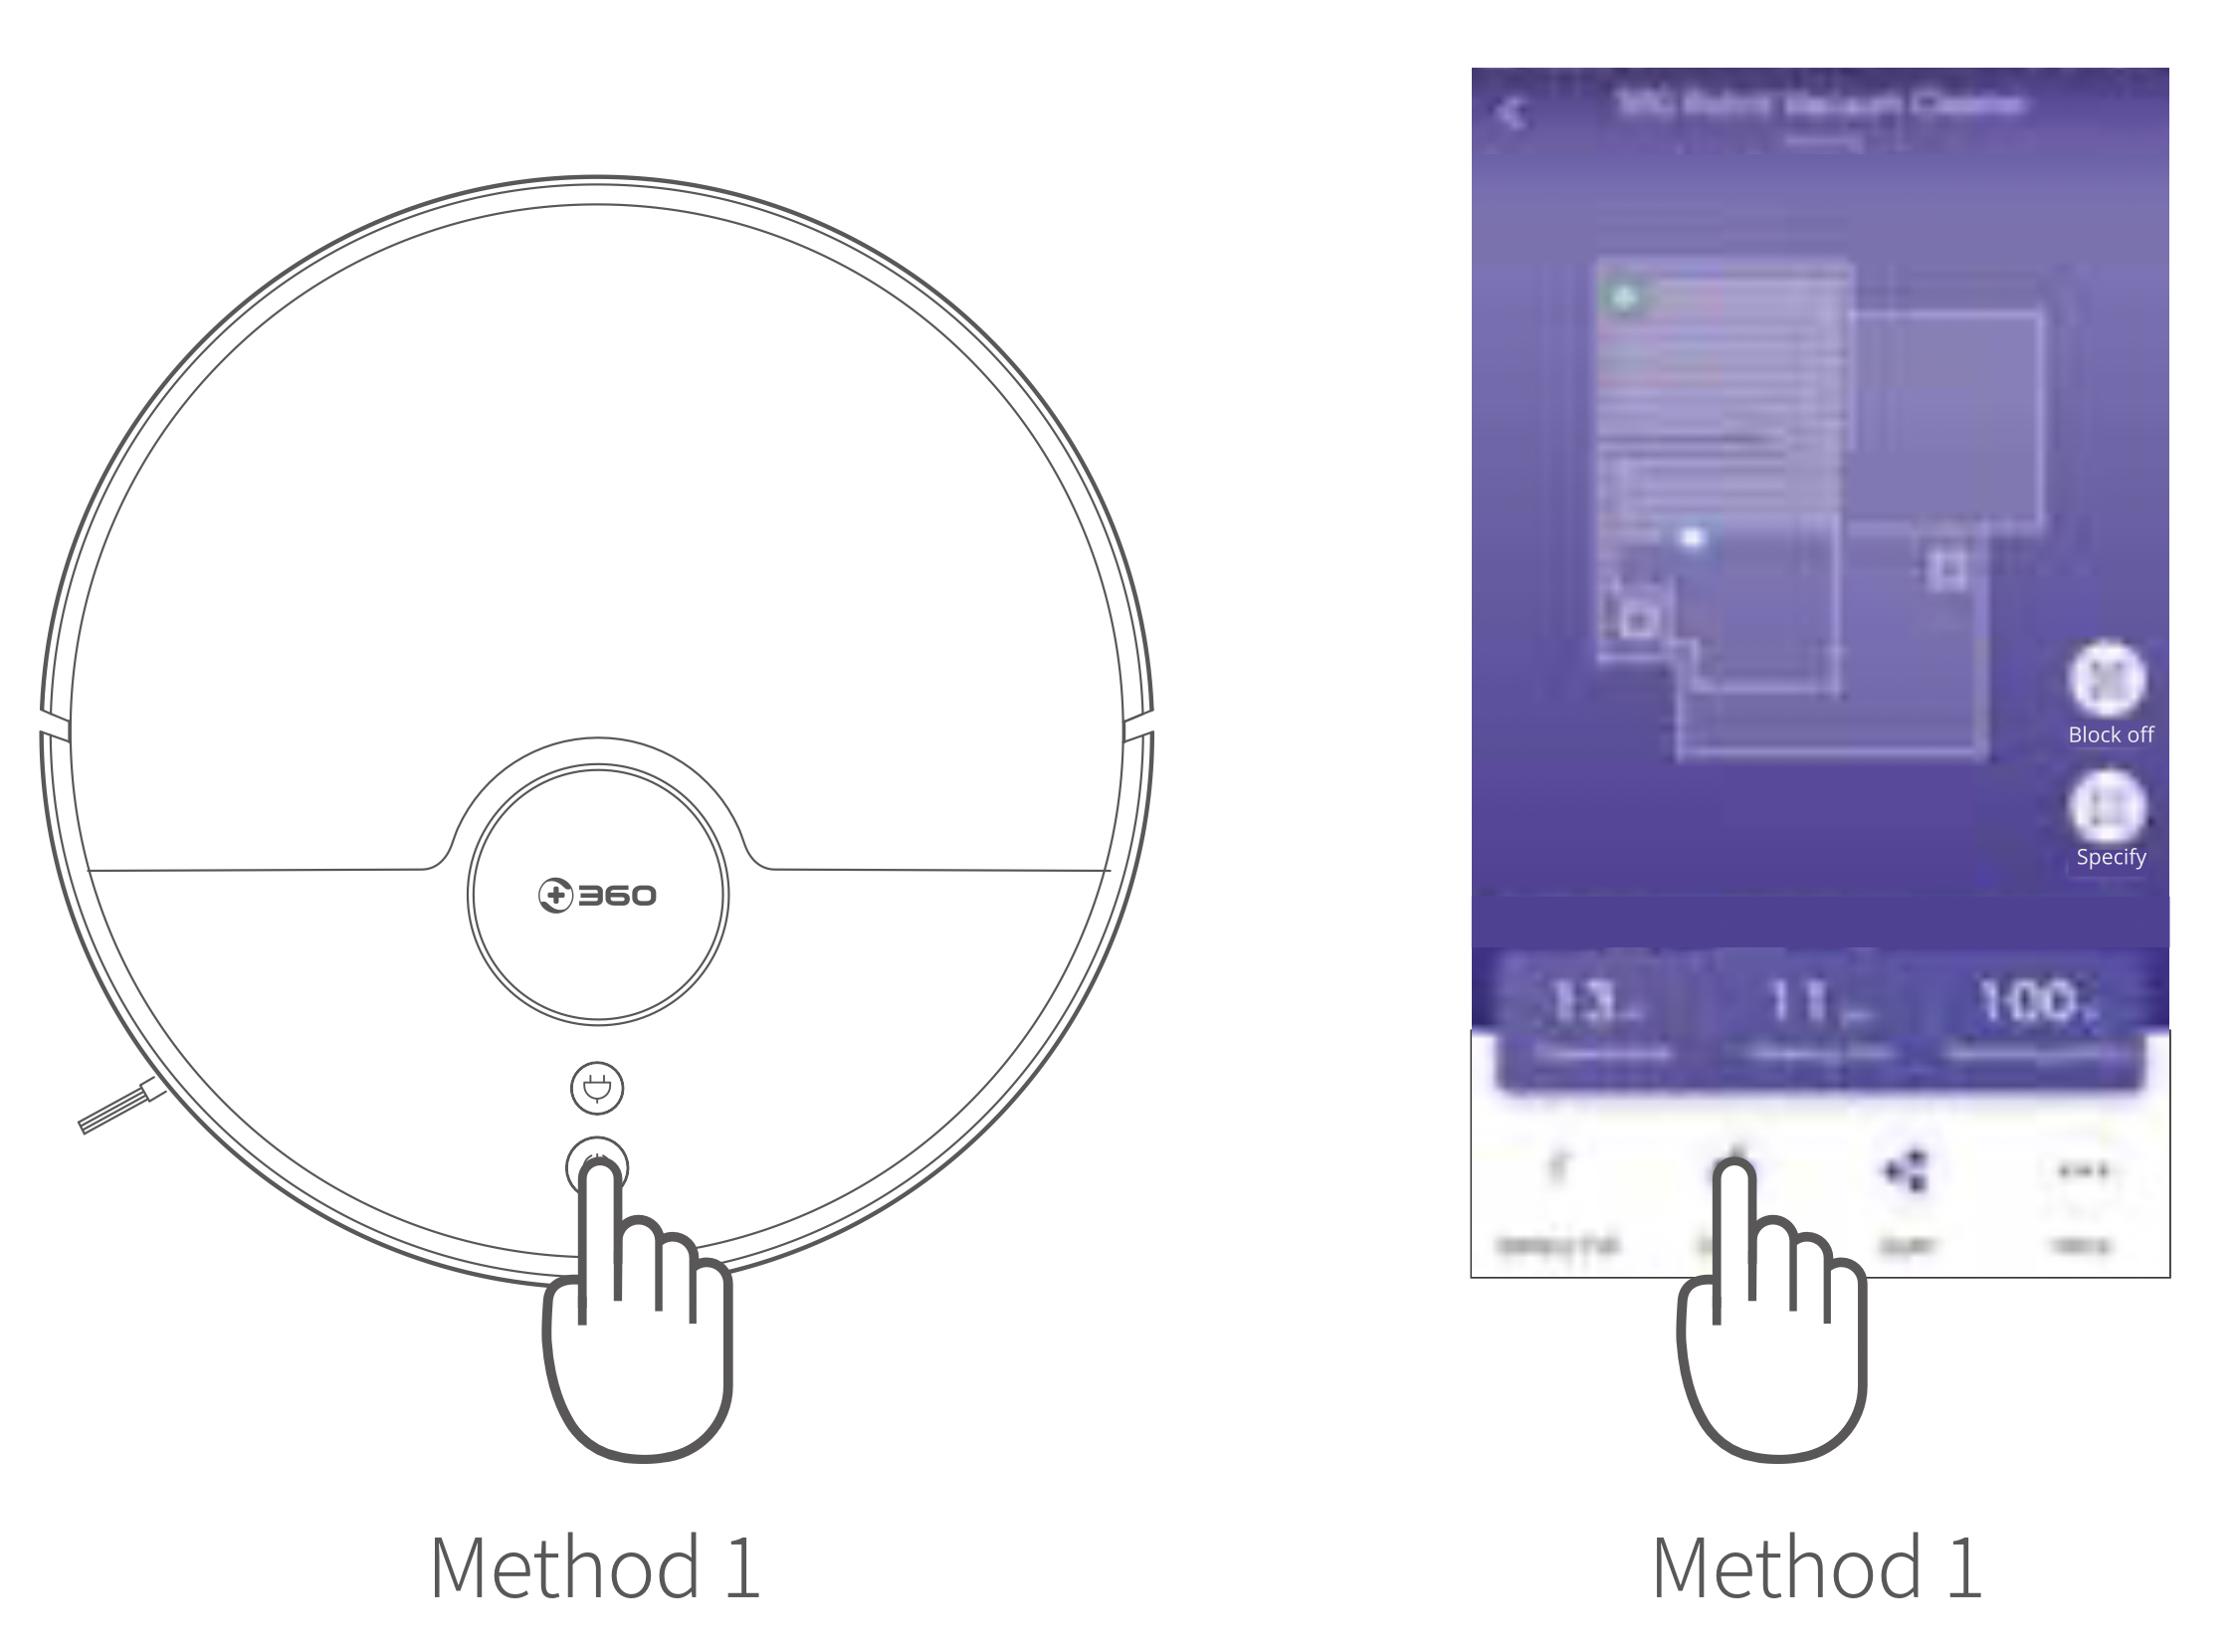
Method 1: After the power is turned on, short press the Power  key on the main unit to start cleaning (press any key to pause while cleaning).
Method 2: Click the clean key in the APP to start cleaning (press the pause key to pause the current task).
Note:
After startup, the robot will scan to generate maps and intelligently create areas. In these areas, the cleaning paths are planned as along the wall firstly, followed by the bow-shaped filling method. The cleaning in each area will be accomplished step by step with high efficiency and full coverage. After the cleaning is completed, Robot will automatically return to charging dock to recharge itself.
Note: Please don't move Robot frequently. Please place the device near the original place if you move it manually. Robot will try to reposition its coordinates when it is started again. If the positioning is successful, Robot will continue to work according to the planned clean path. If the positioning fails, Robot will give up the current task and re-create the map and may not be able to complete the recharge.
Case 1: Starting the Robot in a new area to clean can cause theRobot to re-create map.
Case 2: The main changes of the environment may result in the failure of reposition and may trigger to re-create the map.
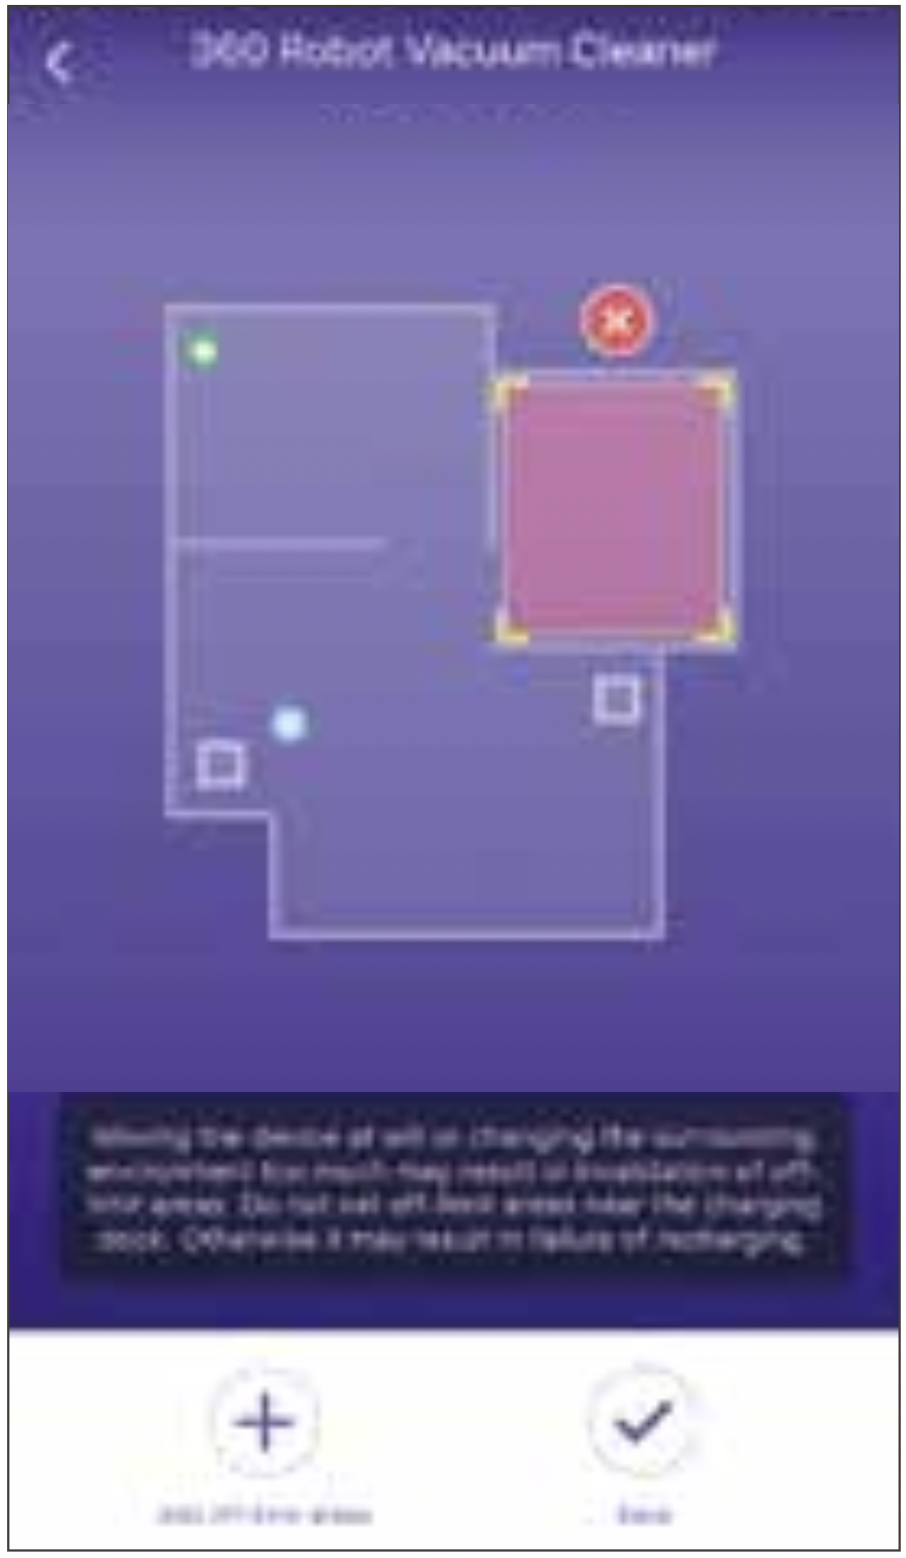
Regenerating map will lose all the settings of the original one (including the restricted zone).
Automatic mode: After cleaning is completed, the device will automatically return to the charging dock to recharge itself.
Manual mode: Under paused state, short press the charging  key to start the recharge, or the APP triggers the recharge.
Note: The ring indicator light flashes while Robot is charging.
Note:
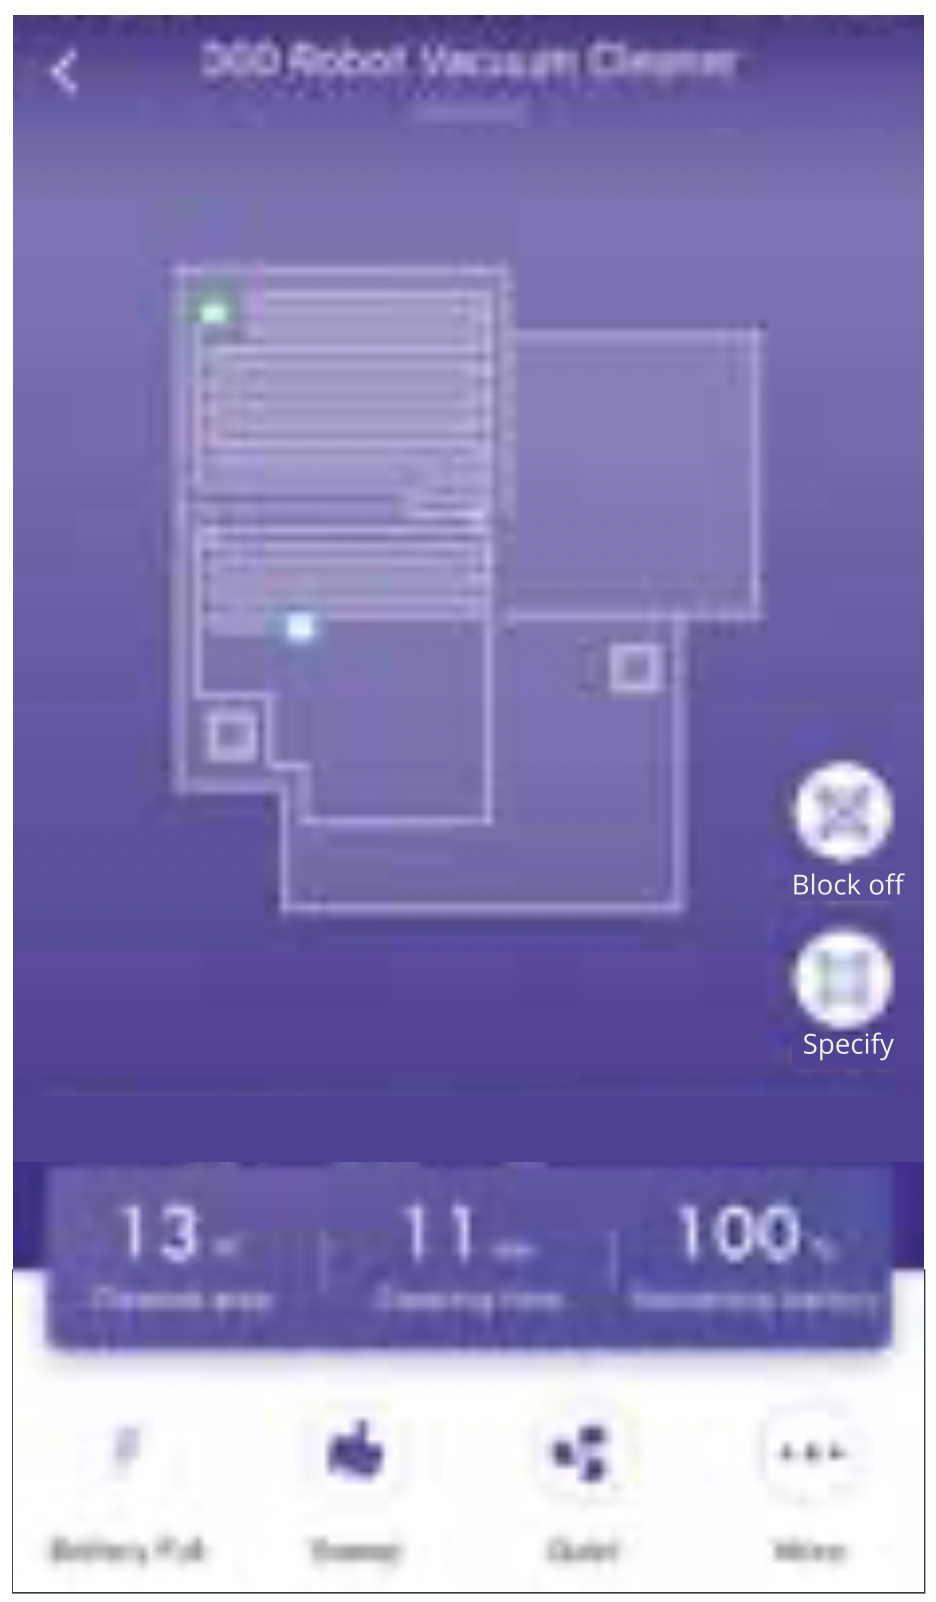
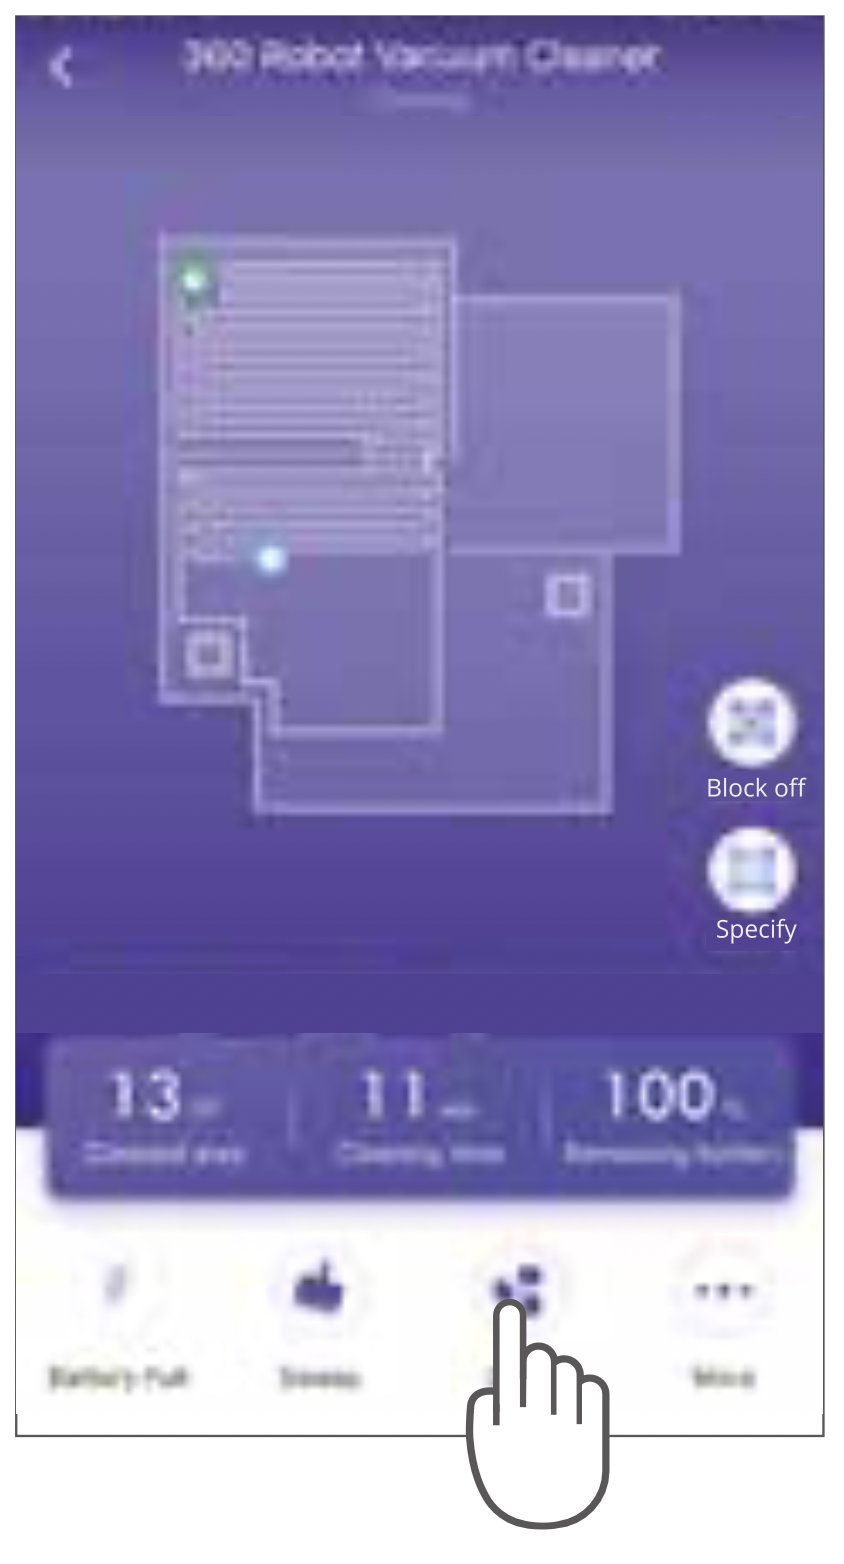
It is particularly applicable for an area which needs deep cleaning. When a user specifies a point on the map, Robot will be near the point and a 2m*2m sweep will be performed around this point. It is easy to drag or click to set the target point in your map operation. The number of cleaning points can be set. The default cleaning is 2 times for each point and 1 time cleaning can also be set optionally.
When Robot is off-line or when the mobile phone is not in the vicinity, you can press and hold the recharge button for 3 seconds, then Robot is centered on itself and is cleaned by 2m*2m. At this time, the user can manually move Robot to the designated location for regional cleaning.

Use phone App to schedule a cleaning time, Robot will automatically start cleaning at the scheduled time, and automatically return to the charging dock after the cleaning is completed.
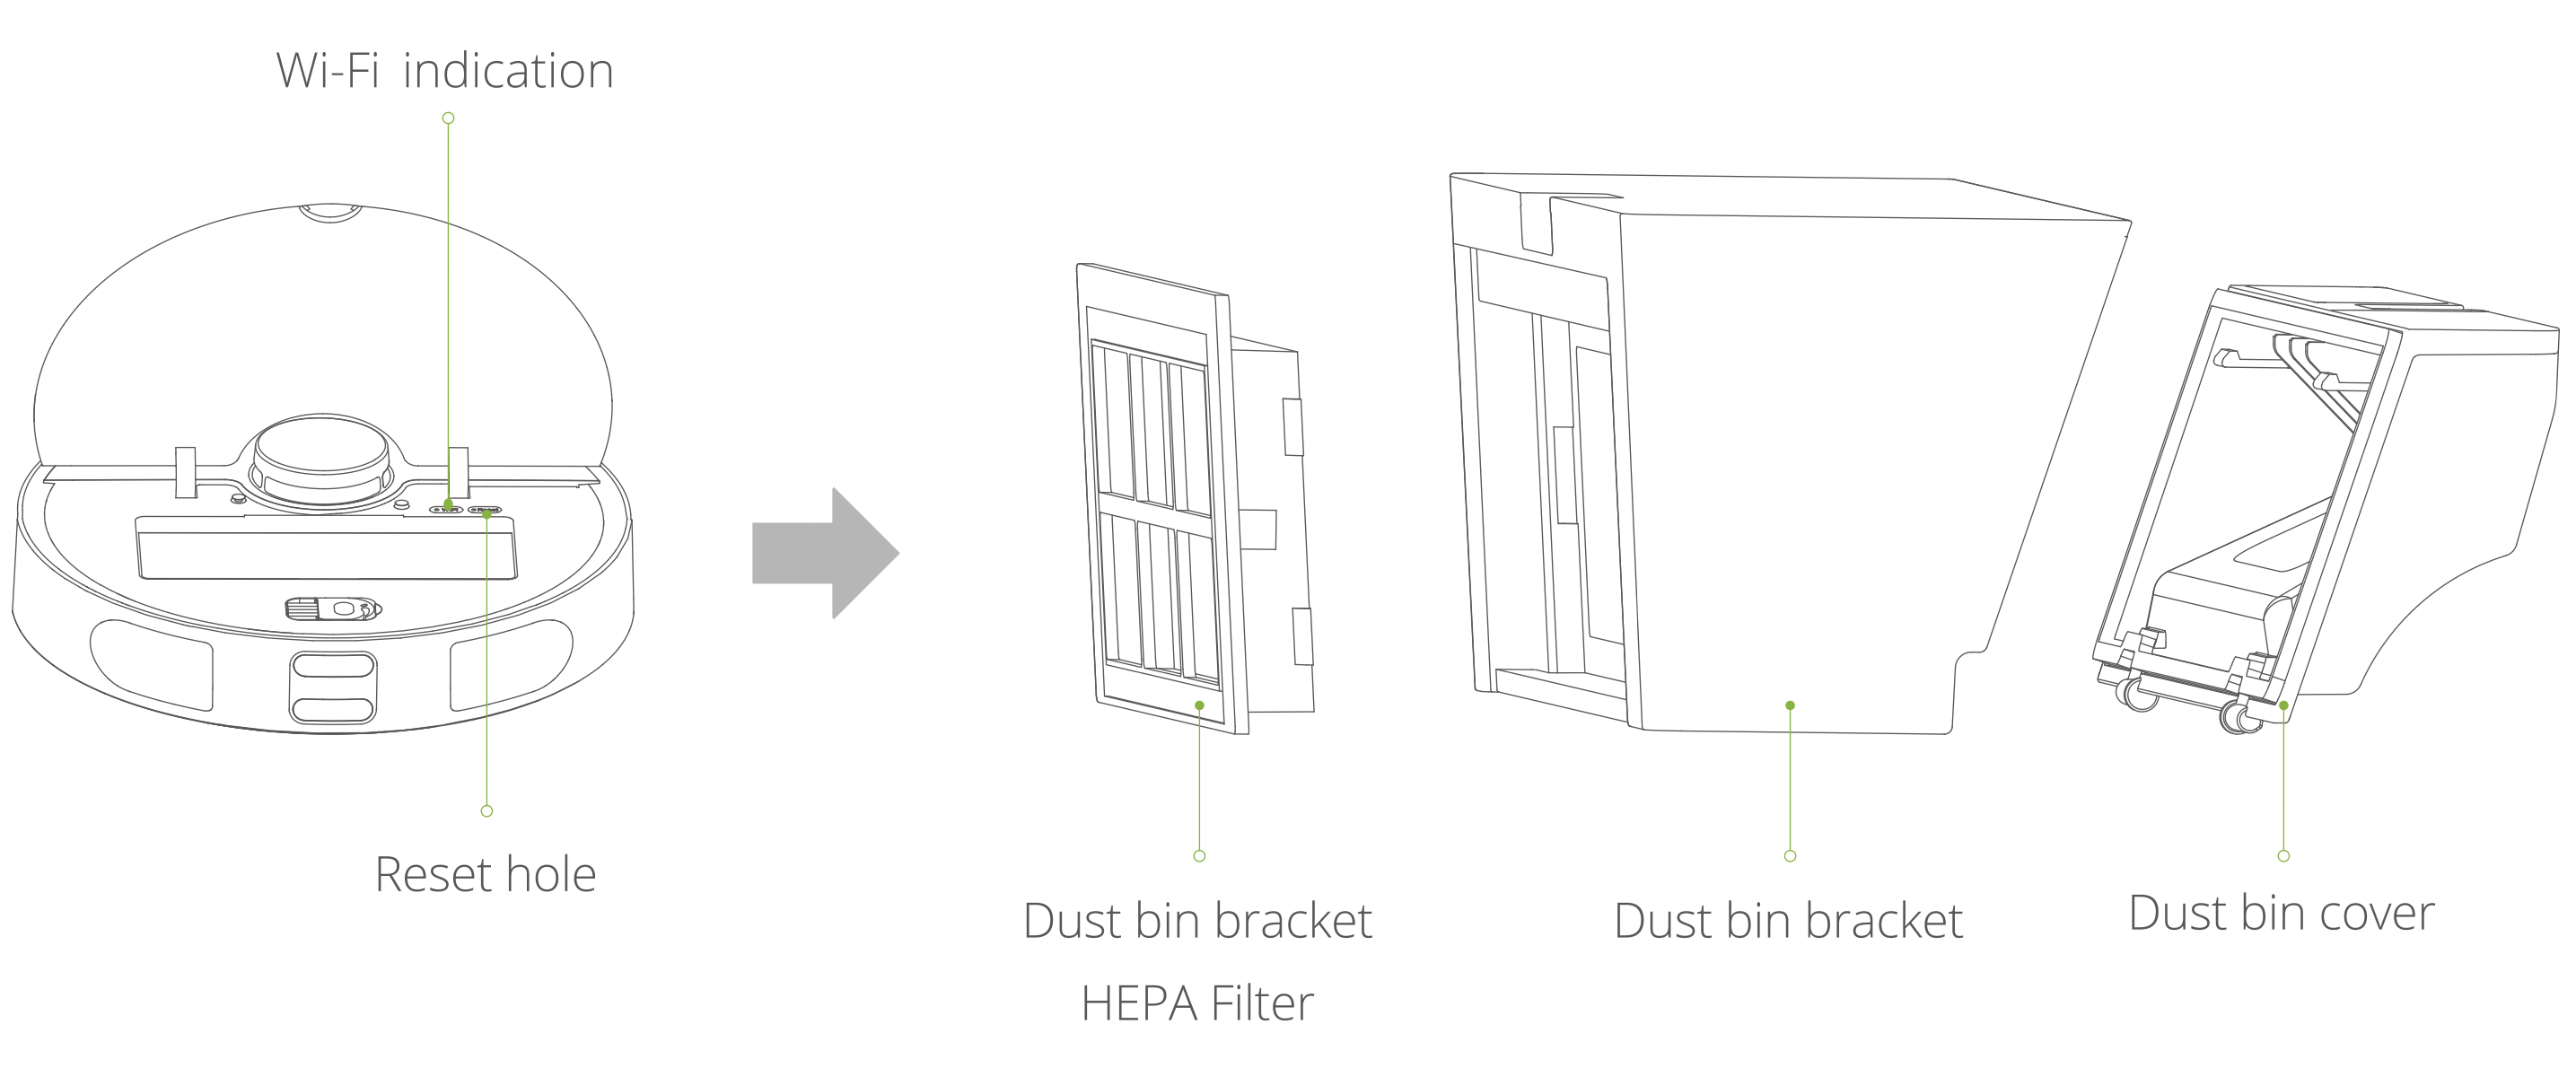
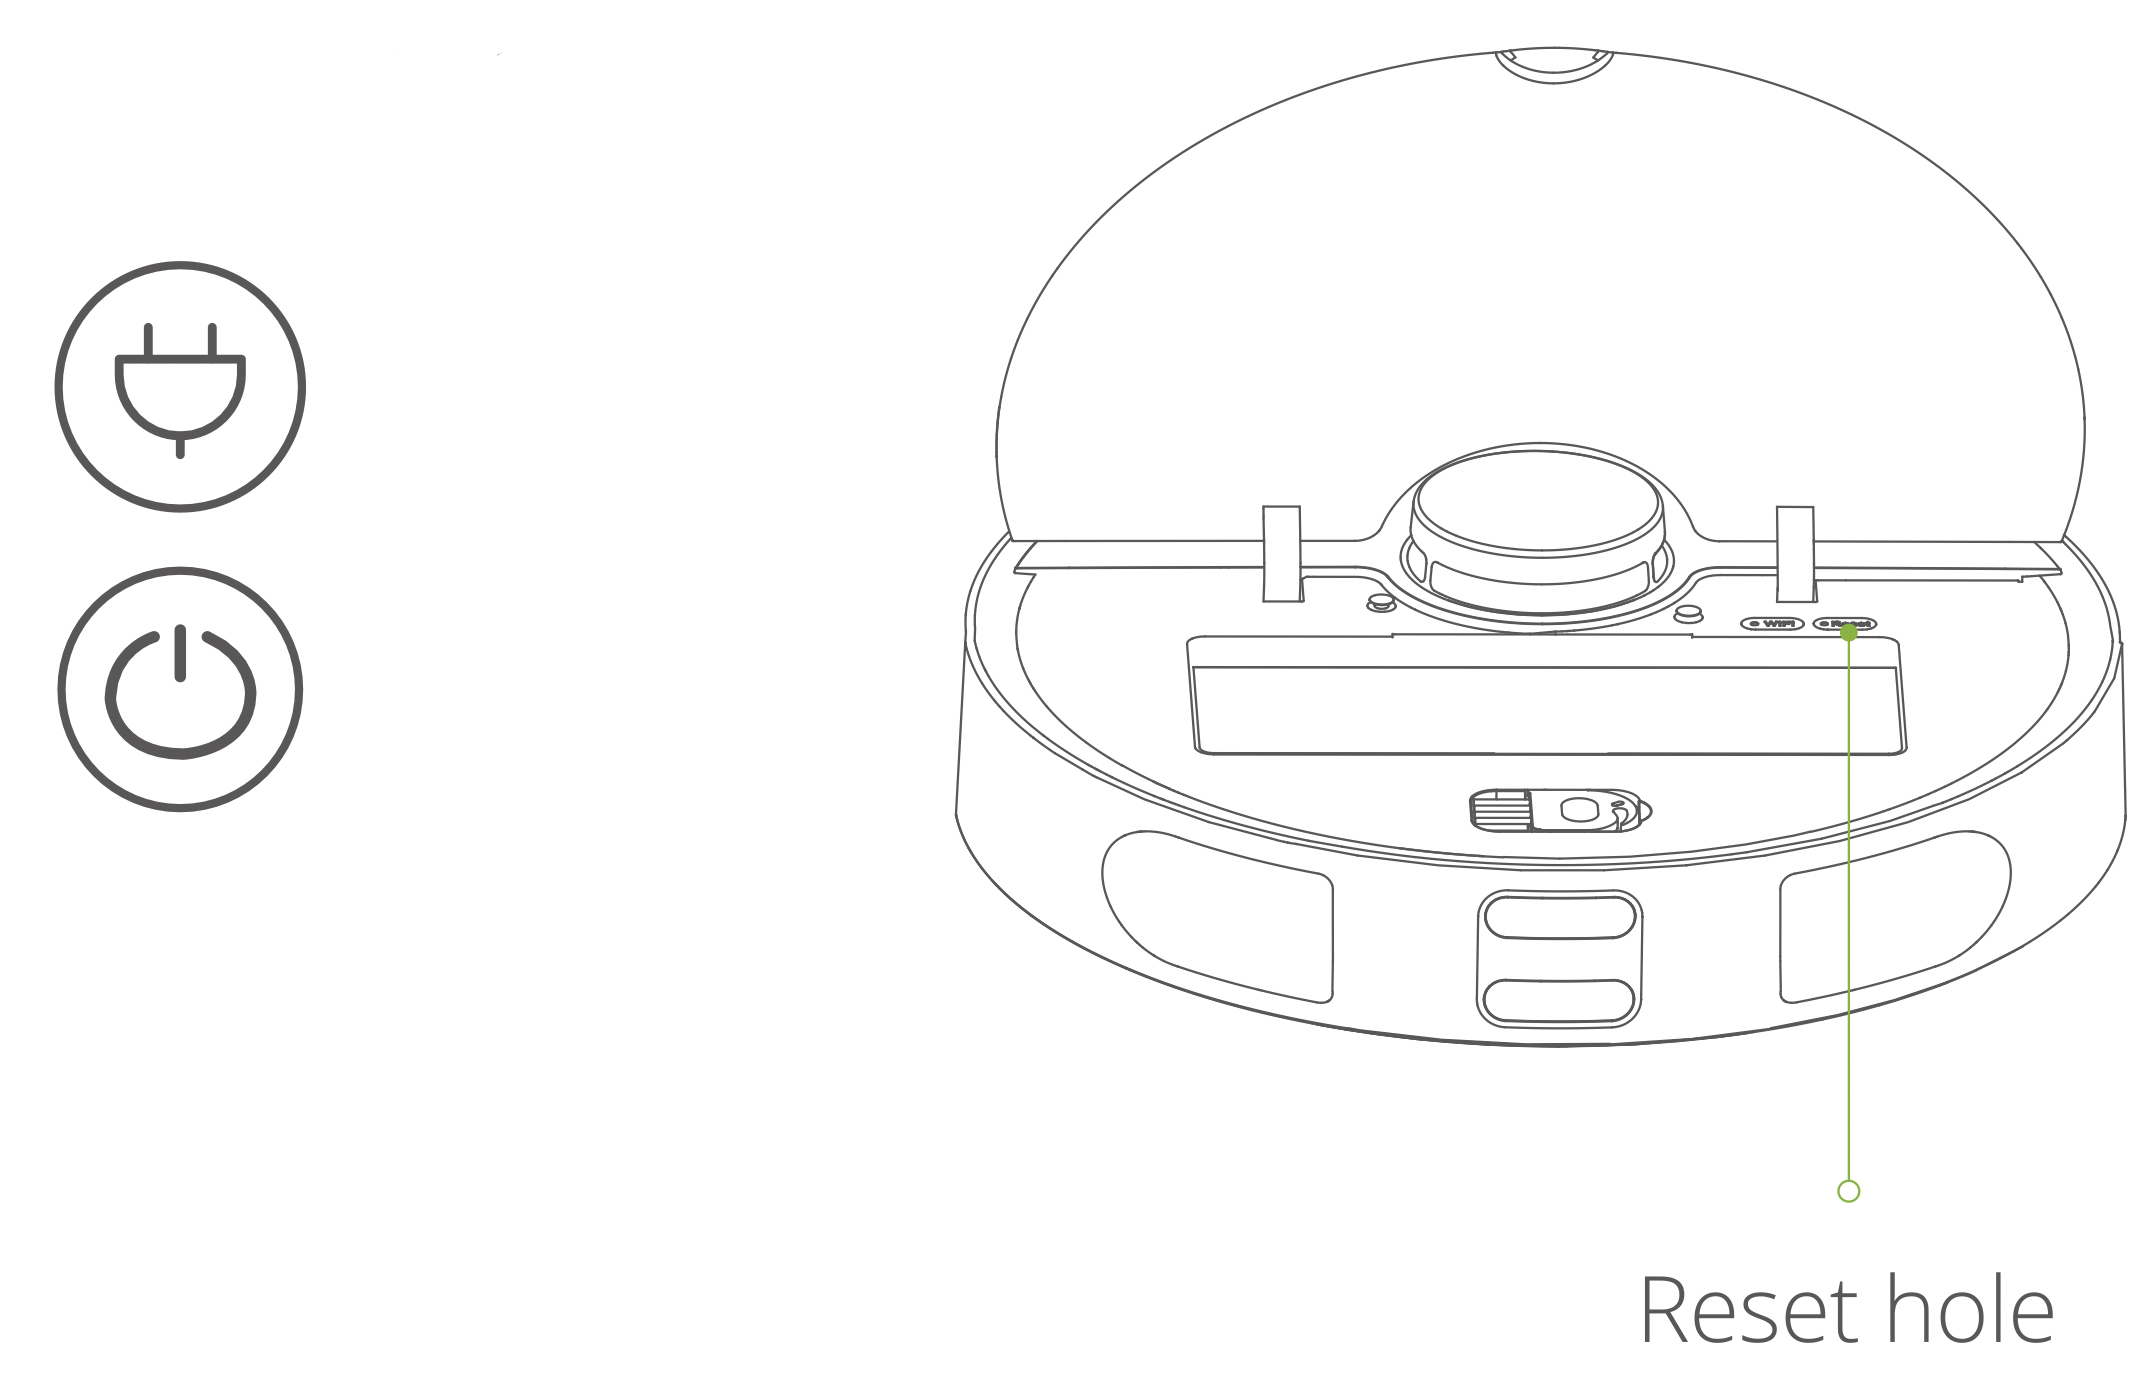
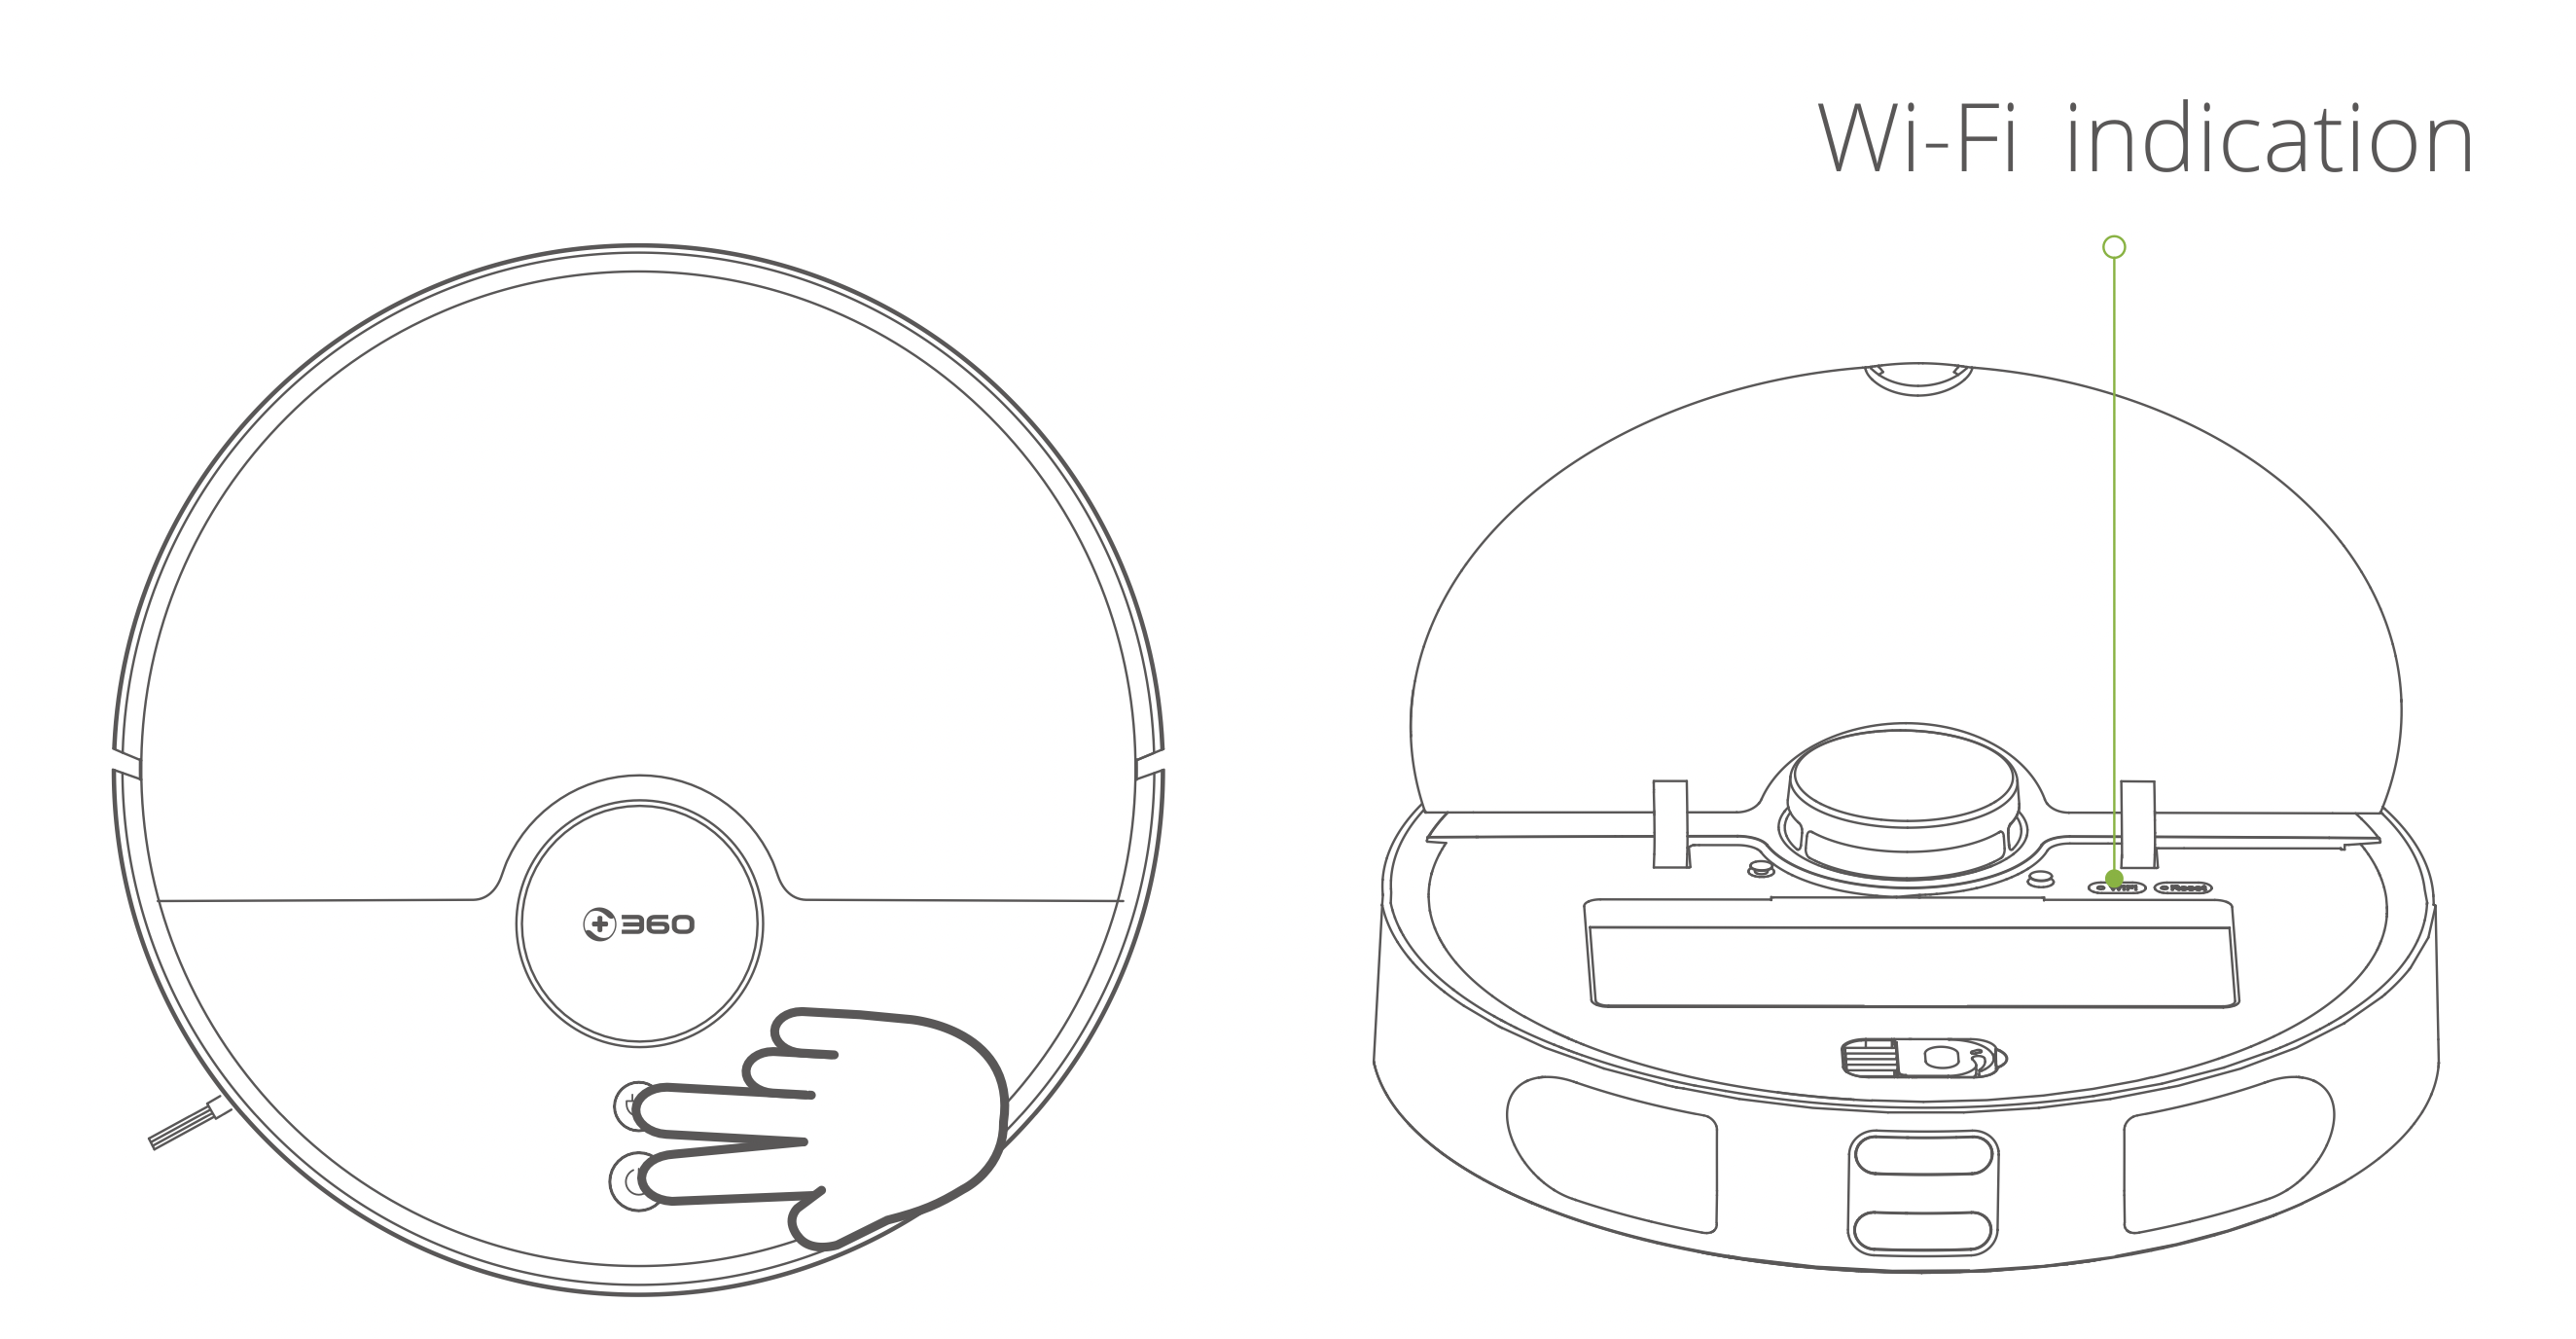
When the router changes settings, passwords, or other reasons that prevent the phone from connecting to Robot, press and hold the Power  key and the
  charging key simultaneously for 3 seconds till the voice prompts "Wi-Fi has been reset" and the Wi-Fi indicator changes to slow flashing purple light which indicates that the reset was successful.
During the Do-Not-Disturb period,Robot will not automatically power off and play voice. The Do-Not-Disturb mode is enabled by default after the main unit has been deployed with internet for the first time. The open period is from 22:00 to 08:00. You can use the phone App to turn off the Do not disturb mode or modify the Do-Not-Disturb mode time period.
Quiet, automatic and powerful modes can be chosen by the phone App. The default is automatic mode.
Note: In order to have a better mopping effect, it is recommended to use the water tank to mop after the robot vacuum completes at least three indoor cleanings.
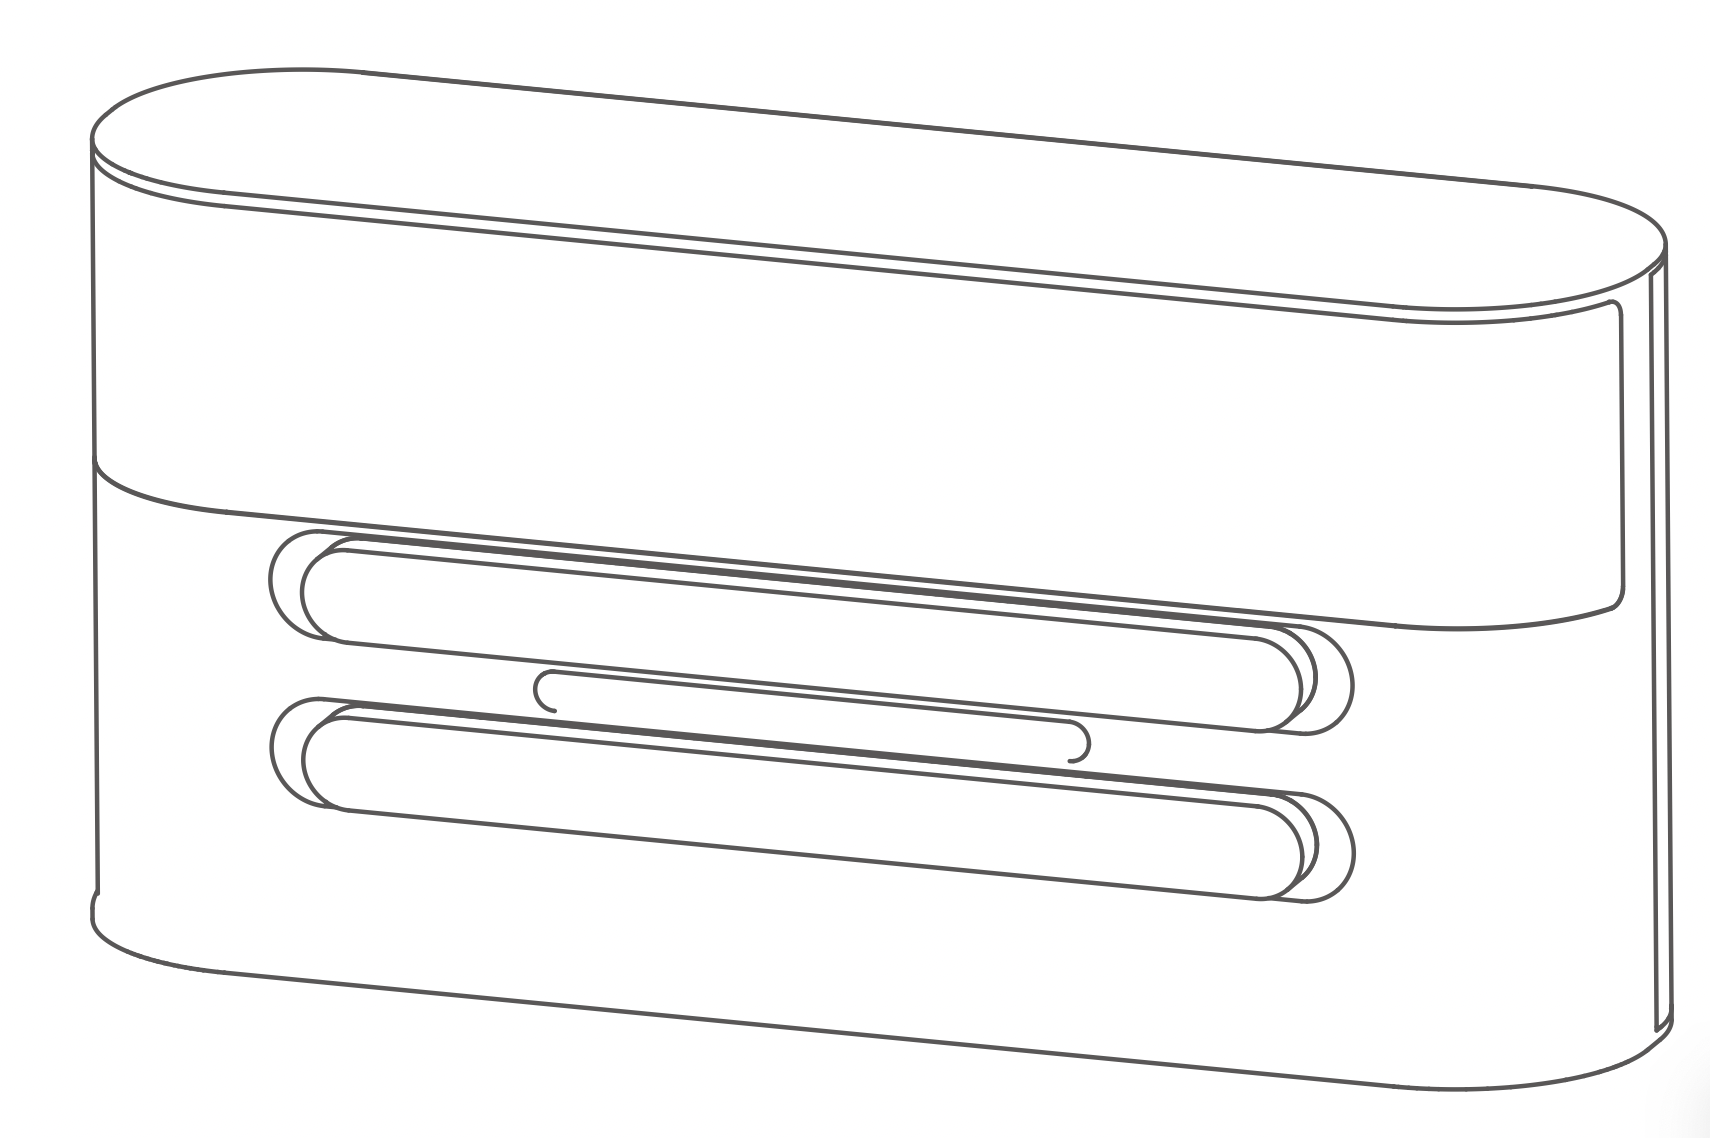
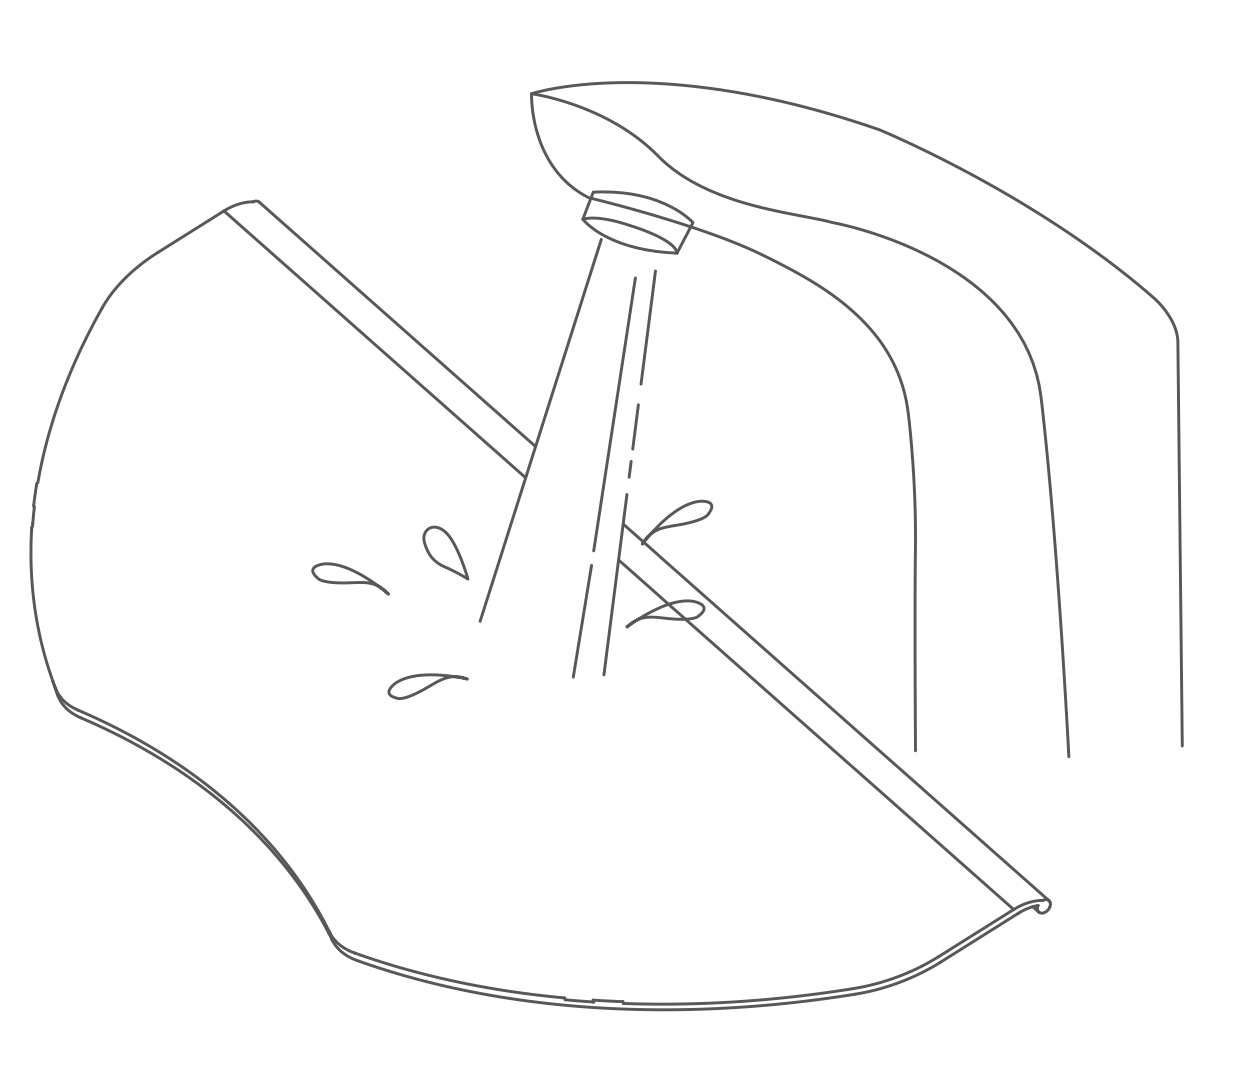
Step 1: add water
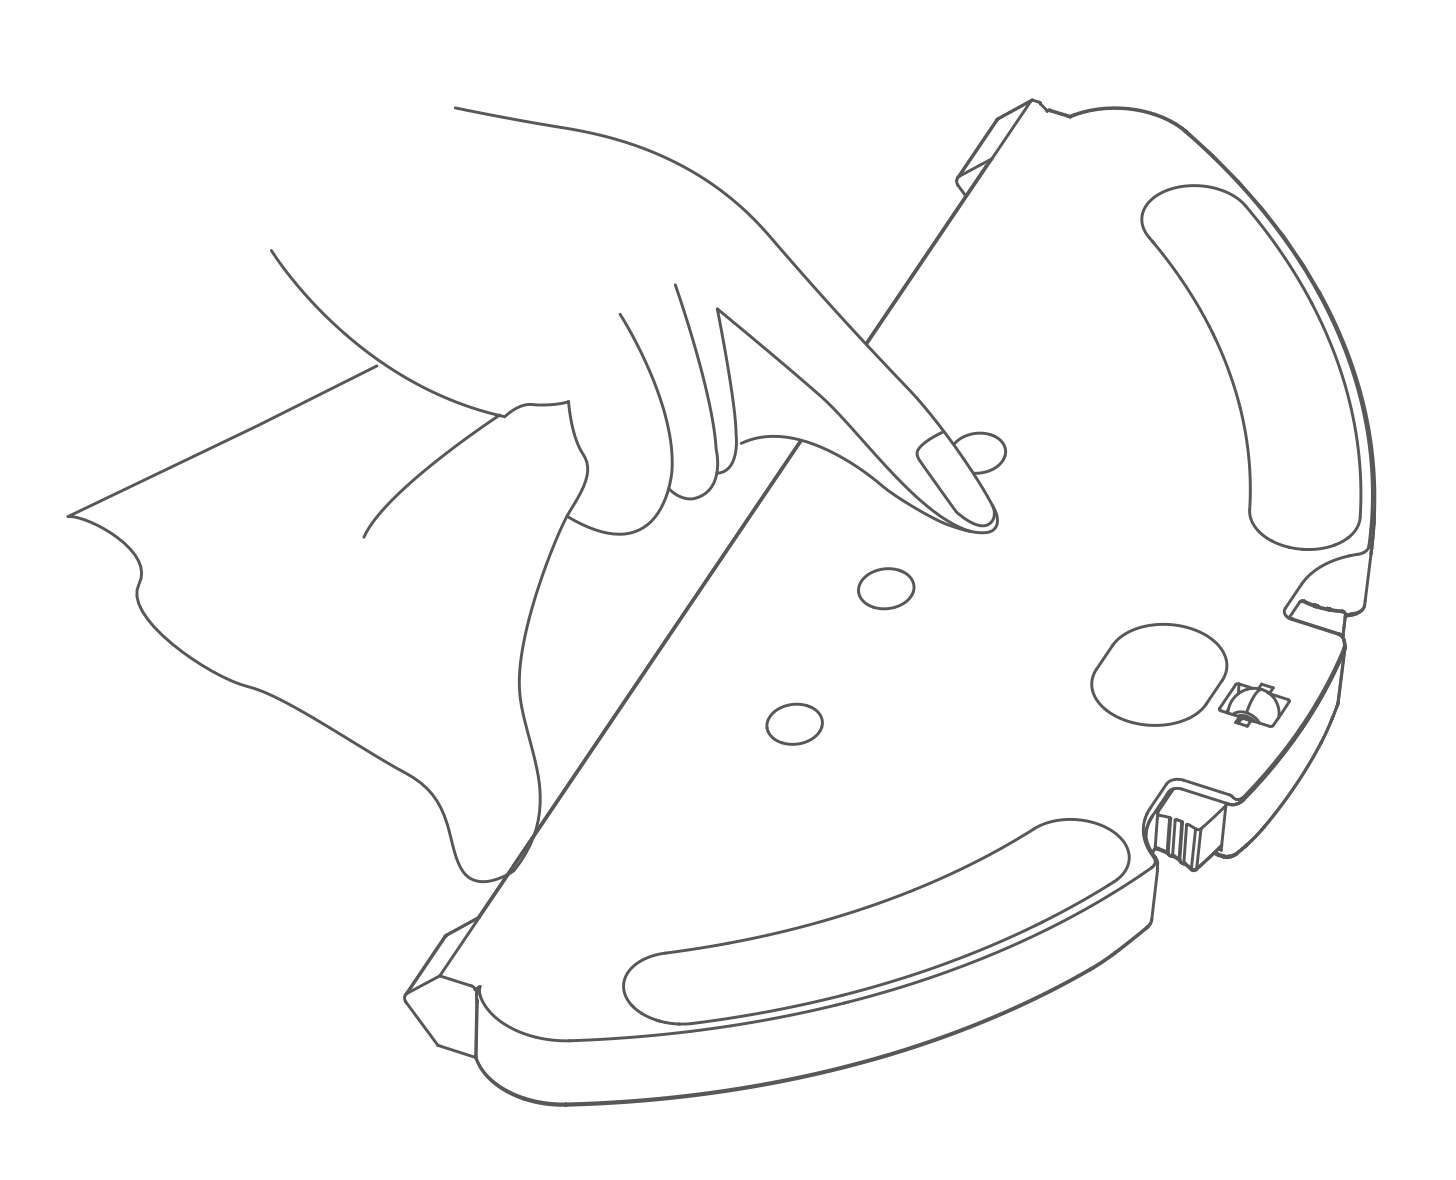
Step 2: buckle up the water tank
Step 3: stick on the mopping cloth
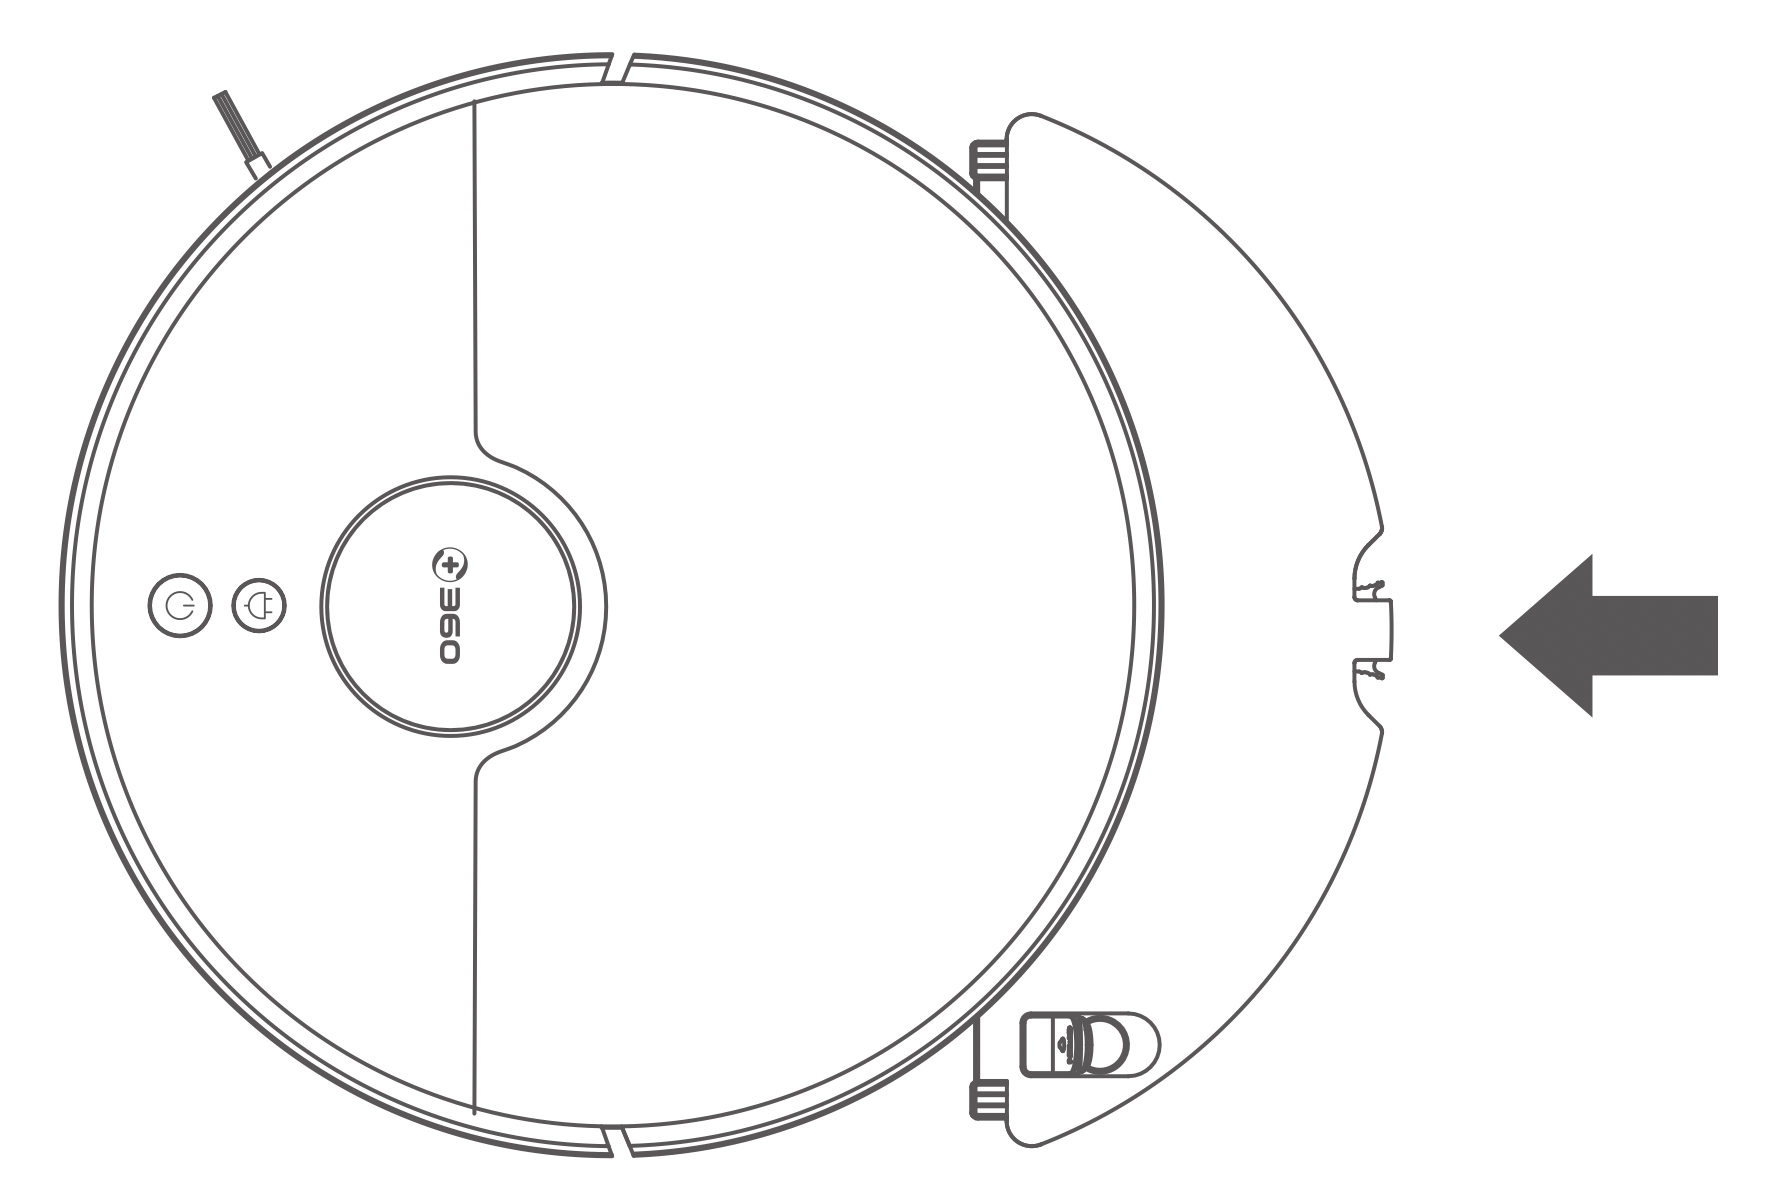
Step 4: Push the water tank horizontally into the bottom of the main unit
In order to ensure the continuous and effective cleaning ability of the product, please clean the water tank and mop after using the water tank assembly.
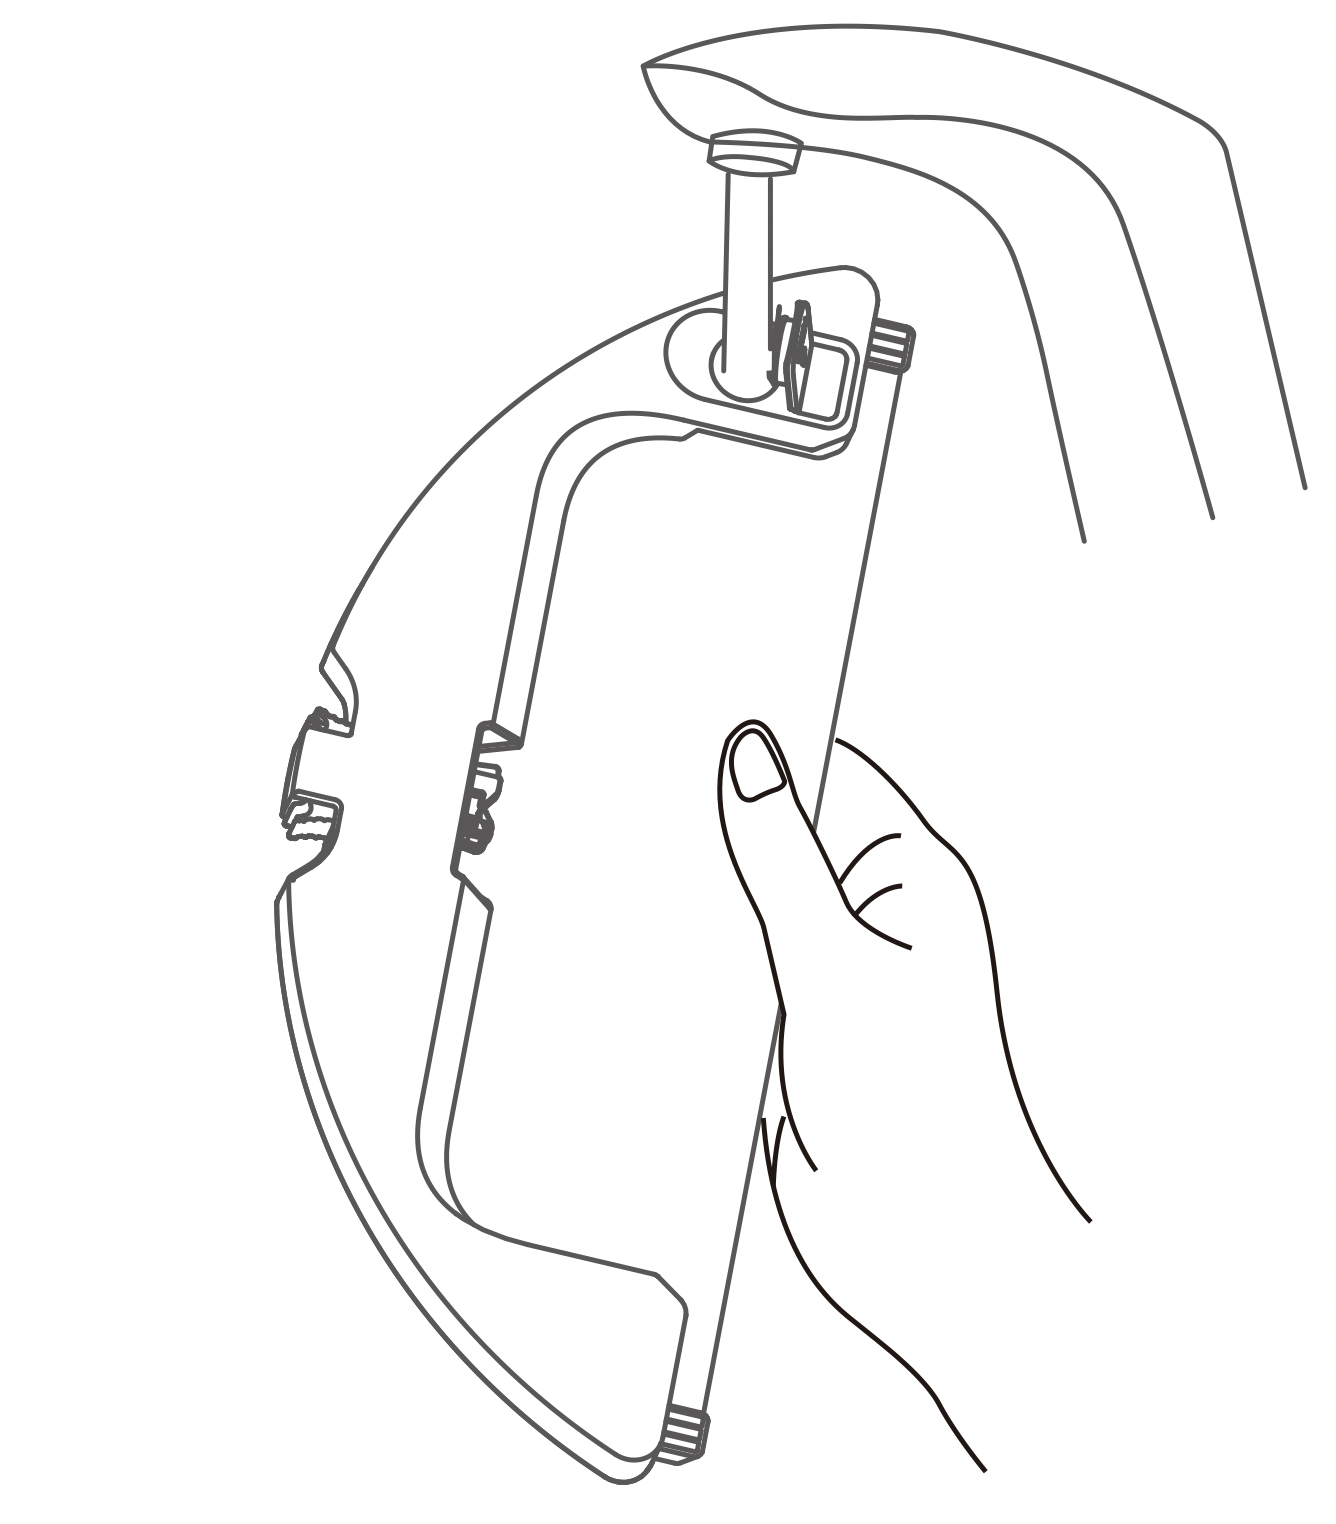
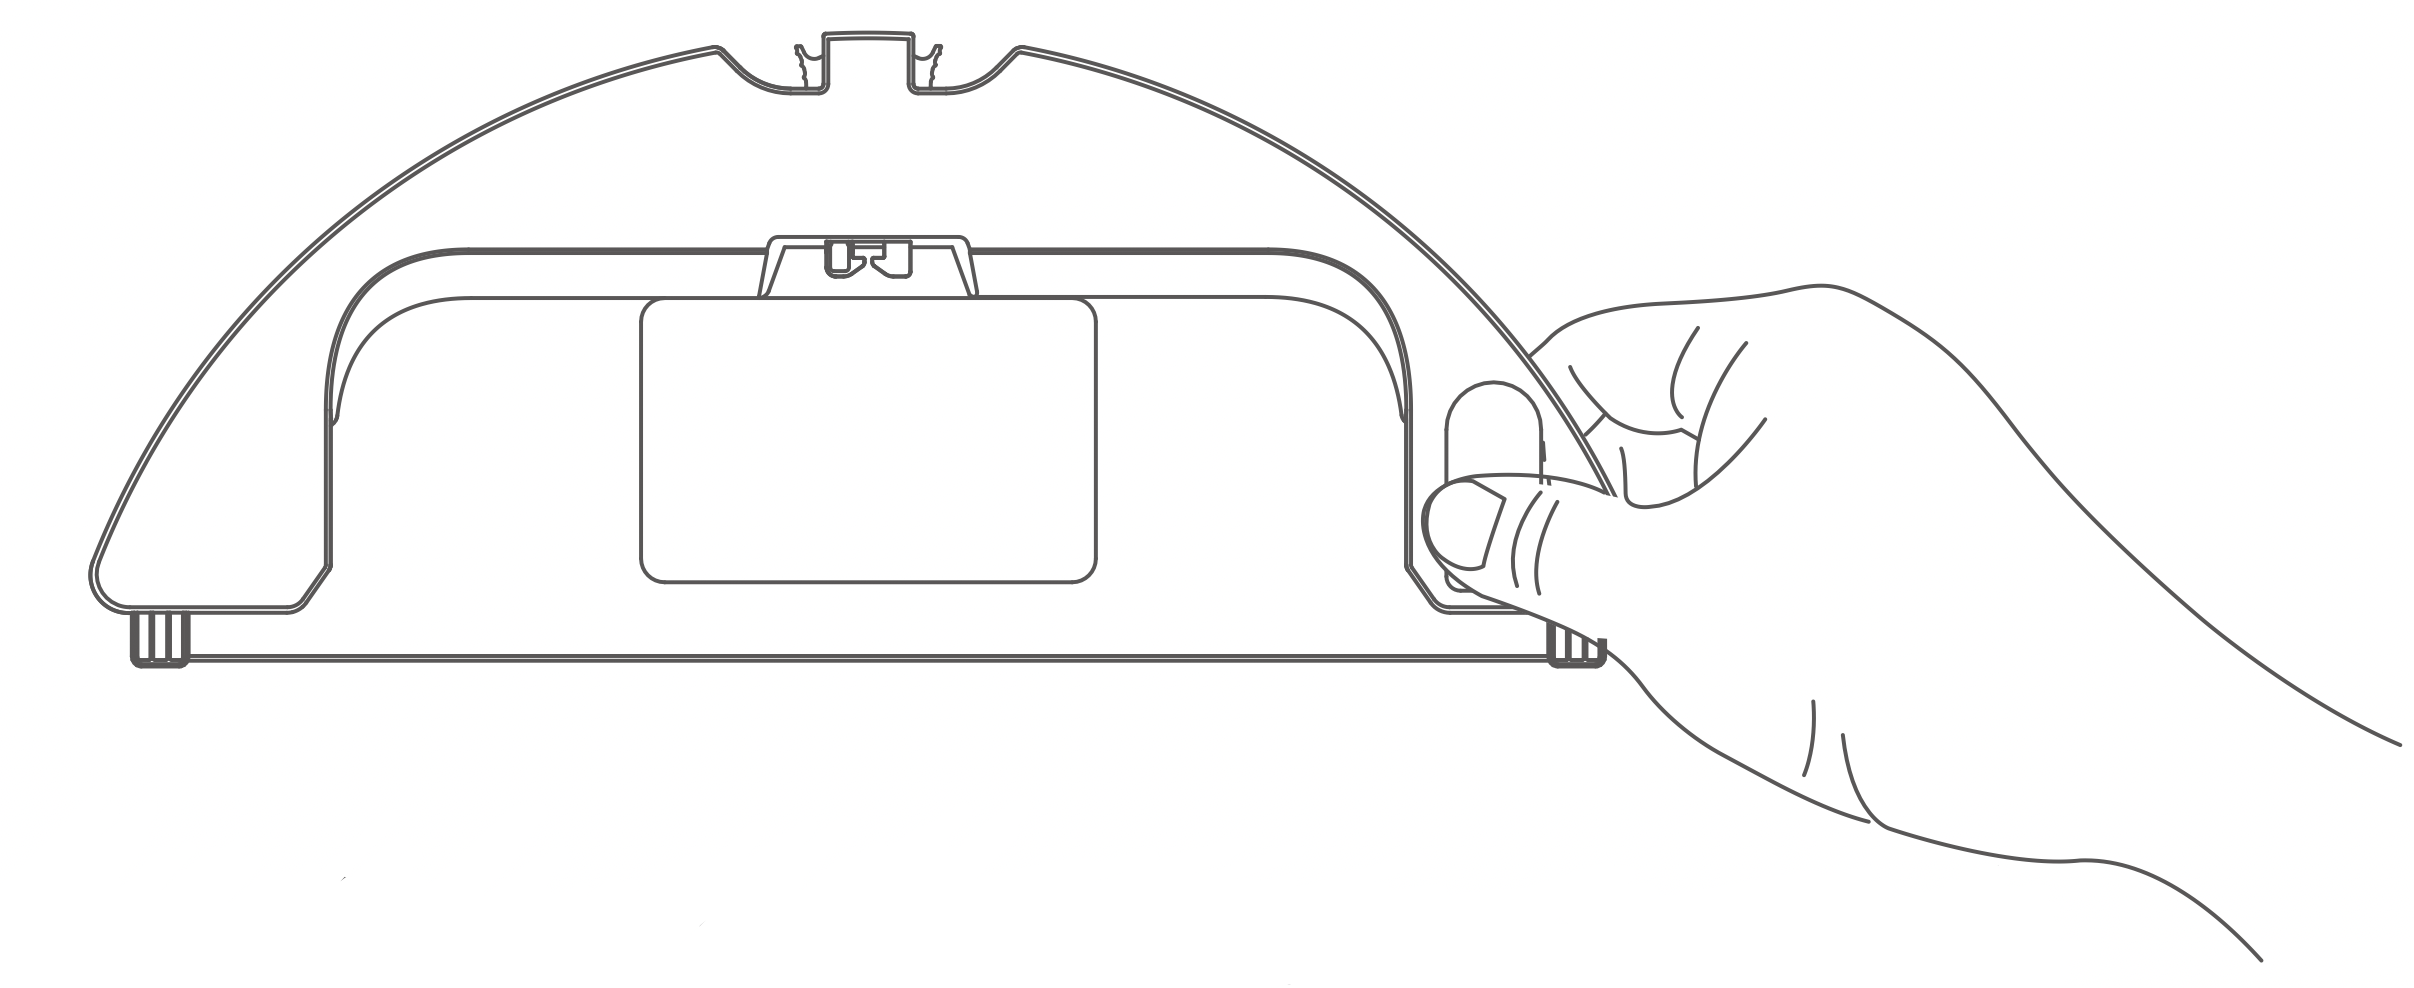
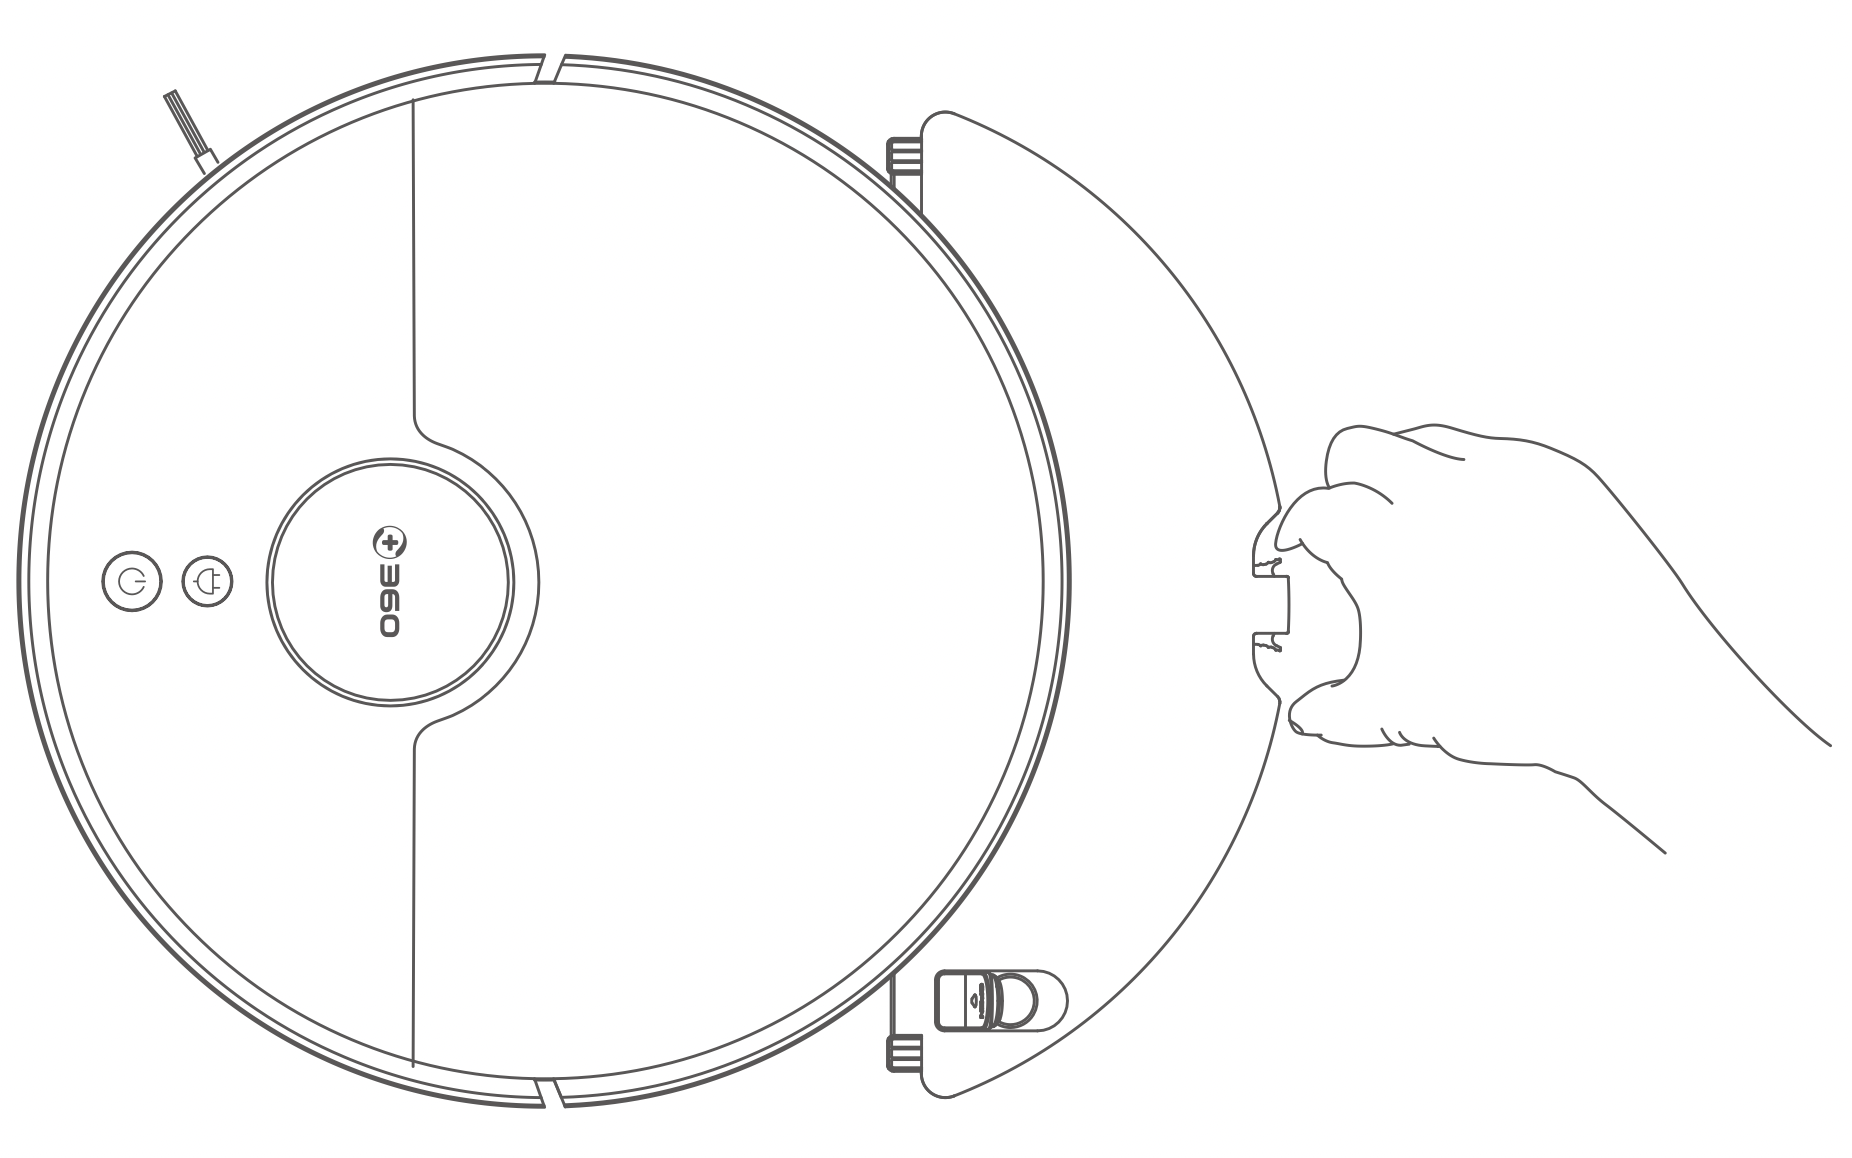
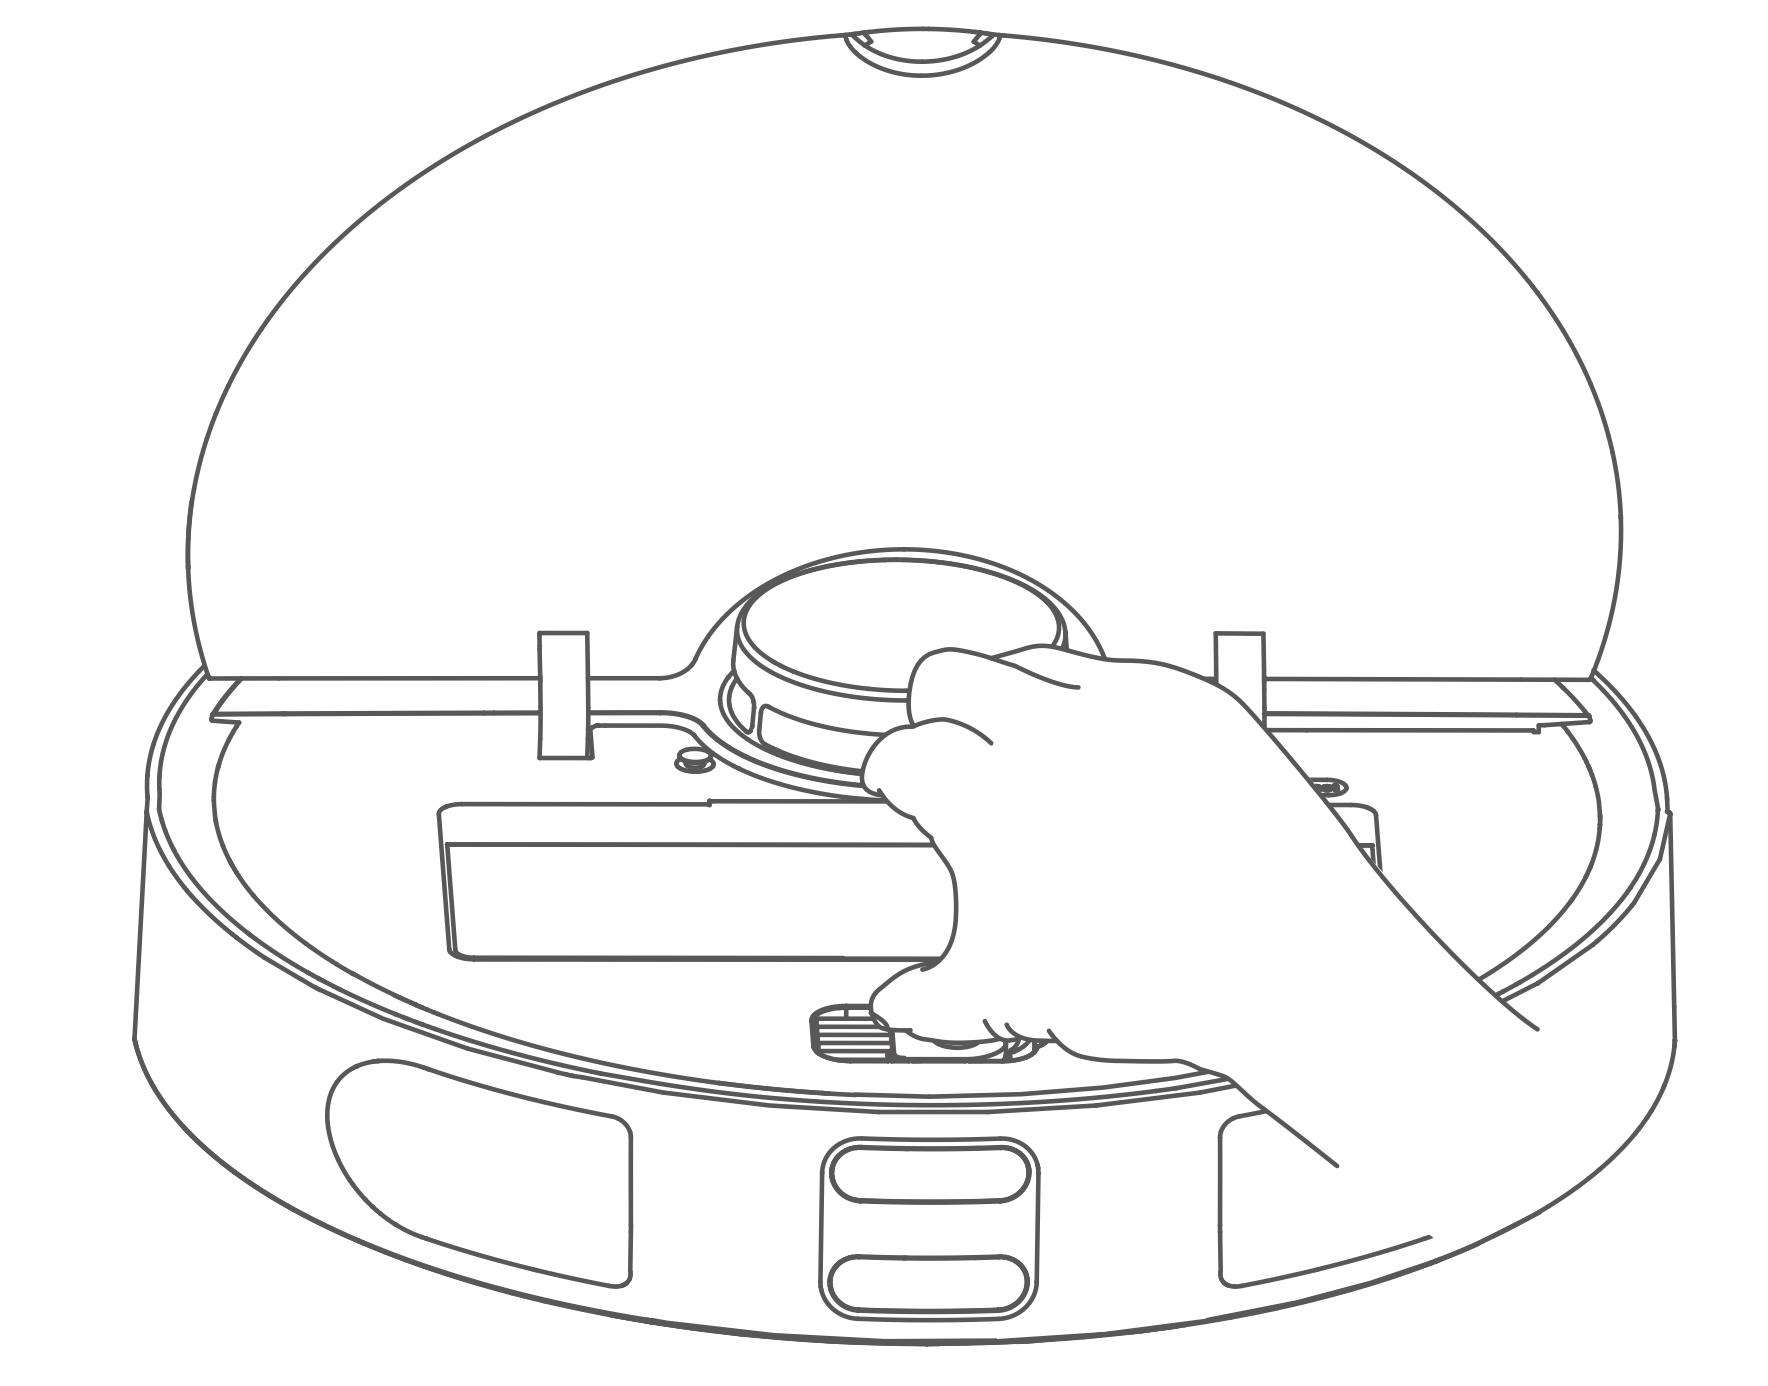
First step: Hold the two buttons above the water tank and pull out the water tank
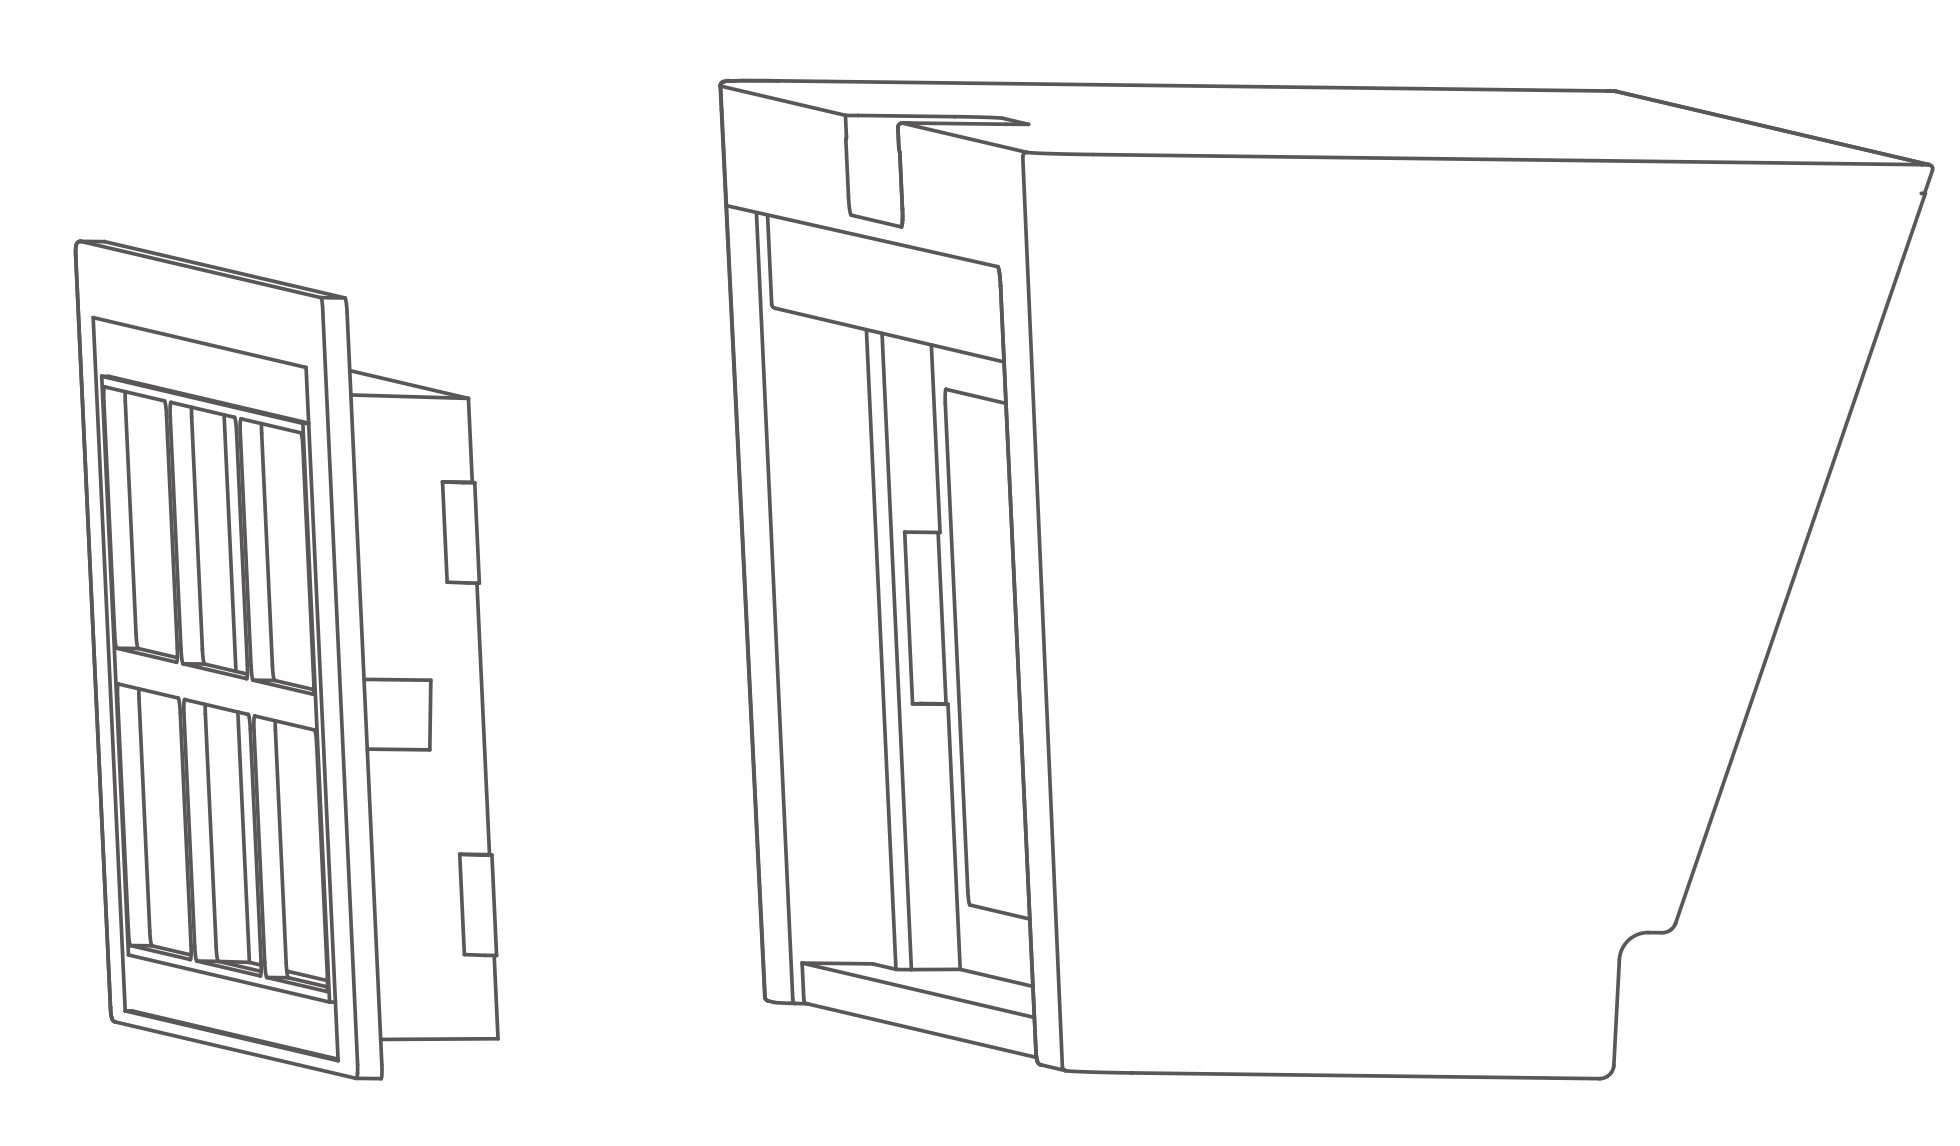
Second step: Remove mopping cloth
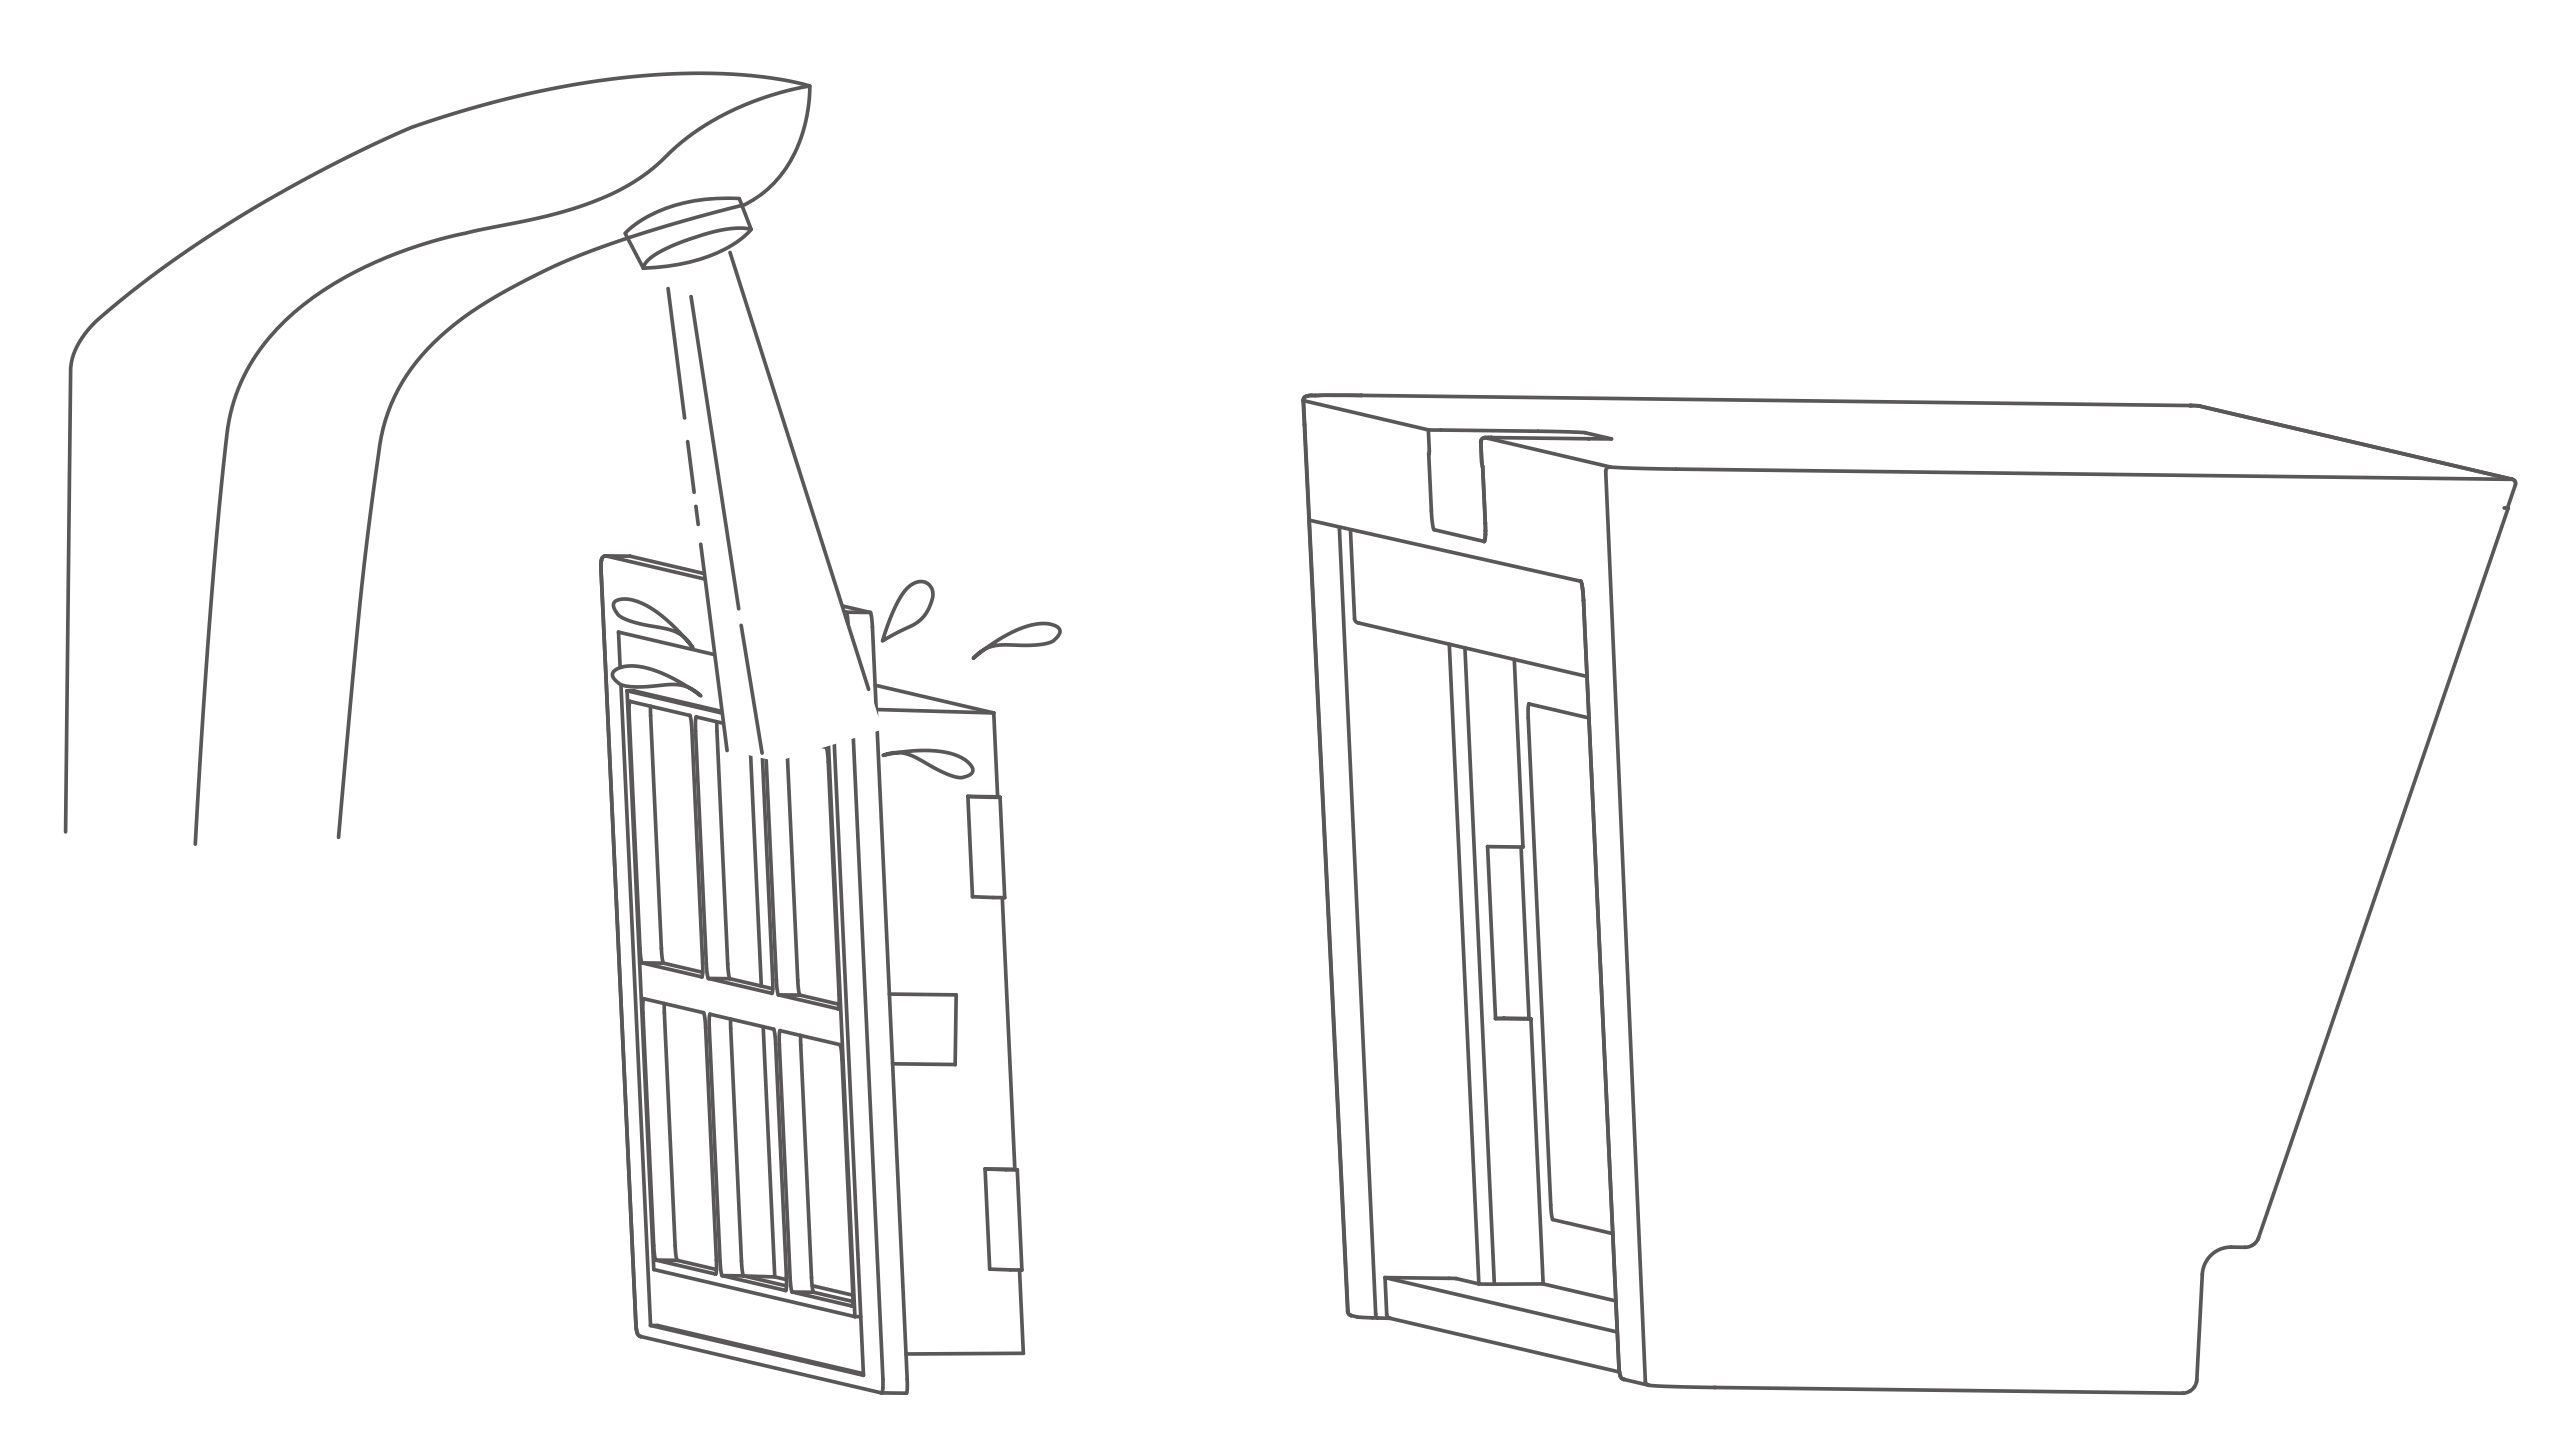
Third step: Clean mopping cloth
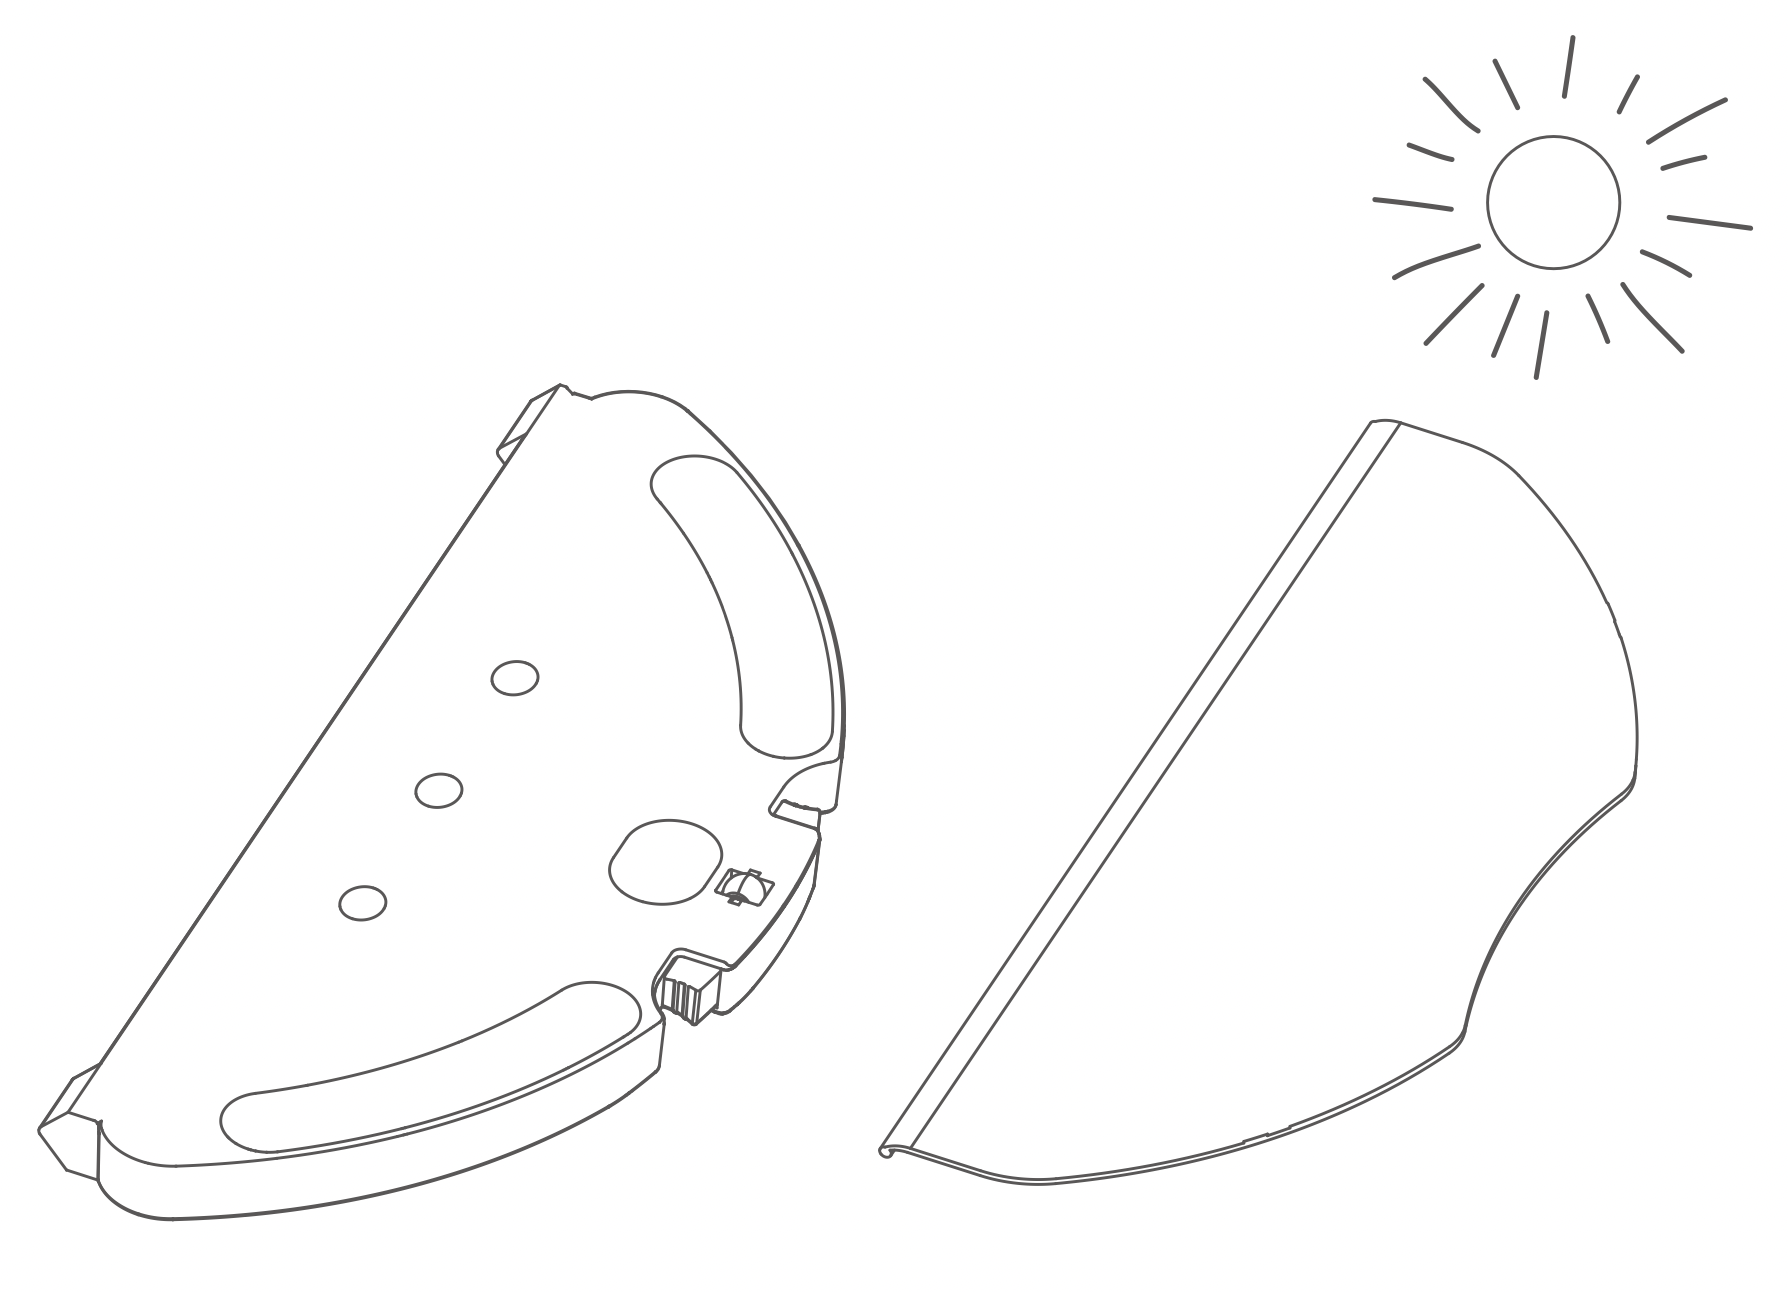
Fourth step: Dry water tank
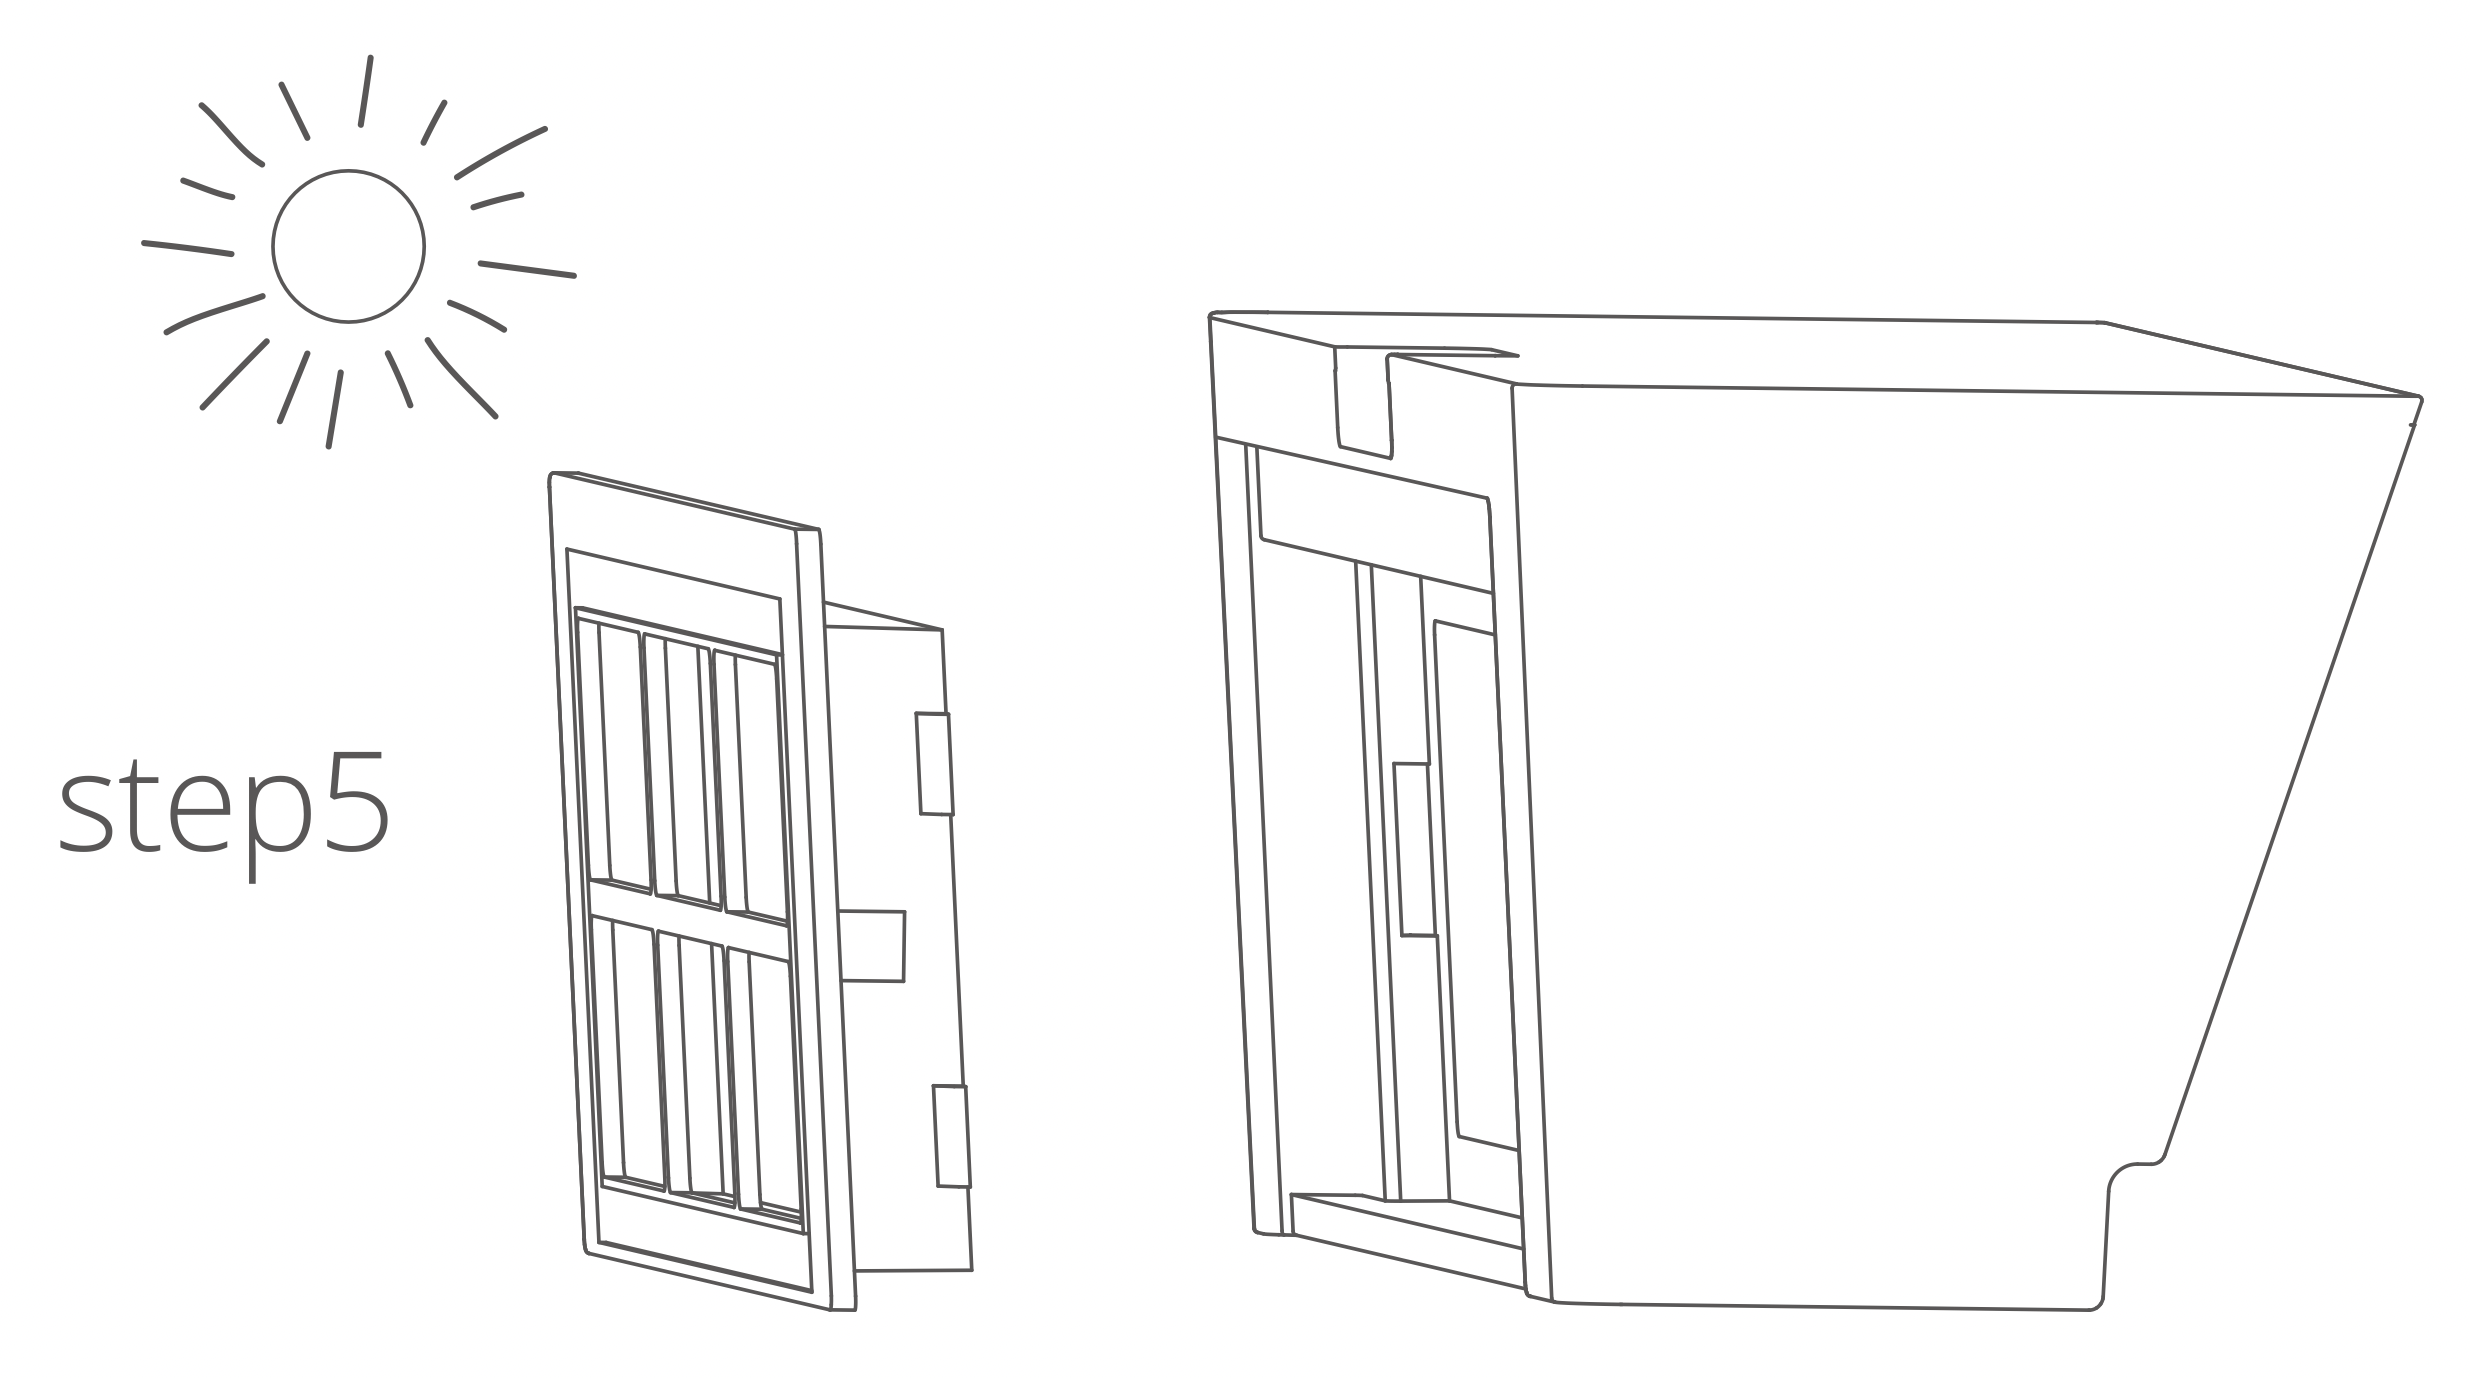
Fifth step: Air-dry the water tank and mopping cloth for next use
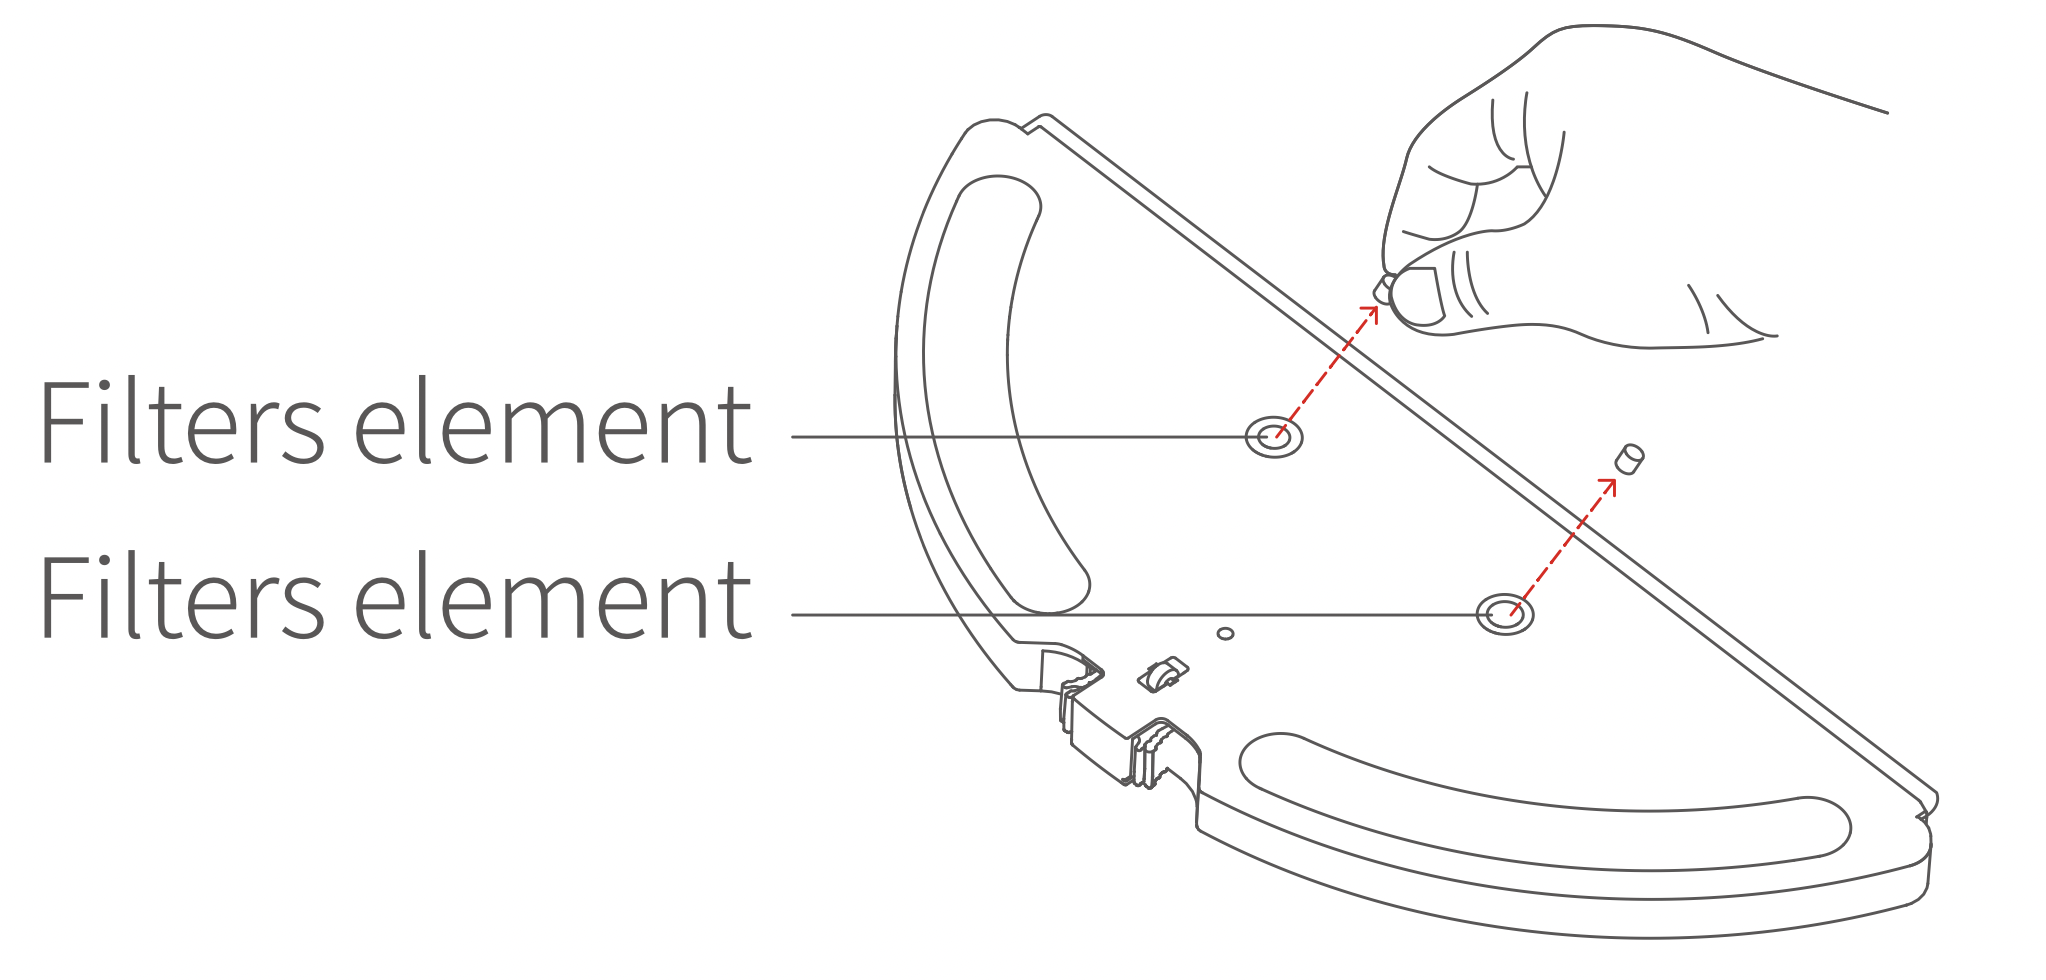
Tips: In order to guarantee the optimal water seepage effects, you should replace the filter element monthly.
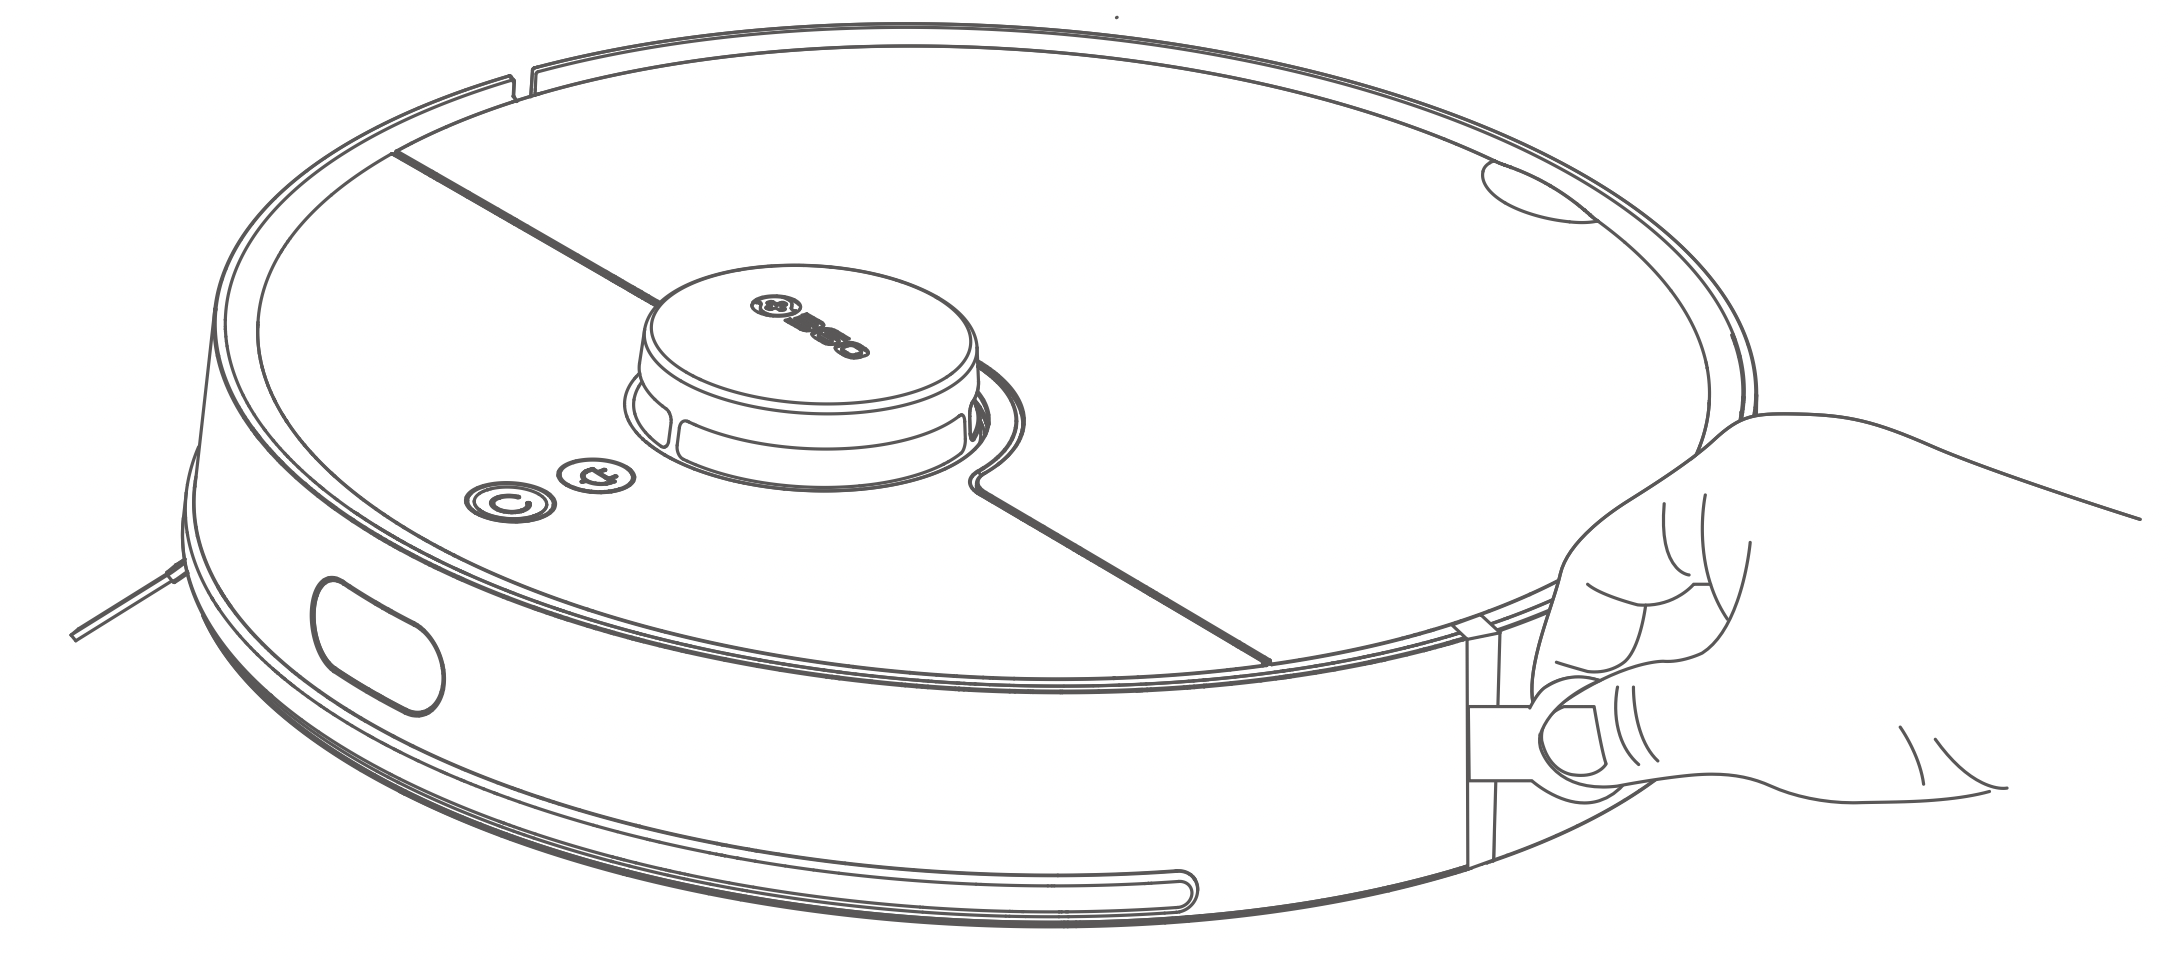
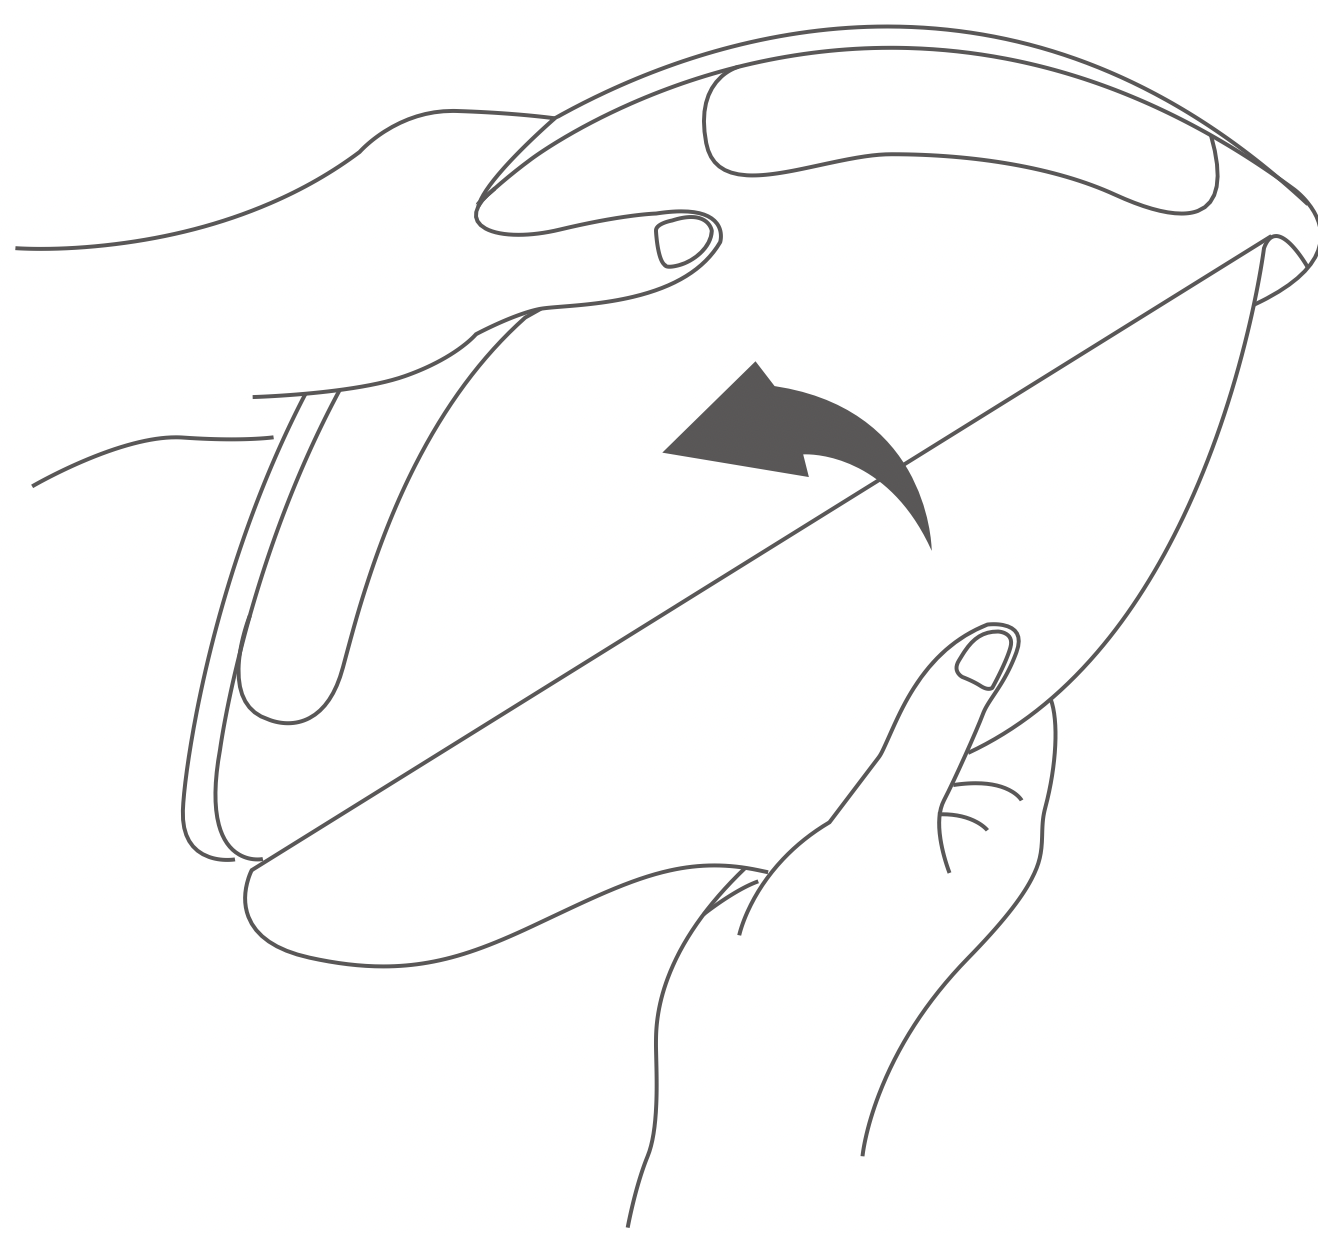
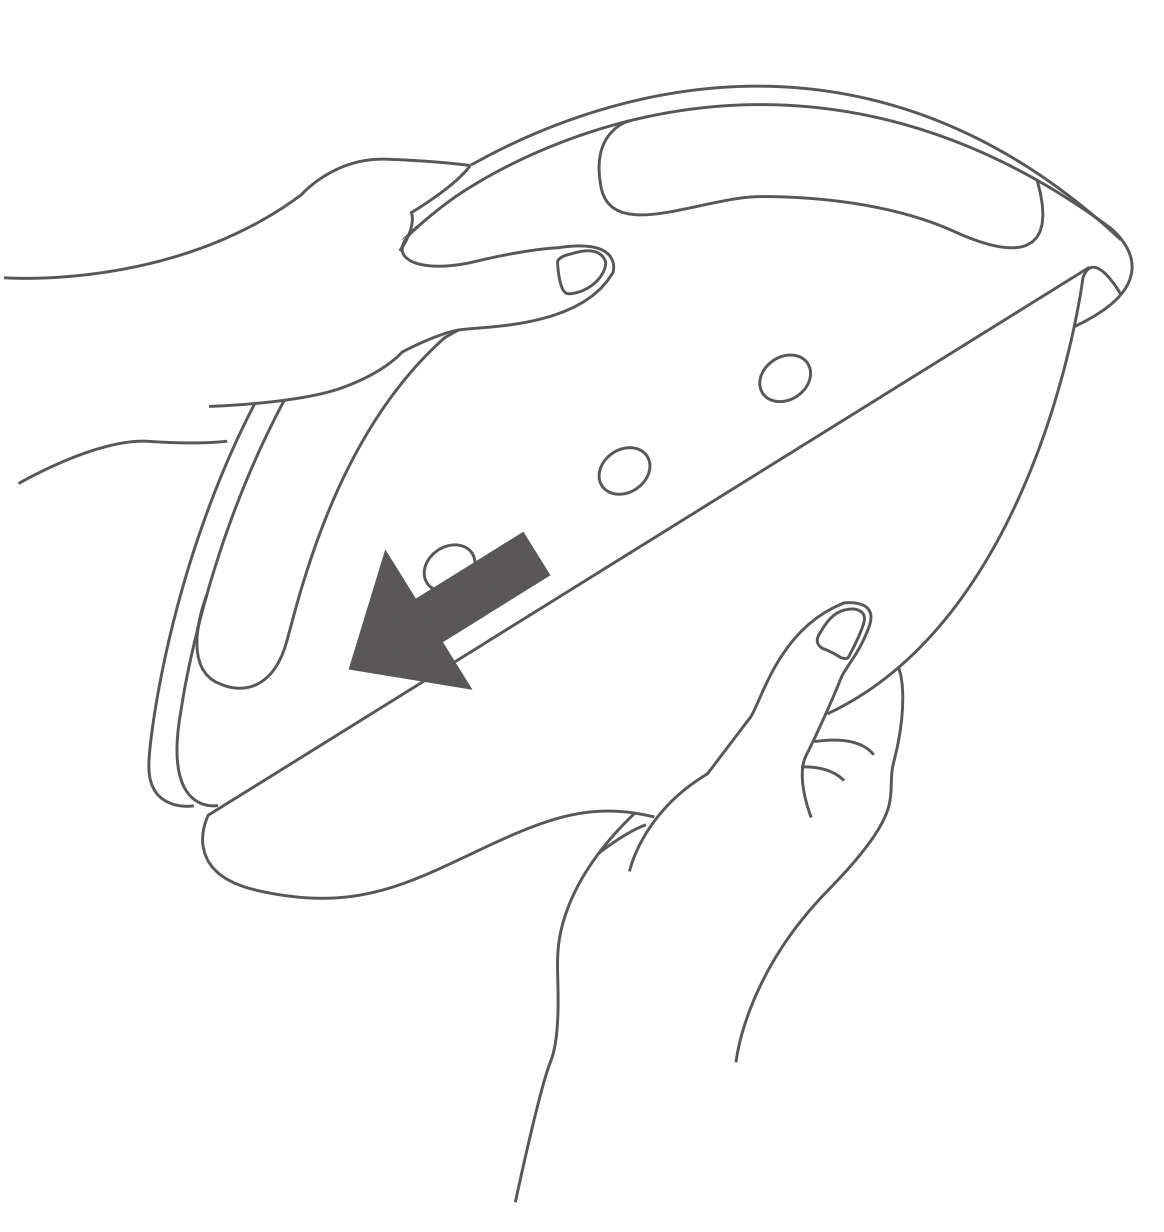
Step 1: Open cover to remove the dust bin.
Step 2: Open the dust bin buckle and empty the dust bin. To avoid spilling the dust, keep the top cover of the dust bin facing up, hold the top cover with your right hand and the transparent dust bin with your left hand. To avoid clogging of the filter, tap the dust bin when you empty it (it is recommended to clean it at least once a week).

Step 3: After a longer period of use, remove the filters component: the high-efficiency HEPA washable filter (recommended to replace a set of filters every 6-12 months to ensure good cleaning results).
Step 4: Rinse dust bin and filters (not too frequent, recommended monthly cleaning).
Step 5: After rinsing, dry the water droplets. Be sure to dry Dust bin and filters completely before reinstalling them to ensure the lifetime of the device.
Note:
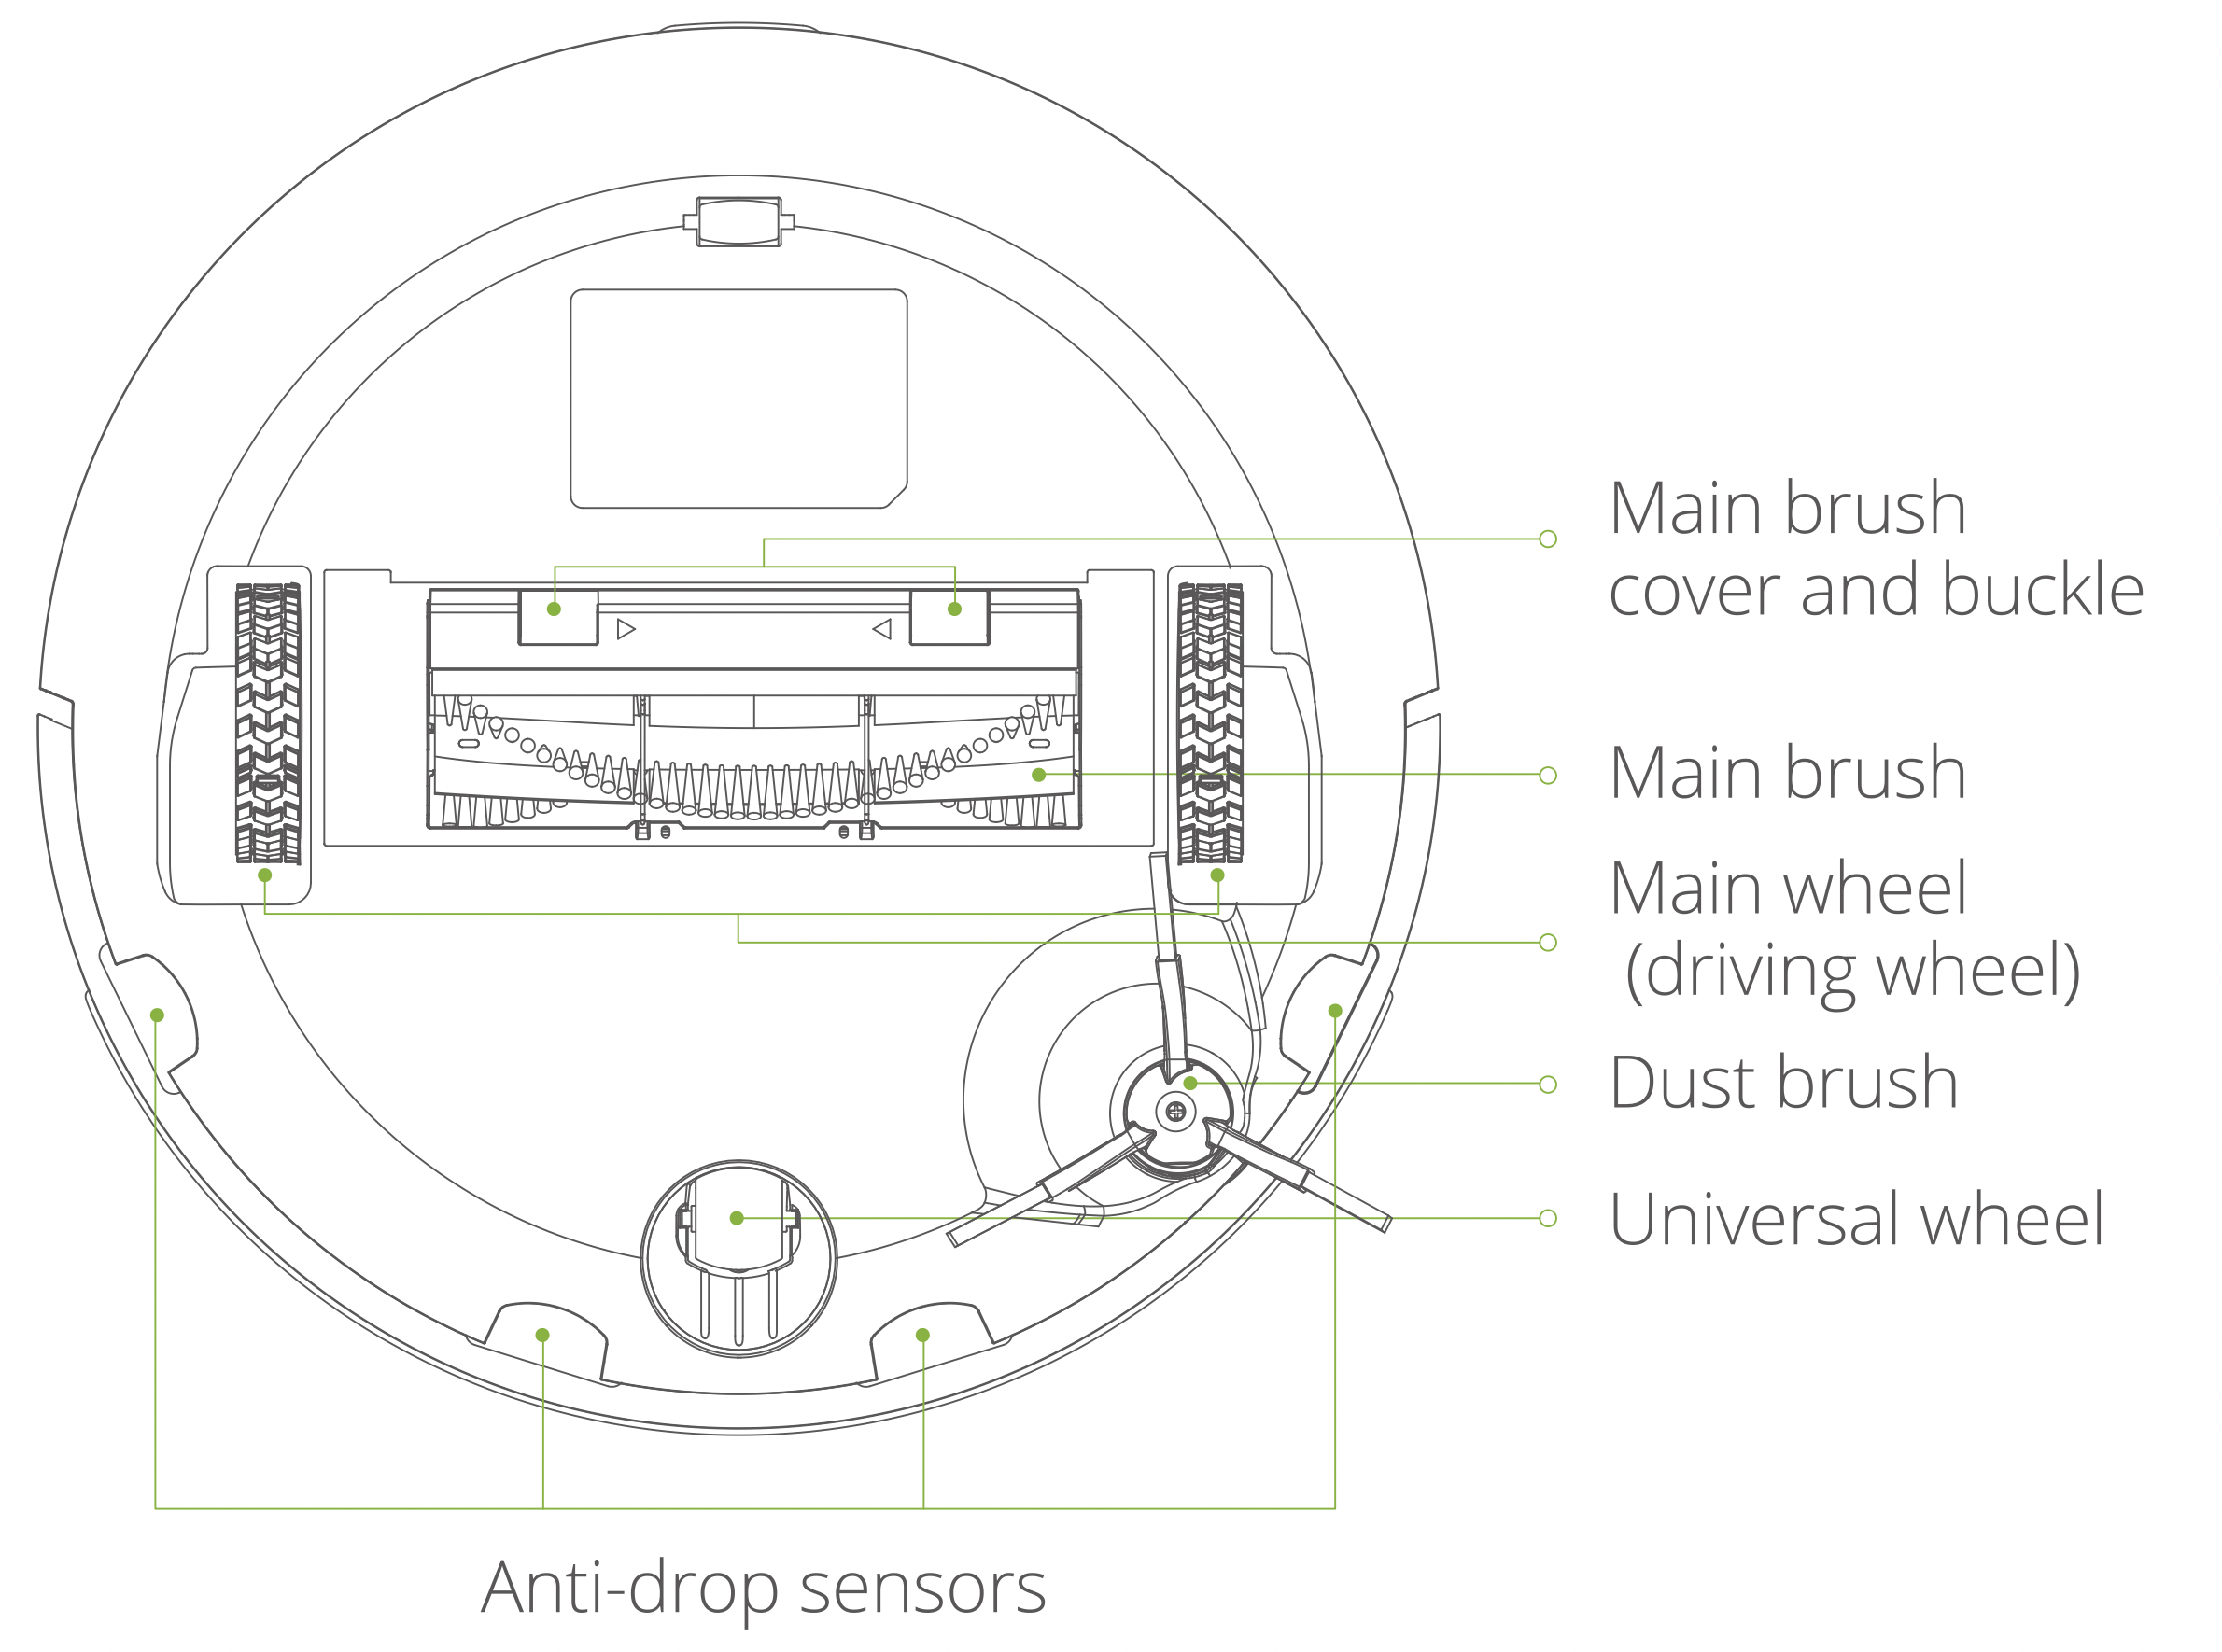
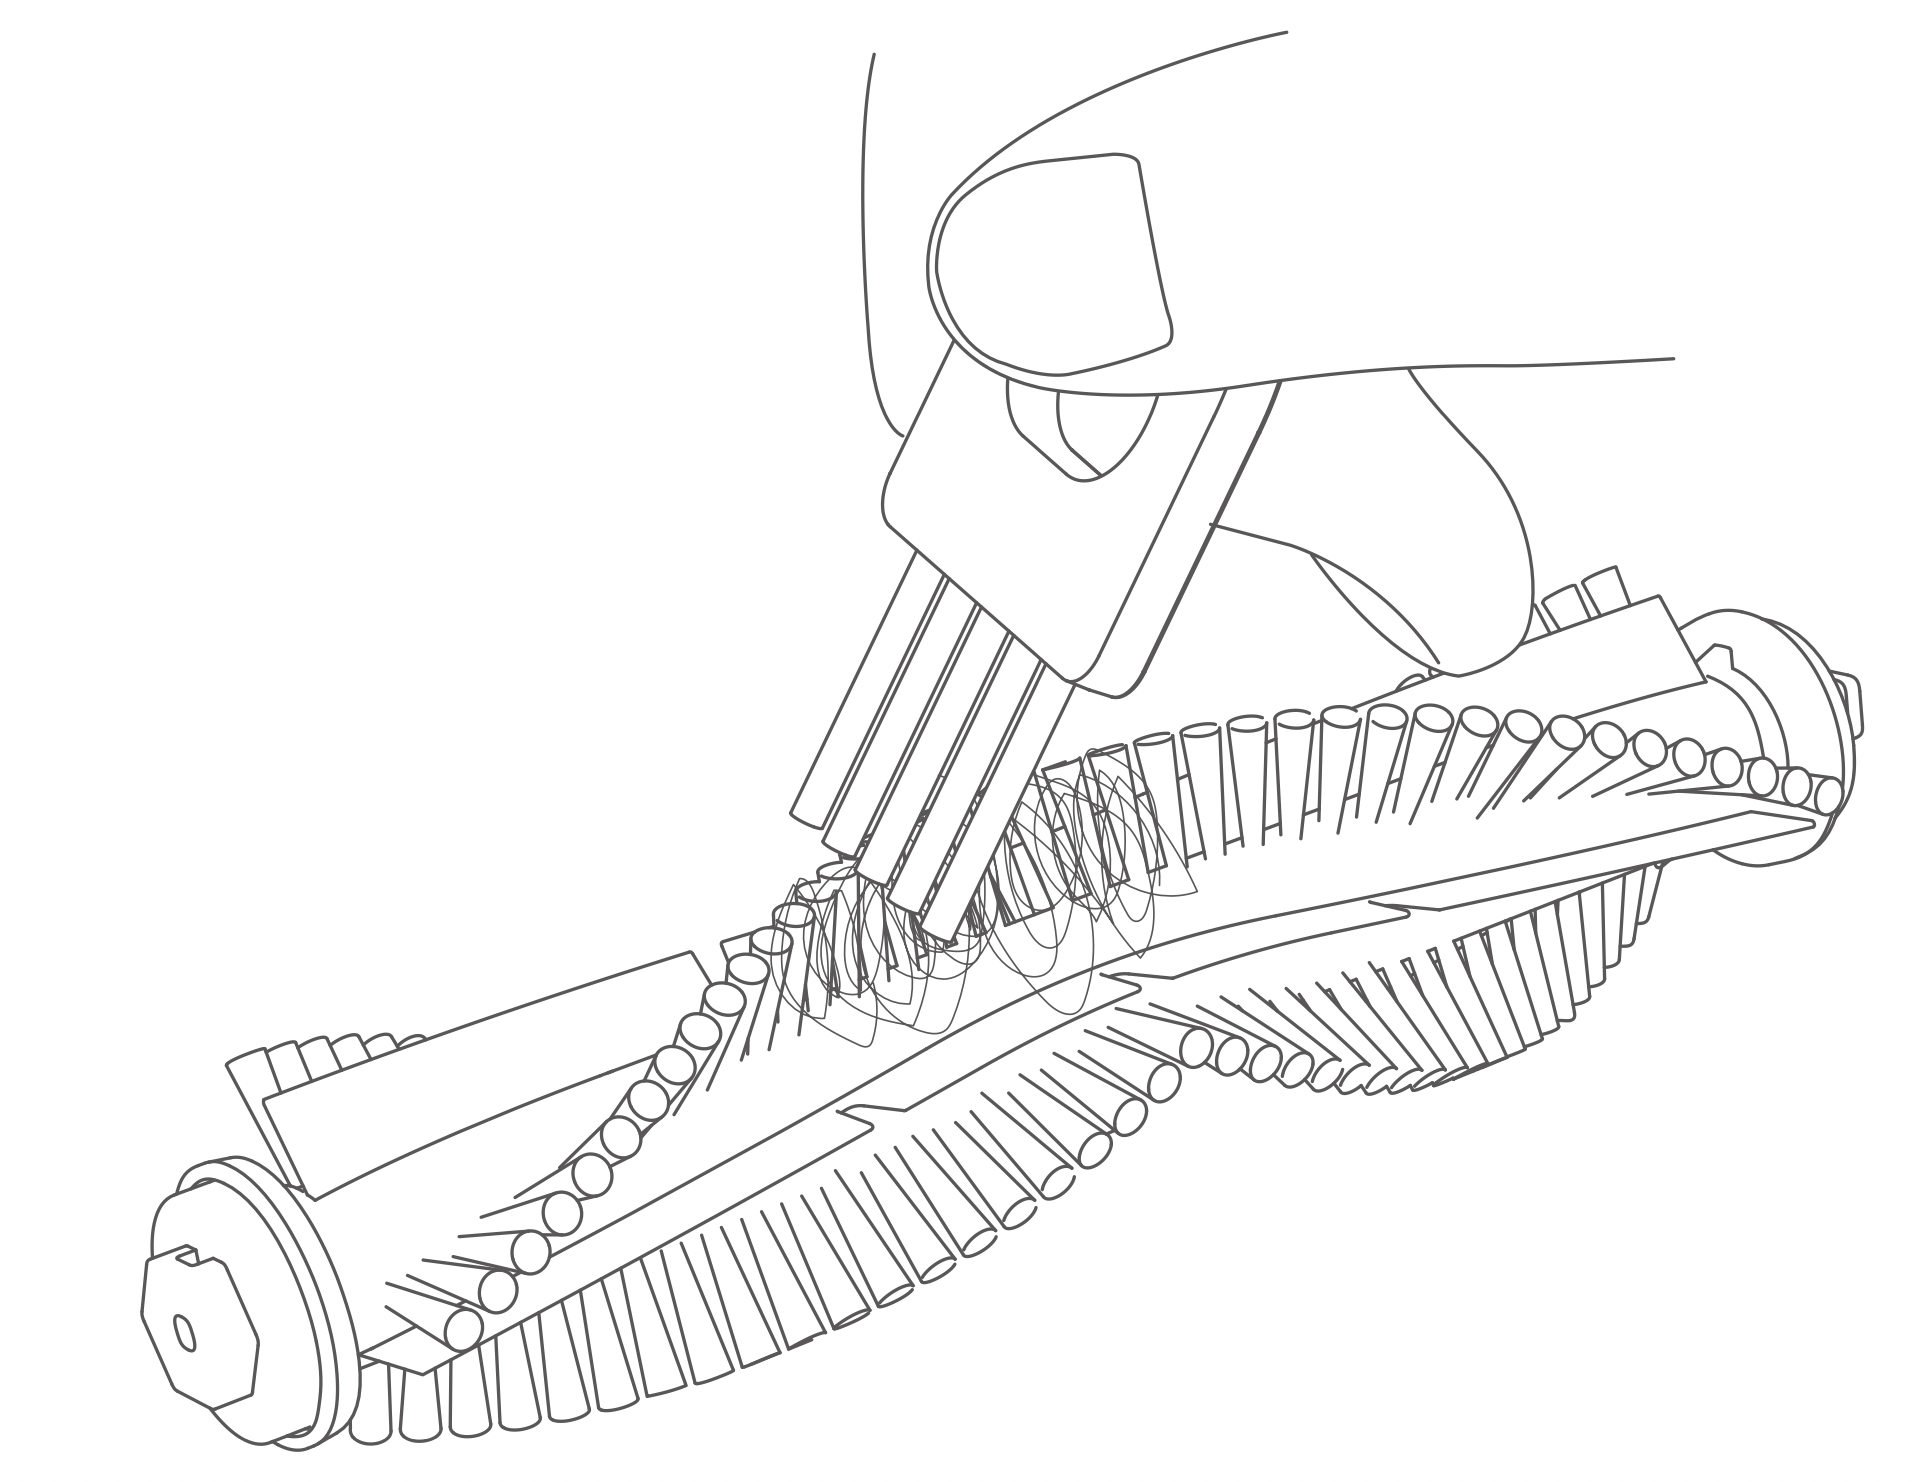
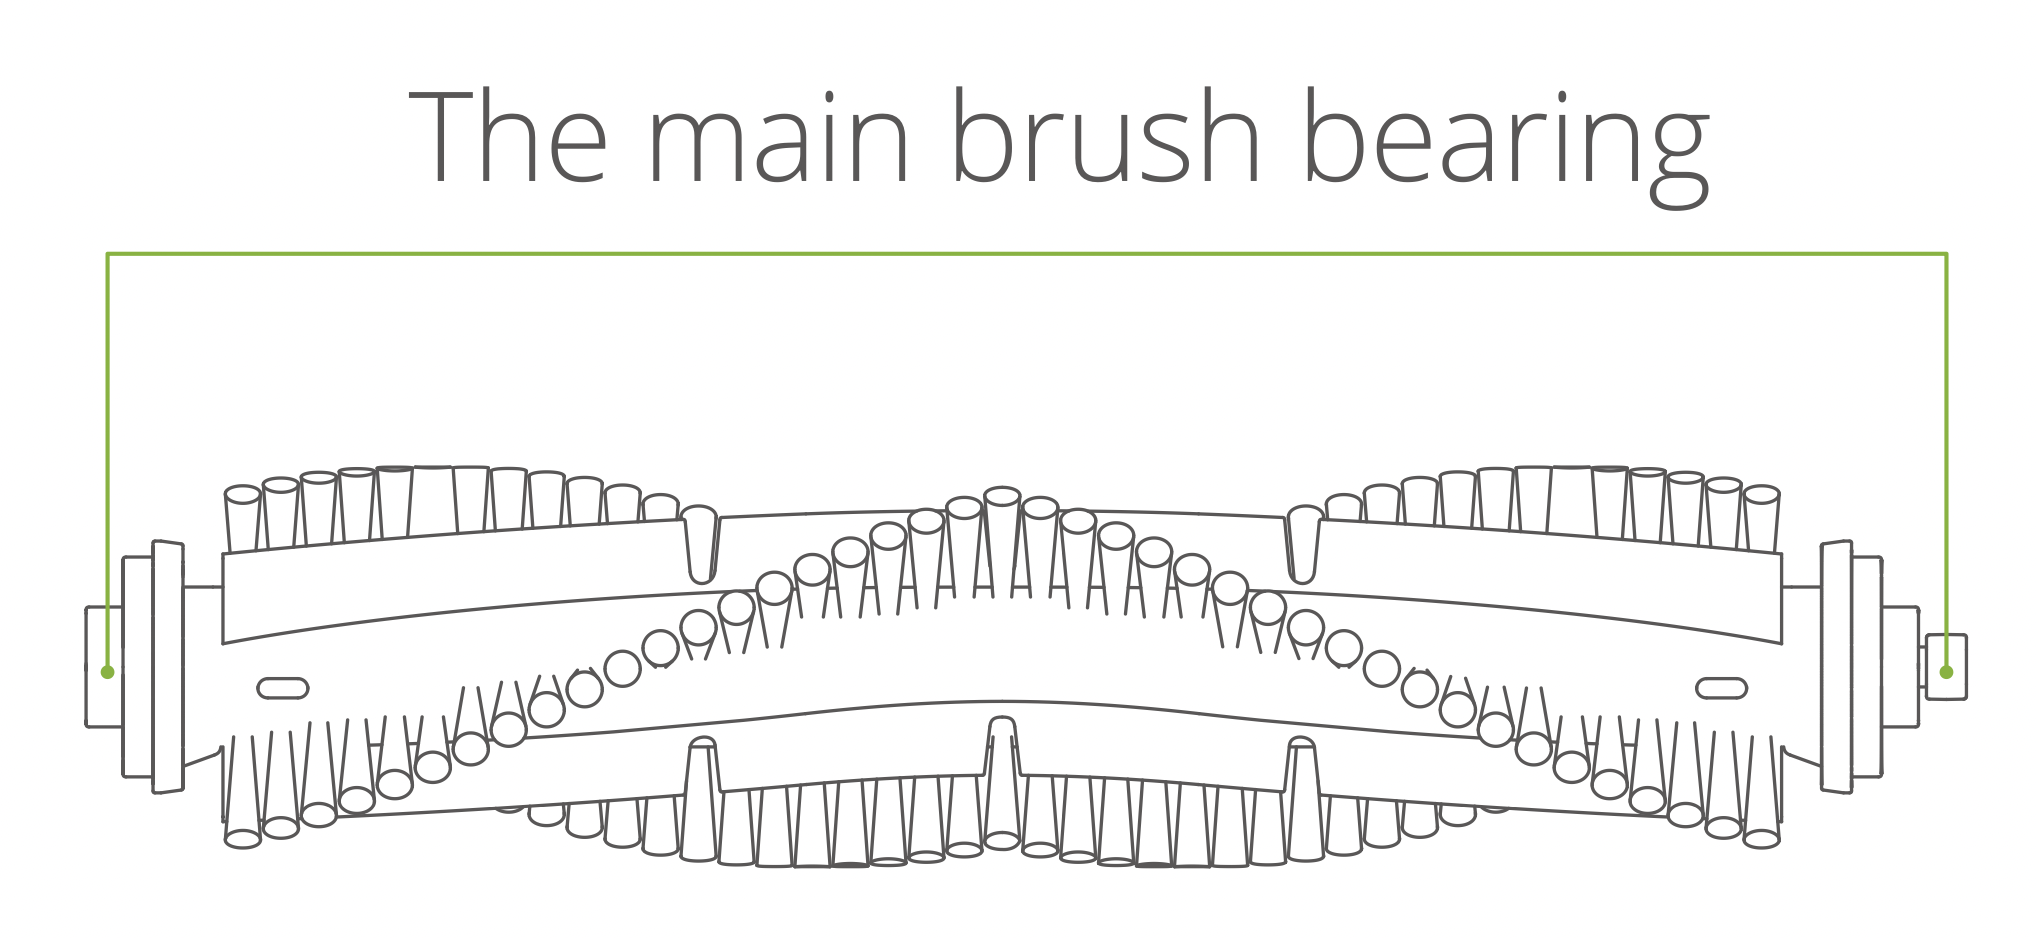
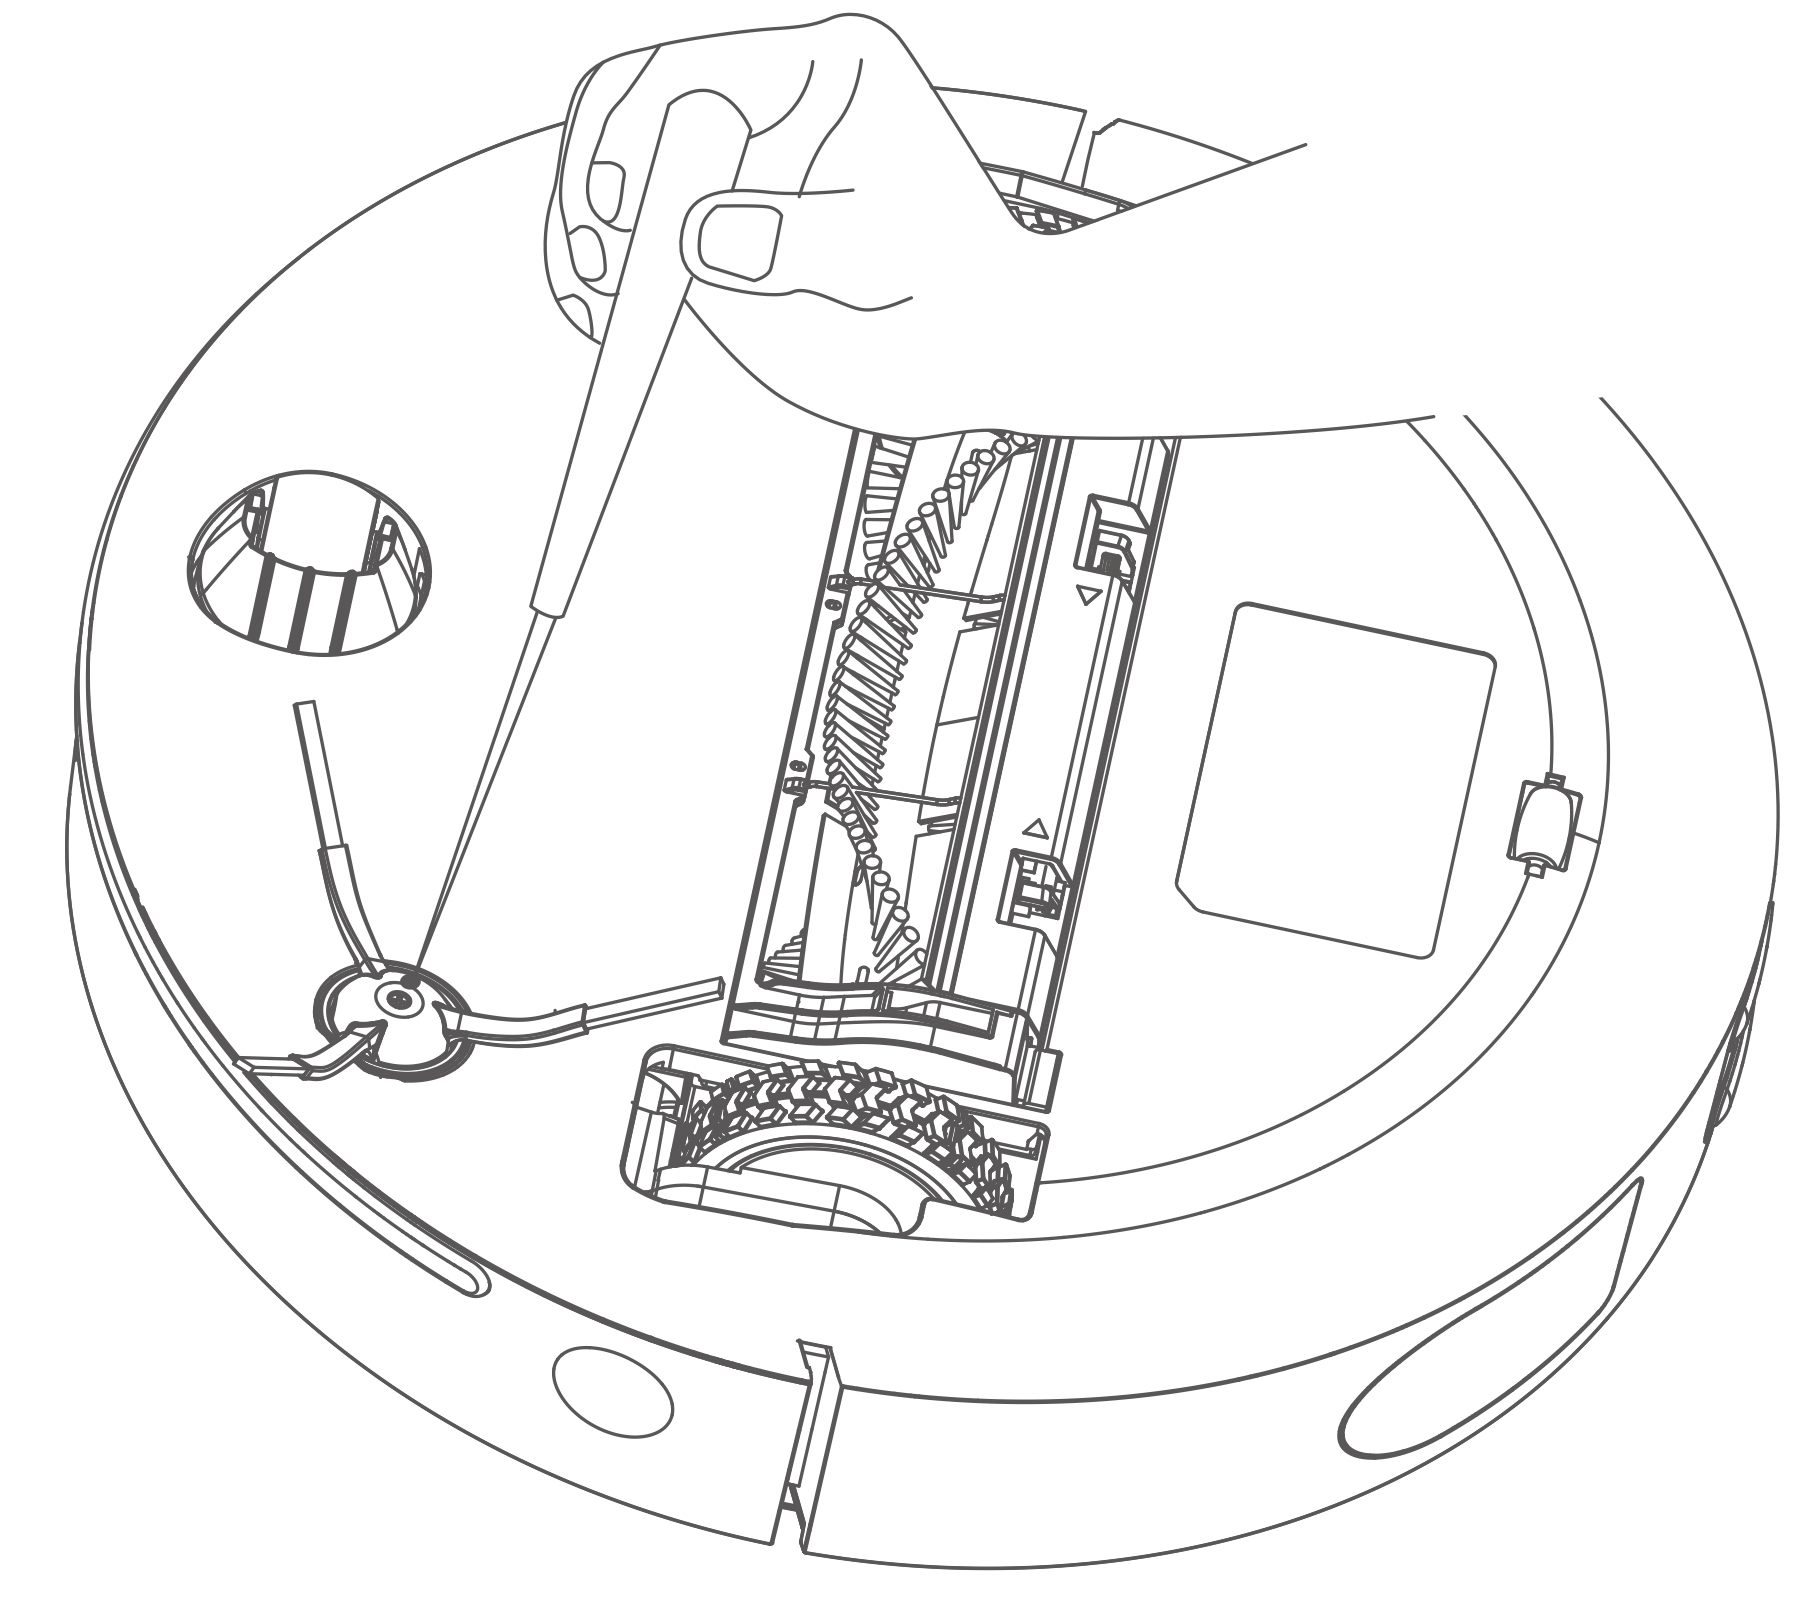
Note: It is recommended to replace the main brush every 6-12 months to ensure good cleaning results.
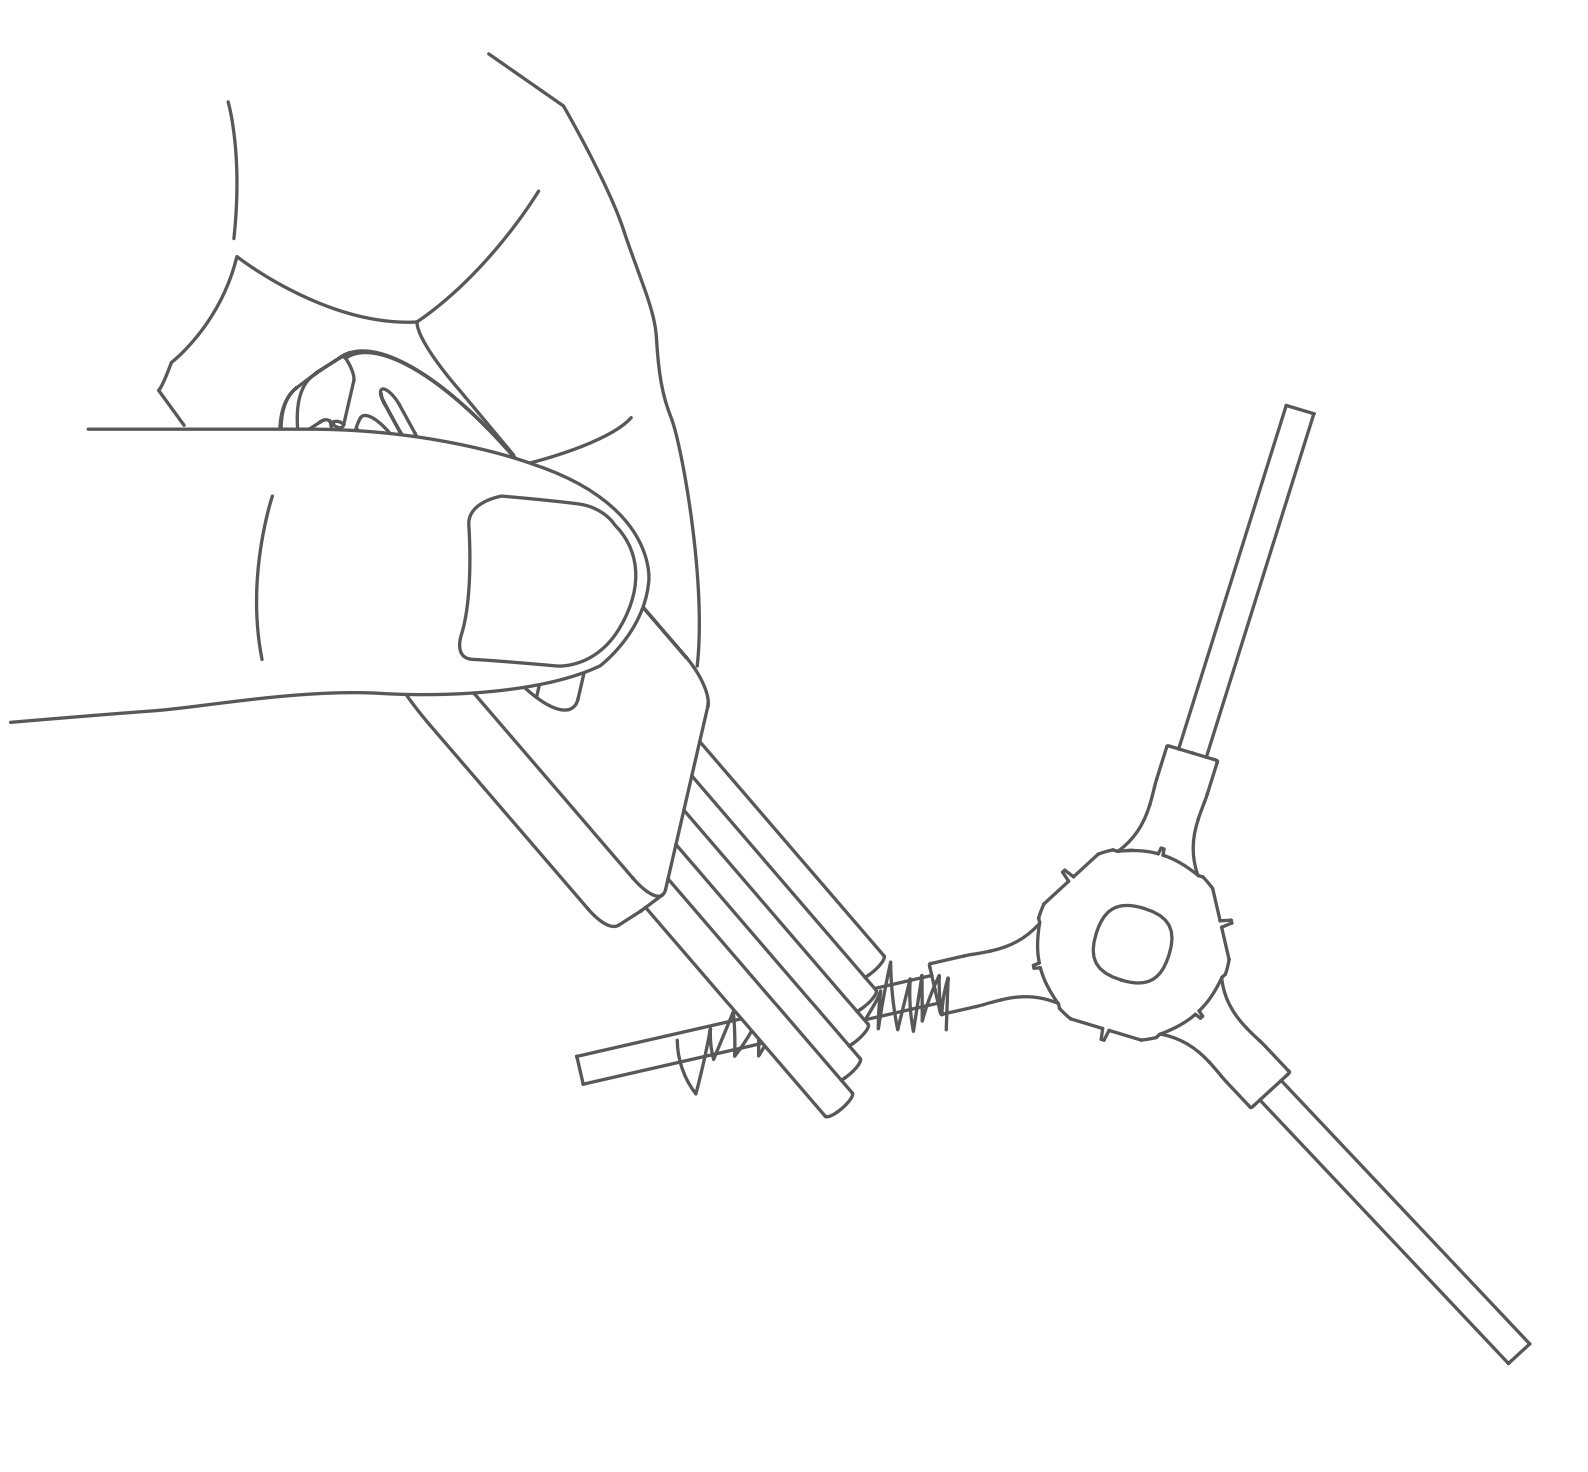
Note: It is recommended to replace the side brush every 3-6 months to ensure good cleaning results.
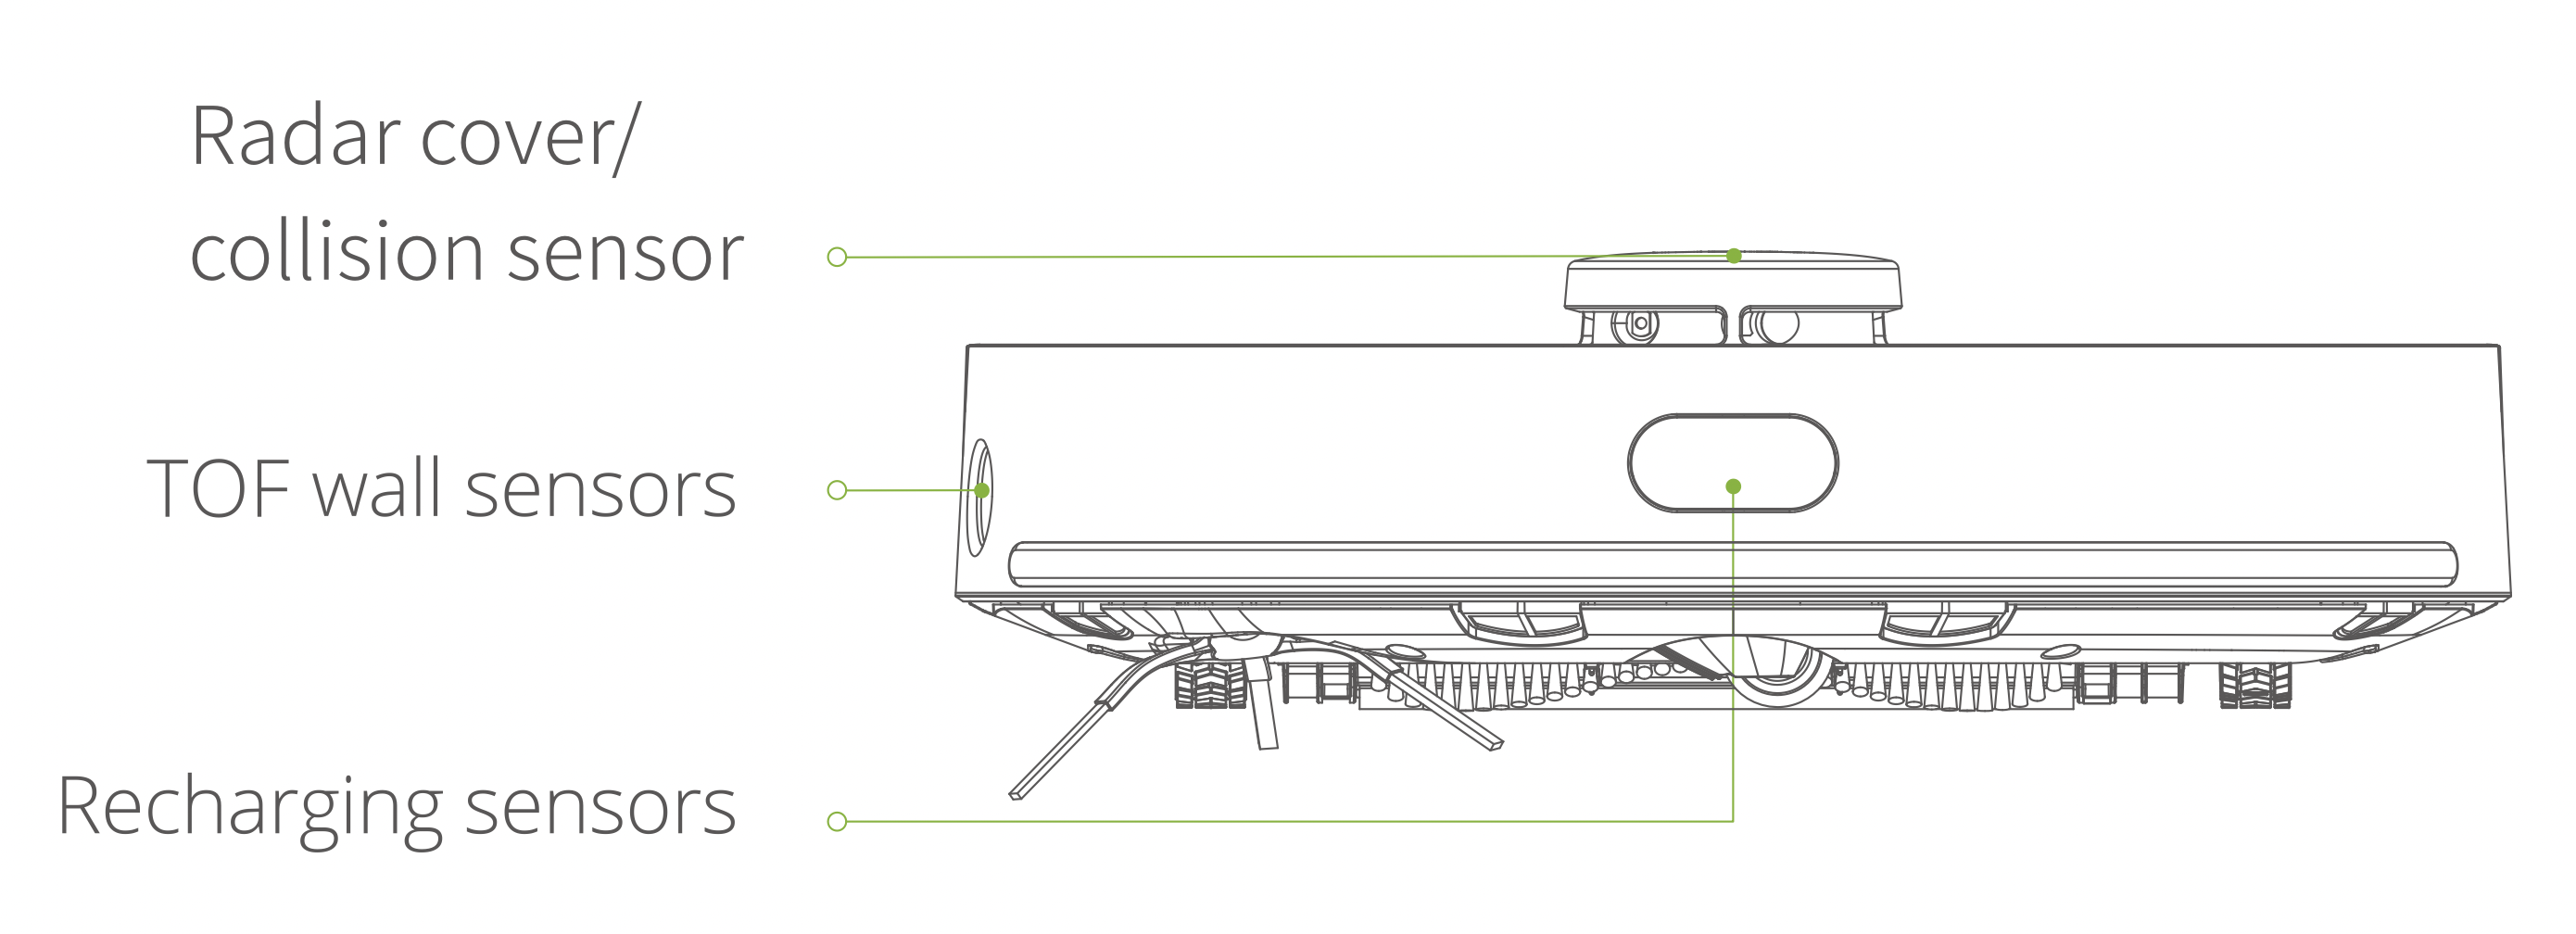
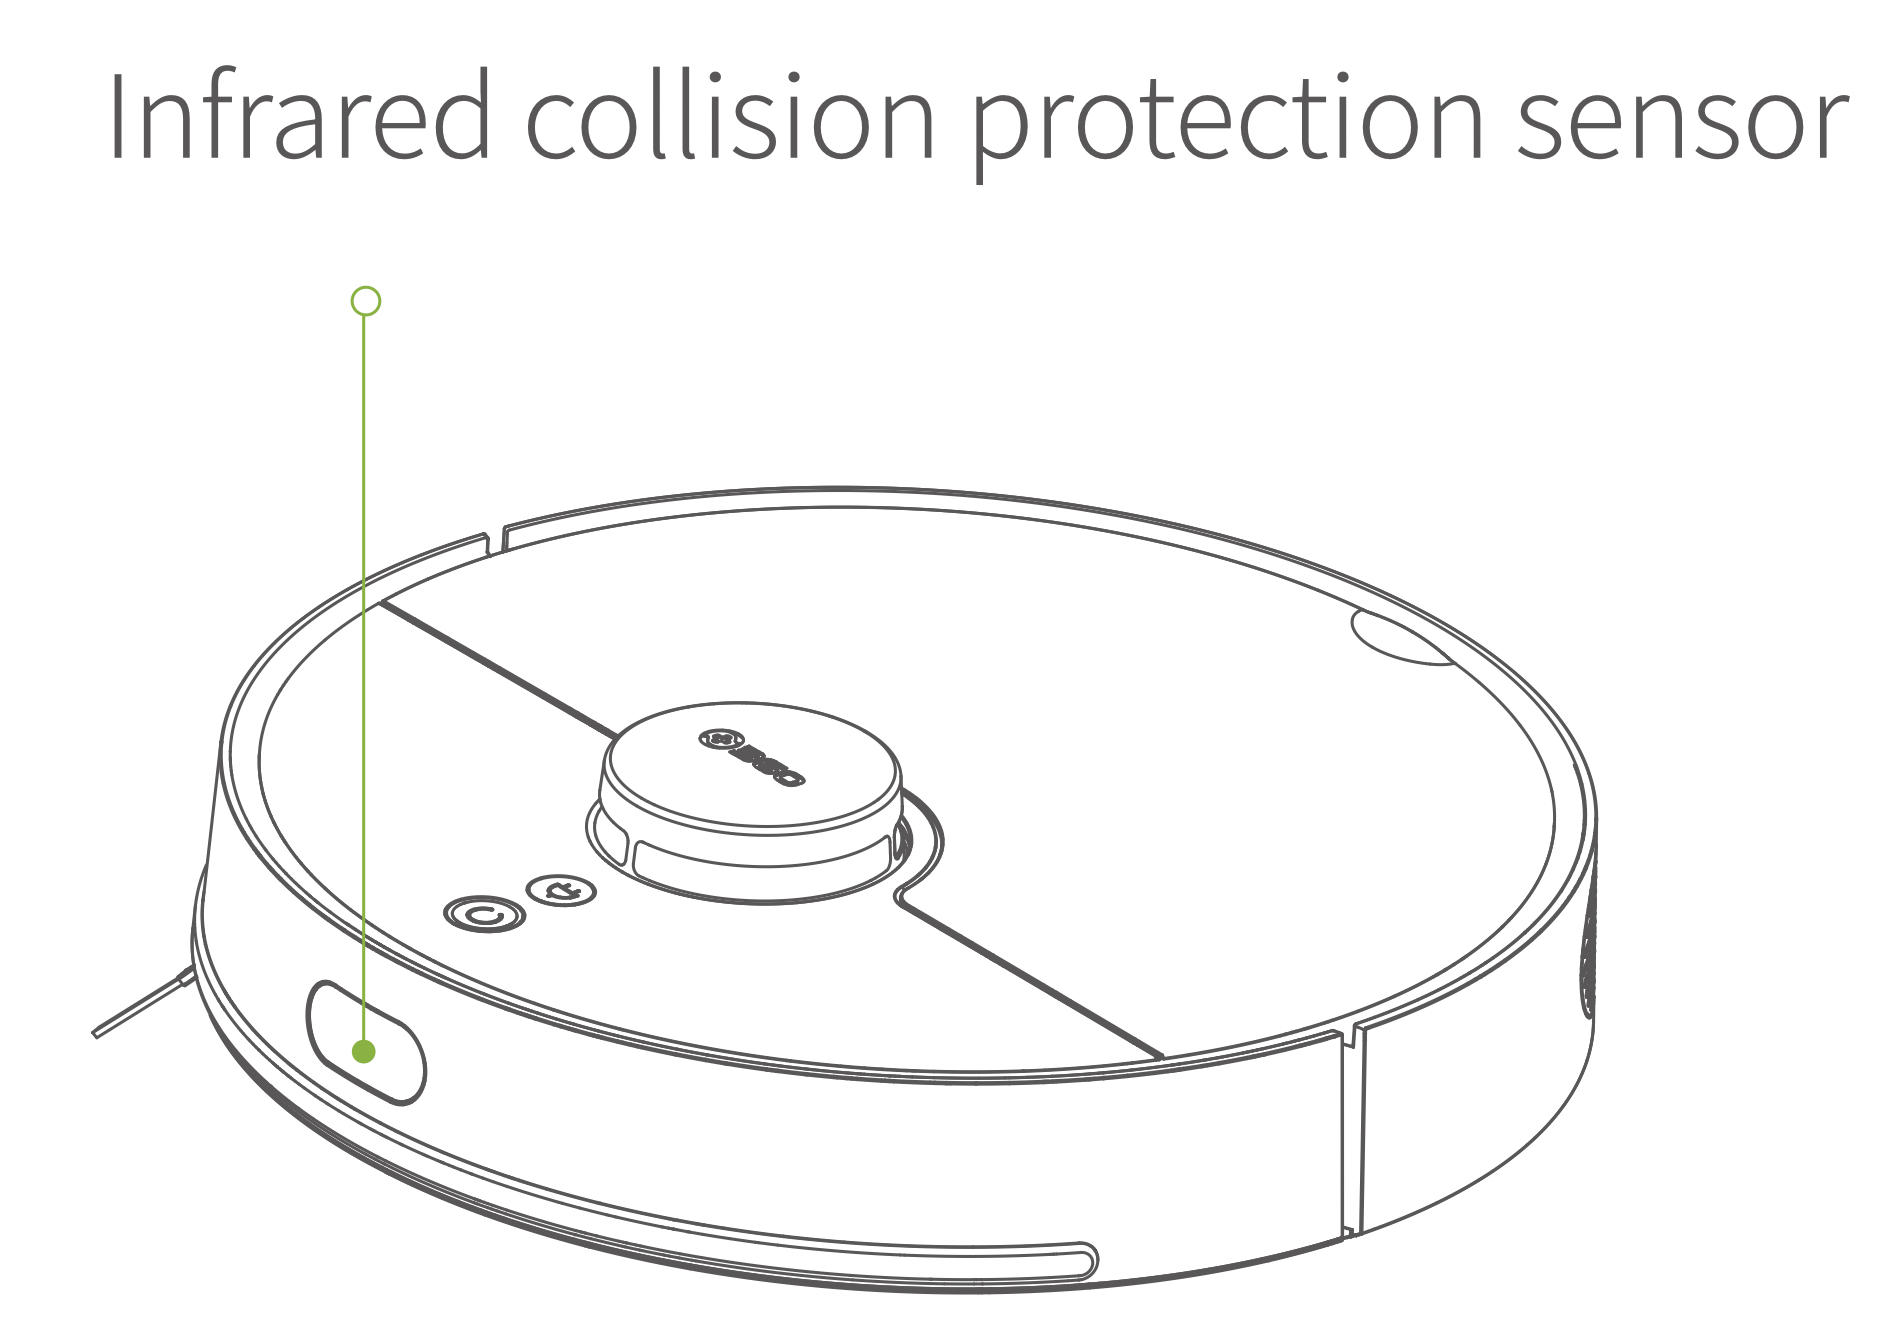
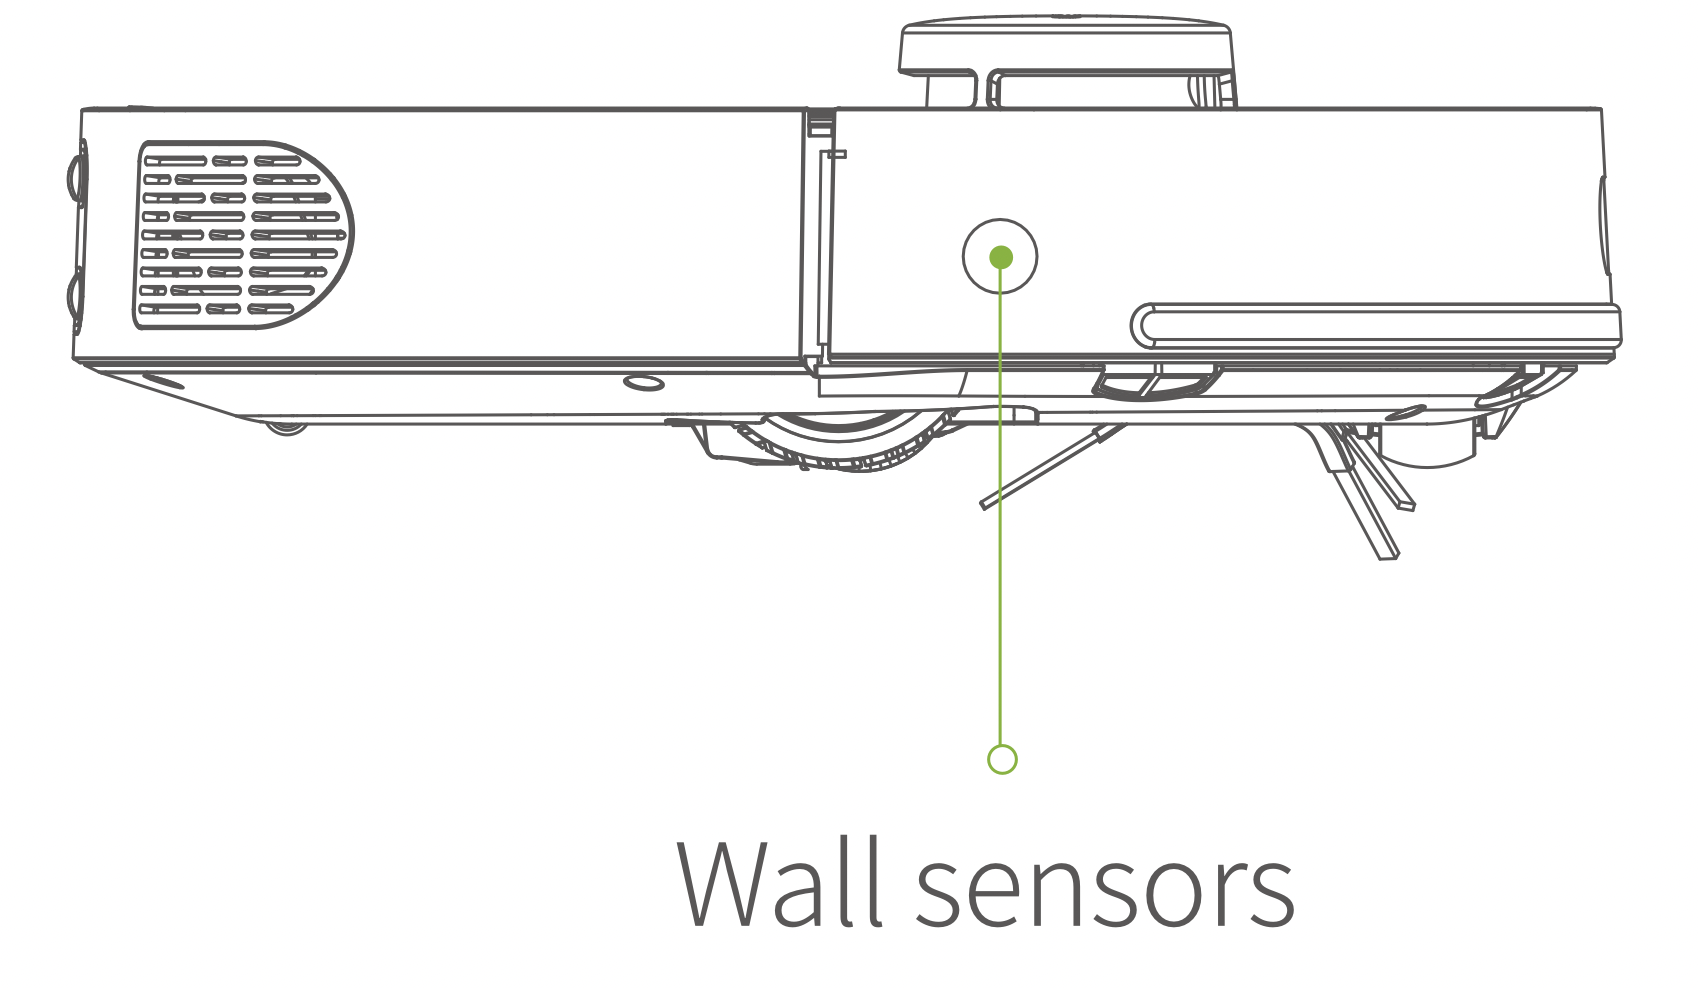
Wipe Robot sensors with a soft, dry cloth, including:
The Lidar is a Light Detection and Ranging equipment. The sensor part contains a laser for emitting infrared (780nm), and a sensor for detecting light. The Lidar motor works for rotating the sensor part. The sample rate of the sensor is 2300 points per second.

Turn robot vacuum upwards, pull out the universal wheel, clean up the wheel body, hair and dirt on the axle, and then reinstall and compress it.

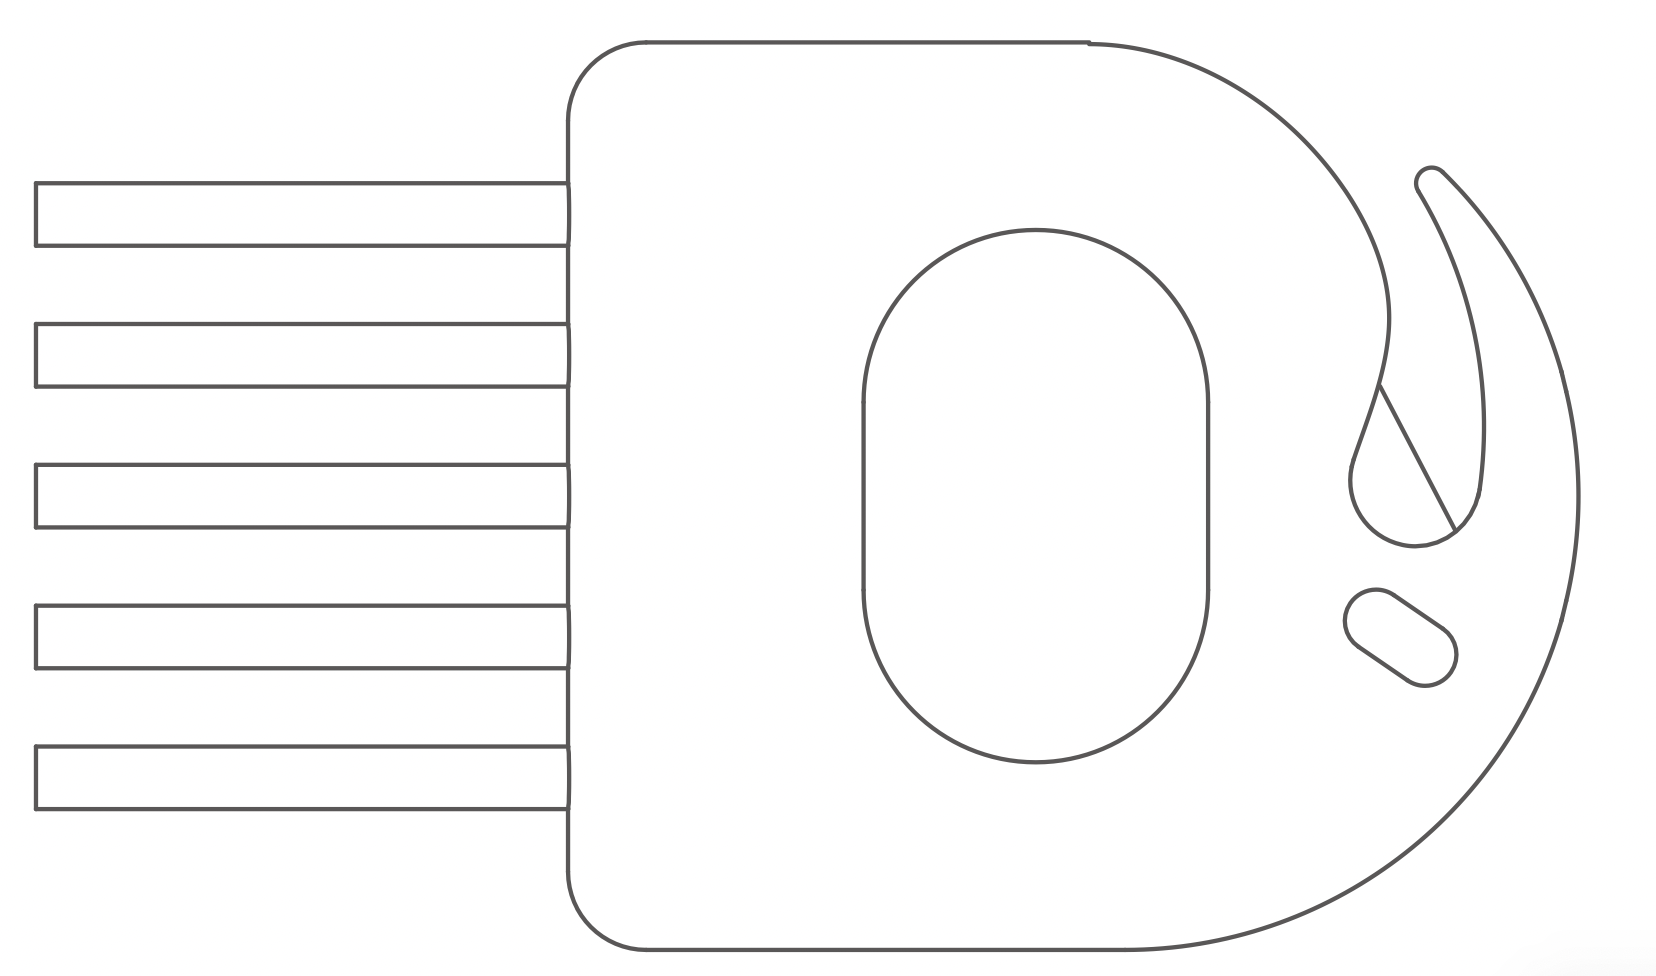
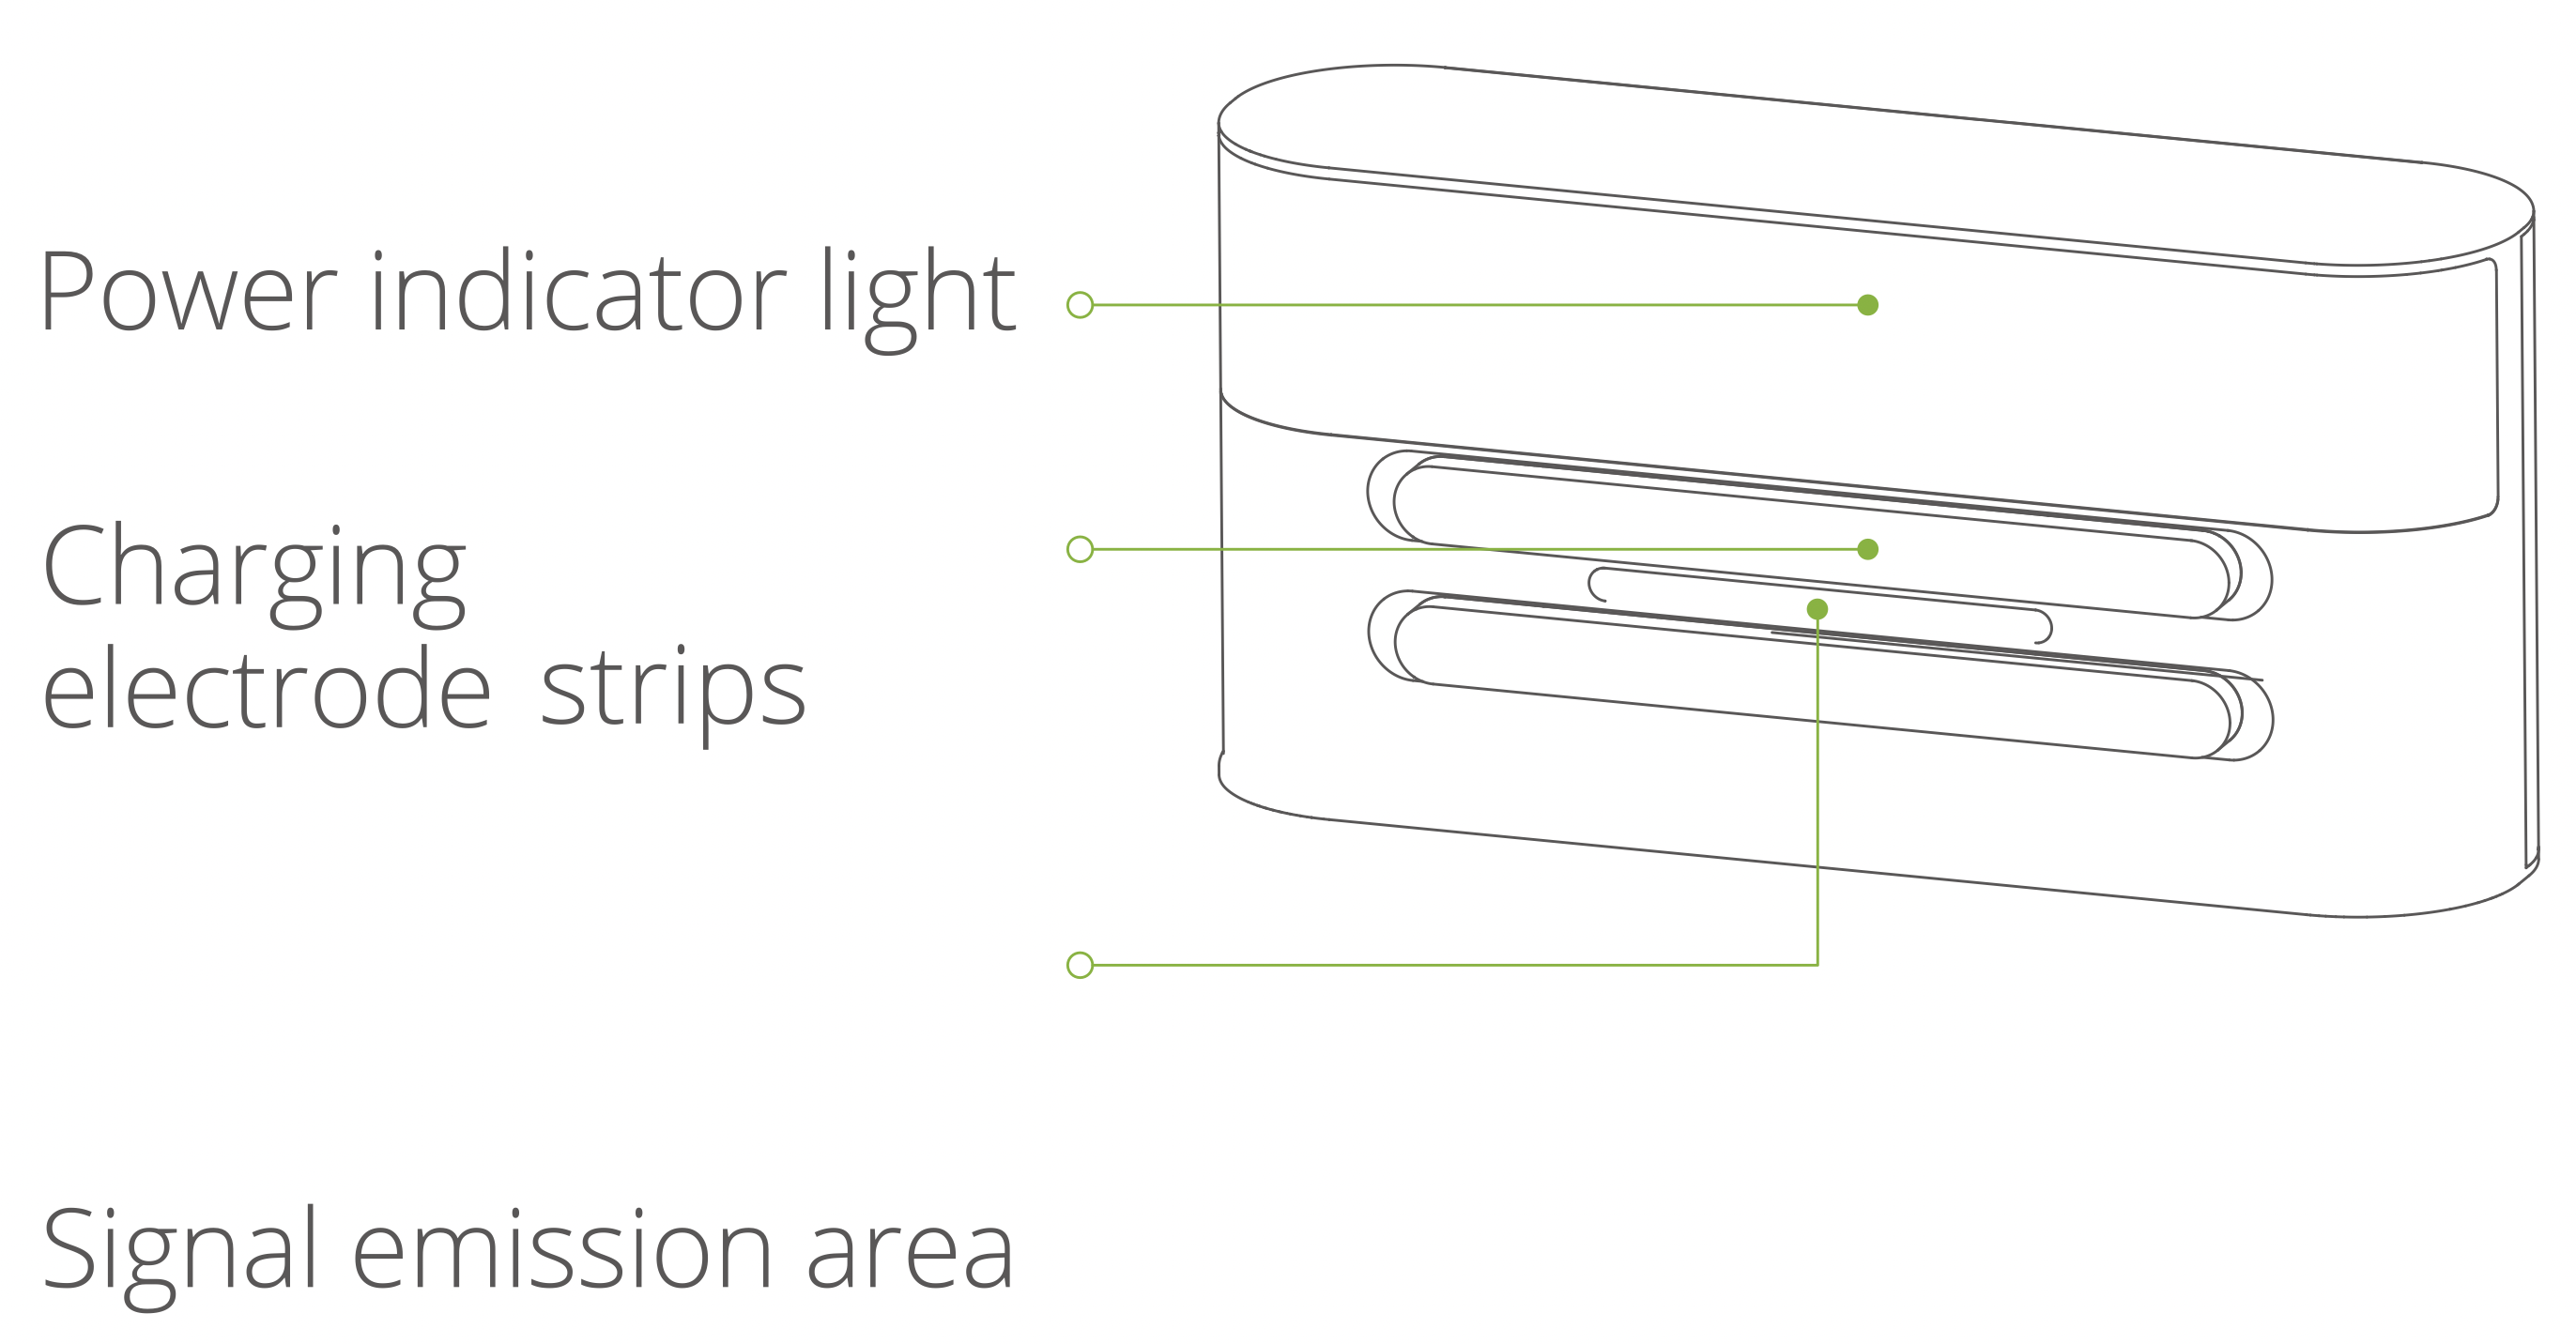
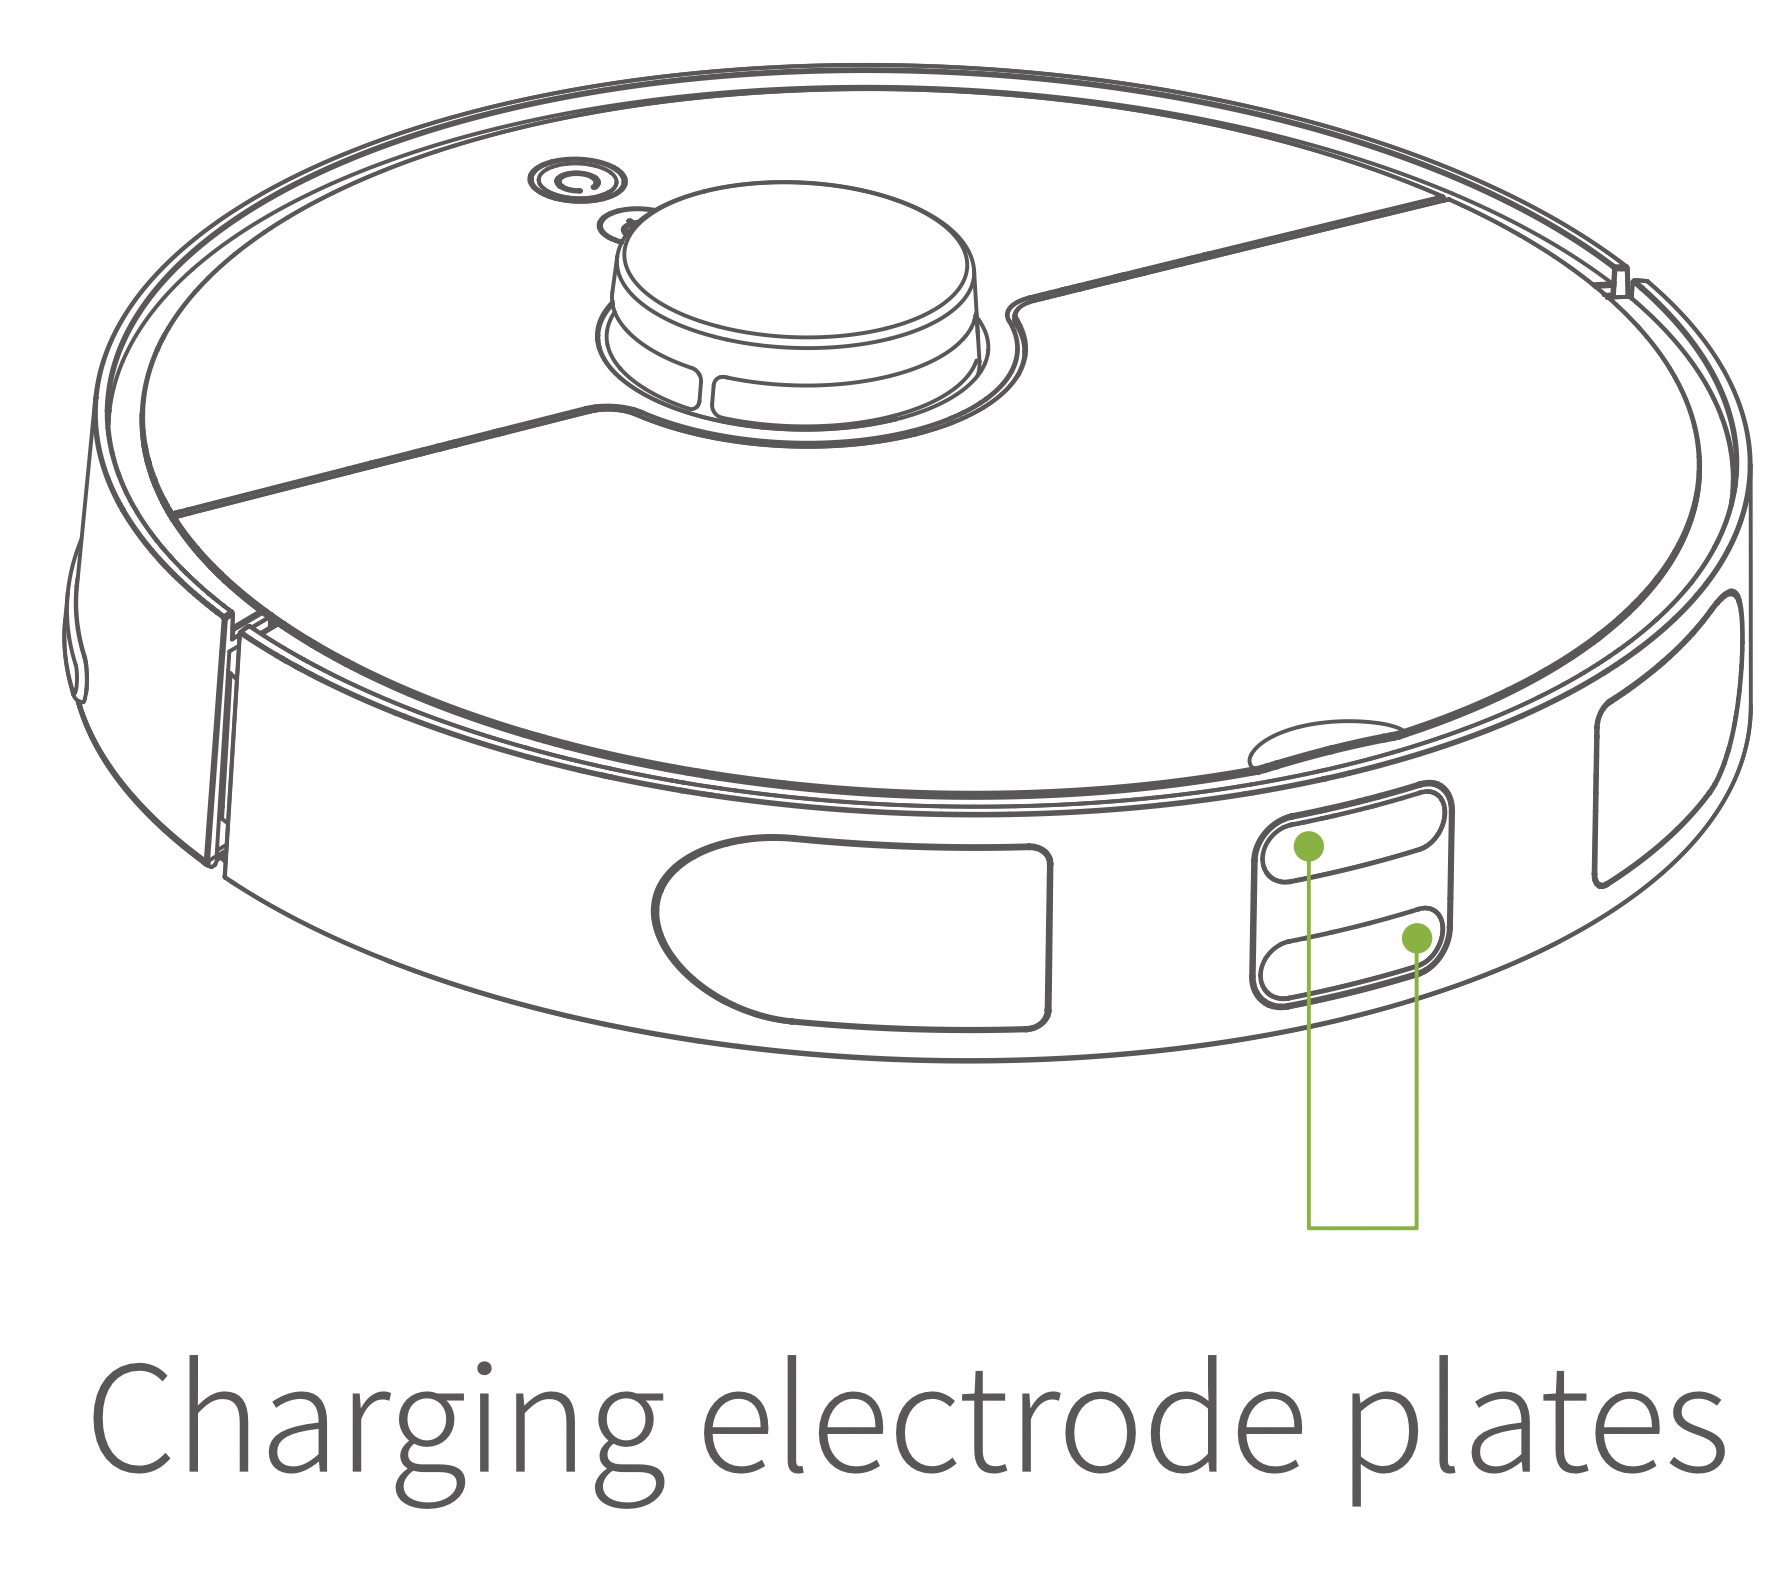
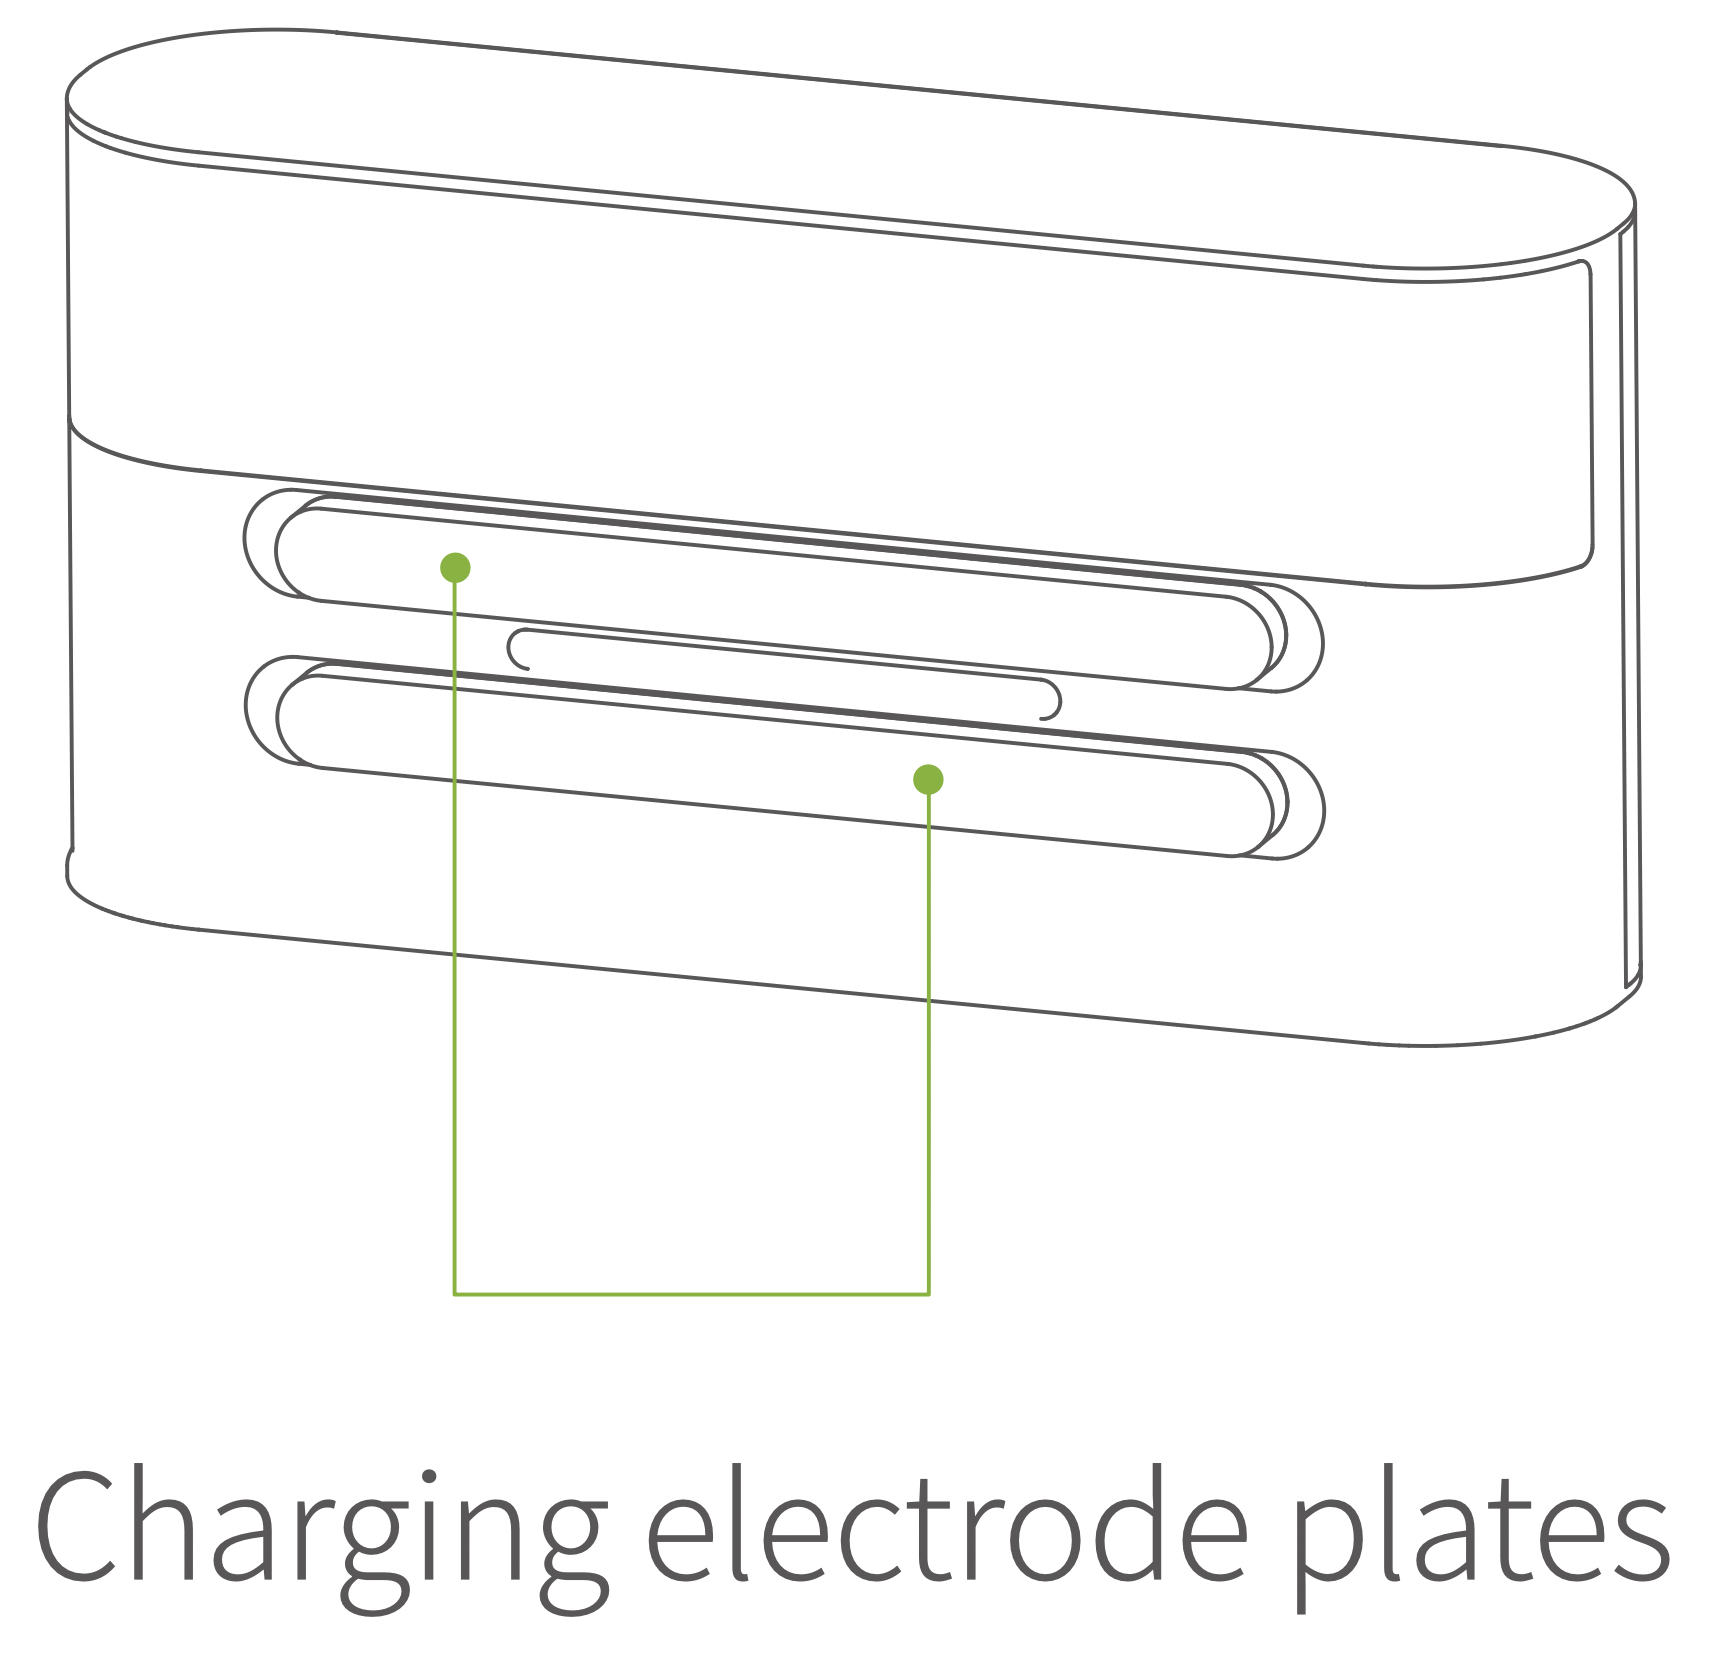
The part, as shown in the diagram, is the charging electrode strips. Please clean the charging electrode strips of Robot and the charging dock with a dry rag (Please turn off the electricity when cleaning. It is recommended to clean it monthly).
The firmware can be upgraded through the phone App. After detecting the new firmware, follow the prompts to carry out the upgrade. When the firmware is upgraded, the power needs to be at least 50%. It is recommended to place Robot on the recharging dock for firmware upgrade.
Remove the dust bin and open the rubber cover located on the side away from the radar. There is a small hole on the side near the USB port, poke it to reset. After the reset, the current map is lost and timed + Wi-Fi + Personalized settings will be reserved.

| Problem types | Causes and solutions |
|---|---|
| Unable to power on |
|
| Unable to charge |
|
| Unable to go back to charge |
|
| Abnormal behavior | Hold power key for seconds to shutdown and push to restart |
| Abnormal noise during cleaning | The main brush, side brush or wheel may be entangled by something, please shutdown and clean it. |
| The cleaning ability declines or dusting |
|
| Cannot be connected to Wi-Fi |
|
| Scheduled Cleaning mode is invalid | Insufficient power! The scheduled time cleaning can only be started when the remaining battery capacity ≥30%. |
| Does the robot vacuum consume power when it is on the charging dock? | The power consumption is very low while Robot is charging, which helps to keep the battery at its best performance. |
| Does robot vacuum need to charge for 16 hours for the first three times uses? | Because of no memory, Lithium battery can be used after fully charged without waiting. |
| Failure prompt voice | Problems and Solutions |
|---|---|
| Error 0: Dust bin is disappeared! | Sweeping when dust bin is removed |
| Error 1: The Top radar seems to be blocked. | The top radar is covered or placed in an open area (without any obstructions in the area of 6'6 square meters) |
| Error 2: Need to change location to start. | Pick up the Robot; or the Robot is vacant |
| Error 3: Please wipe the bottom Anti-Drop Sensors. | Anti-drop sensor is blocked or placed on the high |
| Error 4: Please wipe the front anti-Collision Sensors | Wall detected sensor is dirty or blocked |
| Error 5: Please wipe the right side wall sensors. | Wall sensor is dirty or blocked |
| Error 6: Please clean the top radar cover. | The radar cover anti-collision sensor is dirty or blocked |
| Error 7: Oh, the edges seems to be stuck! | Edges or Anti-Collision Sensors is stuck. |
| Error 8: Please clean the dust bin and sponge filter, install them in the correct position. | Dust Bin is full or the filter needs to be replaced. |
| Error 9: Please clean the dust bin and the filter net | After prompting error 8, the user removes the dust bin and triggers an error 9 prompt |
| Error 10: Stuck! Please help! | Robot is stuck! |
| Error 11: I was paralyzed, please put me up! | Robot slant! |
| Error 12: Oh, Driving Wheel seems to be stuck, help! | Main wheel (driving wheel) is stuck or entangled with something. |
| Error 13: Oh, Main brush seems to be stuck, Help! | Main Brush is stuck or entangled with something. |
| Error 14: Oh, Side Brush seems to be stuck, Help! | Side Brush is stuck or entangled with something. |
| Error 15: Where is the Charging Dock? | Did not find the charging dock for recharging or the charging dock was not plugged in. |
| Error 16: Malfunction! Please try to restart! | Unknown failure caused by abnormality, it is recommended to restart the Robot. |
| Error 17: Malfunction! Please power OFF. | There is a failure that Robot needs to be shut down. The user is reminded and then Robot is automatically shut down or recharged. |
| Error 18: Need Charging! | When the battery is extremely low (less than 10%) and it is not on the charging dock, sweeping is triggered. |
| Error 19: Can't shut down on charging dock. | Power OFF is triggered when Robot is charging on charging dock. |