Loading ...
Loading ...
Loading ...
10
We value your experience using Sunny Health and Fitness products. For assistance with parts or
troubleshooting, please contact us at [email protected] or 1-877-90SUNNY (877-907-
8669)
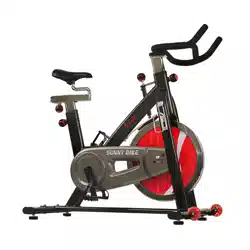
STEP 3:
Left Pedal: Remove the preassembled Left Nylon Nut
(No. 82L) from the Left Crank Arm (No. 47L). Align the
Left Pedal (No. 83L) with the Left Crank Arm (No. 47L) at
90°. Insert the pedal into the crank arm; turn the pedal
counter-clockwise as tightly as you can with your hand,
then use Wrench (No. 80) to tighten securely. Use Wrench
(No. 80) to hold the bolt of the pedal in place then use
Spanner (No. 81) to screw the Left Nylon Nut (No. 82L)
clockwise onto the thread end of the Left Pedal (No. 83L).
Right Pedal: Remove the preassembled Right Nylon Nut
(No. 82R) from the Right Crank Arm (No. 47R). Align the
Right Pedal (No. 83R) with the Right Crank Arm (No.
47R) at 90°. Insert the pedal into the crank arm; turn the
pedal clockwise as tightly as you can with your hand, then
use Wrench (No. 80) to tighten securely. Use Wrench (No.
80) to hold the bolt of the pedal in place then use Spanner
(No. 81) to screw the Right Nylon Nut (No. 82R) counter-
clockwise onto the thread end of the Right Pedal (No.
83R).
#82L/R 9/16*20*H8*S22 2PCS
#22 M5*12*Φ8.5 2PCS
#23 d5*Φ13*1 2PCS
#80 S13-15 1PC
#79 S13-14-15 1PC
#81 S8-14-22 1PC
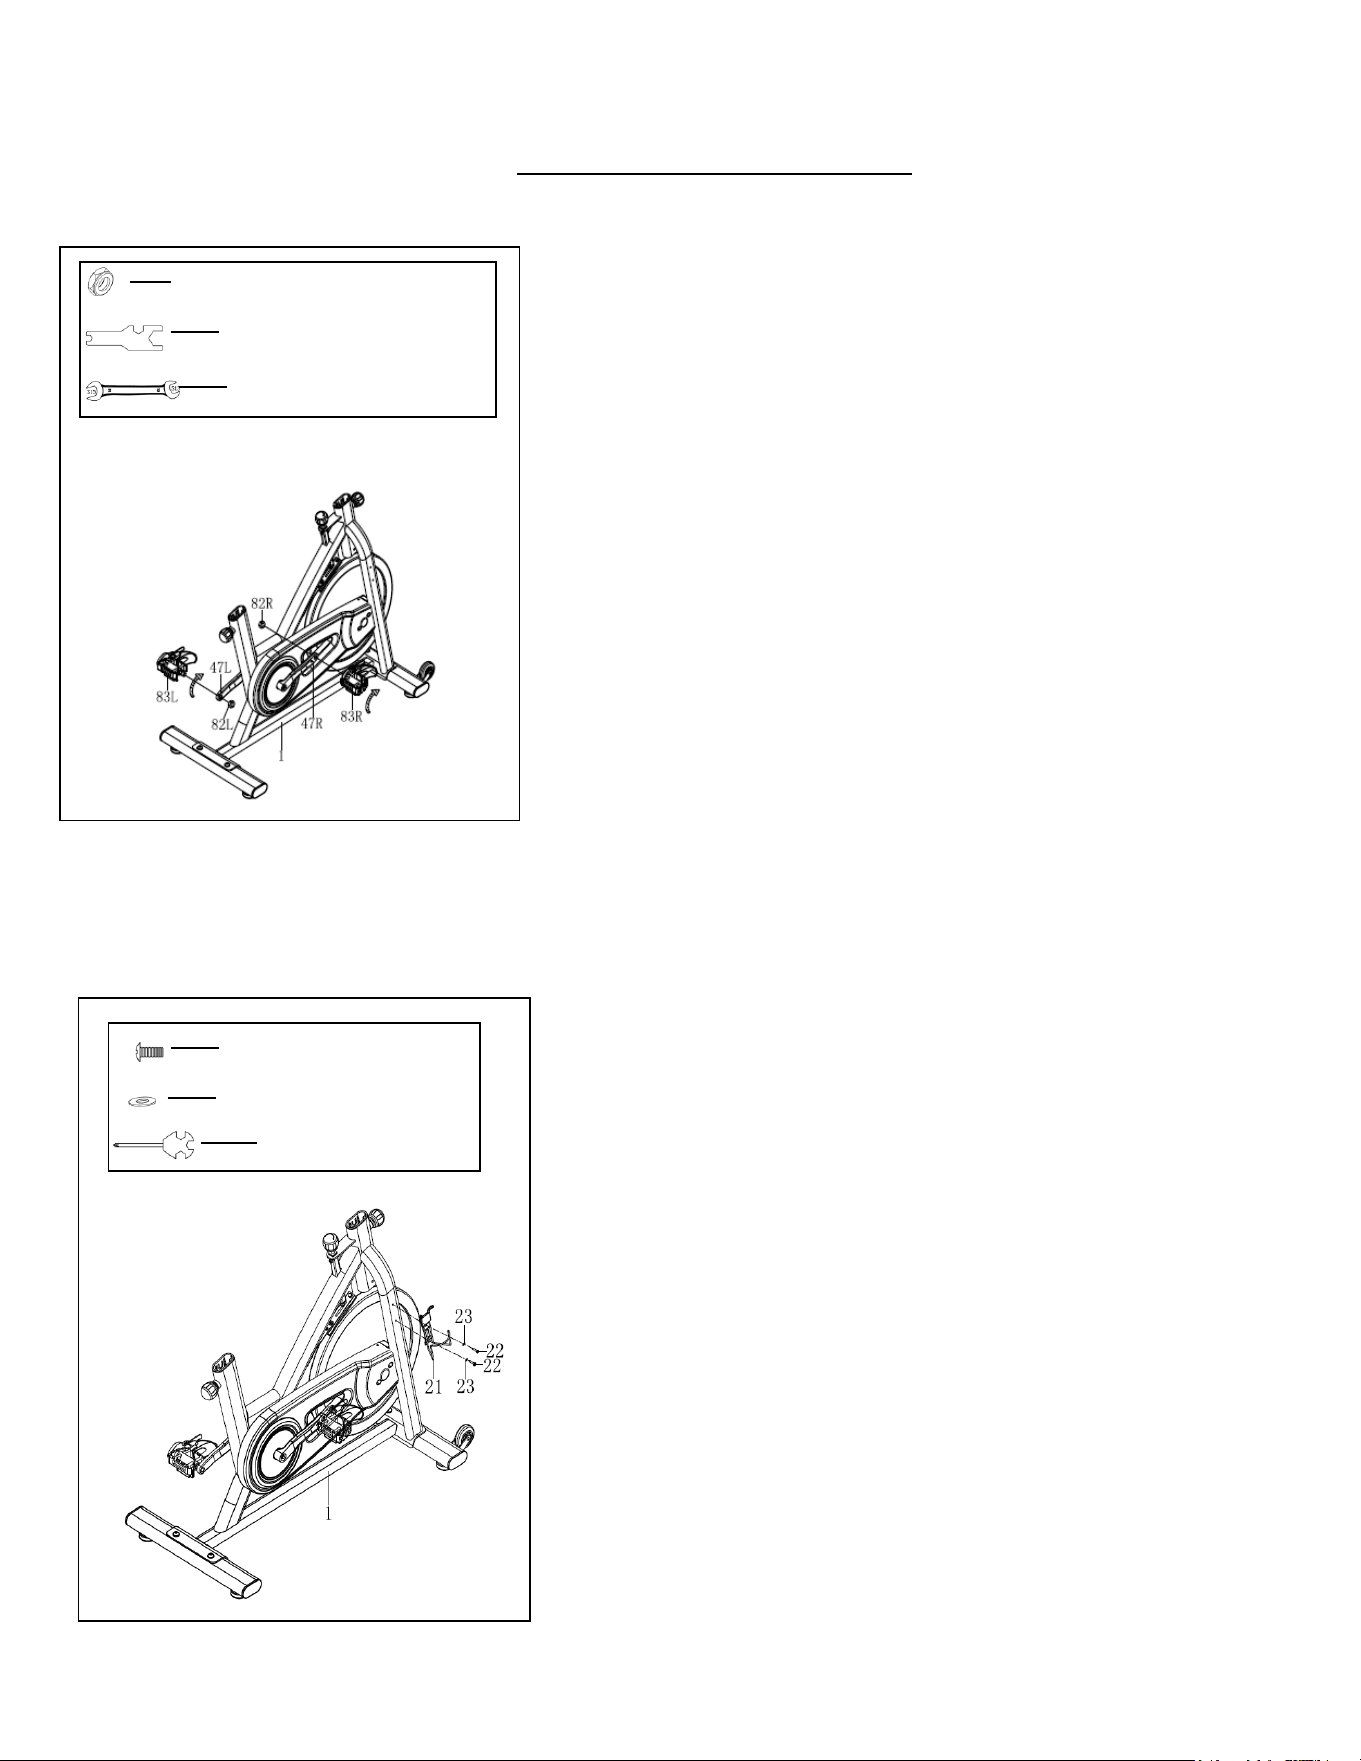
STEP 4:
Remove 2 preassembled Screws (No. 22) and 2 Washers
(No. 23), then connect the Water Bottle Holder (No. 21) to
the Main Frame (No. 1) using 2 Screws (No. 22) and 2
Washers (No. 23). Tighten and secure with Spanner (No.
79).
Loading ...
Loading ...
Loading ...