
Loading ...
Loading ...
Loading ...
13
EN
www.napoleongrills.com
N415-0293 MAY 09.18
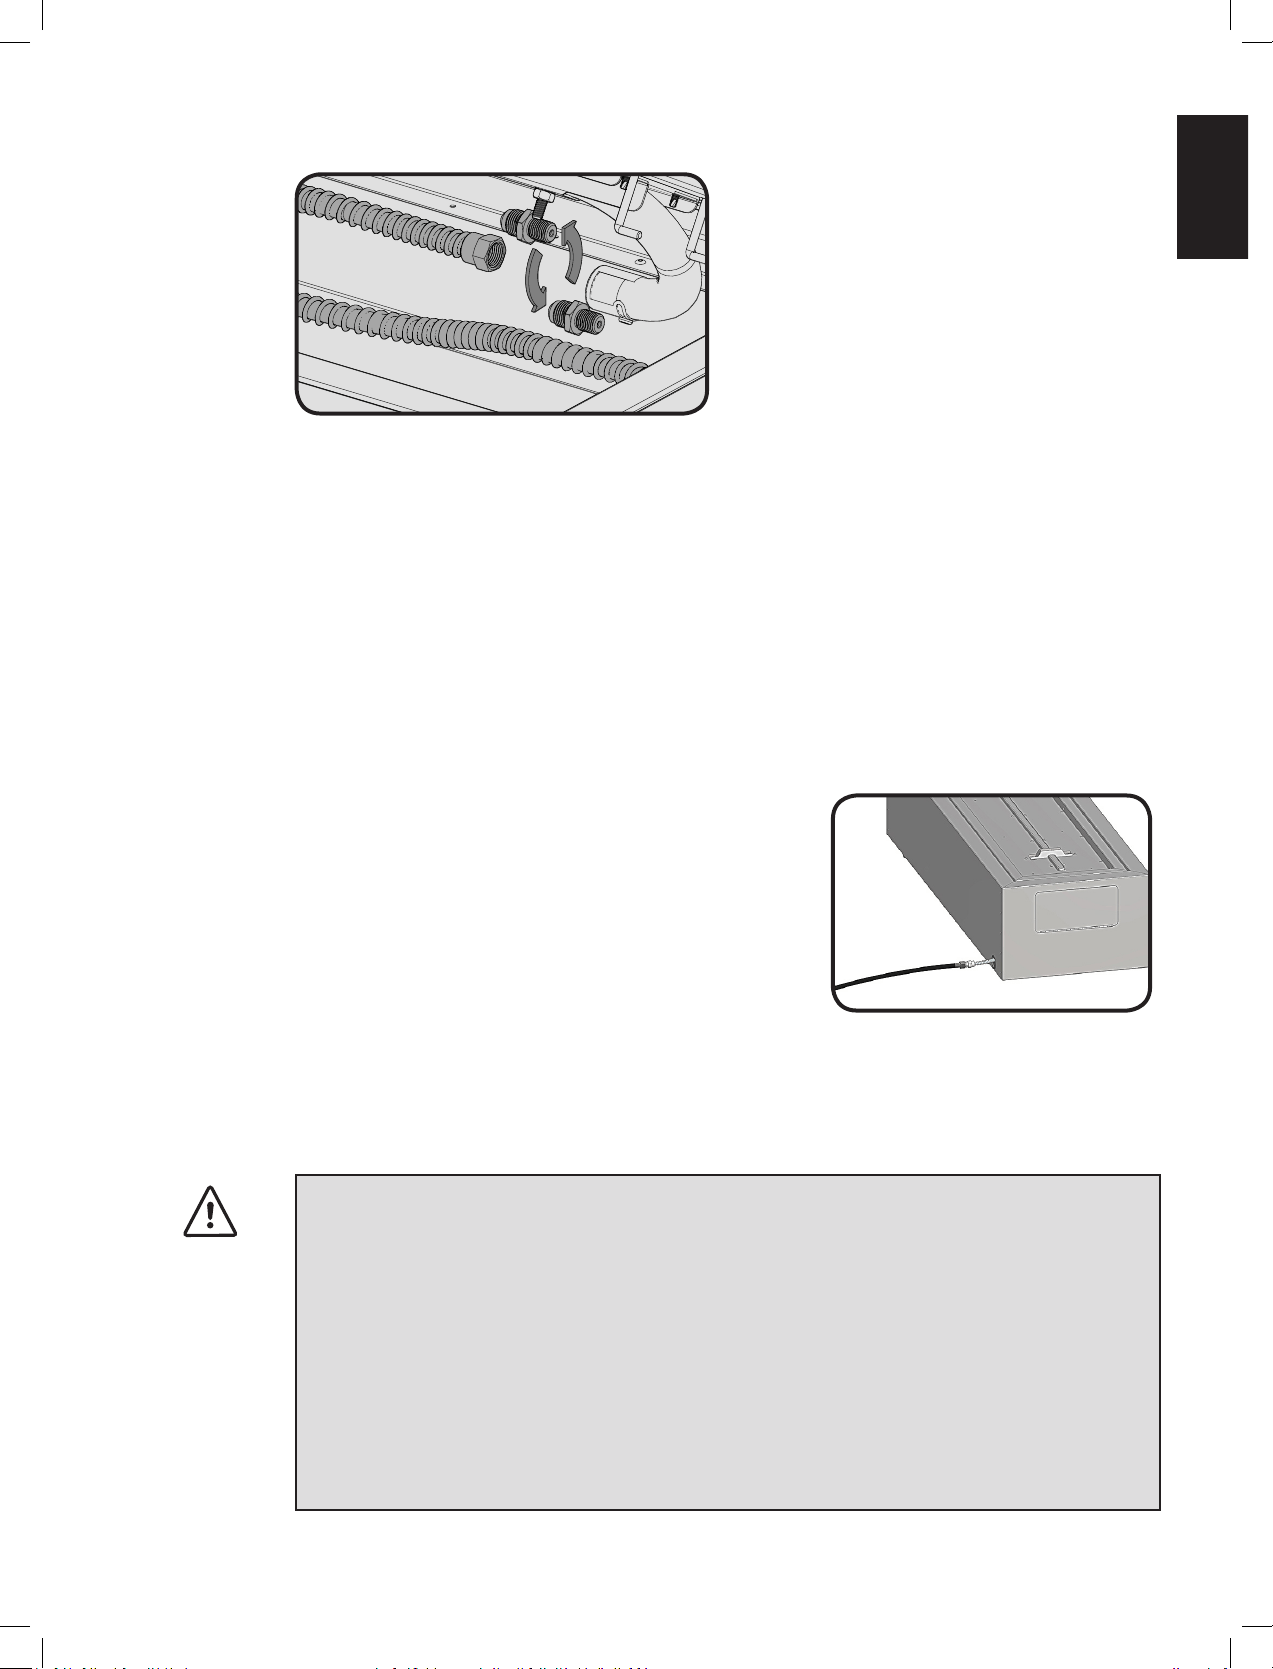
6. Unscrew the propane orice from the inside of the burner as illustrated.
7. Replace the propane orice with the natural gas orice supplied.
Note: The air shuer has been factory set and does not need to be adjusted.
8. Reconnect the stainless steel ex connector to the orice and ghten using (2) wrenches.
9. Place the glass tray over the burner and fasten to the pao ame with the screws removed in step 2.
10. Fill out the conversion label included with your pao ame and apply it to the inside of the control
panel access door.
11. A leak test must be performed according to the leak tesng instrucons found in the manual.
Natural Gas Hook-Up
The gas appliance is designed to operate at an inlet pressure of 7 inches water column. The piping up to
the appliance is the responsibility of the installer. A exible metal connector is included to simplify the
installaon of the unit. Connect the exible connector to rigid
pipe, copper tube or an approved exible metal connector, which
complies with Z21.4/CSA 6.10. If using a gas hose (not supplied)
connect the ared end of the hose to the connector on the end
of the ex tube as illustrated. Tighten using two wrenches. (Do
not use thread sealer/pipe dope.) Leak test all joints prior to using
the appliance. Piping and valves upstream of the quick discon-
nect are not supplied. The gas supply pipe must be suciently
sized to supply the BTU/h specied on the rang plate, based on
the length of the piping run. The quick disconnect must not be
installed in an upward direcon and a readily accessible manual shut-o valve must be installed upstream
of, and as close to, the quick disconnect as is feasible.
Purge the gas supply line of any trapped air prior to the rst ring of the unit.
WARNING!
• The installaon must be performed by a licensed gas er, and all connecons must be leak tested
before operang the appliance.
• Ensure all hose connecons are ghtened using two wrenches. Do not use Teon tape or pipe dope
on any hose connecon.
• Ensure the hose does not contact any high temperature surfaces or it may melt and leak causing a
re.
• Locate the hose out of pathways where people may trip over it or in areas where the hose may be
subject to accidental damage.
• Leak test all the connecons using a soap and water soluon as per the leak tesng instrucons
found in the manual.
Loading ...
Loading ...
Loading ...