Loading ...
Loading ...
Loading ...
16GB
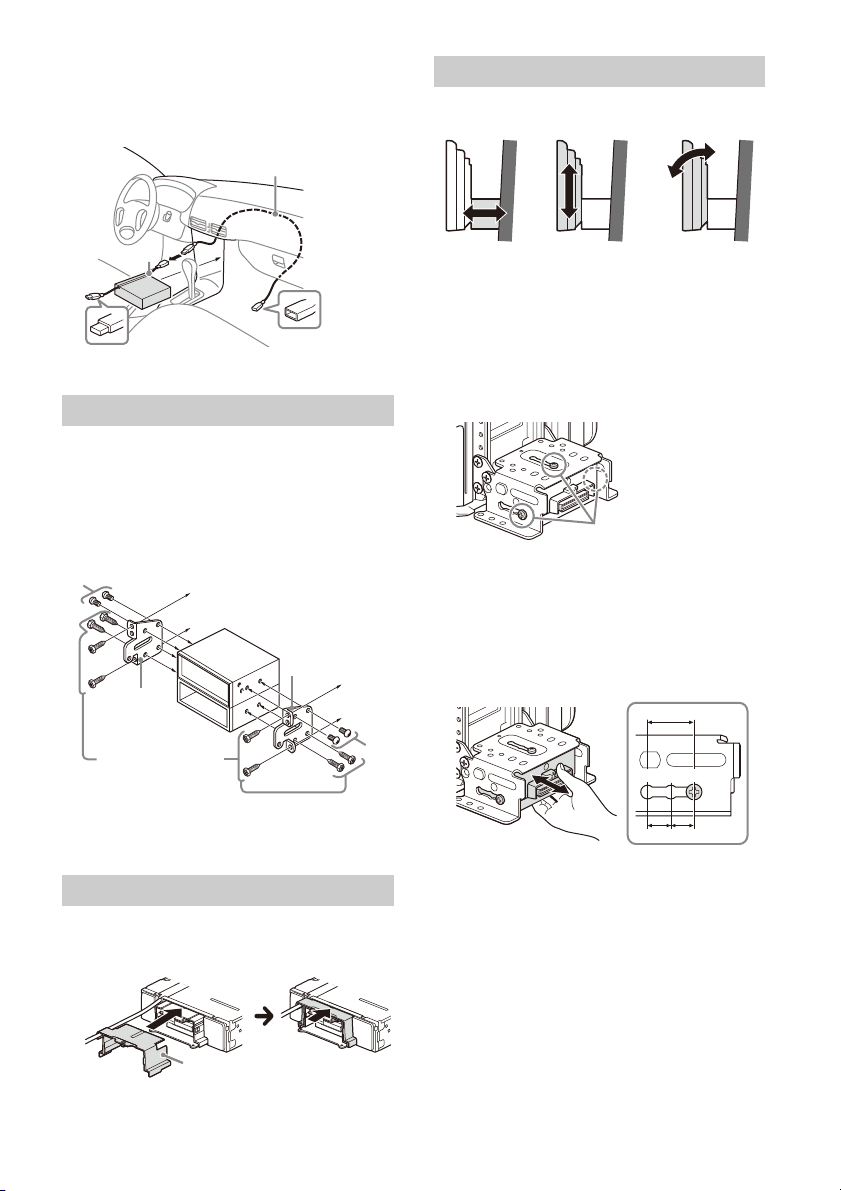
2 Route the USB extension cable (long)
inside the dashboard, then connect the USB
cable (short) from the unit.
Position the USB cable so that its connector
(male) comes out from the center console panel.
* USB connector (male)
Using the mounting brackets supplied
with your car
You may not be able to install this unit in some
makes of Japanese cars. In such a case, consult your
Sony dealer.
Example
Note
To prevent malfunction, install only with the mounting
screws .
1 Attach the joint cover to the mounting
base of the unit, then slide it into the unit
temporarily.
The mounting positions of the display can be
adjusted.
Adjusting the depth of the display
position
1
Loosen the 3 pre-installed screws for depth
adjustment (on top and both sides).
Slightly loosen the screws until you can slide the
connector bracket. Do not remove the screws
from the bracket. Doing so may damage the
parts.
2 Slide the connector bracket to decide the
appropriate depth position.
Adjustable depth: within 20 mm (
13
/16 in) (), in
3 steps, in 10 mm (
13
/32 in) pitch ().
Bracket positions 1 to 3 for the display:
1: Slide-out position
2: Intermediate position
3: Slide-in position
Mounting the unit in the dashboard
Attaching the joint cover
*
*
to dashboard/center console
Bracket
Bracket
Existing parts supplied
with your car
Setting up the display
Depth
(within 20 mm
(
13
/16 in), in 3 steps)
Height
(within 60 mm
(2
3
/8 in), in 7 steps)
Angle
(-10° to +10°, in 3
steps)
Pre-installed screws
ɹ
ɸ
ɹ
321
Loading ...
Loading ...
Loading ...