
2
16
29
43
ΦΟΎΡΝΟΣ ΜΙΚΡΟΚΥΜΆΤΩΝ
MICROWAVE
MICROONDAS
MICROONDAS
[el] Οδηγíες χρήσεως
[en] Instruction manual
[es] Instrucciones de uso
[pt] Instruções de serviço
H52W20N3

2
Ù Πίνακας περιεχομένων
[el]Οδηγíες χρήσεως
Σημαντικές υποδείξεις ασφαλείας ............................................... 2
Αιτίες των ζημιών.......................................................................................4
Τοποθέτηση και σύνδεση .............................................................. 5
Συμβουλές για την ενέργεια και το περιβάλλον......................... 5
Εξοικονόμηση ενέργειας..........................................................................5
Απόσυρση σύμφωνα με τους κανόνες προστασίας του
περιβάλλοντος............................................................................................5
Το πεδίο χειρισμού.......................................................................... 6
Περιστροφικός διακόπτης ....................................................................... 6
Τα εξαρτήματα ..........................................................................................6
Πριν την πρώτη χρήση .................................................................... 7
Ρύθμιση της ώρας.....................................................................................7
Ο φούρνος μικροκυμάτων.............................................................. 7
Υποδείξεις για το μαγειρικό σκεύος ...................................................... 7
Βαθμίδες ισχύος μικροκυμάτων
............................................................. 7
Ρύθμιση του φούρνου μικροκυμάτων.................................................... 8
Ανεμιστήρας ψύξης................................................................................... 8
Memory ............................................................................................. 8
Αποθήκευση Memory ............................................................................... 8
Εκκίνηση Memory...................................................................................... 8
Φροντίδα και καθαρισμός.............................................................. 9
Υλικά καθαρισμού .....................................................................................9
Πίνακας βλαβών .............................................................................. 9
Υπηρεσία τεχνικής εξυπηρέτησης πελατών..............................10
Αριθμός E και αριθμός FD....................................................................10
Αυτόματο σύστημα προγραμμάτων............................................10
Ρύθμιση προγράμματος.........................................................................10
Ξεπάγωμα με το αυτόματο σύστημα προγραμμάτων .......................11
Μαγείρεμα με το αυτόματο σύστημα προγραμμάτων......................11
Δοκιμάστηκαν για εσάς, στο δικό μας εργαστήριο
μαγειρικής ......................................................................................12
Υποδείξεις για τους
πίνακες..................................................................12
Ξεπάγωμα .................................................................................................12
Ξεπάγωμα, ζέσταμα ή μαγείρεμα κατεψυγμένων φαγητών .............12
Ζέσταμα φαγητών ...................................................................................13
Μαγείρεμα φαγητών ...............................................................................14
Συμβουλές σχετικά με τα μικροκύματα ..............................................14
Φαγητά δοκιμών κατά EN 60705..................................................15
Μαγείρεμα και ξεπάγωμα με μικροκύματα.........................................15
Produktinfo
Περαιτέρω πληροφορίες για τα προϊόντα, τα εξαρτήματα, τα
ανταλλακτικά και το σέρβις θα βρείτε στο διαδίκτυο (Internet):
www.neff-international.com και στο online-shop: www.neff-
eshop.com
: Σημαντικές υποδείξεις ασφαλείας
Διαβάστε προσεκτικά αυτές τις οδηγίες. Μόνο
τότε μπορείτε να χειριστείτε τη συσκευή
σίγουρα και σωστά. Φυλάξτε τις οδηγίες
χρήσης για μια αργότερη χρήση ή για τον
επόμενο ιδιοκτήτη.
Μετά την αφαίρεση από τη συσκευασία,
ελέγξτε τη συσκευή. Σε περίπτωση ζημιάς
κατά τη μεταφορά μην την συνδέσετε.
Μόνο ένας αδειούχος εγκαταστάτης
επιτρέπεται να συνδέσει τις συσκευές χωρίς
φις. Σε περίπτωση ζημιών που οφείλονται σε
λάθος σύνδεση, δεν έχετε κανένα δικαίωμα
εγγύησης.
Αυτή η συσκευή προορίζεται μόνο για την
οικιακή χρήση και το οικιακό περιβάλλον.
Χρησιμοποιείτε τη συσκευή μόνο για την
παρασκευή φαγητών και ποτών. Κατά τη
διάρκεια της λειτουργίας επιτηρείτε τη
συσκευή. Χρησιμοποιείτε τη συσκευή μόνο σε
κλειστούς χώρους.
Αυτή η συσκευή προορίζεται για χρήση μέχρι
ένα μέγιστο ύψος 4.000 μέτρων πάνω από
την επιφάνεια της θάλασσας.
Αυτή η συσκευή επιτρέπεται να
χρησιμοποιηθεί από παιδιά από 8 ετών και
πάνω και από άτομα με μειωμένες φυσικές,
αισθητήριες ή πνευματικές ικανότητες ή με
ανεπαρκή εμπειρία ή γνώση, όταν
επιτηρούνται από ένα άτομο που είναι
υπεύθυνο για την ασφάλειά τους ή έχουν
λάβει σχετικές οδηγίες απ’ αυτό για την
ασφαλή χρήση της συσκευής και έχουν
κατανοήσει τους κινδύνους που μπορεί να
προκύψουν.
Τα παιδιά δεν επιτρέπεται να παίζουν με τη
συσκευή.Ο καθαρισμός και η συντήρηση από
το χρήστη δεν επιτρέπεται να
πραγματοποιηθούν από παιδιά, εκτός εάν
είναι 15 ετών και άνω και επιτηρούνται.
Κρατάτε τα παιδιά που είναι κάτω των 8 ετών
μακριά από τη συσκευή και το καλώδιο
σύνδεσης.
Κίνδυνος πυρκαγιάς!
■
Η μη ενδεδειγμένη χρήση της συσκευής
είναι επικίνδυνη και μπορεί να προκαλέσει
ζημιές.
Δεν επιτρέπεται το στέγνωμα από φαγητά ή
ρούχα, το ζέσταμα από παντόφλες,
σακουλάκια με σπόρους και δημητριακά,
σφουγγάρια, υγρά πανιά και παρόμοια.
Για παράδειγμα μπορούν να αναφλεγούν οι
ζεστές παντόφλες, τα ζεστά σακουλάκια με
σπόρους και δημητριακά ακόμα και μετά
από ώρες.Χρησιμοποιείτε τη συσκευή μόνο
για την παρασκευή φαγητών και ποτών.
Κίνδυνος πυρκαγιάς!
■
Τα τρόφιμα μπορούν να αναφλεγούν. Μη
ζεσταίνετε ποτέ τρόφιμα μέσα σε

3
συσκευασίες για τη διατήρηση της
θερμοκρασίας.
Μη ζεσταίνετε ποτέ χωρίς επιτήρηση
τρόφιμα σε δοχεία από πλαστικό, χαρτί ή
άλλα εύφλεκτα υλικά.
Μη ρυθμίζετε ποτέ μια πολύ μεγάλη βαθμίδα
ισχύος ή πολύ μεγάλο χρόνο μικροκυμάτων.
Ακολουθήστε τα στοιχεία που αναφέρονται
σε αυτές τις οδηγίες χρήσης.
Μην ξηραίνετε ποτέ τα τρόφιμα στο φούρνο
μικροκυμάτων.
Μη ξεπαγώνετε ή μη ζεσταίνετε ποτέ τα
τρόφιμα με μικρή περιεκτικότητα νερού,
όπως π.χ. ψωμί, με πολύ μεγάλη βαθμίδα
ισχύος μικροκυμάτων ή για πολύ χρόνο.
Κίνδυνος πυρκαγιάς!
■
Το λάδι φαγητού μπορεί να αναφλεγεί. Μη
ζεσταίνετε ποτέ μόνο του το λάδι φαγητού
στο φούρνο μικροκυμάτων.
Κίνδυνος έκρηξης!
Τα υγρά ή άλλα τρόφιμα σε ερμητικά κλειστά
δοχεία μπορούν να εκραγούν. Μη ζεσταίνετε
ποτέ υγρά ή άλλα τρόφιμα σε ερμητικά
κλειστά δοχεία.
Κίνδυνος σοβαρής βλάβης της υγείας!
■
Σε περίπτωση ανεπαρκούς καθαρισμού
μπορεί να σκουριάσει και να υποστεί ζημιά η
επιφάνεια της συσκευής. Έτσι μπορεί να
εξέλθει ενέργεια μικροκυμάτων. Καθαρίζετε
τακτικά τη συσκευή και απομακρύνετε
αμέσως τα υπολείμματα των τροφίμων.
Κρατάτε το χώρο μαγειρέματος, την
τσιμούχα στεγανοποίησης της πόρτας, την
πόρτα και το κλείστρο της πόρτας πάντοτε
καθαρά, βλέπε επίσης στο κεφάλαιο
Φροντίδα και καθαρισμός.
Κίνδυνος σοβαρής βλάβης της υγείας!
■
Από μια χαλασμένη πόρτα του χώρου
μαγειρέματος ή από μια χαλασμένη
στεγανοποίηση της πόρτας μπορεί να
εξέλθει ενέργεια μικροκυμάτων. Μη
χρησιμοποιείτε ποτέ τη συσκευή, όταν η
πόρτα του χώρου μαγειρέματος ή η
στεγανοποίηση της πόρτας έχουν υποστεί
ζημιά. Καλέστε την υπηρεσία τεχνικής
εξυπηρέτησης πελατών.
Κίνδυνος σοβαρής βλάβης της υγείας!
■
Στις συσκευές χωρίς κάλυμμα περιβλήματος
εξέρχεται ενέργεια μικροκυμάτων. Μην
αφαιρείτε ποτέ το κάλυμμα περιβλήματος.
Σε περίπτωση εργασιών συντήρησης ή
επισκευής καλέστε την υπηρεσία τεχνικής
εξυπηρέτησης πελατών.
Κίνδυνος ηλεκτροπληξίας!
■
Οι ακατάλληλες επισκευές είναι επικίνδυνες.
Μόνο ένας τεχνικός της υπηρεσίας
εξυπηρέτησης πελατών, εκπαιδευμένος από
εμάς, επιτρέπεται να εκτελέσει τις επισκευές
και να αντικαταστήσει τα χαλασμένα
καλώδια σύνδεσης. Εάν η συσκευή έχει
βλάβη, τραβήξτε το φις από την πρίζα ή
κατεβάστε την ασφάλεια στο κιβώτιο των
ασφαλειών. Καλέστε την υπηρεσία
εξυπηρέτησης πελατών.
Κίνδυνος ηλεκτροπληξίας!
■
Στα καυτά μέρη της συσκευής μπορεί να
λιώσει η μόνωση των καλωδίων των
ηλεκτρικών συσκευών. Τα καλώδια
σύνδεσης των ηλεκτρικών συσκευών δεν
επιτρέπεται να έρθουν ποτέ σε επαφή με τα
καυτά μέρη της συσκευής.
Κίνδυνος ηλεκτροπληξίας!
■
Μια εισχώρηση υγρασίας μπορεί να
προκαλέσει μια ηλεκτροπληξία.Μη
χρησιμοποιείτε συσκευές καθαρισμού
υψηλής πίεσης ή συσκευές εκτόξευσης
ατμού.
Κίνδυνος ηλεκτροπληξίας!
■
Μια εισχώρηση υγρασίας μπορεί να
προκαλέσει μια ηλεκτροπληξία. Μην
εκθέτετε τη συσκευή ποτέ σε μεγάλη ζέστη
και υγρασία. Χρησιμοποιείτε τη συσκευή
μόνο σε κλειστούς χώρους.
Κίνδυνος ηλεκτροπληξίας!
■
Μια ελαττωματική συσκευή μπορεί να
προκαλέσει μια ηλεκτροπληξία. Μην
ενεργοποιείτε ποτέ μια χαλασμένη συσκευή.
Τραβήξτε το φις από την πρίζα ή κατεβάστε
την ασφάλεια στο κιβώτιο των ασφαλειών.
Καλέστε την υπηρεσία εξυπηρέτησης
πελατών.
Κίνδυνος ηλεκτροπληξίας!
■
Η συσκευή λειτουργεί με υψηλή τάση. Μην
αφαιρέσετε ποτέ το περίβλημα.
Κίνδυνος ηλεκτροπληξίας!
■
Η εισχώρηση υγρού μπορεί να προκαλέσει
ηλεκτροπληξία.
Τραβήξτε το φις από την πρίζα ή κατεβάστε
την ασφάλεια στο κιβώτιο των ασφαλειών.
Μην τοποθετείτε ποτέ δοχεία με υγρά πάνω
στη συσκευή, μη χρησιμοποιείτε τη συσκευή
ως επιφάνεια εναπόθεσης.
Κίνδυνος εγκαύματος!
■
Η συσκευή ζεσταίνεται πολύ. Μην
ακουμπάτε ποτέ τις ζεστές εσωτερικές
επιφάνειες του χώρου μαγειρέματος ή τα
θερμαντικά στοιχεία. Αφήνετε τη συσκευή
πάντοτε να κρυώσει. Κρατάτε τα παιδιά
μακριά.
Κίνδυνος εγκαύματος!
■
Τα εξαρτήματα ή τα σκεύη ζεσταίνονται
πάρα πολύ. Απομακρύνετε τα καυτά σκεύη
ή εξαρτήματα από το χώρο μαγειρέματος
πάντοτε με μια πιάστρα.
Κίνδυνος εγκαύματος!
■
Οι ατμοί του οινοπνεύματος μπορούν να
αναφλεγούν μέσα στον καυτό χώρο
μαγειρέματος. Μην παρασκευάζετε φαγητά
με μεγάλες ποσότητες δυνατών
οινοπνευματώδη ποτών. Χρησιμοποιείτε
μόνο μικρές ποσότητες από δυνατά
οινοπνευματώδη ποτά. Ανοίγετε προσεκτικά
την πόρτα της συσκευής.
Κίνδυνος εγκαύματος!
■
Τα τρόφιμα με σκληρό κέλυφος ή πέτσα
μπορούν, κατά τη διάρκεια, αλλά επίσης

9
Φροντίδα και καθαρισμός
Με καλή φροντίδα και προσεκτικό καθαρισμό, διατηρεί η συσκευή
μικροκυμάτων για πολύ χρόνο την ωραία του εμφάνιση και τη
λειτουργικότητά του. Εδώ περιγράφουμε με ποιο τρόπο πρέπει να
φροντίζετε και να καθαρίζετε σωστά τη συσκευή σας.
: Κίνδυνος βραχυκυκλώματος!
Μη χρησιμοποιείτε για τον καθαρισμό ποτέ συσκευές καθαρισμού
υψηλής πίεσης ή συσκευές εκτόξευσης ατμού.
: Κίνδυνος εγκαύματος!
Μην καθαρίζετε ποτέ τη συσκευή αμέσως μετά την
απενεργοποίηση. Αφήστε τη συσκευή να κρυώσει.
: Κίνδυνος ηλεκτροπληξίας!
Μη βυθίζετε ποτέ τη συσκευή στο νερό ή μην καθαρίζετε τη
συσκευή κάτω από τρεχούμενο νερό.
Για να μην υποστούν ζημιές οι διάφορες επιφάνειες από λάθος
υλικό καθαρισμού, προσέξτε τα στοιχεία που αναφέρονται στον
πίνακα.
Μη χρησιμοποιείτε
■ ισχυρά καθαριστικά ή υλικά τριψίματος.
Η επιφάνεια μπορεί να υποστεί ζημιά. Εάν ένα τέτοιο υλικό χυθεί
πάνω στην μπροστινή πλευρά, σφουγγίστε το αμέσως με νερό. Μη
χρησιμοποιείτε
■ ξύστρες μετάλλου ή γυαλιού για τον καθαρισμό του γυαλιού στην
πόρτα της συσκευής,
■ ξύστρες μετάλλου ή γυαλιού για τον καθαρισμό της
στεγανοποίησης,
■ σκληρά σύρματα τριψίματος και σφουγγάρια καθαρισμού.
Πριν τη χρήση πλύνετε καλά τα καινούργια σφουγγαρόπανα.
■ ισχυρά αλκοολούχα καθαριστικά.
Υλικά καθαρισμού
Προσοχή!
Πριν το καθαρισμό τραβήξτε το ρευματολήπτη (φις) από την πρίζα
ή κατεβάστε/ξεβιδώστε την ασφάλεια στο κιβώτιο των ασφαλειών.
Καθαρίστε τη συσκευή εξωτερικά και το χώρο μαγειρέματος μ’ ένα
υγρό πανί και με ήπιο υγρό καθαρισμού. Στεγνώστε τη συσκευή μ’
ένα καθαρό πανί.
Πίνακας βλαβών
Εάν παρουσιαστεί κάποια βλάβη, δε σημαίνει πως είναι κάτι το
σοβαρό, συχνά η αιτία είναι ασήμαντη. Προτού καλέσετε την
υπηρεσία τεχνικής εξυπηρέτησης πελατών, προσπαθήστε με τη
βοήθεια του πίνακα να διορθώσετε οι ίδιοι τη βλάβη.
Εάν μια φορά ένα φαγητό δεν πετύχει καλά, ανατρέξτε στο
κεφάλαιο Δοκιμάστηκαν για εσάς, στο δικό
μας εργαστήριο
μαγειρικής. Εκεί θα βρείτε πολλές συμβουλές και υποδείξεις για το
μαγείρεμα.
: Κίνδυνος ηλεκτροπληξίας!
Οι ακατάλληλες επισκευές είναι επικίνδυνες. Οι επισκευές
επιτρέπεται να γίνονται μόνο από έναν τεχνικό του τμήματος
εξυπηρέτησης πελατών, εκπαιδευμένο από εμάς.
Σε ορισμένα μηνύματα σφάλματος μπορείτε να αντιμετωπίσετε οι
ίδιοι τα σφάλματα.
Περιοχή Υλικά καθαρισμού
Μπροστινή πλευρά
συσκευής
Ζεστό διάλυμα απορρυπαντικού πιάτων:
Καθαρίστε μ’ ένα πανί καθαρισμού και στε-
γνώστε μ’ ένα μαλακό πανί. Μη χρησιμοποι-
είτε υγρά καθαρισμού τζαμιών, ξύστρες
μετάλλου ή γυαλιού για τον καθαρισμό.
Κοιλότητα στο χώρο
μαγειρέματος
Υγρό πανί:
Δεν επιτρέπεται να εισχωρήσει καθόλου
νερό μέσα από το μηχανισμό κίνησης του
περιστρεφόμενου δίσκου στο εσωτερικό
της συσκευής.
Περιστρεφόμενος
δίσκος και δακτύλιος
Ζεστό διάλυμα απορρυπαντικού πιάτων:
Όταν τοποθετήσετε ξανά τον περιστρεφό-
μενο δίσκο, πρέπει να ασφαλίσει σωστά.
Τζάμια πόρτας Υγρό καθαρισμού τζαμιών:
Καθαρίστε μ’ ένα πανί καθαρισμού. Μη
χρησιμοποιείτε ξύστρες γυαλιού.
Στεγανοποίηση Ζεστό διάλυμα απορρυπαντικού πιάτων:
Καθαρίστε μ’ ένα πανί καθαρισμού, μην
τρίβετε. Μη χρησιμοποιείτε ξύστρες μετάλ-
λου ή γυαλιού για τον καθαρισμό.
Μπροστινή πλευρά
συσκευής με ανοξεί-
δωτο χάλυβα
Ζεστό διάλυμα απορρυπαντικού πιάτων:
Καθαρίστε μ’ ένα πανί καθαρισμού και στε-
γνώστε μ’ ένα μαλακό πανί. Απομακρύνετε
αμέσως τους λεκέδες από άλατα ασβε-
στίου, λίπος, κορν φλάουρ και ασπράδι
αυγού. Κάτω απ’ αυτούς τους λεκέδες
μπορεί να δημιουργηθεί διάβρωση. Στην
υπηρεσία τεχνικής εξυπηρέτησης πελατών
ή στα ειδικά καταστήματα μπορείτε να
προμηθευτείτε τα ειδικά καθαριστικά ανο
-
ξείδωτου χάλυβα. Μη χρησιμοποιείτε υγρά
καθαρισμού τζαμιών, ξύστρες μετάλλου ή
γυαλιού για τον καθαρισμό.
Χώρος μαγειρέματος
από ανοξείδωτο
χάλυβα
Ζεστό διάλυμα απορρυπαντικού πιάτων ή
ξιδόνερο:
Καθαρίστε μ’ ένα πανί καθαρισμού και στε-
γνώστε μ’ ένα μαλακό πανί.
Σε περίπτωση μεγάλης ρύπανσης: Χρησιμο-
ποιήστε τα απορρυπαντικά φούρνου μόνο
στον κρύο χώρο μαγειρέματος. Χρησιμο-
ποιήστε καλύτερα ένα σφουγγάρι ανοξεί-
δωτου χάλυβα. Μη χρησιμοποιείτε σπρέι
ηλεκτρικού φούρνου και άλλα δυνατά
απορρυπαντικά φούρνου ή υλικά τριψίμα-
τος. Ακατάλληλα είναι επίσης τα σύρματα
τριψίματος, τα τραχιά σφουγγάρια και τα
καθαριστικά κατσαρολών. Αυτά τα
υλικά
δημιουργούν γρατσουνιές στην επιφάνεια.
Αφήστε τις εσωτερικές επιφάνειες να στε-
γνώσουν καλά.
Περιοχή Υλικά καθαρισμού

10
Τι πρέπει να κάνετε σε περίπτωση βλάβης
Υπηρεσία τεχνικής εξυπηρέτησης πελατών
Εάν η συσκευή σας πρέπει να επισκευαστεί, βρίσκεται στη διάθεσή
σας η υπηρεσία τεχνικής εξυπηρέτησης των πελατών της εταιρείας
μας. Εμείς βρίσκουμε πάντοτε μια κατάλληλη λύση, επίσης και για
την αποφυγή των περιττών επισκέψεων του τεχνικού.
Αριθμός E και αριθμός FD
Αναφέρετε στο τηλεφώνημα τον αριθμό προϊόντος (Αριθ. E) και τον
αριθμό κατασκευής ( Αριθ. FD), για να μπορούμε να σας
βοηθήσουμε σωστά. Την πινακίδα τύπου με τους αριθμούς αυτούς
μπορείτε να την βρείτε, ανοίγοντας την πόρτα της συσκευής, δεξιά.
Για να μη χρειαστεί να ψάχνετε πολύ, σε περίπτωση που χρειάζεται,
μπορείτε να γράψετε εδώ
τα στοιχεία της συσκευής σας και τον
αριθμό τηλεφώνου της υπηρεσίας τεχνικής εξυπηρέτησης πελατών.
Προσέξτε, ότι η επίσκεψη του τεχνικού του τμήματος εξυπηρέτησης
πελατών στη περίπτωση ενός εσφαλμένου χειρισμού δεν είναι
δωρεάν, ακόμα και κατά τη διάρκεια του χρόνου της εγγύησης.
Τα στοιχεία επικοινωνίας όλων των χωρών θα τα βρείτε
στον πίνακα
Υπηρεσίες τεχνικής εξυπηρέτησης πελατών που παραδίδεται μαζί.
Εντολή επισκευής και συμβουλές σε περίπτωση βλάβης
Εμπιστευθείτε την εμπειρία του κατασκευαστή. Έτσι εξασφαλίζετε,
ότι η επισκευή γίνεται από εκπαιδευμένους τεχνικούς του σέρβις,
που είναι εξοπλισμένοι με τα γνήσια ανταλλακτικά για τη συσκευή
σας.
Αυτή η συσκευή ανταποκρίνεται στο πρότυπο EN 55011 ή CISPR
11. Είναι
ένα προϊόν της ομάδας 2, τάξη B.
Ομάδα 2 σημαίνει, ότι δημιουργούνται μικροκύματα με σκοπό τη
θέρμανση των τροφίμων. Τάξη B δηλώνει, ότι η συσκευή είναι
κατάλληλη για οικιακή χρήση.
Αυτόματο σύστημα προγραμμάτων
Με το αυτόματο σύστημα προγραμμάτων μπορείτε να ξεπαγώσετε
πολύ εύκολα τρόφιμα και να παρασκευάσετε τα φαγητά, γρήγορα
και χωρίς προβλήματα. Επιλέξτε το πρόγραμμα και δώστε το βάρος
του φαγητού. Την ιδανική ρύθμιση την αναλαμβάνει το αυτόματο
σύστημα προγραμμάτων. Μπορείτε να επιλέξετε ανάμεσα σε 7
προγράμματα.
Ρύθμιση προγράμματος
Αφού επιλέξετε ένα πρόγραμμα, ρυθμίστε ως εξής:
1. Πατήστε το πλήκτρο
g τόσες φορές, μέχρι να εμφανιστεί ο
επιθυμητός αριθμός προγράμματος.
Μήνυμα σφάλματος Πιθανή αιτία Αντιμετώπιση / Υπόδειξη
Η συσκευή δε λειτουργεί Ο ρευματολήπτης (φις) δεν είναι συνδεδεμένος. Τοποθετήστε το ρευματολήπτη (φις) στην
πρίζα.
Διακοπή ρεύματος Ελέγξτε, εάν ανάβει η λάμπα του δωματίου.
Η ασφάλεια είναι χαλασμένη Κοιτάξτε στο κιβώτιο των ασφαλειών, εάν η
ασφάλεια για τη συσκευή είναι
εντάξει.
Εσφαλμένος χειρισμός Κατεβάστε/ξεβιδώστε την ασφάλεια στο κιβώ-
τιο των ασφαλειών. Μετά από περίπου
10 δευτερόλεπτα ανεβάστε/βιδώστε την
ξανά.
Στην ένδειξη ανάβουν τρία μηδενικά. Διακοπή ρεύματος Ρυθμίστε την ώρα από την αρχή.
Η συσκευή δε βρίσκεται σε λειτουργία.
Στην ένδειξη βρίσκεται μια χρονική
διάρκεια.
Ο περιστροφικός διακόπτης μετακινήθηκε αθέ-
λητα.
Πατήστε
το πλήκτρο "Stop".
Μετά τη ρύθμιση δεν πατήθηκε το πλήκτρο εκκίνη-
σης "Start".
Πατήστε το πλήκτρο εκκίνησης "Start" ή ακυ-
ρώστε τη ρύθμιση με το πλήκτρο "Stop".
Ο φούρνος μικροκυμάτων δε λειτουρ-
γεί.
Η πόρτα δεν είναι τελείως κλειστή. Ελέγξτε, εάν έχουν μαγκώσει υπολείμματα
φαγητού ή κάποιο ξένο σώμα στην πόρτα.
Το πλήκτρο εκκίνησης "Start"
δεν πατήθηκε. Πατήστε το πλήκτρο εκκίνησης "Start".
Τα φαγητά ζεσταίνονται αργότερα απ’
ό,τι μέχρι τώρα
Ρυθμίστηκε μια πολύ μικρή βαθμίδα ισχύος μικρο-
κυμάτων.
Επιλέξτε μια μεγαλύτερη βαθμίδα ισχύος
μικροκυμάτων.
Στη συσκευή τοποθετήθηκε μια μεγαλύτερη ποσό-
τητα απ’ ό,τι συνήθως.
Διπλάσια ποσότητα - διπλάσιος χρόνος.
Τα φαγητά ήταν πιο κρύα απ’ ό,
τι συνήθως. Ανακατέψτε ή γυρίστε ενδιάμεσα το φαγητό.
Από τον περιστρεφόμενο δίσκο ακούγε-
ται ένας θόρυβος τριξίματος ή τριβής.
Στην περιοχή του μηχανισμού κίνησης του περι-
στρεφόμενου δίσκου υπάρχει ρύπανση ή κάποιο
ξένο σώμα.
Καθαρίστε το δακτύλιο και την κοιλότητα στο
χώρο μαγειρέματος.
Η λειτουργία μικροκυμάτων διακόπτεται
χωρίς εμφανή αιτία.
Ο
φούρνος μικροκυμάτων έχει μια βλάβη. Εάν επαναλαμβάνεται αυτό το σφάλμα, καλέ-
στε την υπηρεσία τεχνικής εξυπηρέτησης
πελατών.
Αριθ. E
Αριθ. FD
Υπηρεσία τεχνικής
εξυπηρέτησης πελατών
O
GR 18 182
χρέωση κλήσης προς εθνικά δίκτυα

14
Μαγείρεμα φαγητών
Υποδείξεις
■ Τα λεπτά φαγητά μαγειρεύονται γρηγορότερα από τα χοντρά. Γι’
αυτό κατανέμετε τα φαγητά μέσα στο σκεύος σε μικρό κατά το
δυνατόν ύψος. Δεν πρέπει να τοποθετείτε τα τρόφιμα το ένα
πάνω στο άλλο.
■ Μαγειρεύετε τα φαγητά σε κλειστό μαγειρικό σκεύος. Εάν δεν
έχετε ένα κατάλληλο καπάκι για το σκεύος σας, χρησιμοποιήστε
ένα πιάτο ή ειδική μεμβράνη για μικροκύματα.
■ Η χαρακτηριστική γεύση των φαγητών διατηρείται σε μεγάλο
βαθμό. Γι’ αυτό μπορείτε να χρησιμοποιείτε οικονομικά το αλάτι
και τα μπαχαρικά.
■ Μετά το μαγείρεμα αφήστε τα φαγητά να ηρεμήσουν για 2 έως
5 λεπτά για την εξισορρόπηση της θερμοκρασίας.
■ Χρησιμοποιείτε πάντοτε κατάλληλα γάντια ή πιάστρες, όταν
θέλετε να βγάλετε τα πιατικά/μαγειρικά σκεύη.
Συμβουλές σχετικά με τα μικροκύματα
Υγρασία
Στο τζάμι της πόρτας, στα εσωτερικά τοιχώματα και στον πάτο της
συσκευής μπορεί να δημιουργηθεί υγρασία. Αυτό είναι κάτι το
κανονικό. Η λειτουργία του φούρνου μικροκυμάτων δεν
επηρεάζεται από αυτό. Σκουπίστε την υγρασία μετά το μαγείρεμα.
Μαγείρεμα φαγητών Βάρος Ισχύς μικροκυμάτων σε W, διάρ-
κεια σε λεπτά
Υποδείξεις
Ψητός κιμάς 750 γρ. 600 W, 20-25 λεπτά Μαγειρέψτε σε ανοιχτό
σκεύος
Ολόκληρο κοτόπουλο, φρέσκο χωρίς
εντόσθια
1,2 κιλά 600 W, 25-30 λεπτά Γυρίστε μετά την παρέλευση του μισού χρόνου
Λαχανικά, φρέσκα 250 γρ. 600 W, 5-10 λεπτά Κόψτε τα λαχανικά σε ομοιόμορφα μεγάλα κομμά-
τια.
Σε κάθε 100 γρ. λαχανικά προσθέστε 1 έως
2 κουταλιές νερό.
Ανακατεύετε ενδιάμεσα
500 γρ. 600 W, 10-15 λεπτά
Πατάτες 250 γρ. 600 W, 8-10 λεπτά Κόψτε τις πατάτες σε κομμάτια ίδιου μεγέθους.
Σε κάθε 100 γρ. προσθέστε 1 έως 2 κουταλιές
νερό.
Ανακατεύετε ενδιάμεσα
500 γρ. 600 W, 11-14 λεπτά
750 γρ. 600 W, 15-22 λεπτά
Ρύζι 125 γρ. 800 W, 5-7 λεπτά +
180 W, 12-15 λεπτά
Προσθέστε τη διπλάσια ποσότητα υγρού
250 γρ. 800 W, 6-8 λεπτά +
180 W, 15-18 λεπτά
Γλυκά φαγητά, π.χ. πουτίγκα (κρύα
παρασκευή)
500 ml 600 W, 6-8 λεπτά Ανακατέψτε ενδιάμεσα την πουτίγκα καλά με το
χτυπητήρι 2 έως 3 φορές
Φρούτα, κομπόστα 500 γρ. 600 W, 9-12 λεπτά -
Δε μπορείτε να βρείτε κανένα στοιχείο ρύθμισης για την ποσότητα
του φαγητού που ετοιμάσατε.
Αυξήστε ή μειώστε τους χρόνους μαγειρέματος σύμφωνα με τον ακό-
λουθο πρακτικό κανόνα:
Διπλάσια ποσότητα
= σχεδόν διπλάσιος χρόνος
Μισή ποσότητα = μισός χρόνος
Το φαγητό στέγνωσε πολύ. Ρυθμίστε την επόμενη φορά ένα μικρότερο χρόνο μαγειρέματος ή επι-
λέξτε μια χαμηλότερη βαθμίδα ισχύος μικροκυμάτων. Σκεπάστε το
φαγητό και προσθέστε περισσότερο υγρό.
Μετά την παρέλευση του χρόνου το φαγητό δεν ξεπάγωσε, δε
ζεστάθηκε ή δεν ψήθηκε.
Ρυθμίστε περισσότερο χρόνο.
Οι μεγαλύτερες ποσότητες και τα χοντρά
φαγητά χρειάζονται περισσότερο χρόνο.
Μετά την παρέλευση του χρόνου μαγειρέματος το φαγητό είναι
εξωτερικά πολύ ζεστό, στη μέση όμως δεν είναι ακόμα έτοιμο.
Ανακατεύετε ενδιάμεσα και επιλέξτε την επόμενη φορά μια χαμηλότερη
βαθμίδα ισχύος και μια μεγαλύτερη διάρκεια.
Μετά το ξεπάγωμα το πουλερικό ή το
κρέας είναι εξωτερικά ήδη
μαγειρεμένο, αλλά στη μέση δεν έχει ακόμα ξεπαγώσει.
Επιλέξτε την επόμενη φορά μια μικρότερη βαθμίδα ισχύος μικροκυμά-
των. Εάν έχετε μεγάλη ποσότητα τροφίμων για ξεπάγωμα γυρίστε τα επί-
σης αρκετές φορές.

15
Φαγητά δοκιμών κατά EN 60705
Η ποιότητα και η λειτουργία των συσκευών μικροκυμάτων
ελέγχονται από τα εργαστήρια δοκιμών με βάση αυτά τα φαγητά.
Σύμφωνα με το πρότυπο EN 60705, IEC 60705 ή DIN 44547 και
EN 60350 (2009)
Μαγείρεμα και ξεπάγωμα με μικροκύματα
Μαγείρεμα με μικροκύματα
Ξεπάγωμα με μικροκύματα
Φαγητό Ισχύς μικροκυμάτων W, διάρκεια σε λεπτά Υπόδειξη
Μείγμα αυγών-γάλα-
κτος, 565 γρ.
180 W, 25-30 λεπτά + 90 W, 20-25 λεπτά Τοποθετήστε τη φόρμα πυρέξ 20 x 17 cm πάνω στον περιστρε-
φόμενο δίσκο.
Παντεσπάνι 600 W, 8-10 λεπτά Τοποθετήστε τη φόρμα πυρέξ Ø 22 cm πάνω στον περιστρεφό-
μενο δίσκο.
Ψητός κιμάς 600 W, 20-25 λεπτά Τοποθετήστε τη φόρμα πυρέξ στον περιστρεφόμενο δίσκο.
Φαγητό Ισχύς μικροκυμάτων W, διάρκεια σε λεπτά Υπόδειξη
Κρέας 180 W, 5-7 λεπτά + 90 W, 10-15
λεπτά Τοποθετήστε τη φόρμα πυρέξ Ø 22 cm πάνω στον περιστρεφό-
μενο δίσκο.

16
Ú Table of contents
[en]Instruction manual
Important safety information .................................................. 16
Causes of damage .......................................................................... 18
Installation and connection .................................................... 19
Energy and environment tips ................................................. 19
Saving energy...................................................................................19
Environmentally-friendly disposal..................................................19
The control panel..................................................................... 20
Rotary selector .................................................................................20
Accessories ......................................................................................20
Before using the appliance for the first time......................... 21
Setting the clock ..............................................................................21
The microwave......................................................................... 21
Notes regarding ovenware............................................................. 21
Microwave power settings.............................................................. 21
Setting the microwave..................................................................... 21
Cooling fan........................................................................................22
Memory ..................................................................................... 22
Saving memory settings .................................................................22
Starting the memory........................................................................22
Care and cleaning.................................................................... 22
Cleaning agents ...............................................................................23
Malfunction table ..................................................................... 23
After-sales service................................................................... 24
E number and FD number ............................................................. 24
Automatic programmes........................................................... 24
Setting a programme ......................................................................24
Defrosting using the automatic programmes............................. 25
Cooking with the automatic programmes................................... 25
Tested for you in our cooking studio..................................... 25
Information regarding the tables................................................... 25
Defrost................................................................................................ 26
Defrosting, heating up or cooking frozen food .......................... 26
Heating food .....................................................................................27
Cooking food....................................................................................27
Microwave tips.................................................................................. 28
Test dishes in accordance with EN 60705............................. 28
Cooking and defrosting with microwave..................................... 28
Produktinfo
Additional information on products, accessories, replacement
parts and services can be found at www.neff-
international.com and in the online shop www.neff-
eshop.com
: Important safety information
Read these instructions carefully. Only then
will you be able to operate your appliance
safely and correctly. Retain the instruction
manual for future use or for subsequent
owners.
Check the appliance for damage after
unpacking it. Do not connect the appliance
if it has been damaged in transport.
Only a licensed professional may connect
appliances without plugs. Damage caused
by incorrect connection is not covered
under warranty.
This appliance is intended for domestic use
only. The appliance must only be used for
the preparation of food and drink. The
appliance must be supervised during
operation. Only use this appliance indoors.
This appliance is intended for use up to a
maximum height of 4000 metres above sea
level.
This appliance may be used by children
over the age of 8 years old and by persons
with reduced physical, sensory or mental
capabilities or by persons with a lack of
experience or knowledge if they are
supervised or are instructed by a person
responsible for their safety how to use the
appliance safely and have understood the
associated hazards.
Children must not play with, on, or around
the appliance. Children must not clean the
appliance or carry out general maintenance
unless they are at least 15 years old and
are being supervised.
Keep children below the age of 8 years old
at a safe distance from the appliance and
power cable.
Risk of fire!
■
Using the appliance for anything other
than its intended purpose is dangerous
and may cause damage.
The following is not permitted: drying out
food or clothing, heating slippers, grain or
cereal pillows, sponges, damp cleaning
cloths or similar.
For example, heated slippers and grain or
cereal pillows may catch fire, even several
hours after they have been heated.The
appliance must only be used for the
preparation of food and drinks.
Risk of fire!
■
Food may catch fire. Never heat food in
heat-retaining packages.
Do not leave food heating unattended in
containers made of plastic, paper or other

18
Stir or shake well after the food has been
heated. Check the temperature of the food
before it is given to the child.
Risk of burns!
■
Heated food gives off heat. The ovenware
may become hot. Always use oven gloves
to remove ovenware or accessories from
the cooking compartment.
Risk of burns!
■
Airtight packaging may burst when food is
heated. Always observe the instructions
on the packaging. Always use oven gloves
to remove dishes from the cooking
compartment.
Risk of burns!
■
Using the appliance for anything other
than its intended purpose is dangerous.
You are not permitted to use it to dry food
or clothing or to warm slippers, grain or
cereal pillows, sponges, damp cleaning
cloths or the like.
This is because, for instance, overheated
slippers, grain or cereal pillows, sponges
and damp cleaning cloths, etc., may
cause burns to the skin.
Risk of scalding!
■
When you open the appliance door, hot
steam may escape. Open the appliance
door with care. Keep children at a safe
distance.
Risk of scalding!
■
Water in a hot cooking compartment may
create hot steam. Never pour water into
the cooking compartment when the
cooking compartment is hot.
Risk of scalding!
■
There is a possibility of delayed boiling
when a liquid is heated. This means that
the liquid reaches boiling temperature
without the usual steam bubbles rising to
the surface. Even if the container only
vibrates a little, the hot liquid may
suddenly boil over and spatter. When
heating, always place a spoon in the
container. This will prevent delayed
boiling.
Risk of injury!
■
Scratched glass in the appliance door
may develop into a crack. Do not use a
glass scraper, sharp or abrasive cleaning
aids or detergents.
Risk of injury!
■
Unsuitable ovenware may crack. Porcelain
or ceramic ovenware can have small
perforations in the handles or lids. These
perforations conceal a cavity below. Any
moisture that penetrates this cavity could
cause the ovenware to crack. Only use
microwave-safe ovenware.
Risk of injury!
■
If using the appliance in microwave mode
only, placing cookware and containers
made of metal or featuring metal detailing
inside the appliance may cause sparks
when the appliance is operating. This may
damage the appliance. Never use metal
containers when using the appliance in
microwave mode only.
Risk of injury!
■
The glass turntable may splinter.Never
allow hard objects to strike the turntable.
Risk of injury!
■
Cracks or chinks in the glass turntable are
dangerous. Handle the turntable with care.
Causes of damage
Caution!
■ Heavily soiled seal: If the seal is very dirty, the appliance door
will no longer close properly during operation. The fronts of
adjacent units could be damaged. Always keep the seal
clean.
■ Operating the microwave without food: Operating the
appliance without food in the cooking compartment may lead
to overloading. Never switch on the appliance unless there is
food in the cooking compartment. An exception to this rule is
a short crockery test (see the section "Microwave, suitable
crockery").
■ Microwave popcorn: Never set the microwave power too
high. Use a power setting no higher than 600 watts. Always
place the popcorn bag on a glass plate. The disc may jump if
overloaded.
■ Liquid that has boiled over must not be allowed to run
through the turntable drive into the interior of the appliance.
Monitor the cooking process. Choose a shorter cooking time
initially, and increase the cooking time as required.
■ Never use the microwave oven without the turntable.
■ Creation of sparks: Metal e.g. a spoon in a glass must be
kept at least 2 cm from the oven walls and the inside of the
door. Sparks could irreparably damage the glass on the
inside of the door.
■ Foil containers: Do not use foil containers in the appliance.
They damage the appliance by producing sparks.
■ Cooling with the appliance door open: Only leave the
cooking compartment to cool with the door closed. Do not
trap anything in the appliance door. Even if the door is only
slightly ajar, the fronts of adjacent units may be damaged
over time.
■ Condensation in the cooking compartment: Condensation
may appear on the door window, interior walls and floor. This
is normal and does not adversely affect microwave operation.
To prevent corrosion, wipe off the condensation every time
you cook.
19
Installation and connection
Installation and connection
This appliance is intended for domestic use only.
Place the table-top appliance on a solid, level surface (at least
85 cm above the floor). The ventilation slits on the appliance
must not be covered.
The appliance is ready to be plugged in and must only be
connected to a correctly installed earthed socket. The mains
voltage must correspond to the voltage specified on the rating
plate.
Only a qualified electrician may install the socket or replace the
power cable. The appliance plug must always be accessible.
Do not use multi-socket adaptors, power strips or extension
leads. Overloading causes a risk of fire.
Notes
■ You can secure your microwave appliance directly to the
underside of a wall cupboard in the kitchen. Refer to the
special mounting template.
■ The ventilation slots on the left-hand side must not be
obstructed (there must be a clearance of at least 10 cm).
■ You can install your microwave appliance in a fitted unit.
■ Always keep the decorative door open when operating the
microwave. There is a risk of overheating.
Energy and environment tips
Here you can find tips on how to save energy when baking and
roasting and how to dispose of your appliance properly.
Saving energy
Only preheat the oven if you are asked to in the recipe or in the
tables in the instruction manual.
Use dark-coloured, black-coated or enamelled baking tins.
They absorb the heat particularly well.
Always keep the appliance door closed when cooking.
If you are baking more than one cake, it is best to bake them
one after the other.The cooking compartment will still be warm.
This can reduce the baking time for the second cake.
For longer cooking times, you can switch the oven off 10
minutes before the end of the cooking time and use the
residual heat to finish cooking.
Environmentally-friendly disposal
Dispose of packaging in an environmentally-friendly manner.
This appliance is labelled in accordance with
European Directive 2012/19/EU concerning used
electrical and electronic appliances (waste electrical
and electronic equipment - WEEE). The guideline
determines the framework for the return and recycling
of used appliances as applicable throughout the EU.

20
The control panel
Here, you will see an overview of the control panel. Depending
on the appliance model, there may be differences in the
particular details.
Rotary selector
The rotary selector is used to alter the default values and set
values.
The rotary selector is retractable. Press on the rotary selector to
lock it in or out.
Accessories
Caution!
When removing dishes, make sure that the turntable does not
move. Make sure that the turntable is properly locked. The
turntable can turn left or right.
The turntable
How to fit the turntable:
1. Place the turntable ring a in the recess in the cooking
compartment.
2. Let the turntable b slot in place in the drive c in the centre of
the cooking compartment floor.
Note: Do not use the appliance if the turntable is not in place.
Ensure that it is properly slotted into place. The turntable can
turn clockwise or anti-clockwise.
PLQ
NJ
%XWWRQVIRU
DXWRPDWLF
SURJUDPPHV
J SURJUDPPHEXWWRQ
K :HLJKWEXWWRQ
K
L
J
0HPRU\EXWWRQ
'LVSOD\
IRUFORFNDQGFRRNLQJWLPH
6WDUWEXWWRQ
%XWWRQVIRUWKH
PLFURZDYHSRZHUVHWWLQJV
ZDWWV
ZDWWV
ZDWWV
ZDWWV
ZDWWV
'RRURSHQHU
5RWDU\VHOHFWRU
IRUDGMXVWLQJWKHFORFN
DQGFRRNLQJWLPH
RUIRUVHWWLQJ
WKHDXWRPDWLFSURJUDPPHV
6WRSEXWWRQ
&ORFNEXWWRQ
6WRS 6WDUW
E
D
F

21
Before using the appliance for the first time
Here you will find everything you need to do before using the
microwave to prepare food for the first time. First read the
section on Safety information.
Setting the clock
When the appliance is first connected or after a power cut,
three zeros will appear in the display panel.
1. Press the 0 button.
"12:00" and
0 appear in the display.
2. Set the clock using the rotary selector.
3. Press the 0 button again..
The current time is set.
Hiding the clock
Press the
0 button and then press Stop.
The display is blank.
Resetting the clock
Press the
0 button.
"12:00" appears in the display. Make settings as detailed in
points 2 and 3.
Change the clock, e.g. from summer to winter time
Set as described in point 1 to 3.
The microwave
Microwaves are converted to heat in foodstuffs. You will find
information about ovenware and how to set the microwave.
Note: In the Tested for you in our cooking studio section, you
will find examples for defrosting, heating and cooking with the
microwave oven.
Try out the microwave straight away. You could heat up a cup
of water for your tea, for example.
Use a large cup without any decorative gold or silver trim and
place a teaspoon in it. Place the cup containing the water on
the turntable.
1. Press 800 W.
2. Set 1:30 minutes using the rotary knob.
3. Press the Start button.
After 1 minute 30 seconds, a signal sounds. The water is hot.
As you are drinking your tea, please take time to read again the
safety information that can be found at the front of the
instruction manual. This is very important.
Notes regarding ovenware
Suitable ovenware
Suitable dishes are heat-resistant ovenware made of glass,
glass ceramic, porcelain, ceramic or heat-resistant plastic.
These materials allow microwaves to pass through.
You can also use serving dishes. This saves you having to
transfer food from one dish to another. You should only use
ovenware with decorative gold or silver trim if the manufacturer
guarantees that they are suitable for use in microwaves.
Unsuitable ovenware
Metal ovenware is unsuitable. Metal does not allow microwaves
to pass through. Food in covered metal containers will remain
cold.
Caution!
Creation of sparks: metal – e.g. a spoon in a glass – must be
kept at least 2 cm from the oven walls and the inside of the
door. Sparks could destroy the glass on the inside of the door.
Ovenware test
Do not switch on the microwave unless there is food inside. The
following ovenware test is the only exception to this rule.
Perform the following test if you are unsure whether your
ovenware is suitable for use in the microwave:
1. Heat the empty ovenware at maximum power for ½ to
1 minute.
2. Check the temperature occasionally during that time.
The ovenware should still be cold or warm to the touch.
The ovenware is unsuitable if it becomes hot or sparks are
generated.
Microwave power settings
Use the button to set the desired microwave power.
Note: You can set the 800 W microwave power setting for
30 minutes, 600 W for 1 hour, the other power settings for
1 hour and 39 minutes respectively.
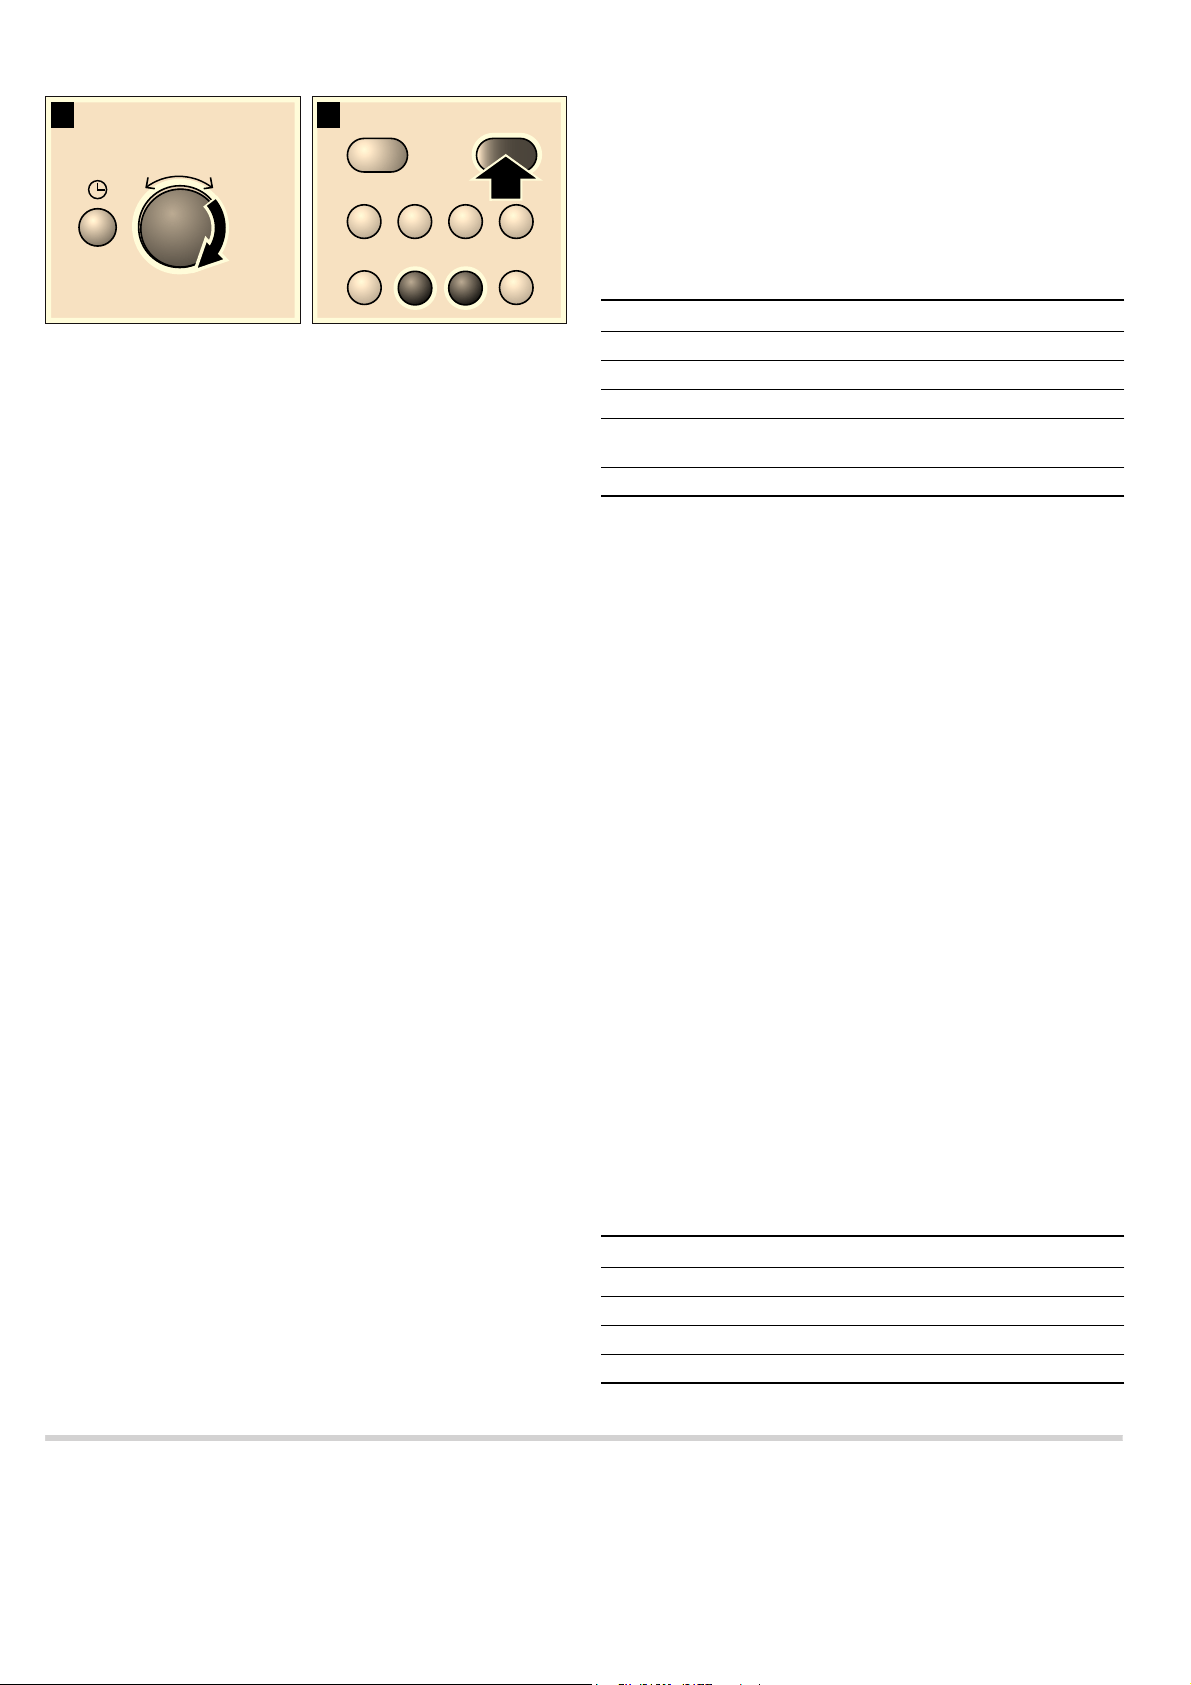
Setting the microwave
Example: microwave power setting 600 W
1. Press the required microwave power setting.
The selected microwave power setting lights up in the
display, and "1:00 min" appears.
PLQ
NJ
PLQ
NJ
90 W For defrosting delicate foods
180 W For defrosting and continued cooking
360 W For cooking meat and heating delicate foods
600 W For heating and cooking food
800 W For heating liquids

22
2. Set a cooking time using the rotary selector.
3. Press the "Start" button.
The cooking time starts counting down.
The cooking time has elapsed
A signal sounds. Open the appliance door or press Stop. The
clock reappears.
Changing the cooking time
This can be done at any time. Change the cooking time using
the rotary selector.
Pausing
Press the Stop button once, or open the appliance door. Press
the START button after closing the door.
Cancelling operation
Press the Stop button twice, or open the door and press the
Stop button once.
Note: You can also adjust the cooking time first and then the
microwave power setting.
Cooling fan
The appliance is equipped with a cooling fan. The fan may run
on even if the oven has been switched off.
Notes
■ The cooking compartment remains cold during microwave
operation. The cooling fan will still switch on. The fan may run
on even when microwave operation has ended.
■ Condensation may appear on the door window, interior walls
and floor. This is normal and does not adversely affect
microwave operation. Wipe away the condensation after
cooking.
Memory
You can save the settings for a dish in the memory and call it
up again at any time.
The memory is useful for if you frequently prepare a specific
dish.
Saving memory settings
Example: 360 W, 25 minutes
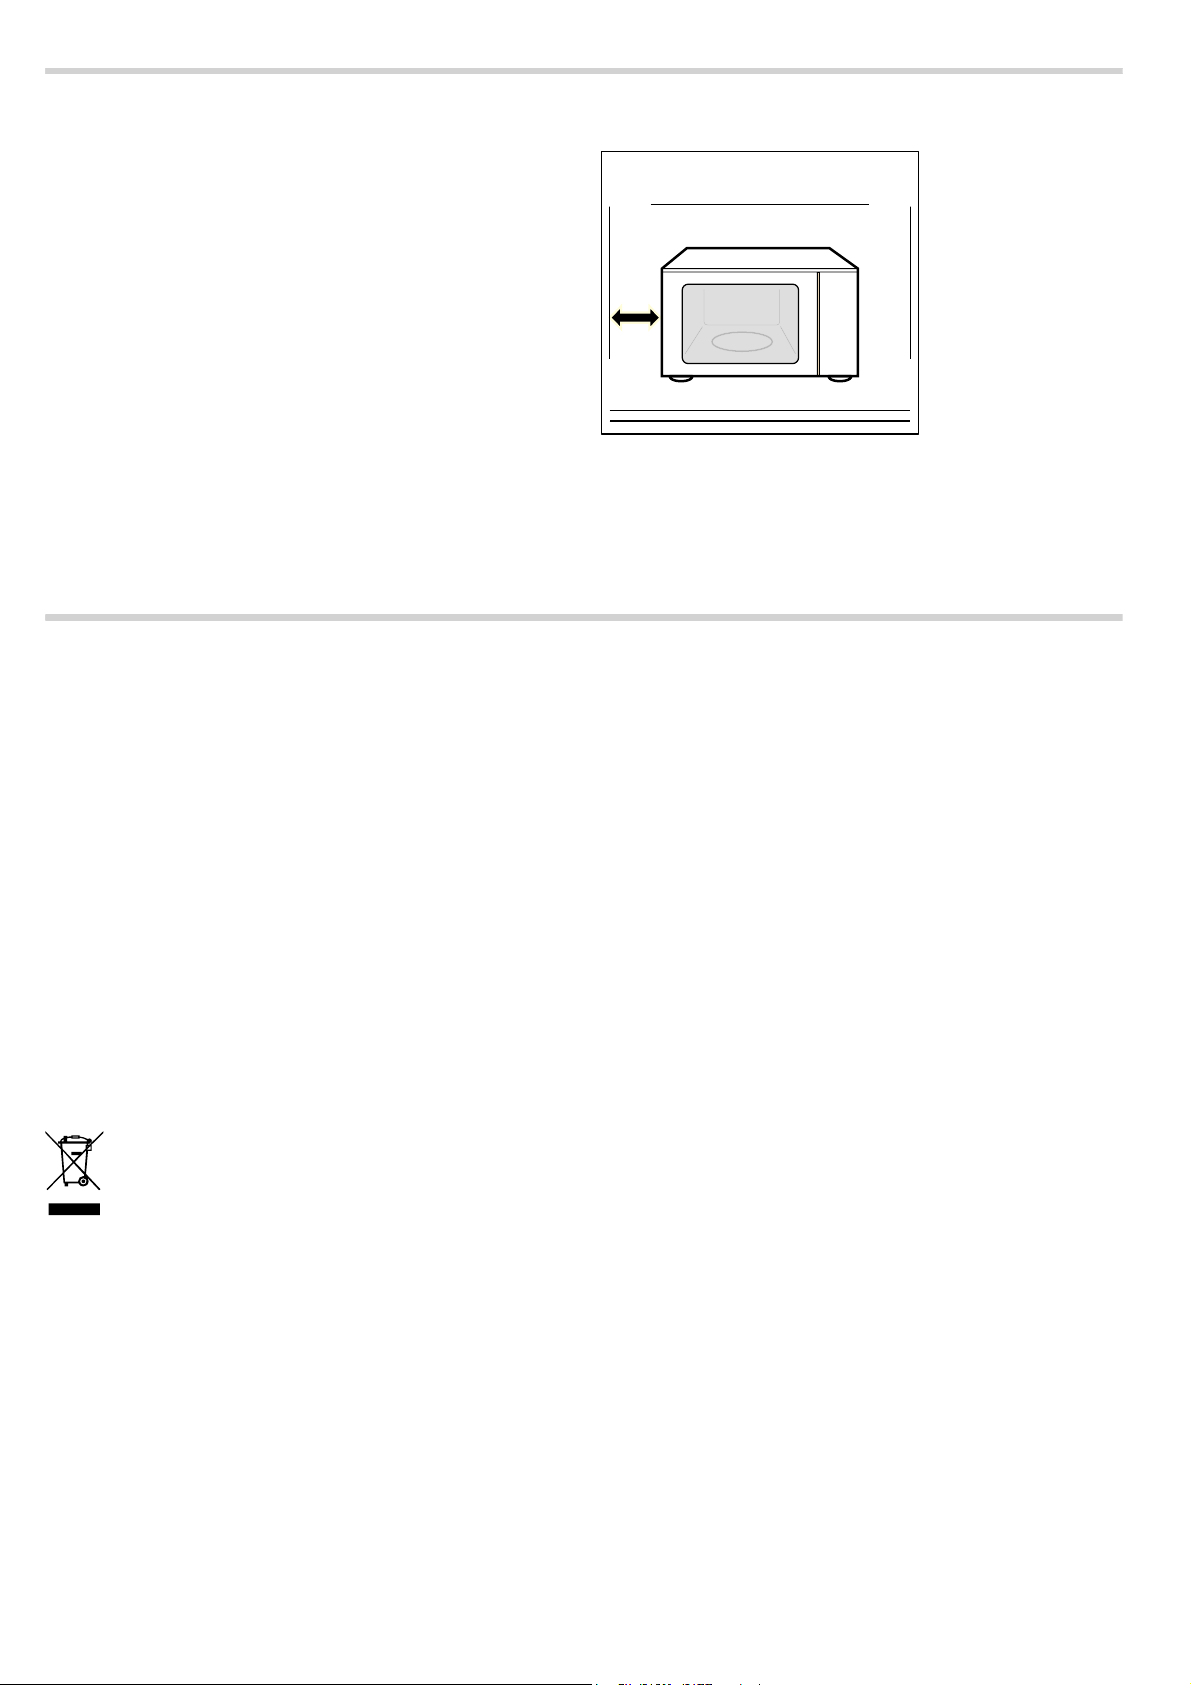
1. Press the i button.
"M" appears in the display.
2. Press the required microwave power setting.
"M", the selected power setting and "1:00 min" appear in the
display.
3. Set the cooking time using the rotary selector.
4. Confirm by pressing the i button.
The clock reappears. The setting is saved.
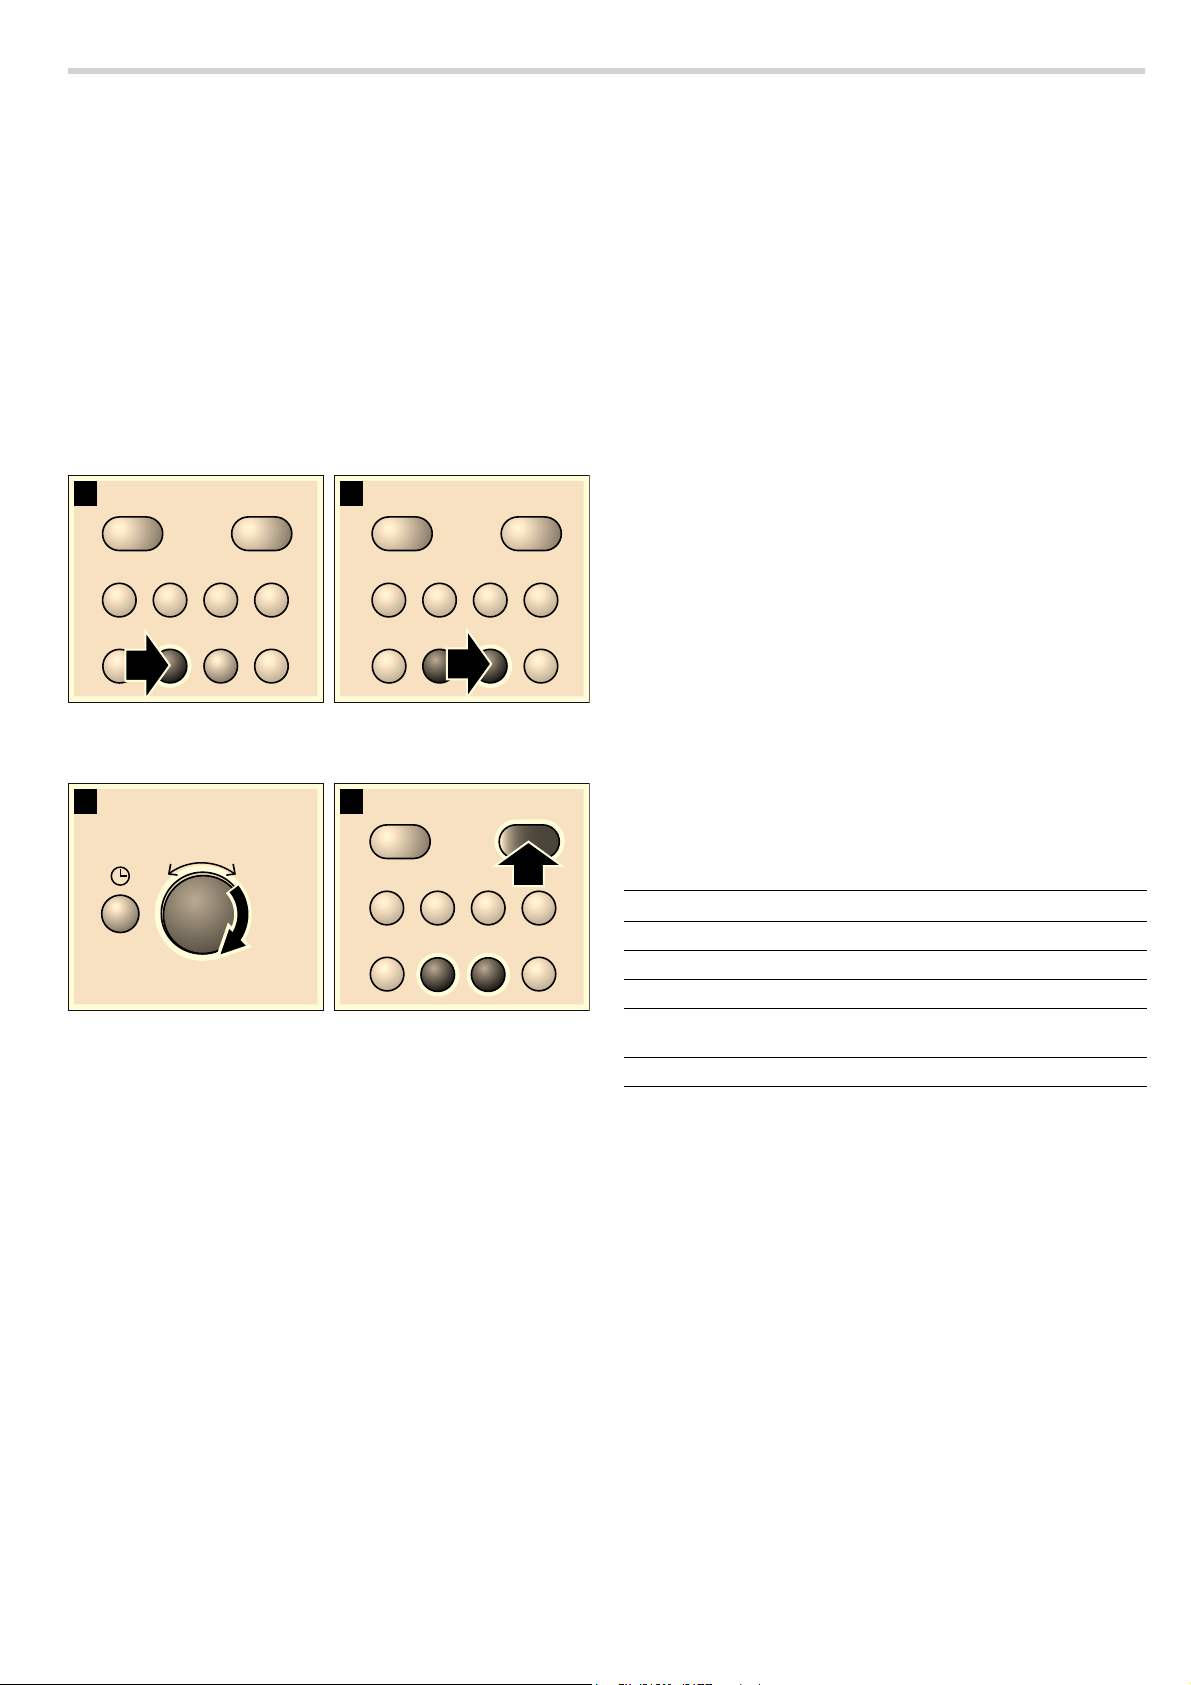
Starting the memory
It is very easy to start the saved programme. Place your meal
into the appliance. Close the appliance door.
1. Press the i button.
The saved settings are displayed.
2. Press the Start button.
The cooking time counts down in the display.
The cooking time has elapsed
A signal sounds. Open the appliance door or press Stop. The
clock reappears.
Pausing
Press the Stop button once, or open the appliance door. Press
the START button after closing the door.
Cancelling the setting
Press the Stop button twice, or open the appliance door and
press the Stop button once.
Care and cleaning
With careful care and cleaning your microwave oven will retain
its looks and remain good order. We will explain here how you
should care for and clean your appliance correctly.
: Risk of short circuit!
Never use high-pressure cleaners or steam cleaners to clean
the oven.
: Risk of burns!
Never clean the appliance immediately after switching off. Let
the appliance cool down.
: Risk of electric shock!
Do not immerse the appliance in water or clean under a jet of
water.
6WRS
6WDUW
PLQ
NJ
K
L
J
6WRS
6WDUW
PLQ
NJ
J
L
25
4. Press the Start button.
You will see the cooking time for the programme counting
down.
The cooking time has elapsed
A signal sounds. Open the appliance door or press Stop. The
clock reappears.
Correction
Press the Stop button twice and reset.
Pausing
Press the Stop button once, or open the appliance door. Press
the START button after closing the door.
Cancelling operation
Press the Stop button twice, or open the door and press the
Stop button once.
Notes
■ For some programmes, a signal sounds after a certain time.
Open the appliance door and stir the food or turn the meat or
poultry. After closing the door, press the "Start" button again.
■ You can query the programme number and weight using "g"
or "
h". The queried value is shown for 3 seconds in the
display.
Defrosting using the automatic programmes
You can use the 4 defrosting programmes to defrost meat,
poultry and bread.
Notes
■ Preparing food
Use food that has been frozen at -18 °C and stored in
portion-sized quantities that are as thin as possible.
Take the food to be defrosted out of all packaging and weigh
it. You need to know the weight to set the programme.
■ Liquid will be produced when defrosting meat or poultry.
Drain off this liquid when turning meat and poultry and under
no circumstances use it for other purposes or allow it to
come into contact with other foods.
■ Ovenware
Place the food in a microwaveable shallow dish, e.g. a china
or glass plate, but do not cover.
■ Resting time
The defrosted food should be left to stand for an additional
10 to 30 minutes until it reaches an even temperature. Large
pieces of meat require a longer standing time than smaller
pieces. Flat pieces of meat and items made from minced
meat should be separated from each other before leaving to
stand.
After this time, you can continue to prepare the food, even
though thick pieces of meat may still be frozen in the middle.
The giblets can be removed from poultry at this point.
■ Signal
For some programmes, a signal sounds after a certain time.
Open the appliance door and separate the food out or turn
the meat or poultry. Close the door and press the Start
button.
Cooking with the automatic programmes
With the 3 cooking programmes, you can cook rice, potatoes
or vegetables.
Notes
■ Ovenware
The food must be cooked in microwaveable cookware with a
lid. For rice, you should use a large, deep dish.
■ Preparing food
Weigh out the food. You need to know the weight to set the
programme.
Rice:
Do not use boil-in-the-bag rice. Add the required amount of
water, as specified on the packaging. This is usually two or
three times the quantity of rice.
Potatoes:
For boiled potatoes, cut the fresh potatoes into small, even-
sized pieces. Add one tablespoon of water for each 100 g
boiled potatoes, and a little salt.
Fresh vegetables:
Weigh out the fresh, trimmed vegetables. Cut the vegetables
into small, even-sized pieces. Add a tbsp water for each
100 g vegetables.
■ Signal
While the programme is running, a signal sounds after some
time. Stir the food.
■ Resting time
Once the programme has finished, stir the food again. You
should leave it to stand for another 5 to 10 minutes until it
reaches an even temperature.
The cooking result will depend on the quality and consistency
of the food.
Tested for you in our cooking studio
Here you will find a selection of recipes and the ideal settings
for them. We show you which microwave power setting is best
suited to your dish. There are also tips about ovenware and
preparation methods.
Information regarding the tables
The following tables provide you with numerous options and
settings for the microwave.
I H
PLQ
NJ
L
J
6WRS 6WDUW
NJ
Programme no. Weight range in kg
Defrost
P 01 Minced meat 0.20 - 1.00
P 02 Pieces of meat 0.20 - 1.00
P 03
Chicken, chicken
pieces
0.40 - 1.80
P 04 Bread 0.20 - 1.00
Programme no. Weight range in kg
Cooking
P 05 Rice 0.05 - 0.2
P 06 Potatoes 0.15 - 1.0
P 07 Vegetables 0.15 - 1.0

26
The times specified in the tables are only guidelines. They may
vary according to the ovenware used, the quality, temperature
and consistency of the food.
Time ranges are often specified in the tables. Set the shortest
time first and then extend the time if necessary.
It may be that you have different quantities from those specified
in the tables. A rule of thumb can be applied:
Double the amount - almost twice the cooking time
Half the amount - half the cooking time.
Always place the ovenware on the turntable.
Defrost
Notes
■ Place the frozen food in an open container on the turntable.
■ Delicate parts such as the legs and wings of chicken or fatty
outer layers of roasts can be covered with small pieces of
aluminium foil. The foil must not touch the oven walls. You
can remove the foil half way through the defrosting time.
■ Liquid will be produced when defrosting meat or poultry.
Drain off this liquid when turning meat and poultry and under
no circumstances use it for other purposes or allow it to
come into contact with other foods.
■ Turn or stir the food once or twice during the defrosting time.
Large pieces of food should be turned several times.
■ Leave defrosted items to stand at room temperature for a
further 10 to 20 minutes so that the temperature is even
throughout. The giblets can be removed from poultry at this
point. The meat can still be further prepared, even if it has a
small frozen core.
Defrosting, heating up or cooking frozen food
Notes
■ Take ready meals out of the packaging. They will heat up
more quickly and evenly in microwaveable ovenware. The
different components of the meal may not require the same
amount of time to heat up .
■ Food which lies flat will cook more quickly than food which is
piled high. You should therefore distribute the food so that it
is as flat as possible in the ovenware. Different foodstuffs
should not be placed in layers on top of one another.
■ Always cover the food. If you do not have a suitable cover for
your ovenware, use a plate or special microwave foil.
■ Stir or turn the food 2 or 3 times during cooking.
■ After heating, allow the food to stand for a further 2 to
5 minutes so that it can achieve an even temperature.
■ Always use an oven cloth or oven gloves when removing
plates from the oven.
■ This will help the food retain its own distinct taste, so it will
require less seasoning.
Defrost Weight Microwave power setting in watts,
cooking time in minutes
Notes
Whole pieces of meat (beef, veal or
pork - on the bone or boned)
800 g 180 W, 15 mins + 90 W, 10-20 mins -
1 kg 180 W, 20 mins + 90 W, 15-25 mins
1.5 kg 180 W, 30 mins + 90 W, 20-30 mins
Meat in pieces or slices of beef,
veal or pork
200 g 180 W, 2 mins + 90 W, 4-6 mins Separate any defrosted parts when
turning
500 g 180 W, 5 mins + 90 W, 5-10 mins
800 g 180 W, 8 mins + 90 W, 10-15 mins
Minced meat, mixed 200 g 90 W, 10 mins Freeze food flat if possible
Turn several times, remove any
defrosted meat
500 g 180 W, 5 mins + 90 W, 10-15 mins
800 g 180 W, 8 mins + 90 W, 10-20 mins
Poultry or poultry portions 600 g 180 W, 8 mins + 90 W, 10-15 mins -
1.2 kg 180 W, 15 mins + 90 W, 20-25 mins
Fish fillet, fish steak or slices 400 g 180 W, 5 mins + 90 W, 10-15 mins Separate any defrosted parts
Vegetables, e.g. peas 300 g 180 W, 10-15 mins -
Fruit, e.g. raspberries 300 g 180 W, 710 mins Stir carefully during defrosting and
separate any defrosted parts
500 g 180 W, 8 mins + 90 W, 5-10 mins
Butter, defrosting 125 g 180 W, 1 min. + 90 W, 2-3 mins Remove all packaging
250 g 180 W, 1 min + 90 W, 3-4 mins
Loaf of bread 500 g 180 W, 6 mins + 90 W, 5-10 mins -
1 kg 180 W, 12 mins + 90 W, 10-20 mins
Cakes, dry, e.g. sponge cake 500 g 90 W, 10-15 mins Only for cakes without icing, cream or
crème pâtissière, separate the pieces
of cake
750 g 180 W, 5 mins + 90 W, 10-15 mins
Cakes, moist, e.g. fruit flan, cheese-
cake
500 g 180 W, 5 mins + 90 W, 15-20 mins Only for cakes without icing, cream or
gelatine
750 g 180 W, 7 mins + 90 W, 15-20 mins
Defrosting, heating up or cooking fro-
zen food
Weight Microwave power setting in
watts, cooking time in minutes
Notes
Menu, plated meal, ready meal
(2-3 components)
300-400 g 600 W, 8-11 mins -
Soup 400 g 600 W, 8-10 mins -
Stews 500 g 600 W, 10-13 mins -
Slices or pieces of meat in sauce, e.g.
goulash
500 g 600 W, 12-17 mins Separate the pieces of meat when stir-
ring

27
Heating food
: Risk of scalding!
There is a possibility of delayed boiling when a liquid is heated.
This means that the liquid reaches boiling temperature without
the usual steam bubbles rising to the surface. Even if the
container only moves a little, the hot liquid can suddenly boil
over and spatter. When heating liquids, always place a spoon in
the container. This will prevent delayed boiling.
Caution!
Metal e.g. a spoon in a glass must be kept at least 2 cm
from the oven walls and the inside of the door. Sparks could
irreparably damage the glass on the inside of the door.
Notes
■ Take ready meals out of the packaging. They will heat up
more quickly and evenly in microwaveable ovenware. The
different components of the meal may not require the same
amount of time to heat up .
■ Always cover the food. If you do not have a suitable cover for
your container, use a plate or special microwave foil.
■ Stir or turn the food several times during the heating time.
Check the temperature.
■ After heating, allow the food to stand for a further 2 to
5 minutes so that it can achieve an even temperature.
■ Always use an oven cloth or oven gloves when removing
plates from the oven.
Cooking food
Notes
■ Food which lies flat will cook more quickly than food which is
piled high. You should therefore distribute the food so that it
is as flat as possible in the ovenware. Different foodstuffs
should not be placed in layers on top of one another.
■ Cook the food in ovenware with a lid. If you do not have a
suitable lid for your ovenware, use a plate or special
microwave foil.
■ This will help the food retain its own distinct taste, so it will
require less seasoning.
■ After cooking, allow the food to stand for a further 2 to
5 minutes so that it can achieve an even temperature.
■ Always use an oven cloth or oven gloves when removing
plates from the oven.
Fish, e.g. fillet steaks 400 g 600 W, 10-15 mins Add water, lemon juice or wine as
desired
Bakes, e.g. lasagne, cannelloni 450 g 600 W, 1015 mins -
Side dishes, e.g. rice, pasta 250 g 600 W, 2-5 mins Add a little liquid
500 g 600 W, 8-10 mins
Vegetables, e.g. peas, broccoli, carrots 300 g 600 W, 8-10 mins Pour water into the dish so that it cov-
ers the base
600 g 600 W, 14-17 mins
Creamed spinach 450 g 600 W, 11-16 mins Cook without additional water
Defrosting, heating up or cooking fro-
zen food
Weight Microwave power setting in
watts, cooking time in minutes
Notes
Heating food Weight Microwave power setting in watts,
cooking time in minutes
Notes
Menu, plated meal, ready meal
(2-3 components)
350-500 g 600 W, 4-8 mins -
Drinks 150 ml 800 W, 1-2 mins Place a spoon in the glass; do not overheat
alcoholic drinks; check during heating
300 ml 800 W, 2-3 mins
500 ml 800 W, 3-4 mins
Baby food, e.g. baby bottle 50 ml 360 W, approx. ½ min No teats or lids. Always shake well after heat-
ing. You must check the temperature.
100 ml 360 W, approx. 1 min.
200 ml
360 W, 1
^ min
Soup 1 cup 200 g 600 W, 2-3 mins -
Soup, 2 cups 400 g 600 W, 4-5 mins -
Meat in sauce 500 g 600 W, 8-11 mins Separate the slices of meat
Stew 400 g 600 W, 6-8 mins -
800 g 600 W, 8-11 mins -
Vegetables, 1 portion 150 g 600 W, 2-3 mins Add a little liquid
Vegetables, 2 portions 300 g 600 W, 3-5 mins
Cooking food Weight Microwave power setting in
watts, cooking time in minutes
Notes
Meat loaf 750 g 600 W, 20-25 mins Cook uncovered

31
graduación. Si se utilizan bebidas
alcohólicas de alta graduación, hacerlo en
pequeñas cantidades. Abrir la puerta del
aparato con precaución.
¡Peligro de quemaduras!
■
Los alimentos con cáscara o piel dura
pueden reventar durante el calentamiento
o incluso una vez finalizado. No cocer los
huevos con la cáscara o calentar huevos
duros. No cocer crustáceos. A los huevos
fritos y los huevos al plato primero se les
debe pinchar la yema. En los alimentos
con la piel dura, como p. ej. manzanas,
tomates, patatas o salchichas, la piel
puede reventar . Antes de calentarlos se
debe pinchar la cáscara o la piel.
¡Peligro de quemaduras!
■
El calor no se distribuye uniformemente
en los alimentos para bebés. No calentar
alimentos para bebés en recipientes
tapados. Retirar siempre la tapa o la
tetina. Remover o agitar bien tras el
calentamiento. Comprobar la temperatura
antes de dar el alimento al bebé.
¡Peligro de quemaduras!
■
Las comidas calentadas emiten calor. Los
recipientes que las contienen pueden
estar muy calientes. Utilizar siempre un
agarrador para sacar la vajilla o los
accesorios.
¡Peligro de quemaduras!
■
Los envoltorios sellados de algunos
alimentos pueden estallar. Observar
siempre las indicaciones del embalaje.
Utilizar siempre un agarrador para sacar
los platos del compartimento de cocción.
¡Peligro de quemaduras!
■
Un uso del aparato diferente al
especificado puede ser peligroso.
No se permite secar alimentos ni ropa,
calentar zapatillas, cojines de semillas o
granos, esponjas, bayetas húmedas ni
cosas similares.
Por ejemplo, las zapatillas, cojines de
semillas o granos, esponjas, bayetas
húmedas o cosas similares
sobrecalentadas pueden ocasionar
quemaduras
¡Peligro de quemaduras!
■
Al abrir la puerta del aparato puede salir
vapor caliente. Abrir la puerta del aparato
con precaución. No dejar que los niños se
acerquen.
¡Peligro de quemaduras!
■
Si se introduce agua en el interior del
horno puede generarse vapor de agua
caliente. No derramar agua en el interior
del horno caliente.
¡Peligro de quemaduras!
■
Al calentar líquidos puede producirse un
retardo de la ebullición. Esto quiere decir
que se puede alcanzar la temperatura de
ebullición sin que aparezcan las burbujas
de vapor habituales. Un ligero movimiento
del recipiente es suficiente para hacer que
el líquido caliente empiece a hervir de
repente y a salpicar intensamente.
Colocar siempre una cuchara en el
recipiente al calentar. De esta manera se
evita el retardo de la ebullición.
¡Peligro de lesiones!
■
Si el cristal de la puerta del aparato está
dañado, puede romperse. No utilizar
rascadores para vidrio o productos de
limpieza abrasivos o corrosivos.
¡Peligro de lesiones!
■
La vajilla no adecuada para el microondas
puede reventar. Los recipientes de
porcelana o cerámica pueden presentar
finos orificios en asas y tapas. Estos
orificios ocultan huecos. La posible
humedad que haya penetrado en estos
huecos puede hacer estallar el recipiente.
Utilizar exclusivamente vajilla adecuada
para el microondas.
¡Peligro de lesiones!
■
La vajilla y los recipientes de metal o con
adornos metálicos pueden provocar la
formación de chispas al usarlos solo con
la función microondas. Esto daña el
aparato. No utilizar nunca recipientes de
metal con la función microondas.
¡Peligro de lesiones!
■
El plato giratorio de cristal puede hacerse
pedazos.No golpear nunca el plato
giratorio con objetos duros.
¡Peligro de lesiones!
■
Las roturas y rajas en el plato giratorio de
cristal son peligrosas. Manejar el plato
giratorio con cuidado.
Causas de daños
¡Atención!
■ Junta muy sucia: Si la junta presenta mucha suciedad, la
puerta del aparato no cerrará correctamente. El frontal de los
muebles contiguos puede deteriorarse. Mantener la junta
siempre limpia.
■ Funcionamiento del microondas sin alimentos: El
funcionamiento del aparato sin alimentos provoca una
sobrecarga del mismo. No conectar el aparato sin que haya
alimentos en el compartimento de cocción. En todo caso se
permite una prueba breve de la vajilla (véase el capítulo
Microondas, recipientes).
■ Palomitas para microondas: No programar el microondas a
una potencia demasiado alta. Utilizar una potencia máxima
de 600 W. Disponer siempre la bolsa de palomitas sobre un
plato de cristal. El cristal puede estallar por sobrecarga.
■ El líquido derramado durante la cocción no debe penetrar a
través del accionamiento del plato giratorio en el interior del
aparato. Supervisar el proceso de cocción. Primero ajustar
una duración de cocción más breve y prolongarla si es
necesario.
■ No utilizar el microondas sin el plato giratorio.
■ Formación de chispas: Los metales, p. ej. la cuchara en un
vaso, deben estar separados al menos 2 cm de las paredes
del horno y de la parte interior de la puerta del horno. La
formación de chispas podría destruir el vidrio interior de la
puerta del aparato.

33
El panel de mando
A continuación se ofrece una vista general del panel de
mando. Los elementos pueden variar según el modelo de
aparato.
Mando giratorio
Con el mando giratorio se pueden modificar todos los valores
recomendados y configurados.
El selector giratorio es retráctil. Para enclavar o desenclavar el
selector giratorio, presionarlo.
Los accesorios
¡Atención!
Al retirar la vajilla, asegurarse de que no se desplace el plato
giratorio. Comprobar que el plato giratorio esté correctamente
encajado. El plato giratorio puede girarse hacia la derecha o
hacia la izquierda.
Plato giratorio
Para colocar el plato giratorio:
1. Colocar el anillo giratorio a en la hendidura del
compartimento de cocción.
2. Enclavar el plato giratorio b en el accionamiento c del centro
de la base del compartimento de cocción.
Nota: Utilizar el aparato solo cuando el plato giratorio esté
colocado. Asegurarse de que queda correctamente enclavado.
El plato giratorio puede girar hacia la izquierda o hacia la
derecha.
PLQ
NJ
7HFODVGH
3URJUDPDDXWRPiWLFR
J 7HFOD3URJUDPD
K 7HFOD3HVR
K
0
J
7HFOD0HPRULD
,QGLFDGRU
SDUDODKRUD\ODGXUDFLyQ
7HFOD6WDUW
7HFODVGH
3RWHQFLDVGHOPLFURRQGDV
:
:
:
:
:
%RWyQGHDSHUWXUDGHSXHUWD
0DQGRJLUDWRULR
SDUDDMXVWDUOD
KRUD\ODGXUDFLyQ
RSDUDDMXVWDUHO
SURJUDPDDXWRPiWLFR
7HFOD6WRS
7HFODGHUHORM
6WRS 6WDUW
E
D
F

34
Antes del primer uso
A continuación se indican los pasos que deben seguirse antes
de utilizar el microondas por primera vez. Leer antes el capítulo
Consejos y advertencias de seguridad.
Programar la hora
Al conectar el aparato a la red eléctrica o tras un corte en el
suministro de corriente, en el panel indicador parpadean tres
ceros.
1. Pulsar la tecla 0.
En el indicador se muestra 12:00 horas y
0
2. Ajustar la hora con el mando giratorio.
3. Volver a pulsar la tecla 0.
La hora actual se ha programado.
Suprimir la indicación de hora
Pulsar la tecla
0 y, a continuación, pulsar Stop.
El indicador se vuelve oscuro.
Reprogramar la hora
Pulsar la tecla
0.
Aparece la hora 12:00 en el indicador. Programar como se
describe en los puntos 2 y 3.
Cambiar la hora p. ej. del horario de verano al de invierno
Programar tal como se describe en los puntos 1 a 3.
El microondas
Las microondas se transforman en calor dentro de los
alimentos. Le presentamos toda información necesaria sobre
recipientes y sobre cómo programar el microondas.
Nota: En el capítulo Platos probados en nuestro estudio de
cocina encontrará ejemplos sobre cómo descongelar, calentar
y cocinar con microondas.
¡Pruebe a utilizar su microondas! Por ejemplo, calentar una
taza de agua para preparar un té.
Coger una taza grande sin decoración dorada o plateada e
introducir una cuchara de té en la taza. Colocar la taza con
agua sobre el plato giratorio.
1. Pulsar 800 W.
2. Programar 1:30 min con el mando giratorio.
3. Pulsar la tecla Start.
Tras 1 minuto y 30 segundos suena una señal. El agua está
caliente.
Mientras se toma el té, volver a leer las indicaciones de
seguridad del principio de las instrucciones de uso. Son muy
importantes.
Consejos y advertencias de los recipientes
Recipientes apropiados
Son adecuados los recipientes resistentes al calor de vidrio,
vitrocerámica, porcelana, cerámica o plástico resistente al
cambio de temperatura. Estos materiales dejan pasar las
microondas.
También puede utilizar recipientes para servir. Así no tiene que
trasvasar los alimentos. Utilizar recipientes con decoración
dorada o plateada sólo si el fabricante garantiza que son aptos
para microondas.
Recipientes no adecuados
Los recipientes de metal no son aptos. El metal no deja pasar
las microondas. La comida en recipientes de metal cerrados
no se calienta
¡Atención!
Formación de chispas: Los metales, p. ej. la cuchara en un
vaso, deben estar separados al menos 2 cm de las paredes
del horno y de la parte interior de la puerta del horno. La
formación de chispas podría destruir el vidrio interior de la
puerta del aparato.
Prueba de la vajilla
No encienda nunca el microondas sin alimentos en su interior,
con excepción de la prueba de la vajilla siguiente.
Si no está seguro de si su recipiente es adecuado para el
microondas, efectúe el siguiente test:
1. Introducir el recipiente vacío en el aparato durante ½ -
1 minuto a la potencia máxima.
2. Comprobar la temperatura de tanto en tanto.
El recipiente debería estar frío o templado.
Si se calienta o se generan chispas, no es adecuado para el
microondas.
Potencias del microondas
Con las teclas ajustar la potencia del microondas deseada.
Nota: El nivel de potencia de microondas de 800 W puede
ajustarse durante 30 minutos, el de 600 W durante 1 hora, y
los niveles restantes durante 1 hora y 39 minutos cada uno.
Programar el microondas
Ejemplo: potencia del microondas 600 W
PLQ
NJ
PLQ
NJ
90 W para descongelar alimentos delicados
180 W para descongelar y continuar la cocción
360 W para cocer carne y para calentar alimentos deli-
cados
600 W para calentar y cocer alimentos
800 W para calentar líquidos

36
Cuidados y limpieza
El microondas mantendrá durante mucho tiempo su aspecto
reluciente siempre y cuando se lleven a cabo la limpieza y los
cuidados pertinentes. A continuación se describen los
cuidados y la limpieza óptimos para el aparato.
: ¡Peligro de cortocircuito!
No utilizar limpiado de alta presión ni por chorro de vapor.
: ¡Peligro de quemaduras!
No limpiar el aparato directamente tras desconectarlo. Dejar
que el aparato se enfríe.
: ¡Peligro de descarga eléctrica!
No sumergir el aparato en agua ni limpiarlo bajo un chorro de
agua.
Tener en cuenta las indicaciones de la tabla para no dañar las
distintas superficies del horno empleando un producto de
limpieza inadecuado.
No utilizar:
■ productos de limpieza abrasivos o corrosivos.
La superficie puede dañarse. Si alguno de estos productos
entra en contacto con la parte delantera, limpiarlo
inmediatamente con agua.
■ rascadores para metal o vidrio para limpiar el cristal de la
puerta del aparato,
■ rascadores para metal o vidrio para limpiar la junta,
■ esponjas o estropajos duros.
Lavar a fondo las bayetas nuevas antes de usarlas.
■ productos fuertes que contengan alcohol.
Productos de limpieza
¡Atención!
Desconectar el fusible de la caja de fusibles o desenchufar el
aparato antes de la limpieza. Limpiar el aparato por fuera y el
compartimento de cocción con un paño húmedo y un producto
de limpieza suave. Secar con un paño limpio.
Tabla de averías
Con frecuencia, cuando se produce una avería, se trata solo de
una pequeña anomalía fácil de subsanar. Antes de avisar al
Servicio de Asistencia Técnica, intentar solucionar la avería con
ayuda de la siguiente tabla.
Si no se obtienen los resultados esperados de un plato,
consultar el capítulo Platos probados en nuestro estudio de
cocina. En este capítulo se describen consejos y sugerencias
para cocinar.
: ¡Peligro de descarga eléctrica!
Las reparaciones inadecuadas son peligrosas. Las
reparaciones sólo pueden ser efectuadas por personal del
Servicio de Asistencia Técnica debidamente instruido.
Algunos mensajes de error pueden ser solucionados por el
propio usuario.
Zona Productos de limpieza
Frontal del aparato Agua caliente con un poco de jabón:
Limpiar con un paño humedecido en
agua con jabón y secar con un paño
suave. No utilizar limpiacristales o ras-
cadores para metal o vidrio para la lim-
pieza.
Hendidura del com-
partimento de coc-
ción
Paño húmedo:
No debe penetrar agua en el interior del
aparato a través del dispositivo de
accionamiento del plato giratorio.
Plato y anillo girato-
rios
Agua caliente con un poco de jabón:
Encajar bien el plato giratorio tras la lim-
pieza.
Cristales de la puerta Limpiacristales:
Limpiar con un paño de limpieza. No uti-
lizar rascadores para vidrio.
Junta Agua caliente con un poco de jabón:
Limpiar con un paño de limpieza sin fro-
tar. No utilizar rascadores para metal o
vidrio para la limpieza.
Frontal del aparato
con acero inoxidable
Agua caliente con un poco de jabón:
Limpiar con un paño humedecido en
agua con jabón y secar con un paño
suave. Limpiar inmediatamente las man-
chas de cal, grasa, almidón y clara de
huevo. Debajo de estas manchas puede
formarse corrosión. Puede adquirir pro-
ductos de limpieza de acero especiales
en el servicio de asistencia técnica o en
comercios especializados. No utilizar
limpiacristales o rascadores para metal
o vidrio para la limpieza.
Compartimento de
cocción de acero
inoxidable
Agua caliente con un poco de jabón o
agua con vinagre:
Limpiar con un paño humedecido en
agua con jabón y secar con un paño
suave.
Si la suciedad es intensa: utilizar sólo
los limpiadores para hornos cuando el
compartimento de cocción esté frío. Uti-
lizar preferentemente una esponja de
acero inoxidable. No utilizar spray para
hornos ni otros productos de limpieza
agresivos o corrosivos. Tampoco es
apropiado utilizar estropajos ni esponjas
ásperas, ya que rayan la superficie.
Dejar que las superficies interiores se
sequen por completo.
Zona Productos de limpieza
38
Programación automática
El programa automático permite descongelar alimentos y
preparar platos de forma cómoda, rápida y sencilla.
Seleccionar el programa e introducir el peso de los alimentos.
El programa automático configura el programa óptimo. Pueden
seleccionarse hasta 7 programas.
Seleccionar el programa
Una vez seleccionado el programa, proceder del siguiente
modo:
1. Pulsar repetidamente la tecla g hasta que se muestre el
número de programa deseado.
2. Pulsar la tecla h.
Se ilumina "P" en el indicador y se muestra una sugerencia
de peso.
3. Ajustar el peso del alimento con el mando giratorio.
4. Pulsar la tecla Start.
Se muestra el transcurso de la duración del programa.
El tiempo ha transcurrido
Suena una señal. Abrir la puerta del aparato o pulsar Stop. Se
muestra de nuevo la hora.
Corregir
Pulsar la tecla Stop dos veces y volver a programar.
Interrumpir
Pulsar una vez la tecla Stop o abrir la puerta del aparato. Tras
cerrar la puerta, pulsar de nuevo la tecla Start.
Cancelar el funcionamiento
Pulsar dos veces la tecla Stop o abrir la puerta y pulsar una
vez la tecla Stop.
Notas
■ En algunos programas suena una señal al cabo de un
tiempo determinado. Abrir la puerta del aparato y remover
los ingredientes o dar la vuelta a la carne o las aves. Tras
cerrar la puerta, pulsar de nuevo la tecla Start.
■ Se pueden consultar el número del programa y el peso con
g o h. El valor consultado se muestra en el indicador
durante 3 segundos.
Descongelación con el programa automático
Los 4 programas de descongelación permiten descongelar
carne, aves y pan.
Notas
■ Preparar los alimentos
Utilizar alimentos congelados a -18 °C y conservados a ser
posible en posición horizontal y repartidos en porciones.
Para descongelar los alimentos, extraerlos del envase y
pesarlos. El peso se necesita para seleccionar el programa.
■ Cuando se descongela carne y ave se produce líquido.
Retirar este líquido al darle la vuelta a la carne. No volverlo a
utilizar en ningún caso ni ponerlo en contacto con otros
alimentos.
■ Recipientes
Introducir los alimentos en un recipiente plano adecuado
para el microondas, p. ej. un plato de cristal o de porcelana,
sin tapa.
■ Tiempo de reposo
Los alimentos descongelados deberían dejarse reposar
durante 10 -30 minutos para homogeneizar su temperatura.
Las piezas grandes de carne requieren un tiempo de reposo
más largo que las piezas pequeñas. Las piezas planas y la
carne picada deberían separarse antes de dejarlas reposar.
A continuación se puede seguir con la preparación de los
alimentos, aun cuando las piezas gruesas de carne todavía
tengan partes congeladas. En este momento pueden
extraerse las vísceras de las aves.
■ Señal
En algunos programas suena una señal al cabo de un
tiempo determinado. Abrir la puerta del aparato y remover
los ingredientes o dar la vuelta a la carne o las aves. Tras
cerrar la puerta, pulsar la tecla Start.
Cocción con el programa automático
Los 3 programas de cocción permiten cocer arroz, patatas o
verduras.
Notas
■ Recipientes
Cocer los alimentos en un recipiente adecuado para el
microondas con tapa. Para el arroz se recomienda emplear
un molde grande y alto.
■ Preparar los alimentos
Pesar los alimentos. El peso se necesita para seleccionar el
programa.
Arroz:
no utilizar arroz en bolsa de cocción. Añadir la cantidad de
agua necesaria de acuerdo con las indicaciones del
fabricante en el embalaje. La cantidad media es de entre dos
y tres veces el peso del arroz.
Patatas:
Para preparar patatas cocidas con sal, cortar las patatas
crudas en trozos pequeños y uniformes. Añadir una
6WRS
6WDUW
6WRS
6WDUW
NJ
L
J
L
J
NJ
I H
PLQ
NJ
L
J
6WRS 6WDUW
NJ
N.° programa Rango de peso en kg
Descongelar
P 01 Carne picada 0,20 - 1,00
P 02 Trozos de carne 0,20 - 1,00
P 03
Pollo, piezas de
pollo
0,40 - 1,80
P 04 Pan 0,20 - 1,00

39
cucharada de agua y un poco de sal por cada 100 g de
patatas.
Verduras frescas:
Pesar las verduras frescas y limpias. Cortar las verduras en
trozos pequeños y uniformes. Añadir una cucharada de agua
por cada 100 g de verduras.
■ Señal
Durante el transcurso del programa, suena una señal al cabo
de un tiempo determinado. Remover los alimentos.
■ Tiempo de reposo
Cuando el programa haya finalizado, volver a remover los
alimentos. Los alimentos deberían dejarse reposar durante
5 -10 minutos para homogeneizar su temperatura.
Los resultados de la cocción dependen de la calidad y la
naturaleza de los alimentos.
Platos probados en nuestro estudio de cocina
A continuación presentamos una selección de platos y los
ajustes óptimos para ellos. Se detallan las potencias del
microondas apropiadas para los respectivos platos. Asimismo
figuran consejos sobre recipientes y el modo de preparación.
Indicaciones sobre las tablas
Las siguientes tablas muestran numerosas posibilidades y
valores de ajuste para el microondas.
Las indicaciones de tiempo que figuran en las tablas deben
entenderse como valores orientativos. Dependen del
recipiente, de la calidad, de la temperatura y del estado de los
alimentos.
En las tablas se indican casi siempre los márgenes de tiempo.
Ajustar primero la configuración de tiempo más corta e ir
aumentando el tiempo según sea necesario.
Es posible que se cocinen cantidades distintas a las indicadas
en la tabla. Para ello existe una regla práctica:
El doble de cantidad requiere casi el doble del tiempo de
cocción,
mientras que la mitad de la cantidad supone la mitad de
tiempo.
Colocar el recipiente siempre sobre el plato giratorio.
Descongelar
Notas
■ Introducir los alimentos congelados en un recipiente
descubierto sobre el plato giratorio.
■ Las partes delicadas, como p. ej. los muslos y las alas de
pollo o los bordes grasos del asado, se pueden cubrir con
pequeños trozos de papel de aluminio. El papel no debe
entrar en contacto con las paredes del horno. Al transcurrir la
mitad del tiempo de descongelado ya se puede retirar el
papel de aluminio.
■ Cuando se descongela carne y ave se produce líquido.
Retirar este líquido al darle la vuelta a la carne. No volverlo a
utilizar en ningún caso ni ponerlo en contacto con otros
alimentos.
■ Entretanto, dar la vuelta o remover los alimentos 1 o 2 veces.
Si las piezas son grandes, darles la vuelta varias veces.
■ Dejar reposar los alimentos descongelados entre 10 y
20 minutos más a temperatura ambiente para homogeneizar
su temperatura. En este momento se pueden extraer las
vísceras de las aves. La carne también puede cocerse
aunque tenga una pequeña parte en su interior aún
congelada.
N.° programa Rango de peso en kg
Cocer
P 05 Arroz 0,05 - 0,2
P 06 Patatas 0,15 - 1,0
P 07 Verduras 0,15 - 1,0
Descongelar Peso Potencia del microondas en vatios,
duración en minutos
Indicaciones
Carne entera de buey, ternera o
cerdo (con o sin huesos)
800 g 180 W, 15 min + 90 W, 10-20 min -
1 kg 180 W, 20 min + 90 W, 15-25 min
1,5 kg 180 W, 30 min + 90 W, 20-30 min
Carne en tacos o filetes de buey,
ternera o cerdo
200 g 180 W, 2 min + 90 W, 4-6 min al dar la vuelta, separar las partes
descongeladas
500 g 180 W, 5 min + 90 W, 5-10 min
800 g 180 W, 8 min + 90 W, 10-15 min
Carne picada, mezcla 200 g 90 W, 10 min Congelar en plano
dar la vuelta varias veces, extraer la
carne descongelada
500 g 180 W, 5 min + 90 W, 10-15 min
800 g 180 W, 8 min + 90 W, 10-20 min
Ave o trozos de ave 600 g 180 W, 8 min + 90 W, 10-15 min -
1,2 kg 180 W, 15 min + 90 W, 20-25 min
Filetes, trozos o ventresca de pes-
cado
400 g 180 W, 5 min + 90 W, 10-15 min separar las partes descongeladas
Verdura, p. ej., guisantes 300 g 180 W, 10-15 min -
Fruta, p. ej., frambuesas 300 g 180 W, 7-10 min remover con cuidado de vez en
cuando, separar las partes desconge-
ladas
500 g 180 W, 8 min + 90 W, 5-10 min
Mantequilla, descongelar 125 g 180 W, 1 min + 90 W, 2-3 min retirar todo el envoltorio
250 g 180 W, 1 min + 90 W, 3-4 min
Pan entero 500 g 180 W, 6 min + 90 W, 5-10 min -
1 kg 180 W, 12 min + 90 W, 10-20 min

42
Agua condensada
Puede aparecer agua condensada en la ventana de la puerta,
en las paredes interiores y en la base. Esto es normal. Esto no
afecta a la función del microondas. Limpie el agua condensada
tras la cocción.
Comidas normalizadas según EN 60705
Existen institutos que verifican la calidad y el funcionamiento de
los aparatos microondas a partir de estos platos.
Según las normas EN 60705, IEC 60705 o. DIN 44547 y
EN 60350 (2009)
Cocer y descongelar con el microondas
Cocer en el microondas
Descongelar en el microondas
Una vez transcurrido el tiempo de cocción, el plato se ha
calentado excesivamente por el exterior, pero aún no está
listo en el centro.
Remover de vez en cuando y seleccionar la próxima vez una
potencia más baja y una duración más larga.
Una vez descongelado, el ave o la carne ha empezado a
cocerse por el exterior pero aún no se ha descongelado del
todo en el centro.
Seleccionar la próxima vez una potencia de microondas más baja.
Si se trata de grandes cantidades, dar la vuelta al alimento varias
veces.
Plato Potencia del microondas en vatios, duración
en minutos
Nota
Mezcla de leche y
huevos, 565 g
180 W, 25-30 min + 90 W, 20-25 min Colocar un molde de vidrio pyrex 20 x 17 cm sobre el plato
giratorio.
Bizcocho 600 W, 8-10 min Colocar el molde de vidrio pyrex Ø 22 cm en el plato girato-
rio.
Asado de carne
picada
600 W, 20-25 min Colocar el molde de vidrio pyrex en el plato giratorio.
Plato Potencia del microondas en vatios, duración
en minutos
Nota
Carne 180 W, 5-7 min + 90 W, 10-15 min Colocar el molde de vidrio pyrex Ø 22 cm en el plato girato-
rio.

44
apenas para a preparação de refeições e
bebidas.
Perigo de incêndio!
■
Os alimentos podem incendiar-se. Nunca
aqueça alimentos dentro de embalagens
próprias para manter os alimentos
quentes.
Nunca aqueça, sem vigilância, alimentos
dentro de recipientes de plástico, papel
ou outros materiais inflamáveis.
Nunca regule a potência de microondas
ou o respectivo tempo para valores
demasiado elevados. Oriente-se pelos
dados constantes neste manual de
instruções.
Nunca seque alimentos no microondas.
Nunca descongele ou aqueça alimentos
com baixo teor de água, p. ex., pão, com
uma potência muito elevada do
microondas ou durante muito tempo.
Perigo de incêndio!
■
O óleo alimentar pode incendiar-se.
Nunca aqueça óleo alimentar sozinho no
microondas.
Perigo de explosão!
Os líquidos ou outros alimentos aquecidos
dentro de recipientes fechados podem
explodir. Nunca aqueça líquidos ou outros
alimentos dentro de recipientes fechados.
Perigo de danos graves para a saúde!
■
A falta de limpeza pode causar danos na
superfície do aparelho. Existe o perigo de
escapar energia de microondas. Limpe o
aparelho regularmente e remova de
imediato eventuais restos de comida.
Mantenha o interior do aparelho, o
vedante e o batente da porta, assim como
a própria porta sempre limpos; consultar
também o capítulo Conservação e
limpeza.
Perigo de danos graves para a saúde!
■
Através da porta do aparelho ou do
respectivo vedante pode escapar energia
de microondas, se estiverem danificados.
Nunca utilize o aparelho se a porta ou o
vedante da porta estiverem danificados.
Contacte o Serviço de Assistência
Técnica.
Perigo de danos graves para a saúde!
■
Os aparelhos sem cobertura da caixa
deixam escapar energia de microondas.
Nunca retire a cobertura da caixa. Para
trabalhos de manutenção ou reparação,
contacte o Serviço de Assistência
Técnica.
Perigo de choque eléctrico!
■
As reparações indevidas são perigosas.
As reparações e substituições de cabos
danificados só podem ser efectuadas por
técnicos especializados do Serviço de
Assistência Técnica. Se o aparelho estiver
avariado, puxe a ficha da tomada ou
desligue o disjuntor no quadro eléctrico.
Contacte o Serviço de Assistência
Técnica.
Perigo de choque eléctrico!
■
O isolamento dos cabos de
electrodomésticos pode derreter em
contacto com partes quentes do aparelho.
Nunca coloque os cabos de
electrodomésticos em contacto com
partes quentes do aparelho.
Perigo de choque eléctrico!
■
A humidade que se infiltra no aparelho
pode dar origem a um choque eléctrico.
Não utilize aparelhos de limpeza a alta
pressão ou de limpeza a vapor.
Perigo de choque eléctrico!
■
A penetração de humidade pode provocar
choques eléctricos. Nunca exponha o
aparelho a calor intenso e humidade. Use
o aparelho apenas em espaços fechados.
Perigo de choque eléctrico!
■
Um aparelho avariado pode causar
choques eléctricos. Nunca ligue um
aparelho avariado. Puxe a ficha da
tomada ou desligue o disjuntor no quadro
eléctrico. Contacte o Serviço de
Assistência Técnica.
Perigo de choque eléctrico!
■
O aparelho trabalha com alta tensão.
Nunca retire a caixa do aparelho.
Perigo de choque elétrico!
■
A infiltração de água pode provocar um
choque elétrico.
Retire a ficha da tomada ou desligue o
disjuntor no quadro elétrico.
Nunca coloque recipientes com líquidos
por cima do aparelho, não utilizar o
aparelho como superfície de apoio.
Perigo de queimaduras!
■
O aparelho fica muito quente. Nunca
toque nas superfícies interiores quentes
do aparelho, nem nas resistências. Deixe
sempre arrefecer o aparelho. Mantenha
as crianças afastadas.
Perigo de queimaduras!
■
Os acessórios ou recipientes ficam muito
quentes. Use sempre uma pega de
cozinha para retirar os acessórios ou
recipientes quentes do interior do
aparelho.
Perigo de queimaduras!
■
Os vapores de álcool podem incendiar-se
no interior quente do aparelho. Nunca
prepare refeições com grandes
quantidades de bebidas com elevado teor
de álcool. Use apenas pequenas
quantidades de bebidas com elevado teor
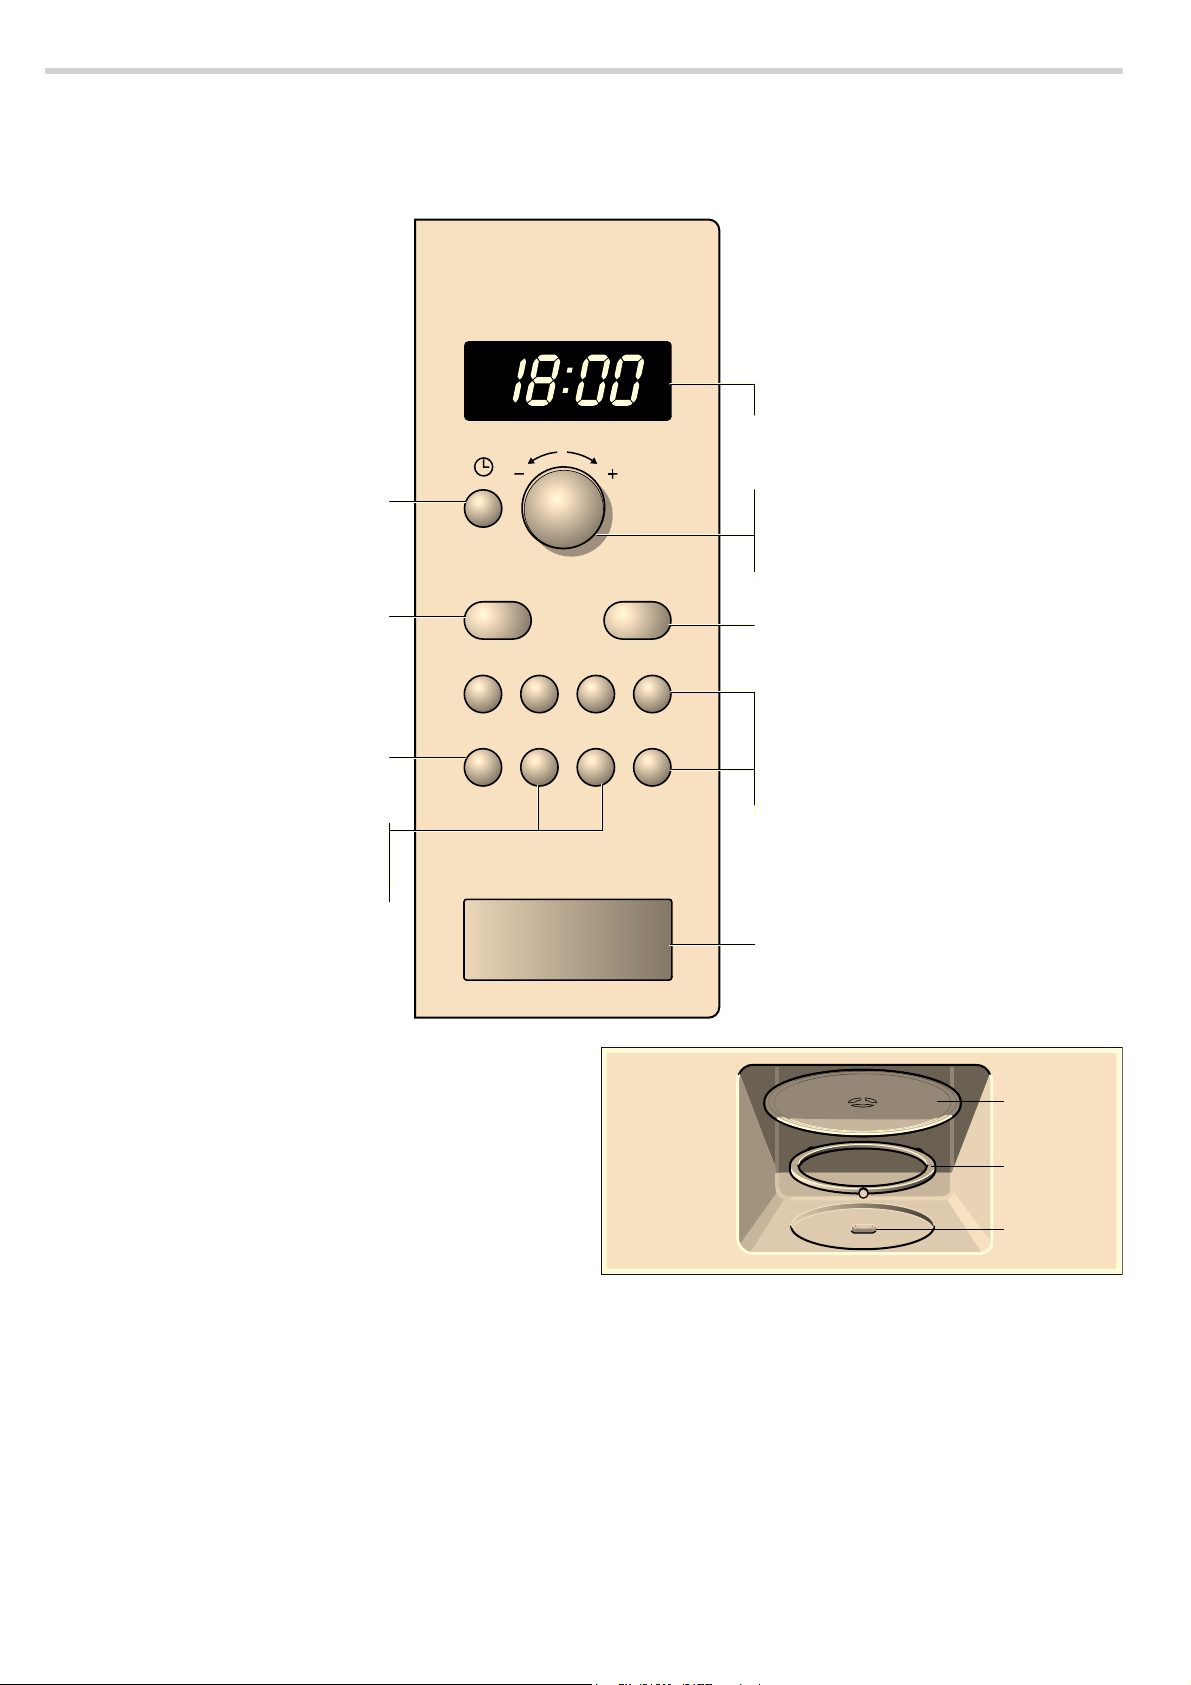
47
O painel de comandos
Apresentamos a seguir uma vista geral do painel de
comandos. Dependendo do modelo do aparelho, os
pormenores podem ser diferentes.
Selector rotativo
Com o selector rotativo pode alterar todos os valores
sugeridos e de regulação.
O selector rotativo é rebaixável. Prima o selector rotativo para o
engatar e desengatar.
Os acessórios
Atenção!
Ao retirar a louça preste atenção para que o prato rotativo não
se desloque. Certifique-se de que o prato rotativo está
encaixado corretamente. O prato rotativo pode girar para
esquerda ou para a direita.
O prato rotativo
O prato rotativo deve ser colocado da seguinte forma:
1. Coloque o aro com rodas a na cavidade que se encontra no
interior do aparelho.
2. Encaixe o prato rotativo b no accionamento c que se
encontra no meio da base do aparelho.
Nota: Utilize o aparelho apenas com o prato rotativo colocado.
Certifique-se de que está correctamente encaixado. O prato
rotativo pode rodar para a esquerda ou para a direita.
PLQ
NJ
7HFODVGH
$XWRPiWLFR
GHSURJUDPDV
J WHFODGHSURJUDPDV
K WHFODGRSHVR
K
L
J
7HFODGHPHPyULD
,QGLFDomRGDKRUD
HGRWHPSRGHGXUDomR
7HFOD6WDUW
7HFODVGH
3RWrQFLDVGHPLFURRQGDV
:
:
:
:
:
$EHUWXUDGDSRUWD
6HOHFWRUURWDWLYR
SDUDDFHUWDUDKRUD
HRWHPSRGHGXUDomR
RXSDUDUHJXODUR
$XWRPiWLFRGHSURJUDPDV
7HFOD6WRS
7HFODGRUHOyJLR
6WRS 6WDUW
E
D
F
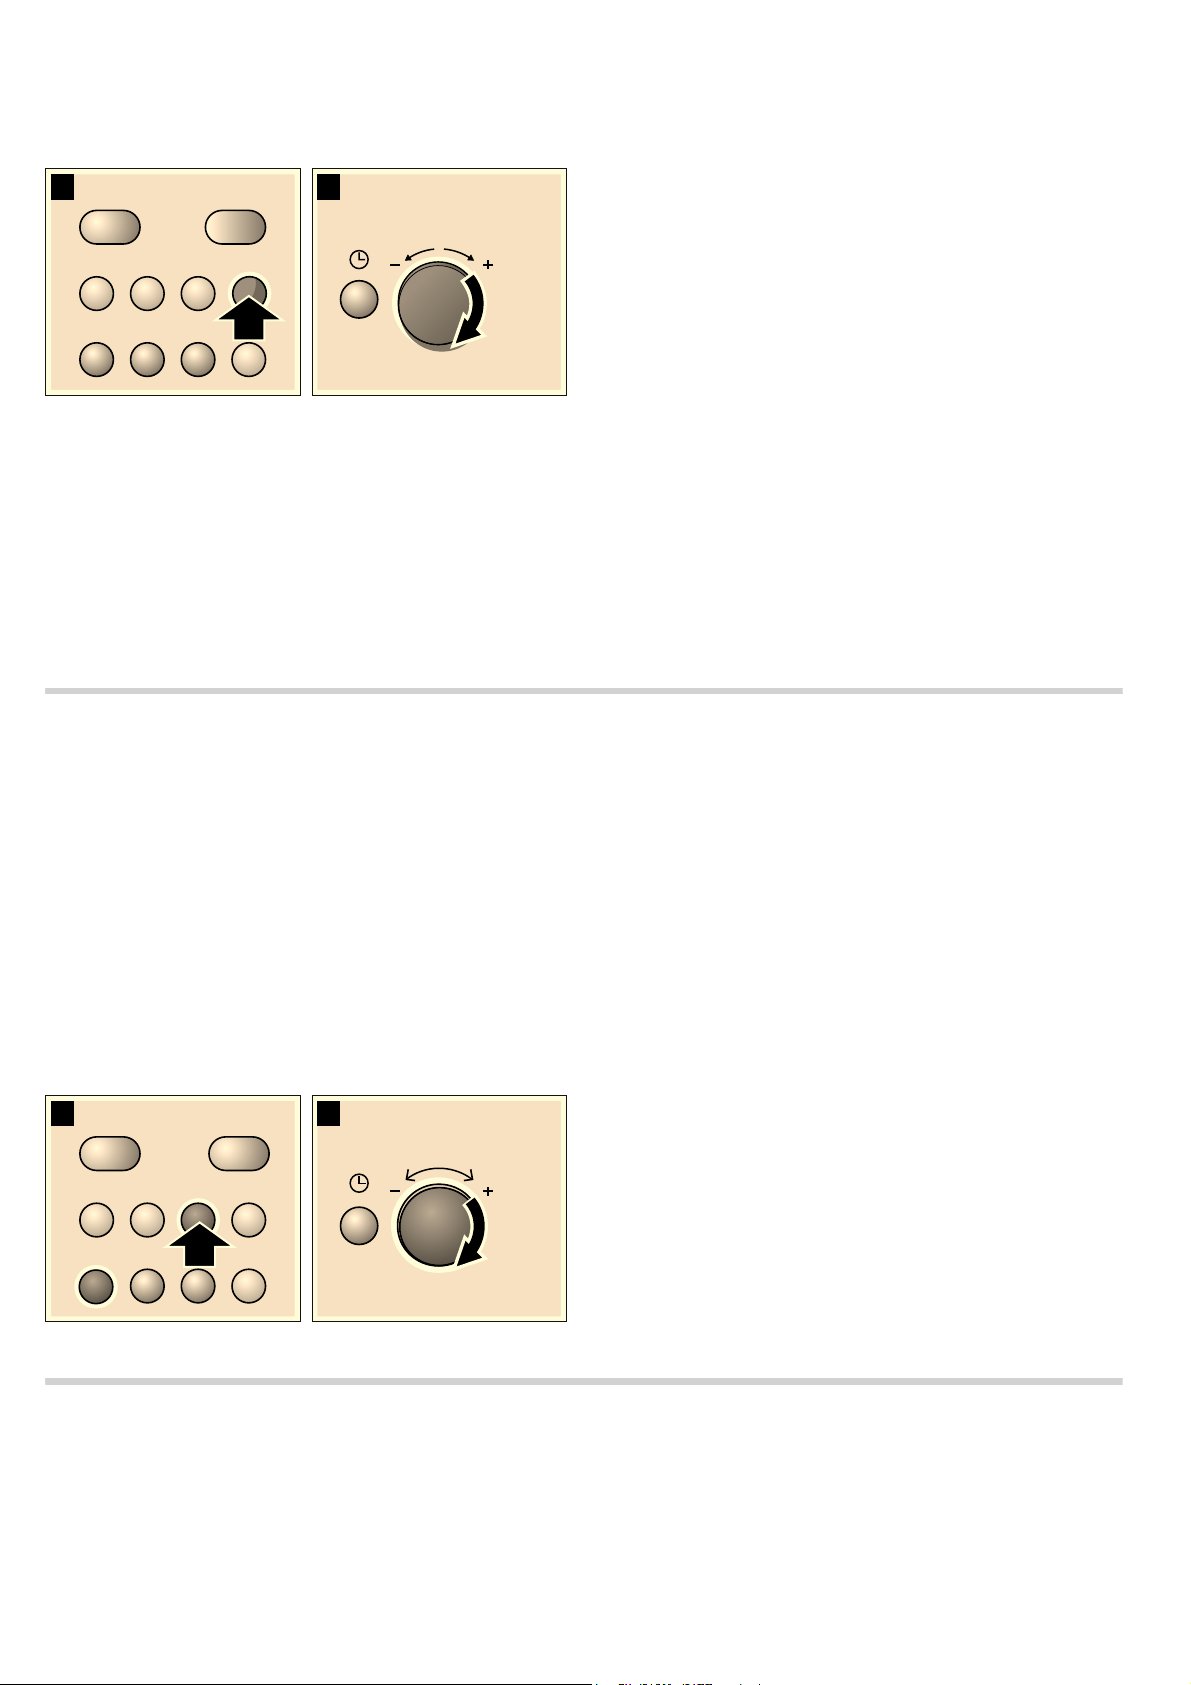
49
1. Prima a potência desejada do microondas.
No visor acende-se a potência regulada do microondas e é
apresentada a duração de 1:00 min.
2. Com o selector rotativo, regule um tempo de duração.
3. Prima a tecla Start.
O tempo de duração decorre de forma visível.
O tempo de duração terminou
Ouve-se um sinal sonoro. Abra a porta do aparelho ou prima a
tecla de fim. A hora aparece novamente.
Alterar o tempo de duração
É possível a qualquer altura. Altere o tempo de duração com o
selector rotativo.
Interromper o funcionamento
Prima uma vez a tecla de fim ou abra a porta do aparelho.
Depois de fechar a porta, prima novamente a tecla de início.
Cancelar o funcionamento
Prima 2 vezes a tecla de fim ou abra a porta e prima a tecla de
fim uma vez.
Nota: Também pode regular primeiro o tempo de duração e só
depois a potência de microondas.
Turbina de arrefecimento
O aparelho está equipado com uma ventoinha de
arrefecimento. A ventoinha pode continuar a trabalhar, mesmo
depois de o aparelho ter desligado.
Notas
■ Quando o aparelho trabalha com microondas, o interior do
forno não aquece. No entanto, a turbina de arrefecimento
liga-se. A turbina pode continuar a trabalhar, mesmo depois
de terminado o funcionamento do microondas.
■ Poderá surgir água de condensação na janela da porta, nas
paredes interiores e na base do aparelho. Isso é normal e
não afecta o funcionamento do microondas. Remova a água
de condensação depois de cozinhar.
Memória
Com a Memória, pode guardar a regulação para uma refeição
e reutilizá-la a qualquer momento.
A Memória é muito útil quando cozinha um determinado prato
com especial frequência.
Gravar as regulações na memória
Exemplo: 360 W, 25 minutos
1. Prima a tecla i.
No visor acende-se um “M”.
2. Carregue na potência de microondas pretendida.
No visor acende-se um “M”, assim como a potência
seleccionada e a indicação 1:00 min.
3. Com o selector rotativo, regule o tempo de duração.
4. Confirme com a tecla i.
A hora aparece novamente. A regulação está memorizada.
Activar a memória
Pode iniciar o programa memorizado de uma forma
extremamente simples. Coloque o seu prato no aparelho.
Feche a porta do aparelho.
1. Prima a tecla i.
As regulações memorizadas aparecem.
2. Prima a tecla de início.
O tempo de duração decresce de forma visível no visor.
O tempo de duração terminou
Ouve-se um sinal sonoro. Abra a porta do aparelho ou prima a
tecla de fim. A hora aparece novamente.
Interromper o funcionamento
Prima uma vez a tecla de fim ou abra a porta do aparelho.
Depois de fechar a porta, prima novamente a tecla de início.
Apagar uma regulação
Prima duas vezes a tecla de fim ou abra a porta do aparelho e
prima a tecla de fim uma vez.
Manutenção e limpeza
Se o seu aparelho de microondas tiver uma manutenção e
limpeza cuidadosas, permanecerá bonito e funcional durante
muito tempo. No presente capítulo explicar-lhe-emos como
deve tratar e limpar o seu aparelho.
: Perigo de curto-circuito!
Nunca utilize aparelhos de limpeza a alta pressão ou a vapor.
: Perigo de queimaduras!
Nunca limpe o aparelho imediatamente depois de o desligar.
Deixe o aparelho arrefecer.
6WRS
6WDUW
PLQ
NJ
K
L
J
6WRS
6WDUW
PLQ
NJ
J
L
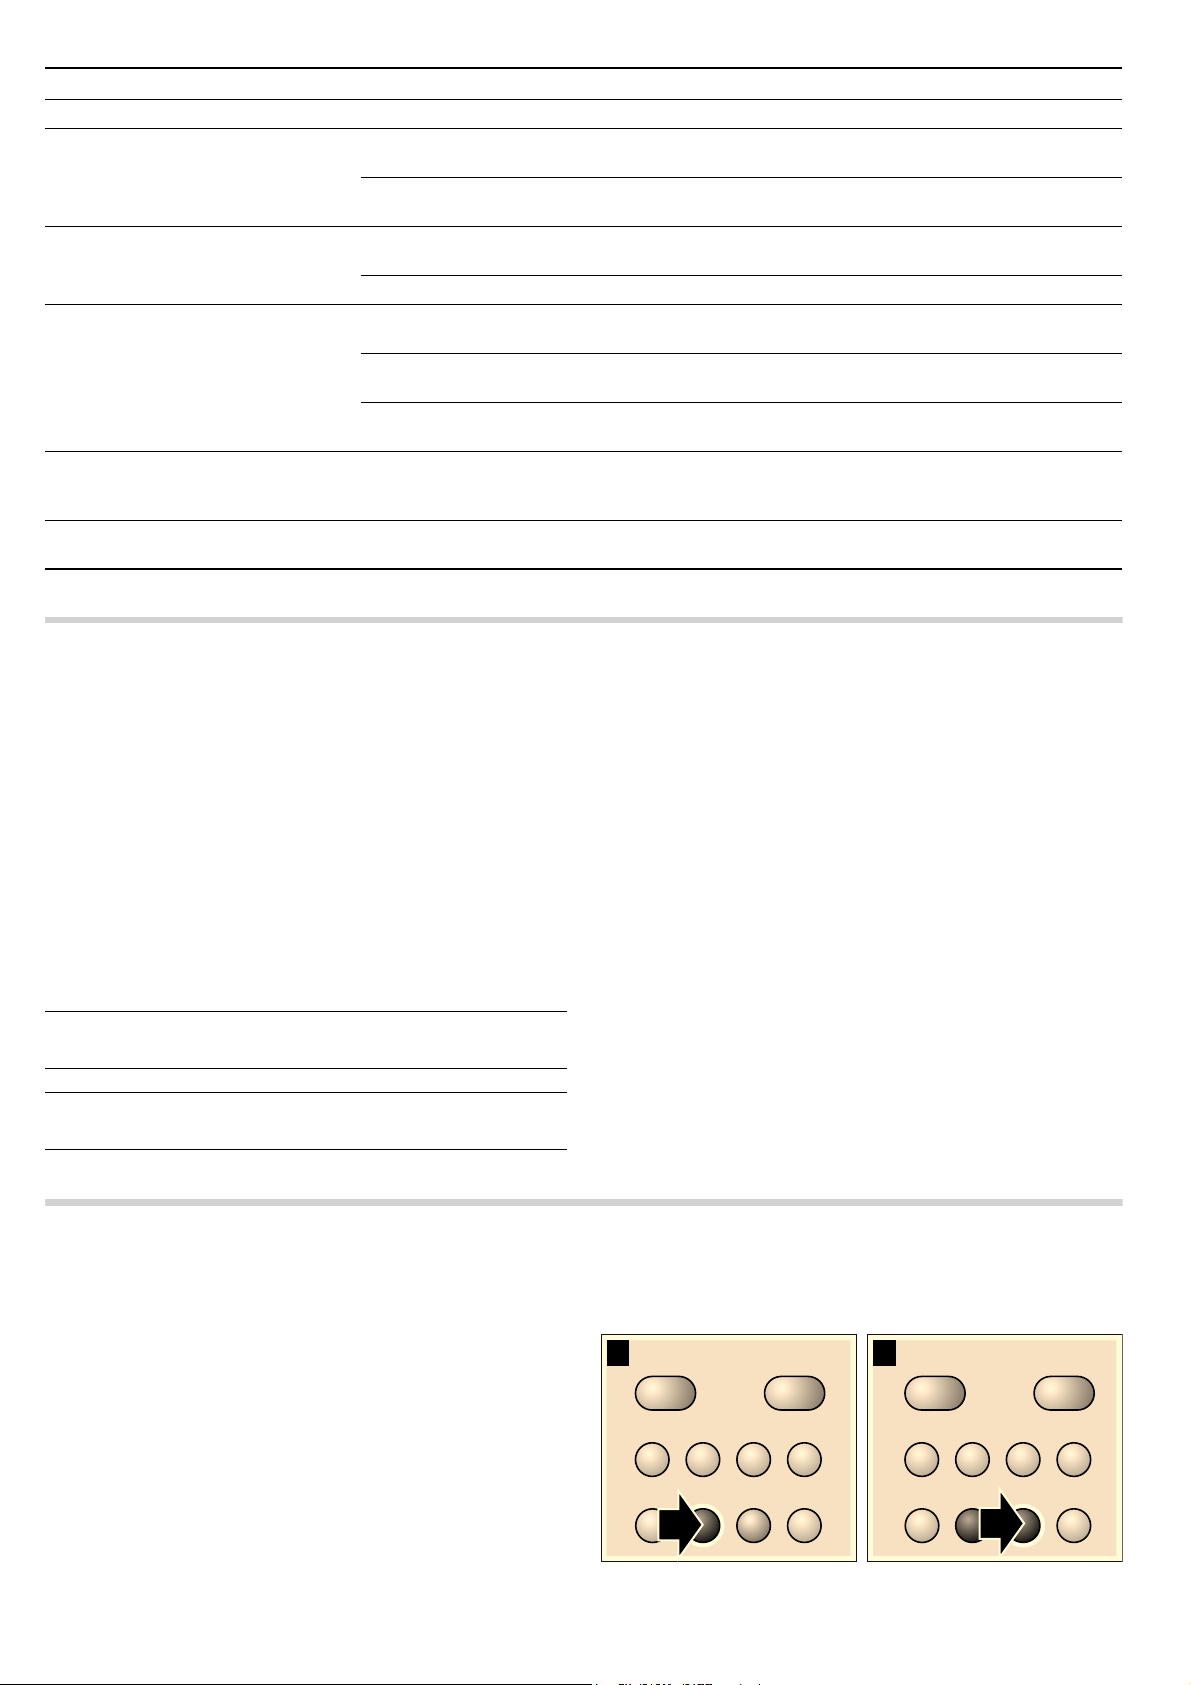
51
Serviço de Assistência Técnica
Se o seu aparelho precisar de ser reparado, o nosso Serviço
de Assistência Técnica está à sua disposição. Encontramos
sempre uma solução adequada, também para evitar
deslocações desnecessárias do técnico.
Número E e número FD
Quando telefonar, indique o número de artigo (N.° E) e o
número de fabrico (N.° FD), para que possamos prestar um
serviço de qualidade. A placa de características onde constam
estas referências encontra-se à direita, quando abre a porta do
aparelho. Para que, em caso de necessidade, não tenha de
procurar durante muito tempo, pode inserir aqui os dados do
seu aparelho e o n.° de telefone do Serviço de Assistência
Técnica.
Tenha em atenção que, no caso de utilização incorrecta, a
deslocação do técnico do serviço de assistência não é
gratuita, mesmo durante o período de garantia.
Os dados para contacto com todos os países encontram-se no
índice dos Serviços Técnicos anexo.
Ordem de reparação e apoio em caso de anomalias
Confie na competência do fabricante. Assim, poderá ter a
certeza de que a reparação é executada por técnicos
especializados com a devida formação e com as peças de
reparação originais para o seu aparelho.
Este aparelho está em conformidade com as normas EN
55011 e CISPR 11. Trata-se de um produto pertencente ao
grupo 2, classe B.
O facto de pertencer ao grupo 2 significa que são utilizadas
microondas para aquecer os alimentos. A classe B significa
que o aparelho foi concebido para uso doméstico.
Automático de programas
Com o automático de programas, é possível descongelar
facilmente alimentos e preparar refeições de modo rápido e
simples. Basta seleccionar o programa e introduzir o peso do
alimento. O automático de programas encarrega-se da
regulação ideal. Tem à sua escolha 7 programas diferentes.
Regular um programa
Se tiver seleccionado um programa, regule-o do seguinte
modo:
1. Prima a tecla g as vezes necessárias, até aparecer o número
do programa pretendido.
2. Prima a tecla h.
No visor acende-se um “P” e surge uma sugestão de peso.
3. Regule o peso da refeição com o selector rotativo.
No visor acendem-se três zeros. Corte de corrente Acerte a hora novamente.
O aparelho não está em funciona-
mento. O visor apresenta um tempo
de duração.
O selector rotativo foi accionado inadvertida-
mente.
Prima a tecla de fim.
A tecla de início não foi premida depois de
efectuar a regulação.
Prima a tecla de início ou anule a regula-
ção com a tecla de fim.
O microondas não funciona. A porta não foi bem fechada. Verifique se há restos de comida ou um
corpo estranho presos porta.
A tecla de início não foi premida. Prima a tecla de início.
Os alimentos aquecem mais lenta-
mente do que o habitual
Foi regulada uma potência de microondas
demasiado baixa.
Seleccione uma potência de microondas
mais elevada.
Foi introduzida no aparelho uma quantidade de
alimentos superior ao normal.
Dobro da quantidade dobro do tempo.
Os alimentos estavam mais frios do que o habi-
tual.
Mexa os alimentos de vez em quando ou
vire-os.
O prato rotativo faz um barulho que
parece arranhar ou estar a roçar em
algo.
Existe sujidade ou algum corpo estranho na
zona do accionamento do prato rotativo.
Limpe o aro com rodas e a cavidade no
interior do aparelho.
O funcionamento do microondas é
cancelado sem razão aparente.
O microondas apresenta uma anomalia. Se este erro se repetir, contacte o Serviço
de Assistência Técnica.
Mensagem de erro Causa possível Solução/ indicações
N.° E
N.° FD
Serviço de Assistência
Técnica
O
PT 21 4250 700
6WRS
6WDUW
6WRS
6WDUW
NJ
L
J
L
J
NJ

53
Testado para si no nosso estúdio de cozinha
Nesta secção encontrará uma selecção de pratos, bem como
as regulações ideais para os preparar. Indicamos-lhe qual a
potência de microondas mais adequada para cada prato.
Encontrará também conselhos sobre os recipientes e acerca
do modo de preparação.
Indicações relativas às tabelas
Nas seguintes tabelas, encontrará muitas possibilidades e
valores de regulação para o microondas.
As indicações de tempo constantes das tabelas são valores de
referência. Dependem do recipiente utilizado, bem como da
qualidade, da temperatura e das características dos alimentos.
Nas tabelas são frequentemente indicadas escalas de tempos.
Seleccione, primeiro, o tempo mais curto e prolongueo depois,
se necessário.
É possível que tenha quantidades que não correspondem às
indicadas nas tabelas. Para isso existe uma regra básica:
o dobro da quantidade - quase o dobro do tempo de duração,
metade da quantidade - metade do tempo de duração.
Coloque sempre o recipiente sobre o prato rotativo.
Descongelar
Notas
■ Coloque os alimentos congelados num recipiente aberto
sobre o prato rotativo.
■ Pode cobrir as partes sensíveis, como, p. ex., pernas e asas
de frango ou rebordos gordos de assados com pequenos
pedaços de folha de alumínio. A folha de alumínio não deve
tocar nas paredes do forno. A meio do tempo de
descongelação pode retirar a folha de alumínio.
■ Da descongelação de carne e aves resultam líquidos. Estes
têm de ser removidos ao virar os alimentos; em caso algum
devem ser usados ou entrar em contacto com outros
alimentos.
■ Entretanto vire ou mexa os alimentos 1 ou 2 vezes. Vire
várias vezes as peças maiores.
■ Depois de descongelados, deixe os alimentos repousarem à
temperatura ambiente durante 10 a 20 minutos, para
uniformizar a temperatura. No caso das aves, pode retirar
então as miudezas. Pode continuar a preparar a carne,
mesmo que esta ainda esteja um pouco congelada no meio.
Descongelar, aquecer ou cozinhar alimentos
ultracongelados
Notas
■ Retire a refeição pronta da embalagem. O aquecimento num
recipiente adequado para microondas é mais rápido e mais
uniforme. Os vários ingredientes podem ter tempos de
aquecimento diferentes.
■ Os alimentos planos levam menos tempo a cozinhar do que
os mais altos. Por esta razão, distribua os alimentos no
recipiente tão planamente quanto possível. Não sobreponha
alimentos.
■ Tape sempre os alimentos. Se não possuir uma tampa
adequada para o recipiente, utilize um prato ou película
especial para microondas.
■ Deve mexer ou virar os alimentos 2 ou 3 vezes durante o
tempo regulado.
■ Após o aquecimento, deixe os alimentos repousar durante
2 a 5 minutos, para uniformizar a temperatura.
Descongelar Peso Potência de microondas em watts,
tempo de duração em minutos
Recomendações
Carne de vaca, vitela ou porco
inteira (com ou sem osso)
800 g 180 W, 15 min. + 90 W, 10-20 min. -
1 kg 180 W, 20 min. + 90 W, 15-25 min.
1,5 kg 180 W, 30 min. + 90 W, 20-30 min.
Carne de vaca, vitela ou porco em
pedaços ou fatias
200 g 180 W, 2 min. + 90 W, 4-6 min. Ao virar, separar as partes desconge-
ladas
500 g 180 W, 5 min. + 90 W, 5-10 min.
800 g 180 W, 8 min. + 90 W, 10-15 min.
Carne mista picada 200 g 90 W, 10 min. Congelar o mais espalmada possível.
Virar várias vezes, retirar a carne já
descongelada
500 g 180 W, 5 min. + 90 W, 10-15 min.
800 g 180 W, 8 min. + 90 W, 10-20 min.
Aves ou pedaços de aves 600 g 180 W, 8 min. + 90 W, 10-15 min. -
1,2 kg 180 W, 15 min. + 90 W, 20-25 min.
Filete de peixe, posta de peixe ou
fatias
400 g 180 W, 5 min. + 90 W, 10-15 min. Separar as partes descongeladas
Legumes, p. ex. ervilhas 300 g 180 W, 1015 min. -
Fruta, p. ex. framboesas 300 g 180 W, 7-10 min. Mexer cuidadosamente de vez em
quando, separar as partes desconge-
ladas
500 g 180 W, 8 min. + 90 W, 5-10 min.
Manteiga, descongelar 125 g 180 W, 1 min. + 90 W, 2-3 min. Remover a embalagem completa
250 g 180 W, 1 min. + 90 W, 3-4 min.
Pão inteiro 500 g 180 W, 6 min. + 90 W, 5-10 min. -
1 kg 180 W, 12 min. + 90 W, 10-20 min.
Bolos, secos, p. ex. bolo de massa
batida
500 g 90 W, 1015 min. Apenas para bolos sem cobertura,
natas ou creme, separar os pedaços
de bolo
750 g 180 W, 5 min. + 90 W, 10-15 min.
Bolos, suculentos, p. ex., bolo de
fruta, cheesecake
500 g 180 W, 5 min. + 90 W, 15-20 min. Apenas para bolos sem cobertura,
natas ou gelatina
750 g 180 W, 7 min. + 90 W, 15-20 min.

54
■ Utilize sempre luvas ou pegas de cozinha para retirar o
recipiente do forno.
■ O sabor próprio dos alimentos permanece inalterado. Por
isso, pode utilizar sal e temperos com moderação.
Aquecer alimentos
: Perigo de queimaduras!
Ao aquecer líquidos, pode ocorrer uma ebulição retardada. Ou
seja, o líquido pode alcançar o ponto de ebulição sem que
surjam as típicas bolhas de vapor. Ao agitar o recipiente,
mesmo ligeiramente, o líquido quente pode subitamente deitar
por fora e salpicar. Ao aquecer líquidos ponha sempre uma
colher dentro do recipiente. Assim evita a ebulição retardada.
Atenção!
O metal (p. ex., a colher dentro do copo) tem de ficar afastado,
pelo menos, 2 cm das paredes do forno e da parte interior da
porta. Eventuais faíscas podem danificar o vidro interior da
porta.
Notas
■ Retire a refeição pronta da embalagem. O aquecimento num
recipiente adequado para microondas é mais rápido e mais
uniforme. Os vários ingredientes podem ter tempos de
aquecimento diferentes.
■ Tape sempre os alimentos. Se não possuir uma tampa
adequada para o recipiente, utilize um prato ou película
especial para microondas.
■ Mexa ou vire várias vezes os alimentos durante o tempo
regulado. Controle a temperatura.
■ Após o aquecimento, deixe os alimentos repousar durante
2 a 5 minutos, para uniformizar a temperatura.
■ Utilize sempre luvas de cozinha ou pegas para retirar a louça
de dentro do aparelho.
Descongelar, aquecer ou cozinhar ali-
mentos ultracongelados
Peso Potência de microondas em
watts, tempo de duração em
minutos
Recomendações
Menu, refeição confeccionada, refei-
ção pronta (2-3 componentes)
300400 g 600 W, 8-11 min. -
Sopa 400 g 600 W, 810min. -
Guisados 500 g 600 W, 10-13 min. -
Fatias ou pedaços de carne com
molho, p. ex. carne de vaca estufada
500 g 600 W, 1217 min. Ao mexer, separar os pedaços de
carne
Peixe, p. ex. filetes 400 g 600 W, 1015 min. Adicionar água, sumo de limão ou
vinho, se necessário
Soufflés, p. ex., lasanha, cannelloni 450 g 600 W, 10-15 min. -
Acompanhamentos, p. ex. arroz, massa 250 g 600 W, 25 min. Adicionar um pouco de água
500 g 600 W, 810min.
Legumes, p. ex. ervilhas, brócolos,
cenouras
300 g 600 W, 810 min. Adicionar água até cobrir o fundo do
recipiente
600 g 600 W, 14-17 min.
Espinafres com natas 450 g 600 W, 1116 min. Cozinhar sem adição de água
Aquecer alimentos Peso Potência de microondas em
watts, tempo de duração em
minutos
Recomendações
Menu, refeição confeccionada,
refeição pronta (2-3 componentes)
350500 g 600 W, 4-8 min. -
Bebidas 150 ml 800 W, 1-2 min. Colocar uma colher no copo, não aquecer
demasiado as bebidas alcoólicas; controlar
de vez em quando
300 ml 800 W, 2-3 min.
500 ml 800 W, 3-4 min.
Comida para bebés, p. ex. bibe-
rões de leite
50 ml 360 W, aprox. ½ min. Sem tetina ou tampa. Agitar bem depois de
aquecer. Verificar, de vez em quando, a tem-
peratura!
100 ml 360 W, aprox. 1 min.
200 ml
360 W, 1
^ min.
Sopa 1 tigela 200 g 600 W, 23 min. -
Sopa 2 tigelas 400 g 600 W, 4-5 min. -
Carne com molho 500 g 600 W, 811 min. Separar as fatias de carne
Guisado 400 g 600 W, 6-8 min. -
800 g 600 W, 811 min. -
Legumes, 1 dose 150 g 600 W, 23 min. Adicionar um pouco de água
Legumes, 2 doses 300 g 600 W, 35 min.


*9000736344*
9000736344
981214(06)
el,en,es,pt