Loading ...
Loading ...
Loading ...
8
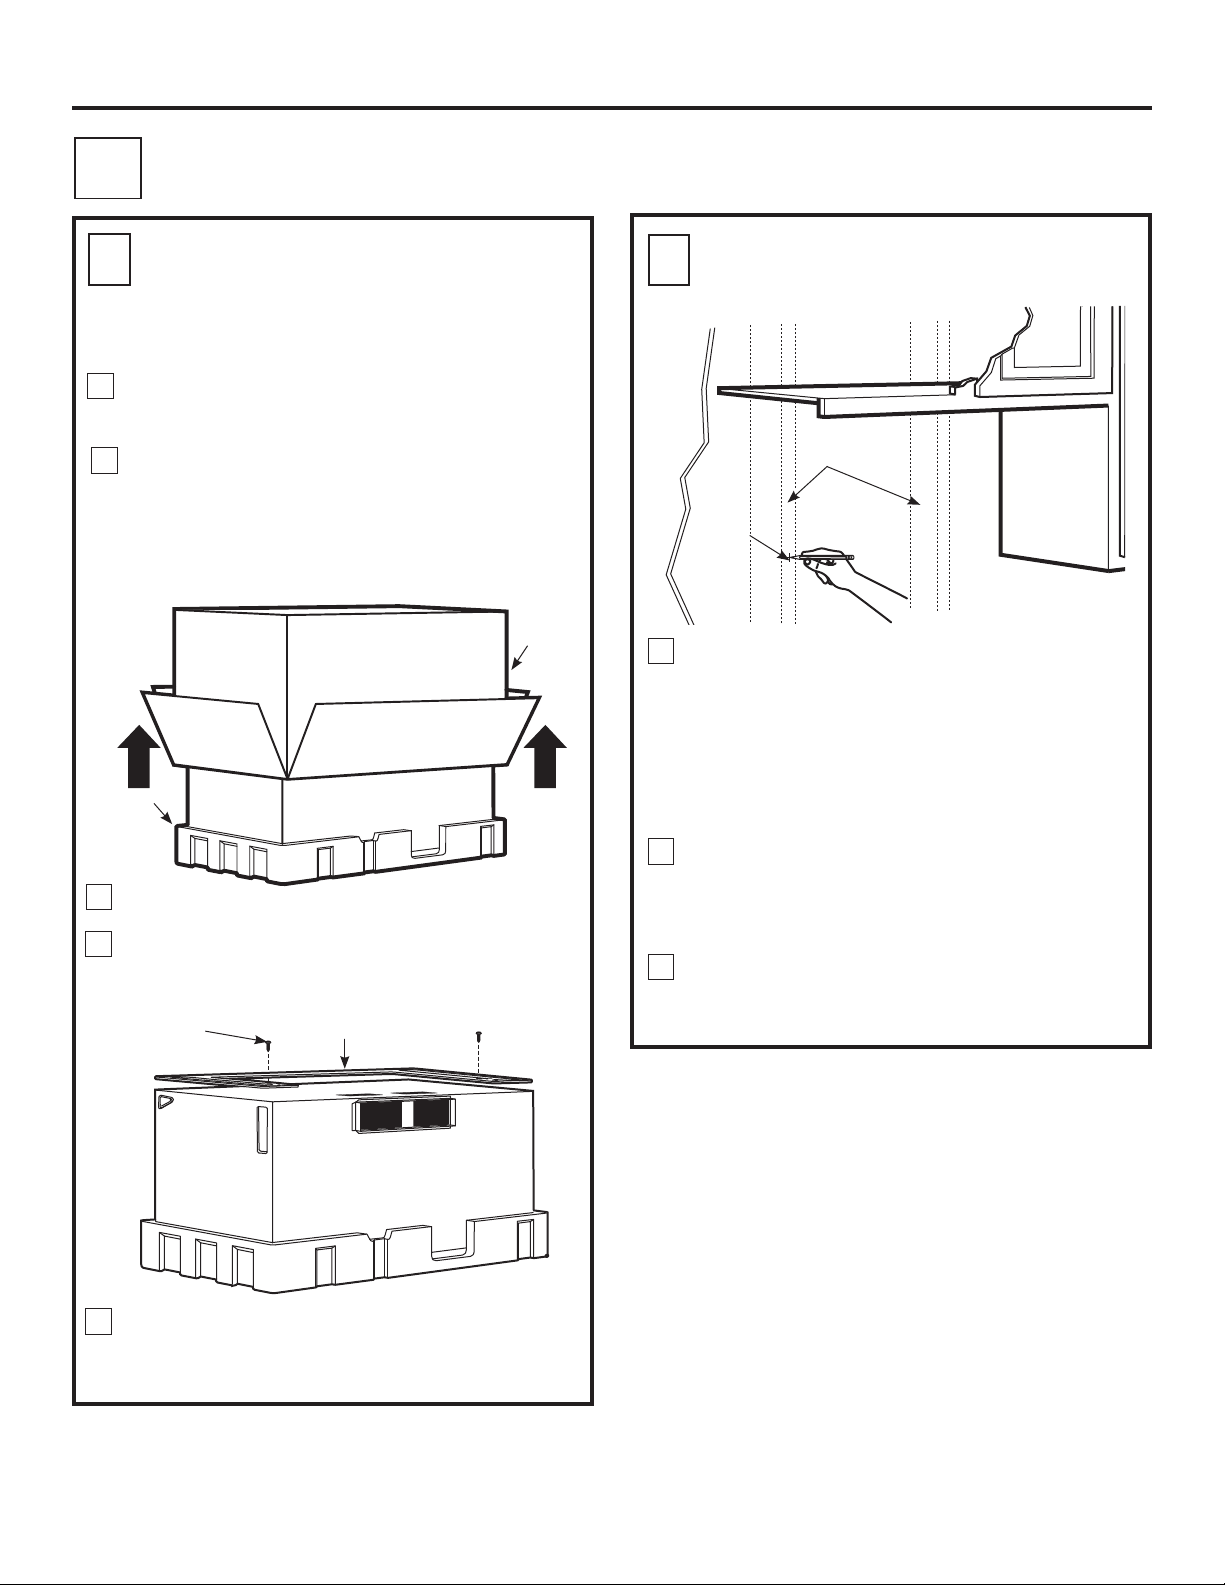
Find the studs, using one of the following
methods:
A. Stud finder – a magnetic device which
locates nails.
OR
B8VHDKDPPHUWRWDSOLJKWO\DFURVVWKH
mounting surface to find a solid sound.
7KLVZLOOLQGLFDWHDVWXGORFDWLRQ
$IWHUORFDWLQJWKHVWXGVILQGWKHFHQWHUE\
probing the wall with a small nail to find the edges
RIWKHVWXG7KHQSODFHDPDUNKDOIZD\EHWZHHQ
WKHHGJHV7KHFHQWHURIDQ\DGMDFHQWVWXGV
should be 16s or 24s from this mark.
Draw a line down the center of the studs.
THE MICROWAVE MUST BE CONNECTED TO
AT LEAST ONE WALL STUD.
1
Remove the installation instructions, filters, glass
WUD\DQGWKHVPDOOKDUGZDUHEDJ'RQRWUHPRYH
the foam protecting the front of the oven.
)ROGEDFNDOOFDUWRQIODSVIXOO\DJDLQVWFDUWRQ
VLGHV7KHQFDUHIXOO\UROOWKHRYHQDQGFDUWRQRYHU
RQWRWKHWRSVLGH7KHRYHQVKRXOGEHUHVWLQJLQ
the foam.
REMOVING THE MICROWAVE
OVEN FROM THE CARTON/
REMOVING THE MOUNTING
PLATE
FINDING THE WALL STUDS
B
.
A
.
2
PLACEMENT OF THE MOUNTING PLATE
1
Wall
Studs
Center
3
3XOOWKHFDUWRQXSDQGRIIWKHRYHQ
Remove the 2 screws from the mounting plate.
7KLVSODWHZLOOEHXVHGDVWKHUHDUZDOOWHPSODWH
DQGIRUPRXQWLQJ<RXPD\GLVFDUGWKHVHVFUHZV
Mounting
3ODWH
Screws
Installation Instructions
2
3
5
5HPRYHDQGSURSHUO\GLVFDUGSODVWLFEDJV
4
1
Carton
foam
Loading ...
Loading ...
Loading ...