Loading ...
Loading ...
Loading ...
17
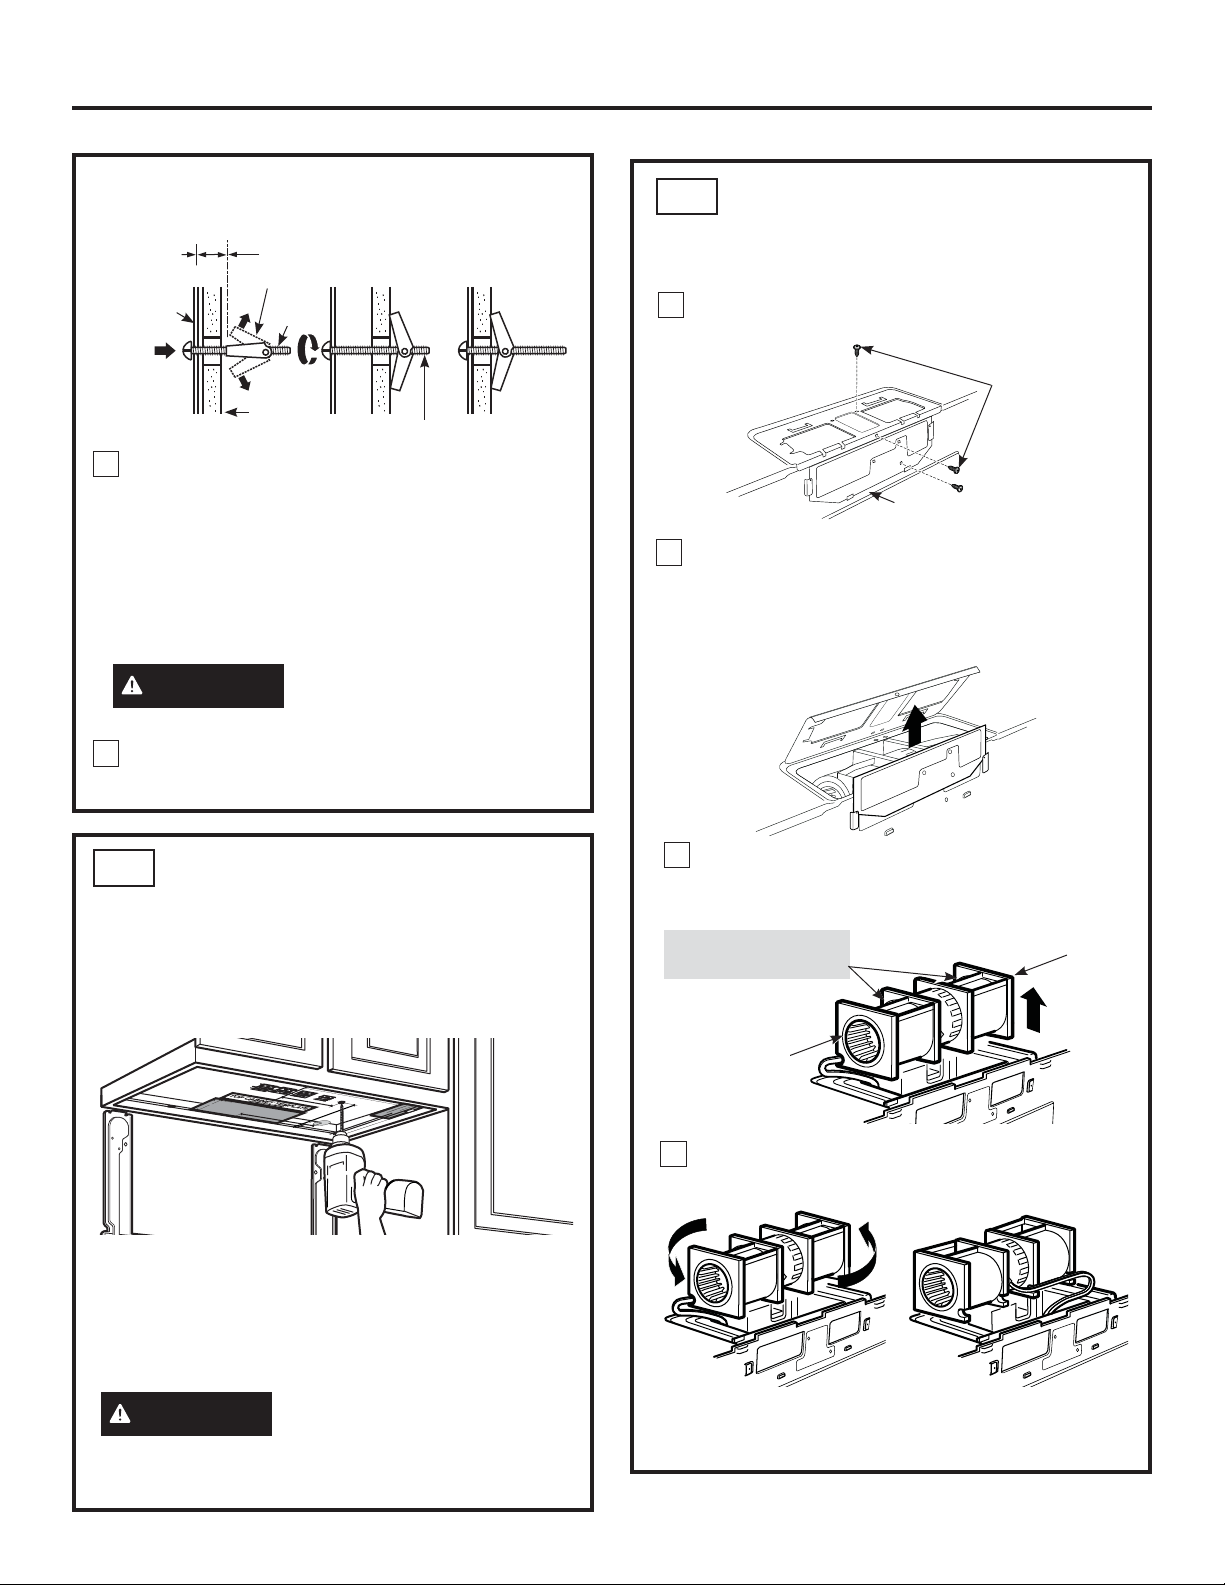
USE TOP CABINET TEMPLATE
FOR PREPARATION OF TOP
CABINET
B3.
5HDGWKHLQVWUXFWLRQVRQWKH723&$%,1(7
7(03/$7(
7DSHLWXQGHUQHDWKWKHWRSFDELQHW
• Drill the holes, following the instructions on the
723&$%,1(77(03/$7(
Wear safety goggles when
drilling holes in the cabinet
bottom.
Wall
Mounting
3ODWH
6SDFLQJIRU7RJJOHV0RUH
7KDQ:DOO7KLFNQHVV
7RJJOH
Bolt
7RJJOH:LQJV
To use toggle bolts:
Bolt End
Installation Instructions
You need to drill holes for the top support screws and
a hole large enough for the power cord to fit through.
3ODFHWKHPRXQWLQJSODWHDJDLQVWWKHZDOODQG
insert the toggle wings into the holes in the wall
to mount the plate.
NOTE: Before tightening toggle bolts and wood
screw, make sure the tabs on the mounting plate
touch the bottom of the cabinet when pushed
IOXVKDJDLQVWWKHZDOODQGWKDWWKHSODWHLVSURSHUO\
centered under the cabinet.
Be careful to avoid pinching
fingers between the back of
the mounting plate and the wall.
7LJKWHQDOOEROWV3XOOWKHSODWHDZD\IURPWKHZDOO
to help tighten the bolts.
3
4
1
Remove and save screws that holds blower
motor to microwave oven.
ADAPTING MICROWAVE
BLOWER FOR OUTSIDE
BACK EXHAUST
B4.
Back of Microwave Oven
2
2SHQWKHEORZHUGRRUE\OLIWLQJLWXSDWWKHEDFNRI
the microwave. Remove and save the blower shield
RQWKHEDFNRIWKHPLFURZDYHE\VOLGLQJLWXS
Remove and save the metal vent fan cover on the
EDFNRIWKHPLFURZDYHE\VOLGLQJLWXS
4
Rotate blower unit counterclockwise 180°.
Before Rotation After Rotation
Back of
Microwave Oven
Back of
Microwave Oven
3
BEFORE: Fan Blade
Openings Facing Up
End B
End A
&DUHIXOO\SXOORXWWKHEORZHUXQLW7KHZLUHV
ZLOOH[WHQGIDUHQRXJKWRDOORZ\RXWRDGMXVWWKH
blower unit.
Blower Retaining
Screws
CAUTION
CAUTION
Loading ...
Loading ...
Loading ...