Loading ...
Loading ...
Loading ...
5
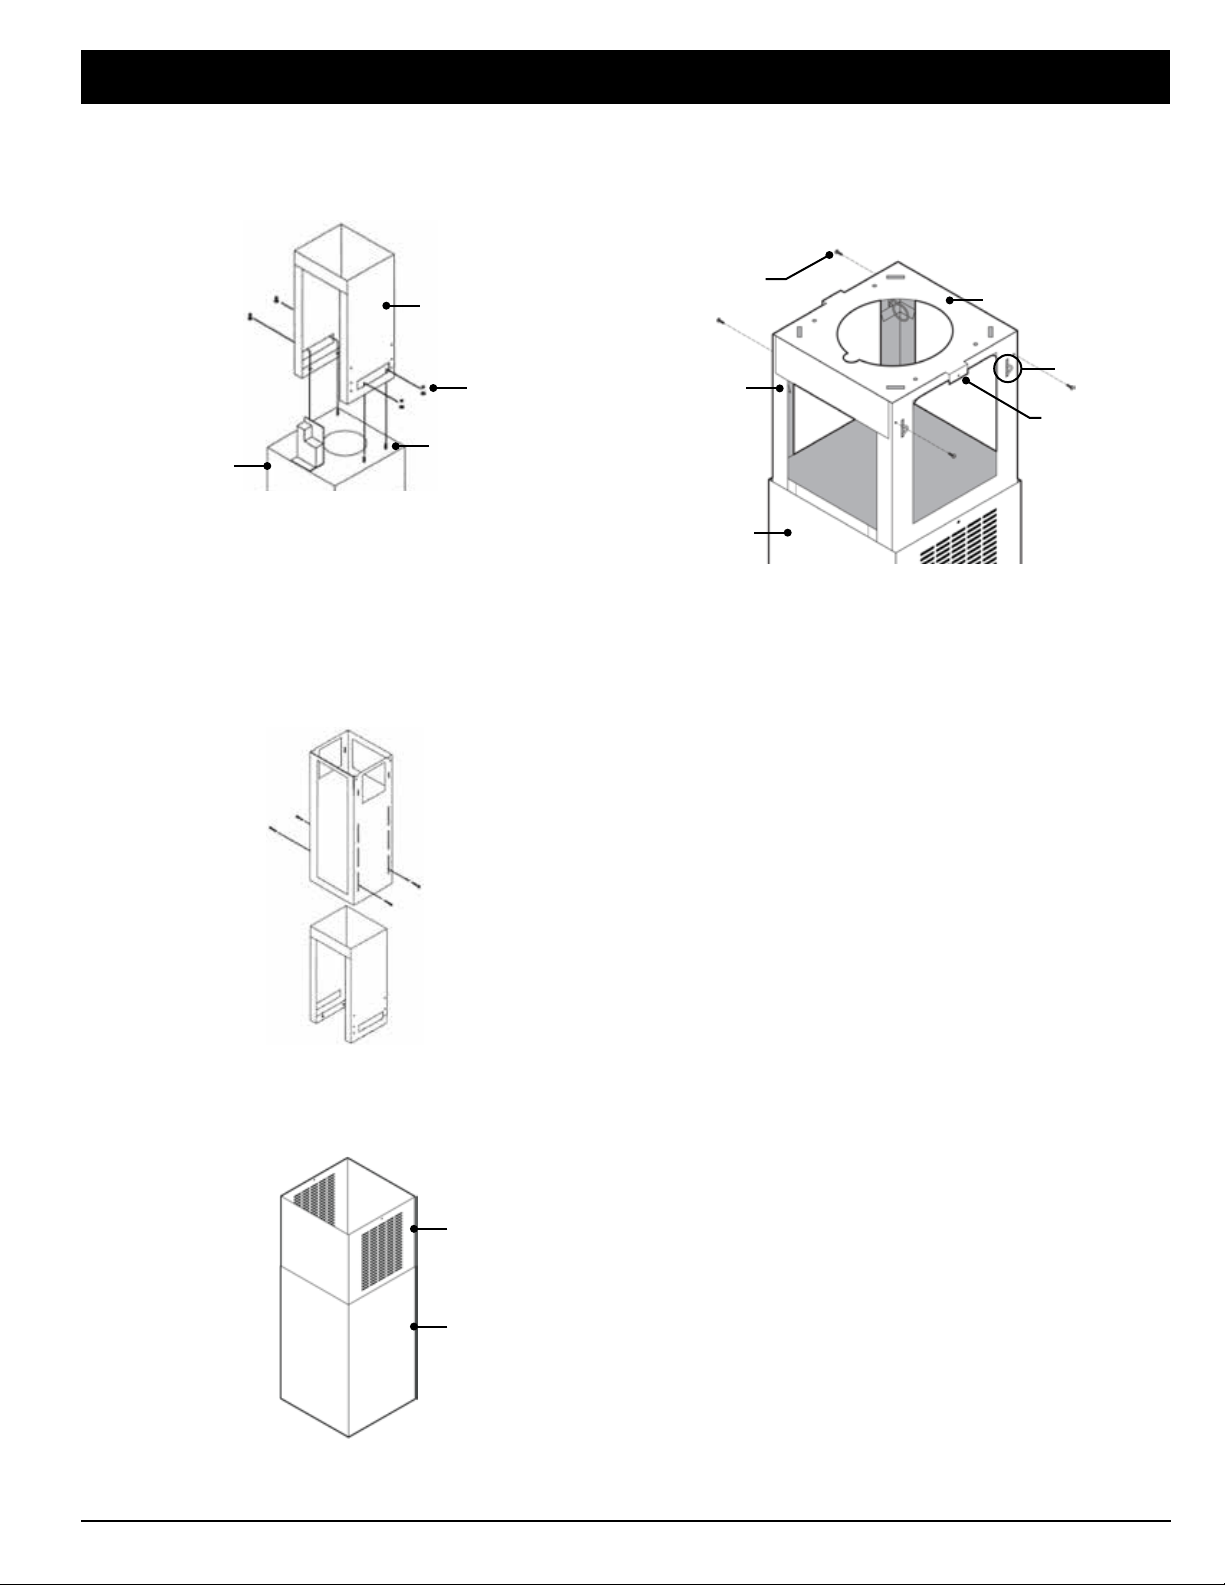
Attaching the Hood to the Ceiling
1. Lift the hood chassis (do not lift by the chimney structure) so
the 4 spring clips in the ceiling plate engage the slots in the
upper chimney piece.
2. Secure the hood/chimney assembly to the ceiling plate with
the 4 safety screws (previous graphic).
3. Connect the hood duct to the exhaust hole with duct tape only.
4. Lift the upper chimney cover (previous graphic), and secure it
to the ceiling plate with the 2 self-tapping screws. (See Step 8.)
5. Install the filters.
6. Turn on power to the hood at the power source.
Attaching the Chimney Structure
1. Align the 4 screw holes on the base chimney piece with the
threaded studs on the chassis superstructure.
2. Place a washer and nut on each stud, and tighten the nuts.
3. (Keeping the cabling within the notch in the ceiling plate)
Place a length of ducting over the collar on the fan outlet, and
secure the ducting with a hose clamp.
4. Slip the upper chimney piece over the base piece, adjust the
height (keeping in mind the cooktop-to-hood minimum dis-
tance), and secure the chimney pieces together.
5. Slip the 2 chimney covers over the chimney framework, rest-
ing the covers on the hood chassis. (The covers remain loose
for the time being.)
INSTALLATION INSTRUCTIONS
Washer and
Nut (4 ea.)
Hood
Chassis
Base Chimney
Piece
Threaded
Stud (4)
Upper
Chimney Cover
Lower
Chimney Cover
Ceiling Plate
Hood/
Chimney
Assembly
Upper
Chimney Cover
Attach Upper
Chimney
Cover here
(both sides)
Spring Clip (4)
Safety
Screw (4)
Loading ...
Loading ...
Loading ...