Loading ...
Loading ...
Loading ...
4
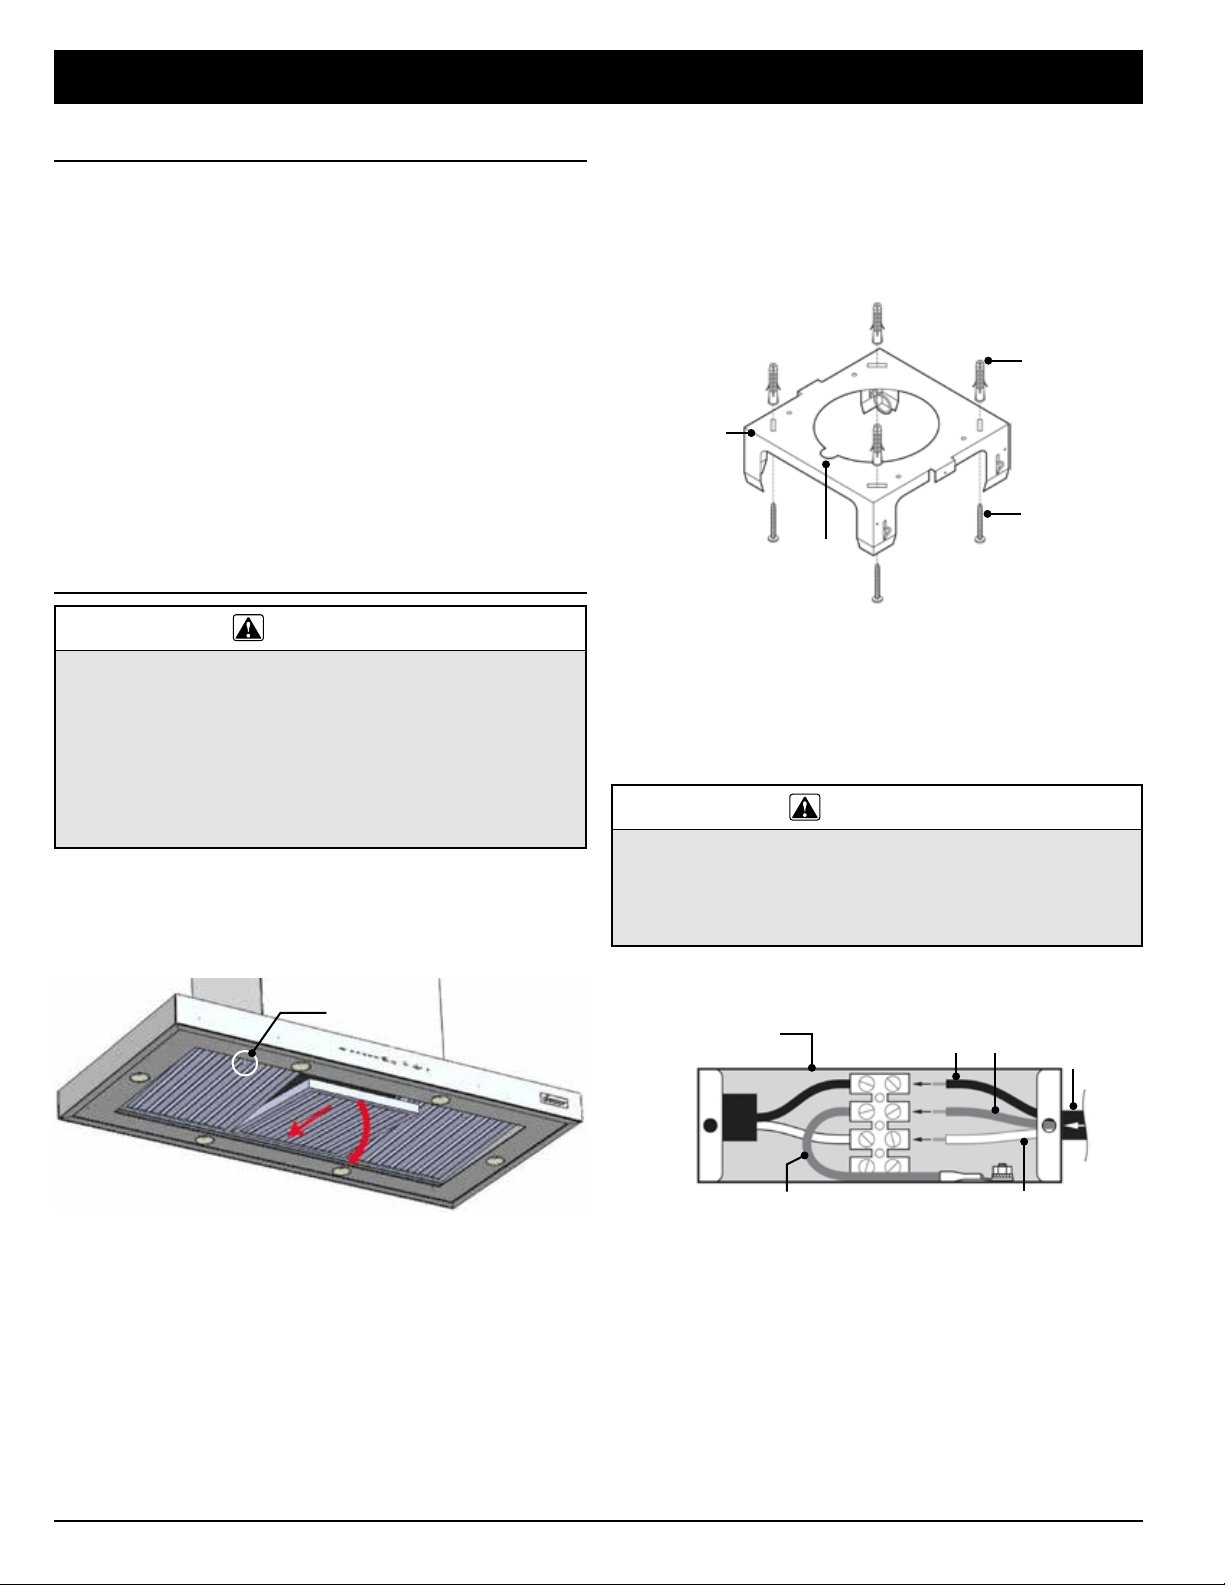
Attaching the Ceiling Plate
1. Holding the ceiling plate in place against the ceiling:
a. Trace the center ducting hole (incl. cabling notch) for cut-
ting the hole through which the cabling/ducting will pass.
b. Mark where the holes will be drilled for anchoring the ceil-
ing plate to the ceiling.
2. Cut the ducting hole, then drill four 8-mm holes at the respec-
tive marks, and insert an anchor in each hole.
3. Align the ceiling plate with the ducting hole and anchors, and
insert and tighten 4 screws, securing the plate to the ceiling.
Making the Electrical Connections
WARNING
• Before making the electrical connection, ensure the home power
supply to the hood is turned off at the source, and that the electrical
connections will conform to the requirements on Pg. 3.)
• Do not ground the hood to the neutral (white) power-supply wire but
to a separate, proper ground wire installed by a licensed electrician.
1. Run the home-supply cable through the hole in the ceiling
down to the hood superstructure.
2. Remove the junction-box cover and the knockout on the right
side of the junction box, and feed the home power-supply cable
through the hole.
3. Connect the neutral (white) power-supply wire to the terminal
opposite the hood white wire.
4. Connect the hot (black) power-supply wire to the terminal
opposite the hood black wire.
5. Connect the ground (green) power-supply wire to the terminal
opposite the hood green wire.
6. Re-install the hood junction-box cover with the two screws.
Verifying Package Contents
Uncrate the hood, and verify that all parts are present.
F Chassis
F
F Chimney framework (2 pcs)
F Chimney covers (2 pcs—upper, with grates; lower)
F Ceiling plate
F Mounting hardware (hex nuts, washers: 4 ea.; plastic anchors:
4; 1 ½" Phillips-head screws: 4; safety screws: 4)
F Stainless-steel cleaner (1 two-oz. bottle)
F Product literature (Installation Instructions, User Manual).
If anything is missing/damaged, contact the dealer immediately.
Do not install a damaged/incomplete unit.
Installing the Hood
WARNING
• Observe all local codes/ordinances. Contact the local building
department for details.
• The owner shall ensure a qualified technician installs the hood as
directed in this manual.
• Do not install the hood unless the power supply meets the electrical
specifications on Pg. 2.
• At the installation site, verify that no utilities/joists/ducting/trusses
are present before cutting/drilling into the ceiling.
• At least two people are needed for safe installation.
Removing the Filters
Before starting the installation, remove the filters.
1. Grasp the filter handle, and push rearward.
2. When the front of the filter clears the front slot, tilt it down,
then pull it out of the rear slot and away from the hood.
INSTALLATION INSTRUCTIONS
Filter Handle
Plastic
Anchor (4)
8 mm Screw
(4)
Ceiling Plate
Cabling
Notch
(faces front)
Black
Green
Home
Supply Line
Hood Green
(ground) Wire
Hood Junction
Box
White
Loading ...
Loading ...
Loading ...