


1
CONTENTS
IMPORTANT!
SAVE THIS GUIDE
The models shown in this user guide may
not be available in all markets and are
subject to change at any time. For current
details about model and specification
availability in your country, please go to
our website fisherpaykel.com or contact
your local Fisher & Paykel dealer.
Registration
Register your product with us so we can
provide you with the best service possible.
To register your product visit our website:
fisherpaykel.com
Introduction 3
Safety and warnings 4
Special features 6
For best performance 7
Operating instructions 8
Cleaning and maintenance 12
Troubleshooting 15
Parts and accessories 16
Service and warranty 17

3
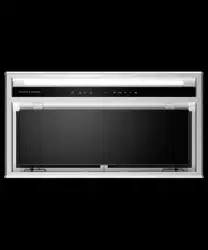
INTRODUCTION
Welcome to the family of Fisher & Paykel appliances. Our team has spent thousands
ofhours designing, engineering and testing this Integrated Rangehood to ensure
youget the perfect product for your home. For more information on your product
please visit fisherpaykel.com or contact our Customer Care team.
4
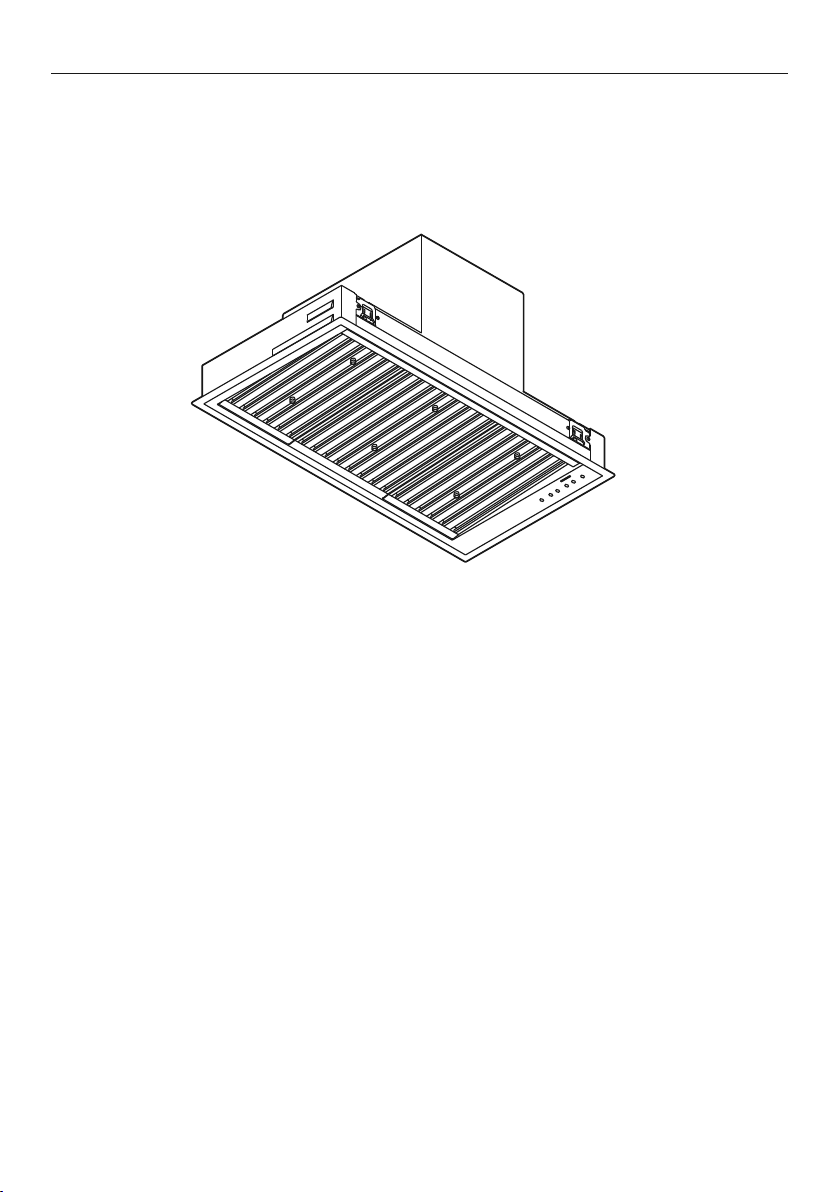
SAFETY AND WARNINGS
!
WARNING!
Weight Hazard
The appliance is heavy. Please ensure adequate care is taken when
installing the appliance to prevent personal injury.
Weight of the products are:
HPB6028-1 = 14 kg
HPB7528-1 = 17 kg
HPB7548-1 = 21 kg
HPB9028-1 = 19 kg
HPB9048-1 = 23 kg
HPB9048-2 = 31 kg
HPB12048-2 = 35 kg
!
WARNING!
Electric Shock Hazard
Always disconnect the appliance from the mains power supply before
carrying out any maintenance or repairs.
Installation work and electrical wiring must be done by qualified
person(s) in accordance with all applicable codes and standards,
including fire-rated construction.
Failure to do so can result in death, electric shock, fire or injury
topersons.

5
SAFETY AND WARNINGS
IMPORTANT SAFETY INSTRUCTIONS
READ THE ENTIRE SET OF INSTRUCTIONS BEFORE INSTALLING OR USING THIS
APPLIANCE. A copy of the user guide and installation guide for this product can
alsobe found at fisherpaykel.com.
!
WARNING:
When using this appliance always exercise basic safety precautions including the
following:
• Please read the entire set of instructions before installing or using this appliance.
• Please make this information available to the person installing the appliance –
doing so could reduce your installation costs.
• Always switch the power off prior to installation, servicing or cleaning of
the appliance.
• There shall be adequate ventilation of the room when the rangehood is used at the
same time as appliances burning gas or other fuels.
• This appliance is not intended for use by persons (including children) with reduced
physical, sensory or mental capabilities, or lack of experience and knowledge, unless
they have been given supervision or instruction concerning the use of the appliance
by a person responsible for their safety.
• Children should be supervised to ensure they do not play with the appliance.
Cleaning and user maintenance shall not be made by children without supervision.
• You must read the details concerning the method and frequency of cleaning.
• There is a fire risk if cleaning is not carried out in accordance with the instructions.
• Never leave frying food unattended since grease can overheat and catch fire.
The risk of fire is even greater in the case of used oil.
• Do not flambé under the rangehood.
• Never use the rangehood without the filters in place.
• During an electrostatic discharge (ESD) it is possible that the device will stop
working. By switching the device off and on the device will again work as intended.
• CAUTION: accessible parts may become hot when used with cooking appliances.
• Remove all packaging, including protective wrappings, before use.
!
WARNING:
Chemical Burn Hazard. Keep batteries away from children.
This product contains a lithium button/coin cell battery. If a new or used lithium
button/coin cell battery is swallowed or enters the body, it can cause severe
internalburns and can lead to death in as little as 2 hours. Always completely
securethe battery compartment. If the battery compartment does not close
securely,stop using the product, remove the batteries, and keep it away from
children. If you think batteries might have been swallowed or placed inside any part
ofthe body, seek immediate medical attention. Even used cell batteries may cause
injury so ensure they are kept away from children and disposed of properly.
READ AND SAVE THESE INSTRUCTIONS

6
SPECIAL FEATURES
Remote control
Selected models have a remote control provided with the rangehood. This remote
canalso be purchased as an optional accessory for other models of this rangehood. The
remote is designed to make your rangehood easier to use. Itallows you to adjustthe fan
speed and brightness of lighting without touching the rangehood.
Clean filter reminder
The clean filter reminder light will illuminate to remind you to clean the filters.
Refertothe ‘Cleaning and maintenance’ section of this user guide for details of
howtoclean your filters.
Delayed shut off
This feature allows you to delay the shut off on the rangehood for up to 25minutes. This
enables you to continue to remove steam and cooking odours after cooking iscomplete.
Heat guard
When excessive heat is detected in the cooking area, a sensor will automatically
turn the fan on at speed 5 and illuminate both fan speed buttons on the control
panel. Oncetheheat decreases the fan speed will gradually reduce and return to
theoriginalfan speed selected.

7
FOR BEST PERFORMANCE
This rangehood should be turned on for a few minutes before cooking in order to
establish air currents upward through the rangehood. This will also enable hotair
removal from your kitchen and keep the rangehood surface cool. When heat, smoke,
moisture, grease and cooking odours are produced, they will be carried outside instead
ofdrifting into other rooms.
Use the low fan speeds for normal use and the higher fan speeds for high heat,
strongodours or fumes.
Rangehood width
The rangehood width is recommended to be no less than the width of the cooktop.
A wider rangehood can be used to increase the capture area if space is not restricted.
The rangehood should ideally be centred above the cooktop for proper performance.
Induction cooking considerations
Induction cooktops use energy efficient technology that only heats the contents
of acooking pot. Unlike gas or traditional electric cooktops, the surrounding air
does notget heated when using an induction cooktop. As a result, rangehood
filters, splashbacks and surrounding cabinetry do not get warmed up, increasing
the likelihoodof condensation on these cooler surfaces. Other factors like ambient
temperature, humidity, natural ventilation of the room, size of the cookware
andhowtheinduction cooktop is being used also influence condensation.
Forexample,rapid boiling on high cooktop heat settings like PowerBoost increasesthe
rate at which water is evaporated, increasing thelikelihood of condensation. It is
important to understand that neither the rangehood northe induction cooktop are
faulty as a resultof this phenomenon.
Condensation can be minimised by:
Installing the rangehood at the maximum height above the cooktop.
Using the rangehood on a lower speed setting when boiling.
Using the induction cooktop on a lower heat setting when boiling.
Switching the rangehood on 5minutes before cooking and letting it run for
atleast5minutes after cooking. Refer to the ‘Delayed shut off’ section for
detailsonhowto usethe timed shut off feature of this rangehood.
Gas cooking considerations
Using a powerful gas cooktop or multiple gas burners operating at the same
timecancause the rangehood surfaces to become hot. This effect can be
reduced by:
– Using the maximum speed setting to enable hot air to be extracted quickly.
– Installing the rangehood at the maximum recommended height.
Consultthecooktop installation and user guide for details on the
installationheight of the rangehood.

8
OPERATING INSTRUCTIONS
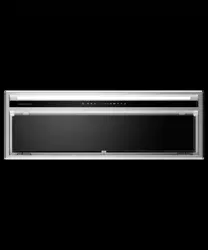
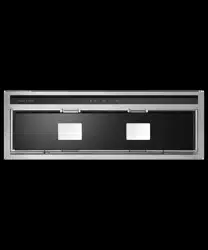
RANGEHOOD CONTROL PANEL FEATURES
Power Turns your rangehood ON and OFF.
Alsoallows you to delay shut off.
Fan speed Allows you to change the fan speed.
1
2
3
4
5
Fan speed indicator Indicates the current speed of the fan.
1 is the lowest fan speed and 5 the highest.
Light Allows you to adjust the level of lighting.
Clean filter reminder Button will illuminate red indicating when
your filters require cleaning.
Power
O
n/Off
Use the
button to turn your rangehood ON and OFF. When you turn your rangehood
on it will remember the last setting used for your fan speed and lightinglevel withthe
following exceptions:
If the fan was off, it will turn on at fan speed1.
If the lighting was off, it will turn on at the lowest lighting level.
Note: The fan and lighting can be turned off independently.

9
OPERATING INSTRUCTIONS
Delayed shut off
To use delayed shut off:
Press and hold the button, the light around the button will blink.
The fan speed will operate for 5minutes, starting at the current speed and then at
eachdecreasing speed before turning OFF (the fan will stop and the light will go out).
To increase the delayed shut off time, press and hold the button again, you will hear
a beep. Each beep indicates the delayed shut off time has been increased by 5minutes.
The maximum delayed shut off time is 25minutes.
To cancel delayed shut off:
Press the button once.
Fan speed
To turn the fan ON, press the button.
Press the button to increase the fan speed.
To go straight to the MAX fan speed, press and hold the button.
The fan will go straight to speed5.
To decrease the fan speed press the button.
To turn the fan OFF, press and hold the button.
Light
To turn the light ON, press the button.
Press the button again to increase the brightness of the lighting.
Press and hold the button to go straight to the brightest lighting.
Press the button to decrease the brightness of the lighting.
To turn the light OFF, press and hold the button.
Clean filter reminder
The clean filter button will blink red for 3seconds when the rangehood is turned
on,then remain illuminated red until the filters are cleaned and the clean filter reminder
is reset.
To reset the clean filter reminder:
Once the filters have been cleaned and replaced in the rangehood the clean filter
reminder should be reset.
Press and hold the button.
Note: Refer to ‘Filter cleaning’ for details on how to remove and replace your filters.
10
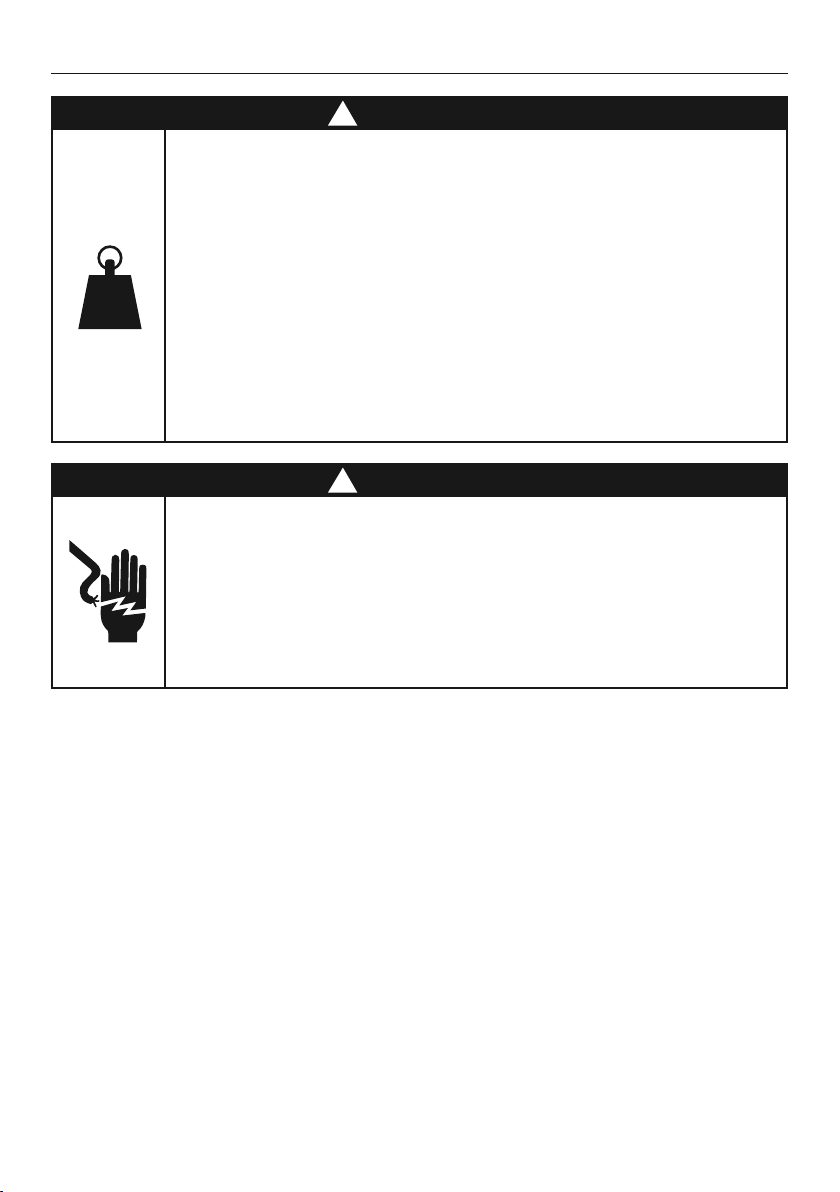
Remote control (selected models or optional extra)
Selected models have a remote control provided with the rangehood. This remote
canalso be purchased as an optional accessory for other models of this rangehood. The
remote is designed to make your rangehood easier to use. Itallows you to adjust the fan
speed and brightness of lighting without touching the rangehood.
REMOTE CONTROL FEATURES
Fan speed Allows you to adjust the speed of the fan.
Light Allows you to adjust the level of lighting.
Battery indicator Illuminates when the battery is running low.
Signal indicator
Indicates if the remote control is paired with
therangehood.
OPERATING INSTRUCTIONS
Press = Fan ON/adjust speed
Long press = Fan OFF
Press = Light ON/adjust lighting
Long press = Light OFF
Fan speed
To turn the fan ON, press the button once.
Press the button to increase/decrease the fan speed. The fan speed will increase
witheach button press until it reaches fan speed5, at the next button press it will
returnto fan speed1.
To turn the fan OFF, press and hold the button.

11
OPERATING INSTRUCTIONS
Light
To turn the light ON, press the button once.
To increase/decrease the brightness press the button. The light brightness will
increase with each button press until it reaches its highestlevel, at the next button
pressit will return to the lowest level.
To turn the light OFF, press and hold the button.
Battery indicator
The battery indictor will illuminate when the battery
is running low and needs to bereplaced.
Signal indicator
The signal indicator will illuminate when your rangehood is paired with the remote.
Theremote can then be used to control the fan speed and brightness of the lighting.
Remote pairing
For selected models your remote will be paired with your rangehood in the factory
prior to delivery.
All other models, where the remote has been purchased as an optional extra, the
remotewill be paired by your Fisher & Paykel trained service technician after they
installthe remote receiver in your rangehood.
12
CLEANING AND MAINTENANCE
WARNING!
Before servicing or cleaning your rangehood, switch the power off at the controlpanel
and disconnect the power to prevent power from being switched onaccidentally.
Allow the appliance to cool after the power has been turned off before servicing.
There is a risk of fire if cleaning is not carried out in accordance with these instructions.
IMPORTANT!
Wear gloves to protect against sharp edges.
Clean your rangehood regularly to avoid the build-up of grease. Grease deposits
arecorrosive and may damage the rangehood. Use warm water with a mild liquid
detergent and a clean soft cloth to wipe down all surfaces of the rangehood.
Do NOT use the following to clean your rangehood, they will damage and/or
discolourthe surfaces:
Corrosive chemicals.
Abrasive cleaning products.
Citrus-based cleaning products.
Hard brushes and steel wool.
Note: In areas of high humidity or coastal environments,
cleaning should be carried outmore frequently.
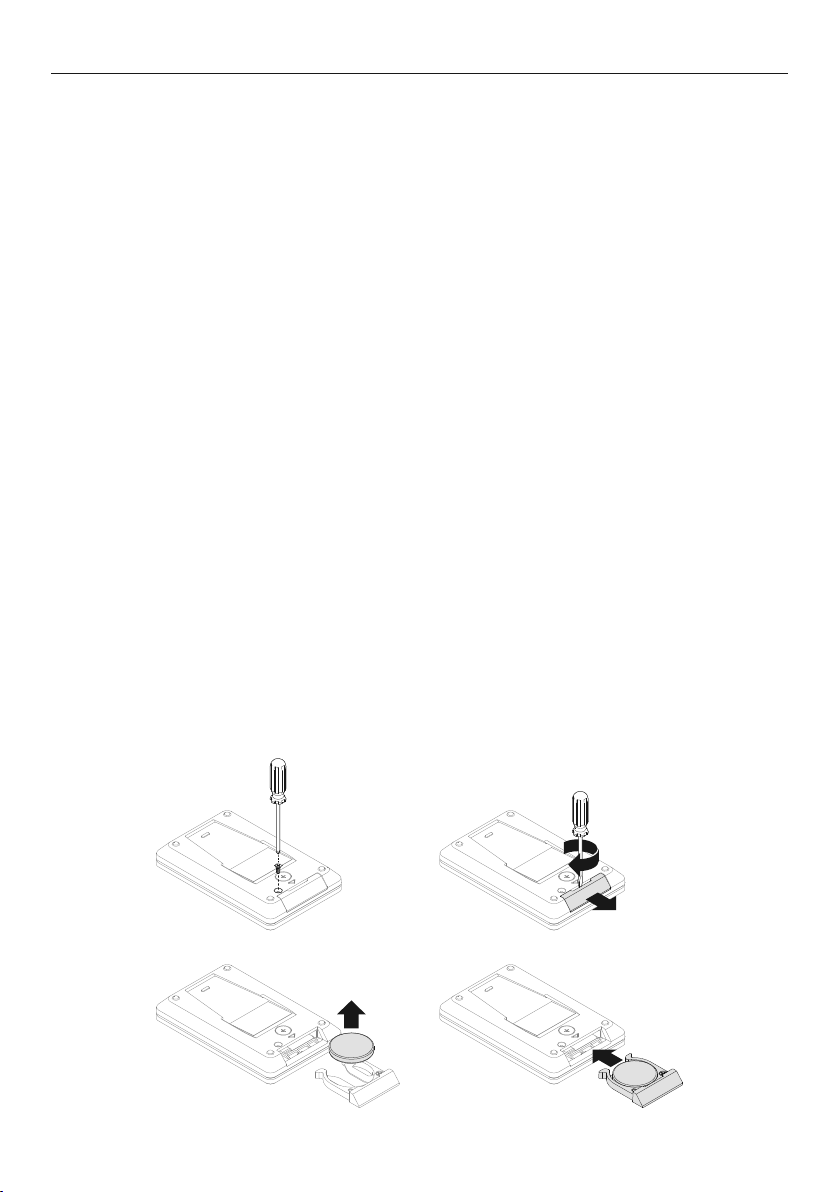
Changing the remote battery:
1
Using a Philips screwdriver, remove the screw from the back (A).
2
To open the compartment, insert flat tool in the notch and twist (B).
3
Replace the old battery with the new one (CR2032), symbol + to be facing up (C).
4
Gently slide the battery compartment until the clips engage (D).
5
Return the screw and tighten.
BA
C
D
13
CLEANING AND MAINTENANCE
Filter cleaning
IMPORTANT!
The filters can cause damage and/or injury if dropped. Ensure you use both hands
toremove and replace the filters.
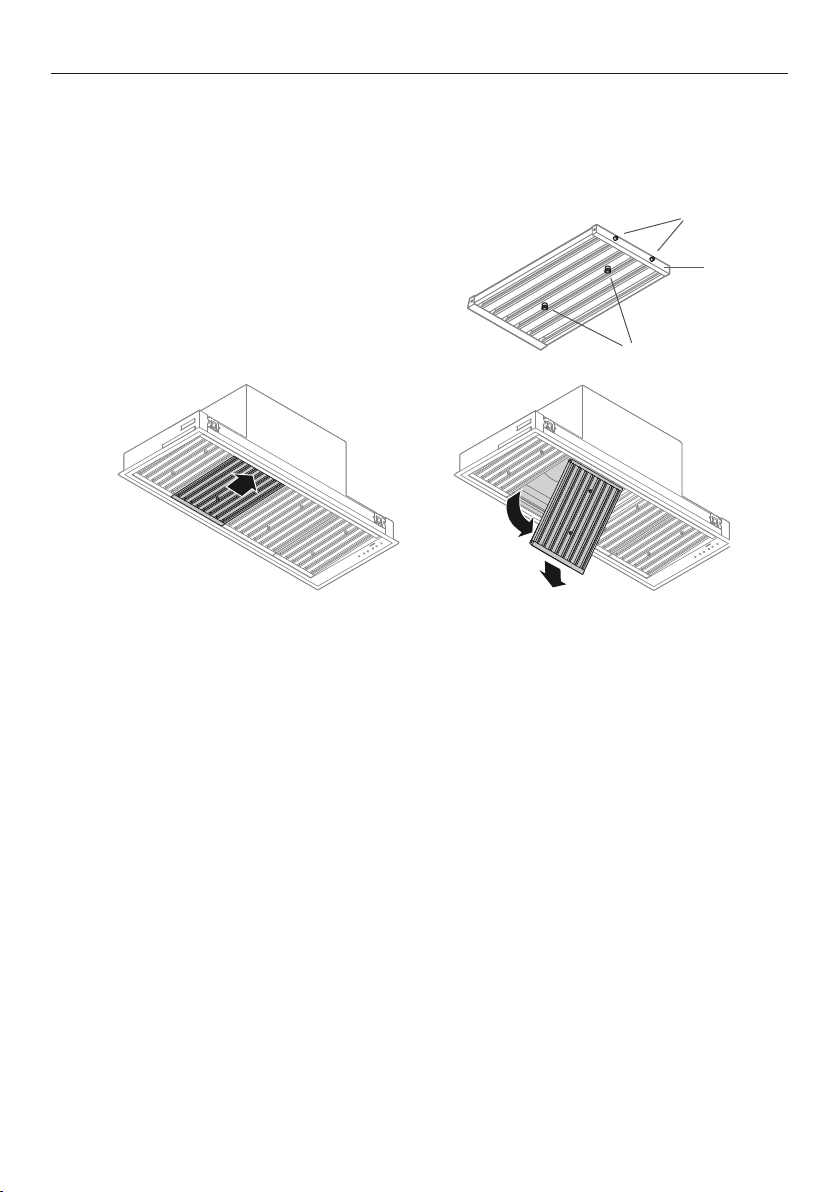
To remove the filters:
1
Use the handles to hold the filter (refer to A).
2
Pull the filter toward you, pushing against the
springs to release the back of the filter from
the rangehood (refer to B).
3
Lower the back of the filter and remove from
the front of the rangehood (refer to C).
Clean the filters at least once a month. Filters may need to be cleaned more frequently
depending on the cooking methods used and frequency of use. The clean filter reminder
will illuminate to remind you to clean the filters.
To clean your filters:
Remove the filters with both hands.
Wash with a mild liquid detergent and hot water or in the dishwasher. If washed in the
dishwasher, the filters should be placed in an upright position.
After cleaning and drying, refit the filters.
Note: Do NOT operate the rangehood without the filters in place.
The filters help prevent damage to the inside of the rangehood.
CB
handles
springs
A
front of filter
14
CLEANING AND MAINTENANCE
Replacing the LED lights
To replace the LED lights please contact your Fisher & Paykel trained and supported
service technician. Refer to fisherpaykel.com or your separate service and warranty
bookprovided with your rangehood for contact details.
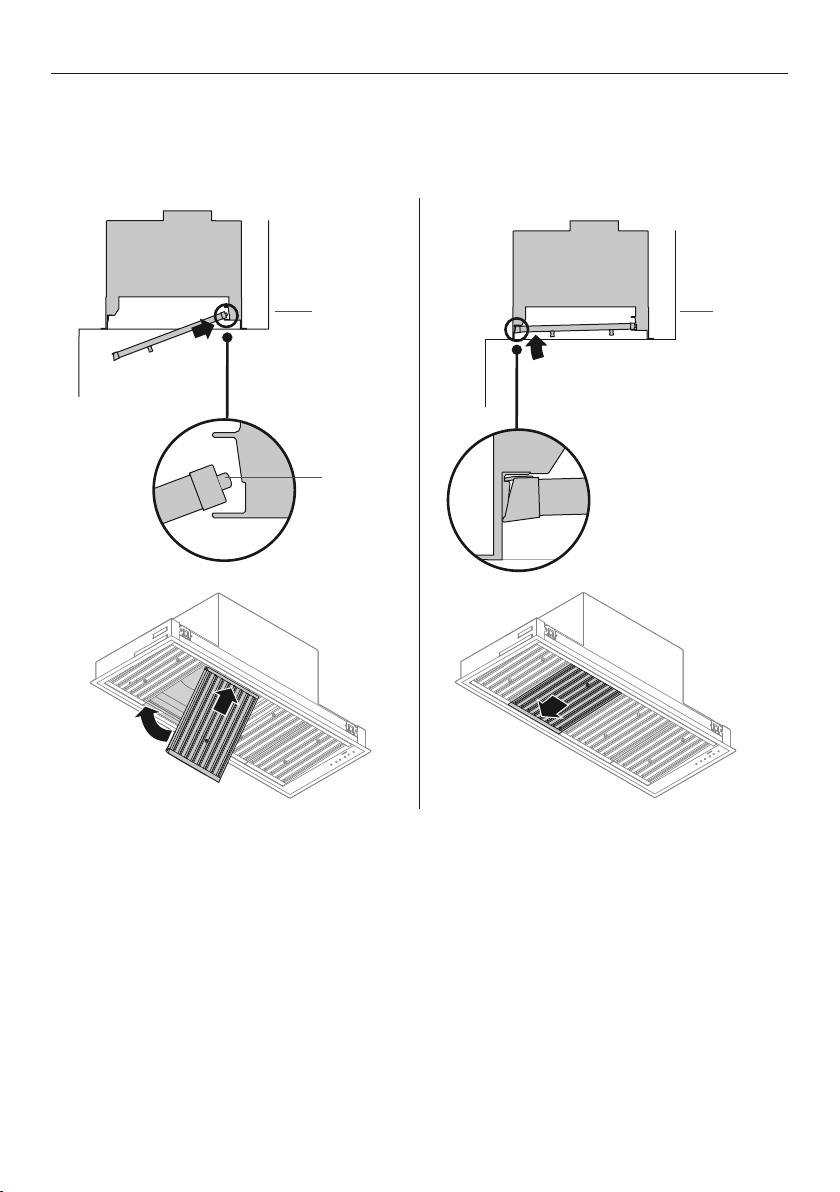
To replace the filters:
1
Place the front end of the filter on the ledge above the LED strip, against the inside
front of the rangehood (refer to D), pull the filter toward you and push the back up into
the rangehood (refer to E) until it firmly seats into place.
Front of
rangehood
D
E
Front of
rangehood
spring

15
PROBLEM POSSIBLE CAUSES WHAT TO DO
Fan has
turned off
automatically.
Fan, light and
power buttons
will illuminate red.
This blower is equipped with
a sensor to automatically
turnOFF the fan when
excessive heat is detected
bythe rangehood.
Removethe source of heat,
wait until the control panel
buttons are no longer illuminated
before attempting to restart
the rangehood.
Fan has turned
on automatically.
The fan speed
buttons will
illuminate red.
The heat guard sensor has
activated. The rangehood has
detected high temperature
and has turned the fan
on automatically.
Tooverride press the fan speed
buttons or turn the rangehood
on/off. We recommend leaving
therangehood on to remove
excess cooking heat.
Refer to ‘Heat guard’ for
furtherdetails.
Filter will not
fit back into
therangehood
The filter has been inserted
thewrong way around.
Turn the filter the other way
roundand try to insert again
following the steps detailed in
‘To replace the filters’.
Filter alert
buttonis lit red
Filters require cleaning. Turn off the rangehood, remove
the filters, clean filters and replace.
Refer to ‘Filter cleaning’ for
furtherdetails.
Grease is
dripping from
therangehood
The filters are saturated with
grease and need to be cleaned.
Turn off the rangehood, remove
the filters, clean filters and replace.
Refer to ‘Filter cleaning’ for
furtherdetails.
Excessive
condensation
appears on
the rangehood
surfaces
Using an induction cooktop
High ambient temperature,
humidity or low natural
ventilation in the room
Height of rangehood
installation.
Condensation can be minimised,
refer to ‘For best performance’
fordetails.
The lighting is
too dim
Lighting brightness needs
tobe increased.
Press the
button to increase
the brightness of the lighting.
Press and hold the button to go
straight to the brightest lighting.
Refer to ‘Light’ for further details
on adjusting the brightness.
Rangehood
surfaces
discoloured
Incorrect cleaning product
hasbeen used.
Refer to ‘Cleaning
and maintenance’.
TROUBLESHOOTING
16
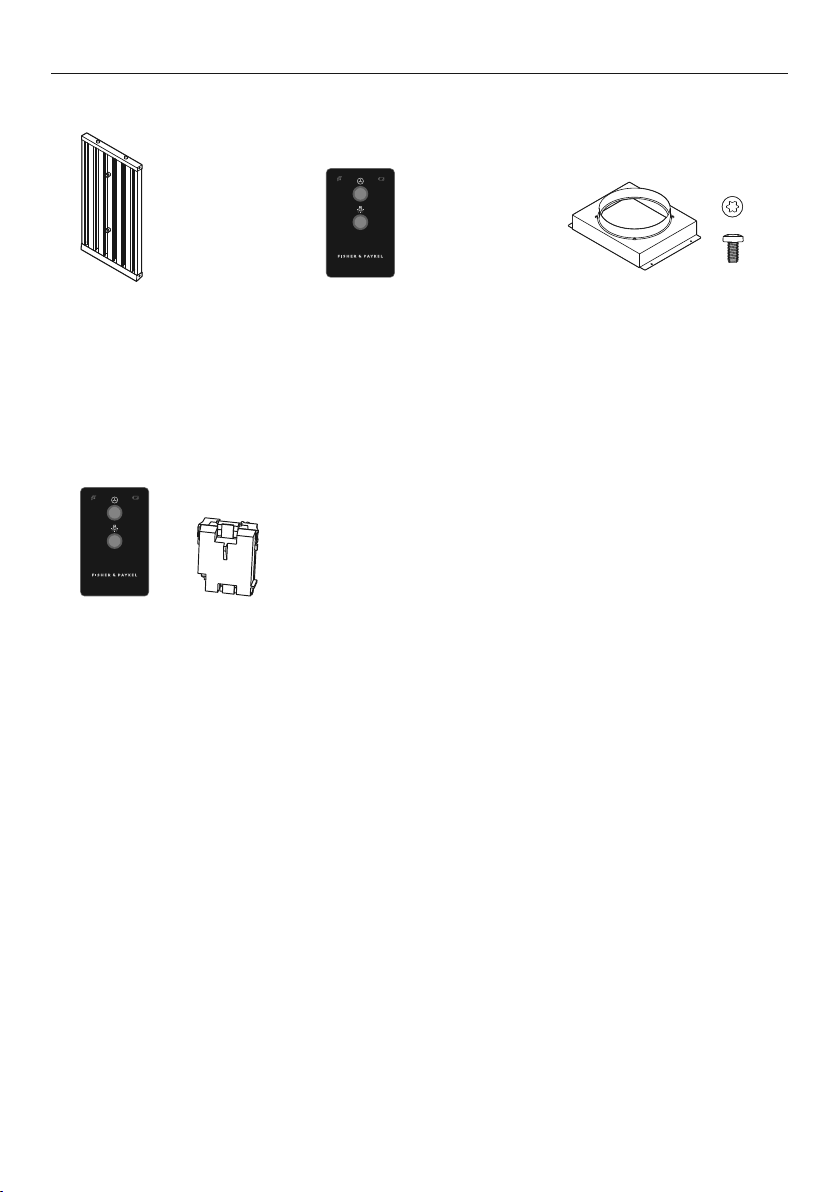
PARTS AND ACCESSORIES
Filters
200mm x 225mm
200mm x 300mm
400mm x 225mm
400mm x 300mm
Remote control
Parts
Accessories
¾” OD x 3/16” ID
Flat Washer
#10-32
Pan Head
Pozi Drive
Wall Plug
#8 x 3/4”
Truss Head
Philips Drive
Self Tapping Screw
¼-20 x ½”
Pan Head
Philips Drive
Machine Screw
M4 x8
Pan Head
Torx Drive
Machine Screw
#10x 3”
Countersunk
Pozidrive
Self tapping Screw
FP Pro Hood Fasteners
Remote control kit
Remote control (1)
Wireless receiver (1)
Duct adapter
8mm T20 drive screws (4)
(selected models)
Note: HPB9048-2 &
HPB12048-2 have a
250mm outlet.

17
SERVICE AND WARRANTY
For details of your manufacturer’s warranty and contacts for servicing, please refer
toyour separate service and warranty book provided with your rangehood.
Complete and keep for safe reference:
Model
Serial No.
Purchase Date
Purchaser
Dealer
Suburb
Town
Country

NZ AU ROW
10546B07.19
FISHERPAYKEL.COM
© Fisher & Paykel Appliances 2019. All rights reserved.
The product specifications in this document apply to the specific
products and models described at the date of issue. Under our policy
of continuous product improvement, these specifications may change
at any time. You should therefore check with your Dealer to ensure this
document correctly describes the product currently available.