Loading ...
Loading ...
Loading ...
EN
©2021 Hestan Commercial Corporation
9
CABINET INSTALLATION
(continued)
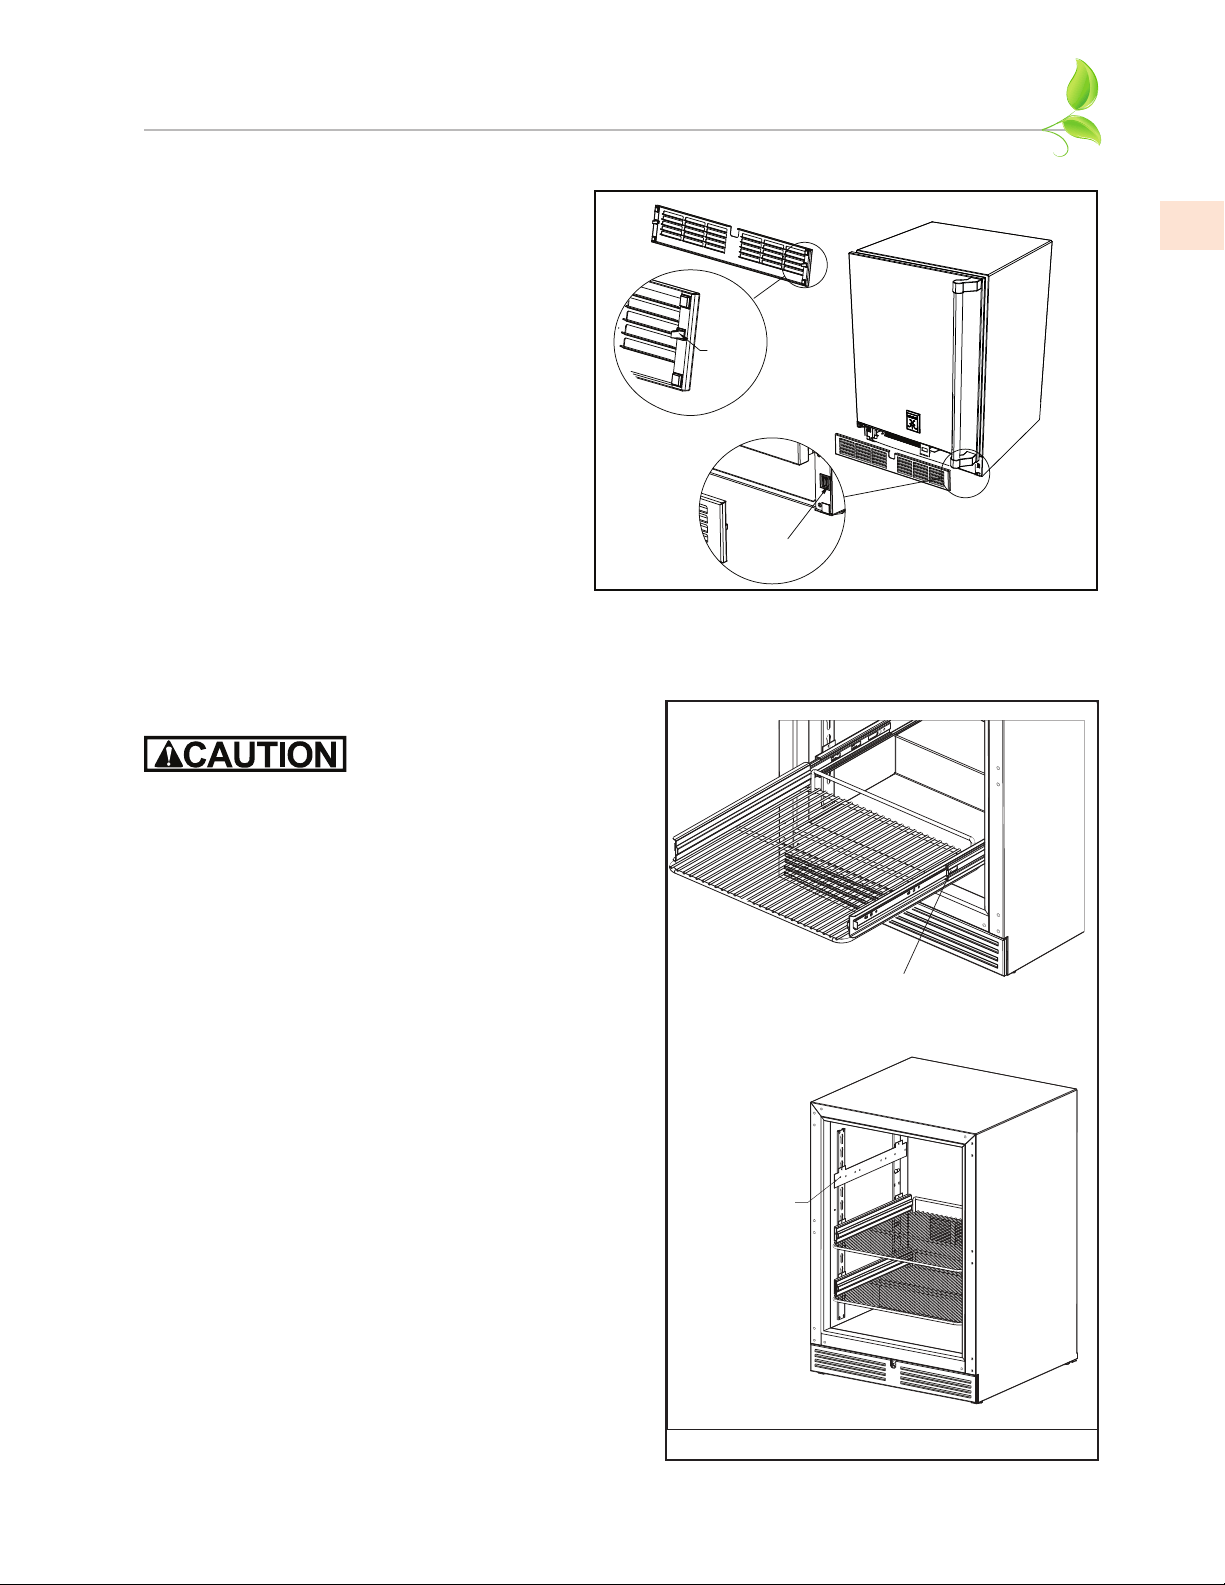
INSTALLING THE FRONT GRILLE COVERINSTALLING THE FRONT GRILLE COVER
Once the unit is secured in place, install the
louvered front grille cover. Secure the cover
by snapping the latch into the latch catch on
the unit (Figure 3).
The vent grille must be removed to service the
unit. The floor cannot interfere with removal,
and the louvered sections must not be covered
or obstructed. Obstructions could prevent
proper air circulation, which may damage the
unit.
NOTE: To achieve maximum performance,
interior louver openings and fan guard
openings should never be obstructed.
SHELVING / DRAWER ADJUSTMENTSSHELVING / DRAWER ADJUSTMENTS
Completely empty shelf or drawer before removing.
1. Pull the shelf/drawer out to its furthest position.
Locate the tabs in the middle of both extenders.
Lift one tab up while pushing the opposite tab
down, and pull shelf/drawer out (Figure 4).
2. Position each bracket separately. Grasp the middle
of the bracket, pull the front end up and out, then
forward to remove it.
3. Place bracket at desired location. Push the bracket
rear hook into the rear mounting slot, then set
front of the bracket in the front slot.
4. Repeat for other brackets.
5. Push extenders completely into brackets. Align the
shelf/drawer grooves with the extenders and slide
completely into the unit.
Latch
Catch
Latch
Figure 3. Front Grille Cover Installation
Lift one tab on slide UP while
pushing tab on opposite slide
DOWN, and pull out to remove.
To remove brackets,
remove shelf, lift front of
bracket to disengage the
front key slot, then pull
forward to disengage the
rear key slot.
Figure 4. Shelving/Drawer Adjustment
Loading ...
Loading ...
Loading ...