For use with BLUEFIN FITNESS 3D Vibration Plate


WHAT’S IN
THE BOX?
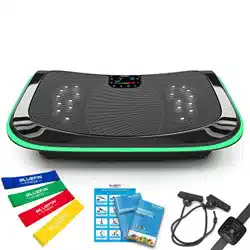
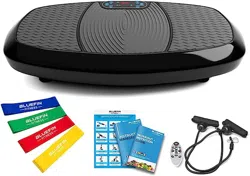
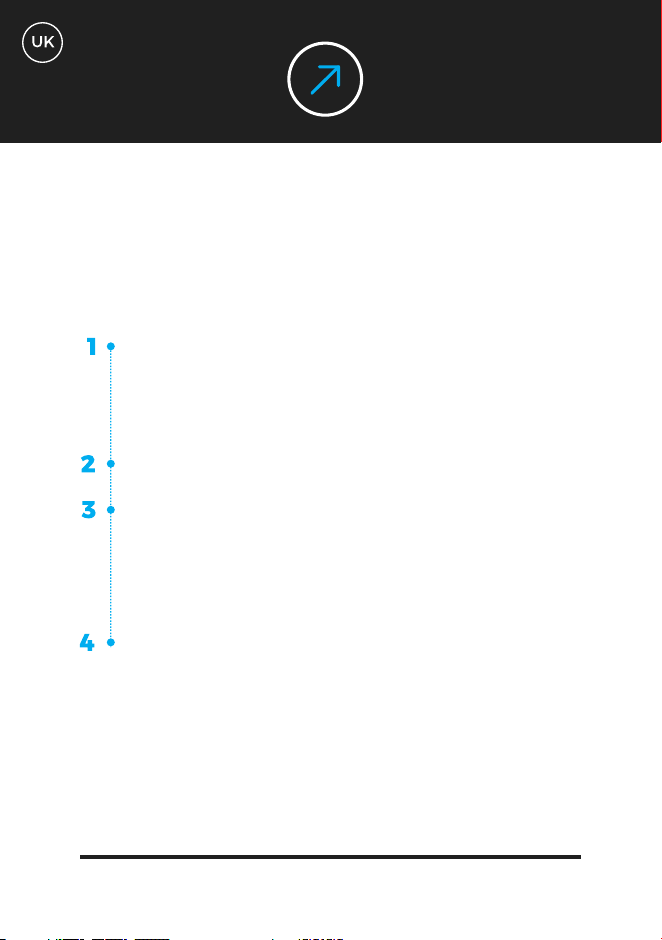
1 x Bluefin 3D Vibration Plate
1 x UK Power Cable
1 x EU Power Cable
1 x Instruction Manual
1 x Workout + Nutrition Guide
1 x Exercise Chart
2 x Workout Cables
Using Accessories:
Your 3D plate comes with 2 bungee cables for use in upper body exercises
in conjunction with the plate. Attach the silver clips on the bungees to the
corresponding silver ring on either side of the bottom of the plate. Do not
attempt to attach or detach accessories from the plate while in use.
Unbox your Bluefin vibration plate and place it on a flat, hard surface. If the
surface is slightly uneven, adjust the feet under the plate. If you live in a flat
or an apartment building we recommend placing a yoga mat or rug beneath
the plate to absorb any noise. Bluefin fitness plates are very quiet but all
vibration plates make at least some noise.
Insert the power cable into the back of the plate and plug the other end into
the electrical outlet. Make sure the plate is close enough to the electrical
outlet that the cord is not stretched. Ensure that the power switch next
to the plug is turned on. If the switch is illuminated, the machine is on.
When not in use, switch the machine off and ensure that this button is not
illuminated.
Familiarise yourself with the screen and remote before stepping onto the
plate. Place your feet on either side of the plate for more intensity and
better balance. Please be sure to step on the 3D plate slowly and carefully
before starting any workout setting. We recommend beginning with speeds
below 120 or using program setting P1.
Insert 2x AAA batteries into the remote control.
GETTING
STARTED
Your 3D vibration plate can be controlled with either the touch screen panel or the remote
control. There are 3 manual programs (L, H, HL) and 5 programmed settings (P1, P2, P3,
P4, P5). The maximum duration of each setting is 10 minutes. Once a manual workout has
begun you can set your workout timer to less than 10 minutes but you cannot increase the
time. Speed can be increased or decreased mid-workout with manual settings by using
the S buttons on the remote control or the speed buttons on the control panel.
You may find it easier to keep the remote control handy rather than attempting to bend
down mid-workout at vigorous speed.
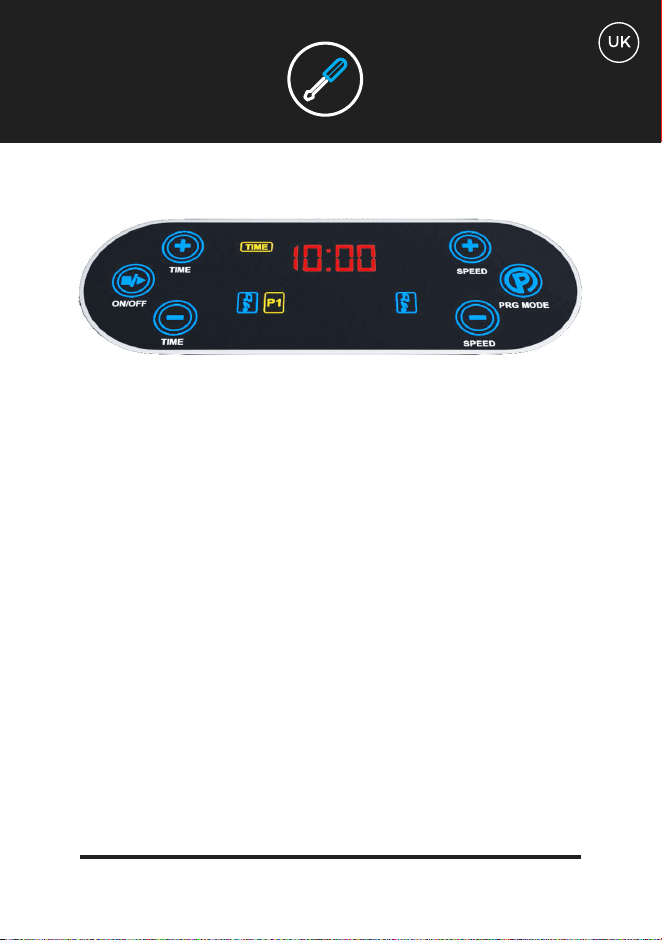
Your Control Screen:
The control screen displays the workout setting in use, the duration of your workout
in minutes and the speed of the setting. The machine speeds begin at 0 and reach a
maximum of 180. 180 can only be reached in manual settings L, H, HL and programmed
settings P4 and P5. Read on for further description of programs and settings.
On your control screen you will notice a series of letters and numbers scrolling through
regularly as you workout. CLL represents an estimation of calories burned. Distance
represents an estimation of the equivalent number of meters you would have walked
taking into account both intensity and duration of the workout.
Use the Program button on the right of the screen to cycle through the manual and
programmed options. The 1st 3 options on the screen are manual settings (L, H, HL) and
the subsequent 5 options are programmed settings (P1, P2, P3, P4, P5).
CONTROLS

Once you’ve scrolled to the desired workout, use the “On” button on the left of the screen
to begin your workout. Use the same button to end it if you’d like to finish before the time
shown on the screen.
When using manual settings L, H and HL speed can be increased or decreased by press-
ing the speed buttons on the right. Time can be decreased with the time buttons on the
left. Speed cannot be adjusted in programmed settings P1 through P5 on the screen.
Using Your Remote:
Use your remote to control your vibration plate without reaching down during your
workout. Please note that the instructions on the remote differ from the instructions for
using the screen alone.
Use the P button in the middle of the remote to scroll through preset workout options (P1,
P2, P3, P4, P5)
For manual settings:
Press button P1 for the 3D or HL manual setting
Press button P3 for manual setting H
Press button P5 for manual setting L
Use the “On/Off” button to begin both preset and manual programs
after selecting.
To change the intensity during a manual workout, use the S+
button to increase difficulty and S- to decrease it.
To shorten your workout when using manual settings use
the T- button. You cannot increase the duration of your
workout.
To finish your workout early, use the “Off” button.
CONTROLS
Manual Workouts:
Linear: Vibration only manual setting. Speed can be controlled with either
the S buttons on the remote or the speed buttons on the control panel of
the plate. Provides challenging platform for body weight or light resistance
exercise. Ideal for massage at lower intensities.
Horizontal: Oscillation only manual setting. Speed can be controlled with
either the S buttons on the remote or the speed buttons on the control panel
of the plate. Less intense motion than linear vibration but augments the
challenge of body weight and light-resistance workouts.
3D mode: This setting oscillates and vibrates at the same time providing a
vigorous sensation throughout the whole body. By far the most challenging
setting for body weight and light-resistance exercise.
Programmed Workouts:
This setting is excellent for beginners getting accustomed the 3D. Consists
of a low-intensity linear (vibrating) workout lasting 10 minutes. You will
experience intervals at varying speeds of up to level 100. Use this setting
to gently introduce limited motion to your 3D workout routine such as
squats and gentle bicep curls. This setting is also good for days that a lower
intensity workout feels appropriate.
WORKOUT
SETTINGS
L
H
HL
P1
Preset low-intensity horizontal workout. 10 minutes of horizontal oscillation
intervals at varying speeds of 20 to 120. This workout is a slight step up in
intensity from P1 and the primary motion of the plate is side-to-side. Try
doing P1 the first day and P2 the day after to challenge yourself with the
different motions. Once you feel comfortable doing both you will be ready to
progress to the more advanced settings, which combine the motions.
Preset workout combining 3D, linear and horizontal motion. When you feel
comfortable with P1 and P2, it’s time to step up the intensity. P3 consists of
10 minutes of moderate difficulty combining oscillation, vibration and 3D
intervals at speeds up to 160. This level is considerably more challenging
than P1 or P2 and is sure to challenge your core stability in new ways.
Notice the different sensations in your abdominal wall when doing standard
compression type movements i.e. clenching and releasing your muscles.
Preset workout combining linear vibration and 3D motion. This setting
is another progression in intensity and should not be used until you have
mastered the previous 3 settings. Consists of 10 minutes of more intense
difficulty combining linear and 3D intervals with more gradual transitions
at speeds up to 180. This setting is excellent for use with the lower body
exercises that can be found on your exercise chart such as single leg glute
bridges and reverse lunges.
Preset workout combining horizontal oscillation and 3D motion. This is the
most advanced of all the workouts. It consists of 10 minutes of the highest
speed intervals of the longest duration. We recommend using this setting in
conjunction with exercise bands to challenge your glutes and quads in new
ways with exercises such as the classic squat or glute bridge.
WORKOUT
SETTINGS
P2
P3
P4
P5
TECH
SPECS
MOTOR
FUNCTIONS
POWER REQUIRED
LEVELS
PROGRAMS
MANUAL FUNCTION
USER WEIGHT
UNIT WEIGHT
WARRANTY
Dual Motors
3D Oscillation, Vibration, Massage
AC 100-240v / 50-60Hz
180 levels
5 built in programs
180 levels & variable time control
Maximum: 150kg
19kg
Lifetime Motor Warranty
WARRANTY
General wear and marks from use.
Water damage.
Damage due to impromper use.
Chassis damage and scratching due to impromper use or dropping.
Electronic damage due to impromper use or dropping.
The Bluefin warranty covers any technical faults with your item. If you need to make
a warranty claim contact us via email at support@bluefintrading.co.uk
Your warranty begins on receipt of delivery, technical faults are covered for 12
months and the motor is covered for life!
If you have any questions regarding your warranty please email us at:
support@bluefintrading.co.uk
Your warranty does not cover the following:
LIFETIME MOTOR WARRANTY
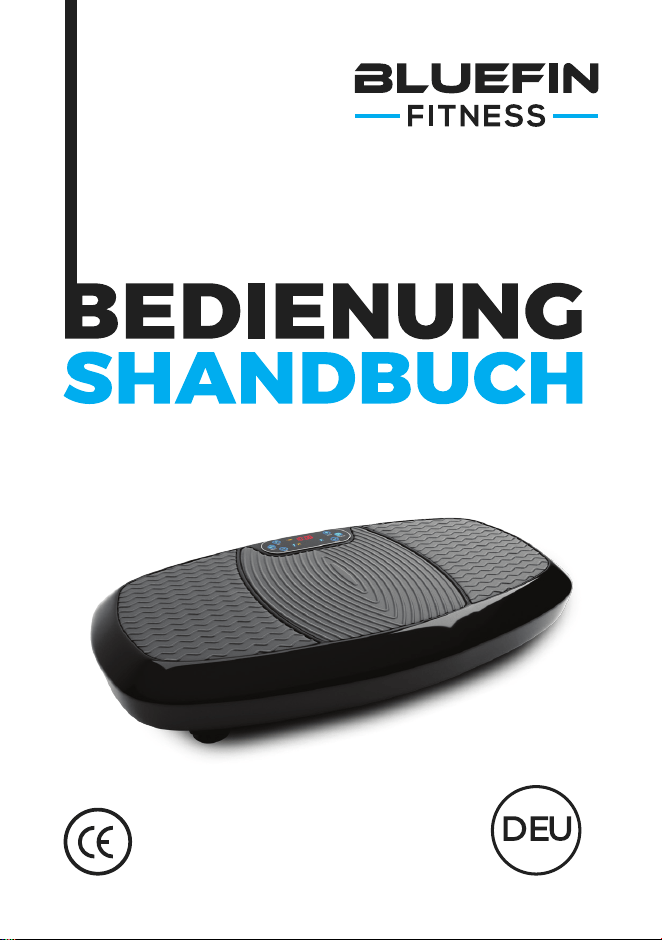
zur Verwendung von BLUEFIN FITNESS
3D Vibrationsplatte


WAS IST IN
DER BOX?
1 x Bluefin 3D Vibrationsplatte
1 x UK-Netzkabel
1 x EU-Netzkabel
1 x Bedienungsanleitung
1 x Workout + Ernährungsguide
1 x Übungstabelle
2 x Trainingsbänder
Verwendung von Zubehör:
Ihre 3D-Platte wird mit 2 Bungee-Bändern für den Einsatz bei
Oberkörperübungen in Verbindung mit der Platte geliefert. Befestigen Sie
die silbernen Klammer an den Bungees am entsprechenden Silberring auf
beiden Seiten der Unterseite der Platte. Versuchen Sie nicht, Zubehörteile
während der Verwendung von der Platte zu befestigen oder zu lösen.
Entpacken Sie Ihre Bluefin-Vibrationsplatte und legen Sie sie auf eine
ebene, harte Oberfläche. Wenn die Oberfläche leicht uneben ist, stellen
Sie die Füße unter der Platte ein. Wenn Sie in einer Wohnung oder einem
Mehrfamilienhaus wohnen, empfehlen wir Ihnen, eine Yogamatte oder
einen Teppich unter die Platte zu legen, um Geräusche zu absorbieren.
Bluefin Fitness-Platten sind sehr leise, aber alle Vibrationsplatten machen
zumindest etwas Lärm.
Stecken Sie das Netzkabel in die Rückseite der Platte und stecken Sie das
andere Ende in die Steckdose. Vergewissern Sie sich, dass sich die Platte so
nah an der Steckdose befindet, dass das Kabel nicht gedehnt wird. Stellen
Sie sicher, dass der Netzschalter neben dem Stecker eingeschaltet ist.
Wenn der Schalter leuchtet, ist die Maschine eingeschaltet. Wenn Sie die
Maschine nicht benutzen, schalten Sie sie aus und achten Sie darauf, dass
der Knopf nicht leuchtet.
Machen Sie sich mit dem Bildschirm und der Fernbedienung vertraut, bevor
Sie auf die Platte treten. Stellen Sie Ihre Füße auf beide Seiten der Platte
für mehr Intensität und ein besseres Gleichgewicht. Bitte stellen Sie sicher,
dass Sie langsam und vorsichtig auf die 3D-Platte steigen, bevor Sie mit der
Trainingseinstellung beginnen. Wir empfehlen, mit Geschwindigkeiten unter
120 zu beginnen oder die Programmeinstellung P1 zu verwenden.
Legen Sie 2x AAA-Batterien in die Fernbedienung ein.
ERSTE
SCHRITTE

Ihre 3D-Vibrationsplatte kann entweder über das Touchscreen-Panel oder die
Fernbedienung gesteuert werden. Es gibt 3 manuelle Programme (L, H, HL) und 5
programmierte Einstellungen (P1, P2, P3, P4, P5). Die maximale Dauer jeder Einstellung
beträgt 10 Minuten. Sobald ein manuelles Training begonnen hat, können Sie Ihren
Trainingstimer auf weniger als 10 Minuten einstellen, aber Sie können die Zeit nicht
erhöhen. Die Geschwindigkeit kann während des Trainings mit manuellen Einstellungen
erhöht oder verringert werden, indem Sie die S-Tasten auf der Fernbedienung oder die
Kurzwahltasten auf dem Bedienfeld verwenden.
Sie finden es möglicherweise einfacher, die Fernbedienung griffbereit zu halten, anstatt
zu versuchen, sich mit hoher Geschwindigkeit in der Mitte des Trainings zu beugen.
Ihr Kontrollbildschirm:
Der Kontrollbildschirm zeigt die verwendete Trainingseinstellung, die Dauer Ihres
Trainings in Minuten und die Geschwindigkeit der Einstellung an. Die Maschineng-
eschwindigkeiten beginnen bei 0 und erreichen ein Maximum von 180. 180 kann nur in
den manuellen Einstellungen L, H, HL und den programmierten Einstellungen P4 und P5
erreicht werden. Lesen Sie weiter für Informationen zu Programmen und Einstellungen.
Auf Ihrem Kontrollbildschirm werden Sie eine Reihe von Buchstaben und Zahlen sehen,
die während des Trainings regelmäßig durchlaufen. CLL stellt eine Schätzung der
verbrannten Kalorien dar. Die Entfernung stellt eine Schätzung der äquivalenten Anzahl
von Metern dar, die Sie unter Berücksichtigung der Intensität und Dauer des Trainings
gegangen wären.
STEUERUNG

Verwenden Sie die Programm-Taste auf der rechten Seite des Bildschirms, um durch
die manuellen und programmierten Optionen zu blättern. Die ersten 3 Optionen auf dem
Bildschirm sind manuelle Einstellungen (L, H, HL) und die folgenden 5 Optionen sind
programmierte Einstellungen (P1, P2, P3, P4, P5).
Nachdem Sie zum gewünschten Training gescrollt sind, verwenden Sie die Schaltfläche
“Ein” - links auf dem Bildschirm -, um mit dem Training zu beginnen. Verwenden Sie die
gleiche Taste, um es zu beenden, wenn Sie vor der auf dem Bildschirm angezeigten Zeit
fertig werden möchten.
Bei Verwendung der manuellen Einstellungen können die L-, H- und HL-
Geschwindigkeiten durch Drücken der Geschwindigkeitstasten rechts erhöht oder
verringert werden. Die Zeit kann mit den Zeittasten auf der linken Seite verringert werden.
Die Geschwindigkeit kann in den programmierten Einstellungen P1 bis P5 auf dem
Bildschirm nicht eingestellt werden.
Verwedung der Fernbedienung:
Verwenden Sie Ihre Fernbedienung, um Ihre Vibrationsplatte zu steuern, ohne während
des Trainings nach unten zu greifen. Bitte beachten Sie, dass die Anwei-
sungen auf der Fernbedienung von den Anweisungen zur alleinigen
Verwendung des Bildschirms abweichen.
Verwenden Sie die P-Taste in der Mitte der Fernbedienung, um
durch die voreingestellten Trainingsoptionen zu blättern (P1, P2,
P3, P4, P5).
STEUERUNG

Für manuelle Einstellungen:
Drücken Sie die Taste P1 für die manuelle Einstellung 3D oder HL.
Drücken Sie die Taste P3 für die manuelle Einstellung H.
Drücken Sie die Taste P5 für die manuelle Einstellung L
Mit der Taste “On/Off” können Sie nach der Auswahl sowohl voreingestellte als auch
manuelle Programme starten.
Um die Intensität während eines manuellen Trainings zu ändern, verwenden Sie die Taste
S+, um den Schwierigkeitsgrad zu erhöhen und S-, um ihn zu verringern.
Um Ihr Training bei manuellen Einstellungen zu verkürzen, verwenden Sie die T-Taste.
Sie können die Dauer deines Trainings nicht verlängern.
Um das Training vorzeitig abzuschließen, verwenden Sie die Taste “Off”
STEUERUNG

Manuelle Trainingseinheiten:
Linear: Vibration nur in manueller Einstellung. Die Geschwindigkeit
kann entweder mit den S-Tasten auf der Fernbedienung oder mit den
Geschwindigkeitstasten auf dem Bedienfeld der Platte gesteuert werden.
Bietet eine anspruchsvolle Plattform für Körpergewicht- oder leichte
Widerstandsübungen. Ideal für Massagen mit niedrigerer Intensität.
Horizontal: Schwingung nur in manueller Einstellung. Die Geschwindigkeit
kann entweder mit den S-Tasten auf der Fernbedienung oder mit
den Geschwindigkeitstasten auf dem Bedienfeld der Platte gesteuert
werden. Weniger intensive Bewegungen als lineare Vibrationen, aber
sie erhöhen die Herausforderung der Körpergewichts- und der leichten
Widerstandsübungen.
3D-Modus: Diese Einstellung schwingt und vibriert gleichzeitig und sorgt
für ein kräftiges Gefühl im ganzen Körper. Mit Abstand die anspruchsvollste
Einstellung für Körpergewichts- und leichte Widerstandsübungen.
Programmierte Trainingseinheiten:
Diese Einstellung ist hervorragend für Anfänger, die sich mit dem 3D
vertraut machen möchten. Besteht aus einem linearen (vibrierenden)
Training von niedriger Intensität, das 10 Minuten dauert. Sie werden
Intervalle mit unterschiedlichen Geschwindigkeiten bis zu Level 100 erleben.
Verwenden Sie diese Einstellung, um leicht eingeschränkte Bewegungen
in Ihre 3D-Trainingsroutine, wie Kniebeugen und leichte Bizepscurls
einzubringen. Diese Einstellung ist auch für Tage gut, an denen sich ein
Training mit geringerer Intensität als angemessen anfühlt.
TRAININGSEIN-
STELLUNGEN
L
H
HL
P1
Voreinstellung für ein horizontales Training mit niedriger Intensität.
10 Minuten horizontale Schwingungsintervalle bei unterschiedlichen
Geschwindigkeiten von 20 bis 120. Dieses Training ist ein leichter Anstieg der
Intensität gegenüber P1 und die primäre Bewegung der Platte ist von einer
Seite zur anderen. Versuchen Sie, P1 am ersten Tag und P2 am Tag danach
zu machen, um sich mit den verschiedenen Bewegungen zu messen. Sobald
Sie sich mit beiden Stufen vertraut gemacht haben, sind Sie bereit, zu den
erweiterten Einstellungen überzugehen, die die Bewegungen kombinieren.
Voreinstellung für Training, das 3D-, lineare und horizontale Bewegungen
kombiniert. Wenn Sie sich mit P1 und P2 wohl fühlen, ist es an der Zeit,
die Intensität zu erhöhen. P3 besteht aus 10 Minuten mit mittlerem
Schwierigkeitsgrad und kombiniert Schwingungen, Vibrationen und
3D-Intervalle mit Geschwindigkeiten von bis zu 160. Dieses Level ist
wesentlich anspruchsvoller als P1 oder P2 und wird Ihre Kernstabilität auf
neue Weise herausfordern. Beachten Sie die verschiedenen Empfindungen
in Ihrer Bauchdecke, wenn Sie Standardbewegungen vom Typ Kompression
ausführen, d.h. Ihre Muskeln zusammenpressen und lösen.
Voreinstellung für Training, das lineare Vibration und 3D-Bewegung
kombiniert. Diese Einstellung ist eine weitere Steigerung der Intensität
und sollte nicht verwendet werden, bis Sie die vorherigen 3 Einstellungen
gemeistert haben. Besteht aus 10 Minuten intensiverer Schwierigkeit,
die lineare und 3D-Intervalle mit langsameren Übergängen bei
Geschwindigkeiten von bis zu 180 kombinieren. Diese Einstellung ist
hervorragend für die Verwendung mit den Unterkörperübungen, die Sie
in Ihrer Übungstabelle finden, wie z.B. einbeinige Becken-Brücken und
rückwärtige Ausfallschritte.
TRAININGSEIN-
STELLUNGEN
P2
P3
P4

P5
Voreinstellung für Training, das horizontale Schwingung und
3D-Bewegung kombiniert. Dies ist die am weitesten fortgeschrittene
aller Trainingseinheiten. Sie besteht aus 10 Minuten der höchsten
Geschwindigkeitsintervalle der längsten Dauer. Wir empfehlen, diese
Einstellung in Verbindung mit Trainingsbändern zu verwenden, um Ihre
Gesäßmuskulatur und Ihre Quads mit Übungen, wie der klassischen
Kniebeuge oder der Becken-Brücke auf neue Weise herauszufordern.
TRAININGSEIN-
STELLUNGEN
TECHNISCHE SPE-
ZIFIKATIONEN
MOTOR
FUNKTIONEN
STROMVERSORGUNG
STUFEN
PROGRAMME
MANUELLE FUNKTION
BENUTZERGEWICHT
PLATTENGEWICHT
GARANTIE
Doppelmotoren
3D Oscillation, Vibration, Massage
AC 100-240v / 50-60Hz
180 stufen
5 eingebaute Programme
Vollständige manuelle Funktion mit 180
Stufen und variabler Zeitsteuerung
Maximales Benutzergewicht 150kg
19kg
Lebenslange Motor Garantie

GARANTIE
Allgemeine Verschleiß und Gebrauchsspuren.
Wasserschäden.
Schäden durch unsachgemäßen Gebrauch.
Gehäuseschaden und Kratzer durch unsachgemäßen Gebrauch oder Fallenlassen.
Elektronischer Schaden durch unsachgemäßen Gebrauch oder Fallenlassen.
Die Bluefin-Garantie deckt für 12 Montae alle technischen Fehler mit Ihrem Produkt.
Sofern Sie einen Garantieanspruch geltend machen müssen, kontaktieren Sie uns
per E-Mail unter support@bluefintrading.co.uk
Ihre Gewährleistung beginnt mit Erhalt der Lieferung. Technische Mängel sind für
12 Monate und der Motor für ein Leben lang abgedeckt!
Senden Sie uns bitte eine E-Mail, wenn Sie Fragen zu Ihrer Garantie haben:
support@bluefintrading.co.uk
Ihre Garantie umfasst nachfolgendes nicht:
LEBENSLANGE MOTOR GARANTIE
Para su uso con la placa vibratoria
BLUEFIN FITNESS 3D


¿QUÉ VIENE
EN LA CAJA?
1 x Placa vibratoria Bluefin 3D
1 x Cable de alimentación del Reino Unido
1 x Cable de alimentación EU
1 x Manual de instrucciones
1 x Entrenamiento + Guía de nutrición
1 x Tabla de Ejercicios
2 x Cables de Entrenamiento
Uso de los accesorios:
Su placa 3D viene con 2 cables elásticos para su uso en los ejercicios de la
parte superior del cuerpo en conjunción con la placa. Sujete los clips de
plata de las correas elásticas al anillo de plata correspondiente a cada lado
de la parte inferior de la placa. No se debe intentar conectar o desconectar
accesorios de la placa mientras esté en uso.

Desempaque su placa vibratoria Bluefin y colóquela sobre una superficie
plana y dura. Si la superficie es ligeramente irregular, ajuste los pies
debajo del plato. Si usted vive en un piso o en un edificio de apartamentos,
le recomendamos que coloque una esterilla o alfombra de yoga debajo de la
placa para que absorba cualquier ruido. Las placas Bluefin para fitness son
muy silenciosas, pero todas las placas vibratorias hacen algo de ruido.
Inserte el cable de alimentación en la parte posterior de la placa y enchufe
el otro extremo en la toma de corriente. Asegúrese de que la placa esté lo
suficientemente cerca de la toma de corriente para que el cable no esté
estirado. Asegúrese de que el interruptor de alimentación situado junto al
enchufe esté encendido. Si el interruptor está encendido, la máquina está
encendida. Cuando no esté en uso, apague la máquina y asegúrese de que
este botón no esté iluminado.
Familiarícese con la pantalla y el mando a distancia antes de pisar la
placa. Coloque los pies a cada lado del plato para obtener más intensidad
y un mejor equilibrio. Por favor, asegúrese de pisar la placa 3D lenta y
cuidadosamente antes de comenzar cualquier ajuste de entrenamiento.
Recomendamos comenzar con velocidades inferiores a 120 o utilizar el
ajuste de programa P1.
Coloque 2 pilas AAA en el mando a distancia.
PARA
EMPEZAR

La placa vibratoria 3D se puede controlar tanto con la pantalla táctil como con el
mando a distancia. Hay 3 programas manuales (L, H, HL) y 5 ajustes programados
(P1, P2, P3, P4, P5). La duración máxima de cada ajuste es de 10 minutos. Una vez
que ha comenzado un entrenamiento manual, puede ajustar el temporizador de
entrenamiento a menos de 10 minutos, pero no puede aumentar el tiempo. Se puede
aumentar o disminuir la velocidad a mitad del entrenamiento con ajustes manuales
utilizando los botones S del mando a distancia o los botones de velocidad del panel
de control.
Puede que le resulte más fácil tener a mano el mando a distancia en lugar de
intentar agacharse a mitad del entrenamiento a una velocidad vigorosa.
Su pantalla de control:
La pantalla de control muestra la configuración de entrenamiento en uso, la duración
de su entrenamiento en minutos y la velocidad de la configuración. Las velocidades
de la máquina comienzan en 0 y alcanzan un máximo de 180. El valor 180 solo se
puede alcanzar en los ajustes manuales L, H, HL y en los ajustes programados P4 y
P5. Siga leyendo para obtener más información sobre los programas y los ajustes.
En su pantalla de control notará una serie de letras y números que se desplazan
regularmente a medida que hace ejercicio. La CLL representa una estimación de las
calorías quemadas. La distancia representa una estimación del número equivalente
de metros que habrías caminado teniendo en cuenta tanto la intensidad como la
duración del entrenamiento.
CONTROLES
Utilice el botón Programa a la derecha de la pantalla para desplazarse por las opciones
manuales y programadas. Las 3 primeras opciones de la pantalla son ajustes manuales
(L, H, HL) y las 5 siguientes son ajustes programados (P1, P2, P3, P4, P5).
Una vez que se haya desplazado hasta el entrenamiento deseado, utilice el botón “On”
situado a la izquierda de la pantalla para comenzar el entrenamiento. Utilice el mismo
botón para finalizar si desea terminar antes de la hora que se muestra en la pantalla.
Cuando se utilizan los ajustes manuales L, H y HL, la velocidad puede aumentarse o
reducirse pulsando los botones de velocidad de la derecha. El tiempo se puede reducir
con los botones de tiempo de la izquierda. La velocidad no se puede ajustar en los ajustes
programados de P1 a P5 en la pantalla.
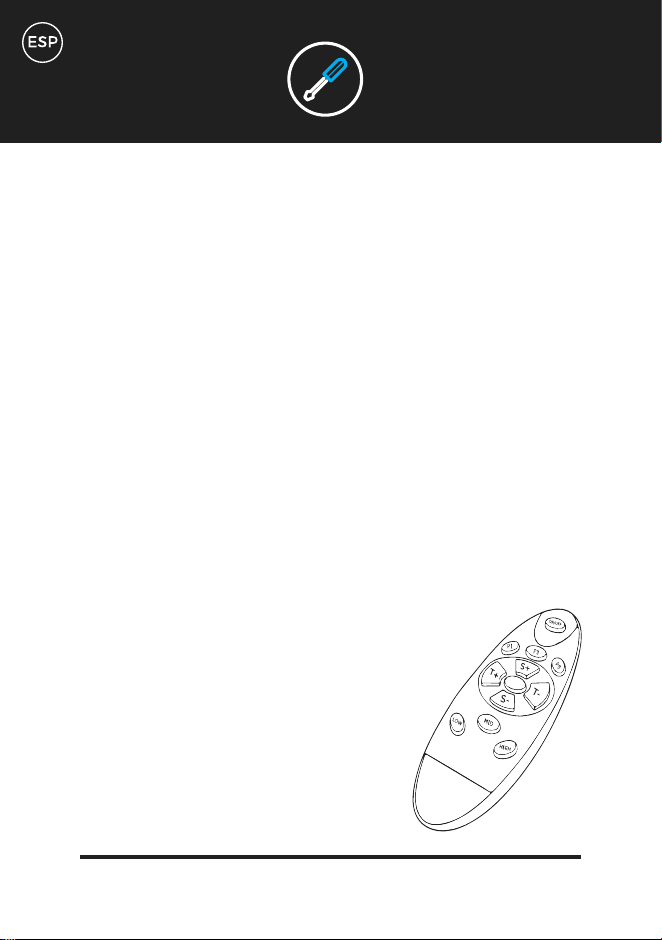
Uso del mando a distancia:
Utilice el mando a distancia para controlar la placa de vibración sin tener que agacharse
durante el entrenamiento. Tenga en cuenta que las instrucciones del mando a distancia
difieren de las instrucciones de uso de la pantalla solamente.
Utilice el botón P en el centro del mando a distancia para desplazarse por
las opciones de entrenamiento preestablecidas (P1, P2, P3, P4, P5).
CONTROLES

Para ajustes manuales:
Presione el botón P1 para el ajuste manual 3D o HL.
Presione el botón P3 para el ajuste manual H
Presione el botón P5 para el ajuste manual L
Con la tecla “Encendido/Apagado” se inician los programas de preselección y los progra-
mas manuales después de la selección.
Para cambiar la intensidad durante un entrenamiento manual, utilice el botón S+ para
aumentar la dificultad y S- para disminuirla.
Para acortar el tiempo de entrenamiento al utilizar los ajustes manuales, utilice el botón
T-. No puede aumentar la duración de su entrenamiento.
Para terminar su entrenamiento temprano, use el botón “Off”.
CONTROLES
Entrenamientos manuales:
Lineal: Ajuste manual de la vibración solamente. La velocidad se puede
controlar con los botones S del mando a distancia o con los botones de
velocidad del panel de control de la placa. Proporciona una plataforma
desafiante para ejercicios de peso corporal o de resistencia ligera. Es ideal
para masajes de baja intensidad.
Horizontal: Oscilación solo ajuste manual. La velocidad se puede controlar
con los botones S del mando a distancia o con los botones de velocidad del
panel de control de la placa. Movimiento menos intenso que la vibración
lineal, pero aumenta el desafío del peso corporal y los ejercicios de
resistencia a la luz.
Modo 3D: Este ajuste oscila y vibra al mismo tiempo proporcionando una
sensación de vigor en todo el cuerpo. Con mucho, el entorno más desafiante
para el peso corporal y el ejercicio de resistencia a la luz.
Entrenamientos programados:
Este ajuste es excelente para que los principiantes se acostumbren al 3D.
Consiste en un entrenamiento lineal (vibratorio) de baja intensidad que
dura 10 minutos. Experimentarás intervalos a diferentes velocidades de
hasta el nivel 100. Utilice esta configuración para introducir suavemente el
movimiento limitado a su rutina de ejercicios en 3D, tales como sentadillas
y suaves flexiones de bíceps. Este ajuste también es bueno para los días en
los que un entrenamiento de baja intensidad se siente apropiado.
PROGRAMAS DE
ENTRENAMIENTO
L
H
HL
P1

Entrenamiento horizontal de baja intensidad preestablecido. 10 minutos de
intervalos de oscilación horizontal a velocidades variables de 20 a 120. Este
entrenamiento es un ligero aumento de la intensidad de P1 y el movimiento
primario de la placa es de lado a lado. Intenta hacer P1 el primer día y P2 el
siguiente para desafiarte a ti mismo con los diferentes movimientos. Una vez
que se sienta cómodo haciendo ambas cosas, estará listo para progresar a los
ajustes más avanzados, que combinan los movimientos.
Entrenamiento preestablecido que combina movimientos en 3D, lineales y
horizontales. Cuando se sienta cómodo con P1 y P2, es hora de aumentar la
intensidad. El P3 consiste en 10 minutos de dificultad moderada combinando
oscilación, vibración e intervalos 3D a velocidades de hasta 160. Este nivel es
considerablemente más desafiante que P1 o P2 y es seguro que desafiará su
estabilidad central en nuevas formas. Fíjese en las diferentes sensaciones
de la pared abdominal al realizar movimientos de compresión estándar, es
decir, al apretar y soltar los músculos.
Entrenamiento preestablecido que combina vibración lineal y movimiento
3D. Este ajuste es otra progresión en intensidad y no debe usarse hasta
haber dominado los 3 ajustes anteriores. Consiste en 10 minutos de
dificultad más intensa combinando intervalos lineales y 3D con transiciones
más graduales a velocidades de hasta 180. Este ajuste es excelente para
usar con los ejercicios de la parte inferior del cuerpo que se pueden
encontrar en la tabla de ejercicios, como los puentes glúteos de una pierna
y los saltos en reversa.
PROGRAMAS DE
ENTRENAMIENTO
P2
P3
P4

P5
Entrenamiento preestablecido que combina la oscilación horizontal y el
movimiento 3D. Este es el más avanzado de todos los entrenamientos.
Consiste en 10 minutos de los intervalos de velocidad más altos de la
duración más larga. Recomendamos utilizar este ajuste junto con bandas de
ejercicios para desafiar a sus glúteos y cuádriceps de nuevas maneras con
ejercicios como el clásico squat o el puente de glúteos.
PROGRAMAS DE
ENTRENAMIENTO

ESPECIFICACIONES
TÉCNICAS
MOTOR
FUNCIONES
ENERGÍA REQUERIDA
NIVELES
PROGRAMAS
FUNCIÓN MANUAL
PESO DEL USUARIO
PESO DEL TABLERO
GARANTIA
Motores duales
Oscilación 3D, Vibración, masaje
AC 100-240v / 50-60Hz
180 niveles
5 programas
Función manual completa con 180 niveles y
control de tiempo variable
Peso máximo del usuario 150kg
19kg
Garantía del motor de por vida

GARANTIA
Desgaste general y marcas de uso.
Daños por agua.
Daños debidos a un uso inadecuado.
Daños en el chasis y arañazos debido a usos inadecuados o caídas.
Daño electrónico debido a usos inadecuados o caídas.
La garantía de Bluefin cubre cualquier defecto técnico con su artículo por 12 meses,
si necesita hacer un reclamo de garantía, contáctenos por correo electrónico a
support@bluefintrading.co.uk
¡Su garantía comienza al momento de recibir la entrega, los defectos técnicos
están cubiertos por 12 meses y el motor está cubierto de por vida!
Si tiene alguna pregunta sobre su garantía, envíenos un correo electrónico a:
support@bluefintrading.co.uk
Su garantía no cubre lo siguiente:
GARANTÍA DEL MOTOR DE POR VIDA
Pour utilisation avec la plaque vibrante
BLUEFIN FITNESS 3D Vibration Plate


QU’Y A-T-IL
DANS LA BOÎTE
1 x plaques vibrantes 3D Bluefin
1 x Câble d’alimentation UK
1 x câble d’alimentation EU
1 x Manuel d’instruction
1 x séance d’entraînement + Guide nutritionnel
1 x Tableau d’exercice
2 x câbles d’entraînement
Utilisation des accessoires :
Votre plaque 3D est livrée avec 2 câbles élastiques pour les exercices du
haut du corps en combinaison avec la plaque. Fixez les pinces argentées
sur les élastiques à l’anneau d’argent correspondant de chaque côté du
fond de la plaque. N’essayez pas de fixer ou de détacher des accessoires de
la plaque pendant l’utilisation.

Déballez votre plaque vibrante Bluefin et placez-la sur une surface plane et
dure. Si la surface est légèrement inégale, ajustez les pieds sous la plaque.
Si vous vivez dans un appartement ou un immeuble d’appartements, nous
vous recommandons de placer un tapis de yoga ou une couverture sous
l’assiette pour absorber le bruit. Les plaques de mise en forme du thon
rouge sont très silencieuses, mais toutes les plaques vibrantes font au
moins un peu de bruit.
Insérez le câble d’alimentation à l’arrière de la plaque et branchez
l’autre extrémité dans la prise électrique. Assurez-vous que la plaque est
suffisamment près de la prise électrique pour que le cordon ne soit pas
tendu. Assurez-vous que l’interrupteur d’alimentation à côté de la prise est
allumé. Si la touche est allumée, la machine est en marche. Lorsqu’il n’est
pas utilisé, éteignez la machine et assurez-vous que cette touche n’est pas
allumée.
Familiarisez-vous avec l’écran et la télécommande avant de monter sur la
plaque. Placez vos pieds de chaque côté de l’assiette pour plus d’intensité
et un meilleur équilibre. Veillez à marcher sur la plaque 3D lentement et
prudemment avant de commencer toute séance d’entraînement. Nous
recommandons de commencer avec des vitesses inférieures à 120 ou
d’utiliser le réglage du programme P1.
Insérez 2x piles AAA dans la télécommande.
POUR
COMMENCER
Votre plaque vibrante 3D peut être contrôlée soit par l’écran tactile, soit par la
télécommande. Il y a 3 programmes manuels (L, H, HL) et 5 réglages programmés
(P1, P2, P3, P4, P5). La durée maximale de chaque réglage est de 10 minutes. Une
fois qu’une séance d’entraînement manuelle a commencé, vous pouvez régler la
minuterie de votre séance d’entraînement à moins de 10 minutes, mais vous ne
pouvez pas l’augmenter. La vitesse peut être augmentée ou diminuée au milieu
de l’entraînement avec des réglages manuels en utilisant les touches S de la
télécommande ou les touches de vitesse du panneau de contrôle.
Vous trouverez peut-être plus facile de garder la télécommande à portée de main
plutôt que d’essayer de vous pencher vers le bas au milieu de l’entraînement à une
vitesse vigoureuse.
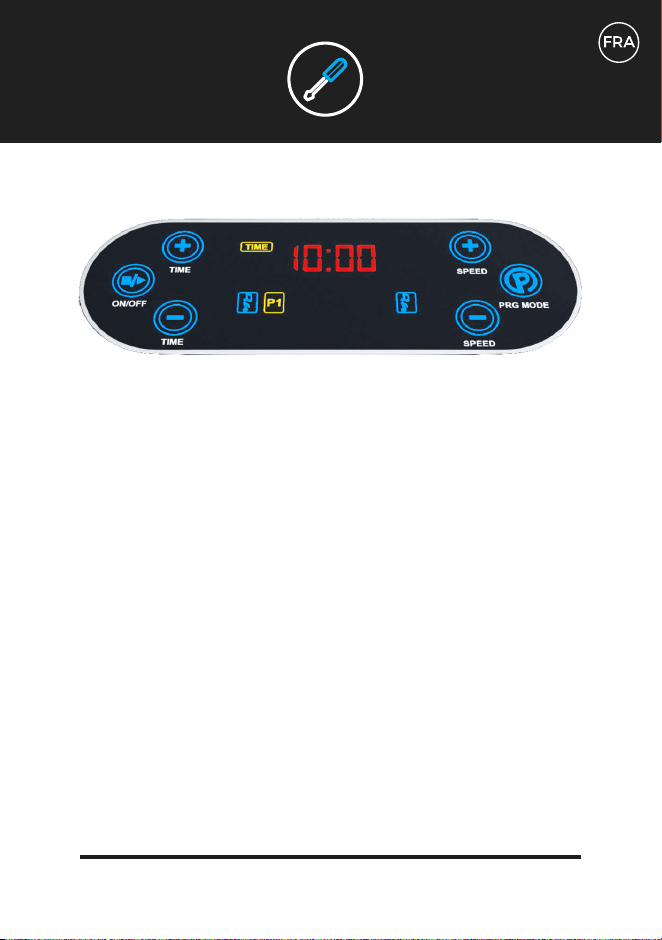
Votre écran de contrôle :
L’écran de contrôle affiche le réglage de l’entraînement utilisé, la durée de
l’entraînement en minutes et la vitesse du réglage. Les vitesses de la machine
commencent à 0 et atteignent un maximum de 180. Le 180 n’est accessible qu’avec
les réglages manuels L, H, HL et les réglages programmés P4 et P5. Lisez la suite
pour une description plus détaillée des programmes et des réglages.
Sur votre écran de contrôle, vous remarquerez une série de lettres et de chiffres
qui défilent régulièrement à mesure que vous vous entraînez. CCL représente une
estimation des calories brûlées. La distance représente une estimation du nombre
équivalent de mètres que vous auriez parcourus en tenant compte de l’intensité et de
la durée de l’entraînement.
CONTRÔLES

Utilisez le bouton Programme à droite de l’écran pour faire défiler les options manuelles
et programmées. Les 3 premières options à l’écran sont des réglages manuels (L, H, H,
HL) et les 5 options suivantes sont des réglages programmés (P1, P2, P3, P4, P5).
Une fois que vous avez fait défiler jusqu’à l’entraînement désiré, utilisez le bouton “On” à
gauche de l’écran pour commencer votre entraînement. Utilisez le même bouton pour le
terminer si vous souhaitez terminer avant l’heure affichée à l’écran.
En utilisant les réglages manuels L, H et HL, la vitesse peut être augmentée ou diminuée
en appuyant sur les boutons de vitesse sur la droite. Le temps peut être réduit à l’aide
des boutons de temps sur la gauche. La vitesse ne peut pas être réglée dans les réglages
programmés P1 à P5 à l’écran.
Utilisation de la télécommande :
Utilisez votre télécommande pour contrôler votre plaque vibrante sans vous pencher vers
le bas pendant votre entraînement. Veuillez noter que les instructions sur la télécom-
mande diffèrent des instructions d’utilisation de l’écran seul.
Utilisez la touche P au milieu de la télécommande pour faire défiler les
options d’entraînement prédéfinies (P1, P2, P3, P4, P5).
CONTRÔLES

CONTRÔLES
Pour les réglages manuels :
Appuyer sur la touche P1 pour le réglage manuel 3D ou HL
Appuyer sur la touche P3 pour le réglage manuel H
Appuyer sur la touche P5 pour le réglage manuel L
Utilisez la touche “On/Off” pour lancer les programmes préréglés et manuels après les
avoir sélectionnés.
Pour changer l’intensité pendant un entraînement manuel, utilisez le bouton S+ pour
augmenter la difficulté et S- pour la diminuer.
Pour raccourcir votre séance d’entraînement lorsque vous utilisez les réglages manuels,
utilisez la touche T-. Vous ne pouvez pas augmenter la durée de votre entraînement.
Pour terminer votre entraînement plus tôt, utilisez le bouton “Off”.

Entraînements manuels :
Linéaire : Réglage manuel uniquement par vibration. La vitesse peut être
contrôlée soit par les touches S de la télécommande, soit par les touches
de vitesse du panneau de commande de la plaque. Fournit une plate-forme
stimulante pour les exercices de poids corporel ou de résistance légère.
Idéal pour les massages de faible intensité.
Horizontal : Réglage manuel de l’oscillation uniquement. La vitesse
peut être contrôlée soit par les touches S de la télécommande, soit par
les touches de vitesse du panneau de commande de la plaque. Moins de
mouvements intenses que les vibrations linéaires, mais augmente le défi du
poids corporel et des entraînements de résistance à la lumière.
Mode 3D : Ce réglage oscille et vibre en même temps, procurant une sen-
sation vigoureuse dans tout le corps. C’est de loin le réglage le plus difficile
pour les exercices de poids corporel et de résistance à la lumière.
Entraînements programmés :
Ce réglage est excellent pour les débutants qui s’habituent à la 3D. Il s’agit
d’un entraînement linéaire (vibrant) de faible intensité d’une durée de 10
minutes. Vous ferez l’expérience d’intervalles à des vitesses variables allant
jusqu’au niveau 100. Utilisez ce réglage pour introduire doucement des
mouvements limités à votre routine d’entraînement 3D tels que les flexions
des jambes et les douces boucles des biceps. Ce réglage est également bon
pour les jours où une séance d’entraînement de moindre intensité semble
appropriée.
PARAMÈTRES
D’ENTRAÎNEMENT
L
H
HL
P1
Entraînement horizontal de basse intensité préréglé. 10 minutes d’oscillations
horizontales à des vitesses variables de 20 à 120. Cet entraînement est une
légère augmentation d’intensité par rapport à P1 et le mouvement primaire de
la plaque se fait d’un côté à l’autre. Essayez de faire P1 le premier jour et P2
le lendemain pour vous remettre en question avec les différents mouvements.
Une fois que vous vous sentirez à l’aise de faire les deux, vous serez prêt à
passer aux réglages les plus avancés, qui combinent les mouvements.
Entraînement prédéfini combinant des mouvements 3D, linéaires et
horizontaux. Lorsque vous vous sentez à l’aise avec P1 et P2, il est temps
d’augmenter l’intensité. P3 consiste en 10 minutes de difficulté moyenne
combinant oscillations, vibrations et intervalles 3D à des vitesses allant
jusqu’à 160. Ce niveau est beaucoup plus exigeant que les niveaux P1 ou
P2 et mettra à l’épreuve votre stabilité de base d’une nouvelle façon. Notez
les différentes sensations ressenties dans votre paroi abdominale lorsque
vous effectuez des mouvements de compression standard, c.-à-d. serrer et
relâcher vos muscles.
Entraînement prédéfini combinant vibration linéaire et mouvement 3D. Ce
réglage est une autre progression en intensité et ne doit pas être utilisé
avant d’avoir maîtrisé les 3 réglages précédents. Se compose de 10 minutes
de difficulté plus intense combinant des intervalles linéaires et 3D avec des
transitions plus graduelles à des vitesses allant jusqu’à 180. Ce réglage est
excellent pour les exercices du bas du corps que l’on peut trouver sur votre
tableau d’exercices, tels que les ponts fessiers à une jambe et les fentes
inverses.
PARAMÈTRES
D’ENTRAÎNEMENT
P2
P3
P4

P5
Entraînement prédéfini combinant oscillation horizontale et mouvement 3D.
C’est la plus avancée de toutes les séances d’entraînement. Il se compose
de 10 minutes des intervalles de vitesse les plus élevés de la durée la plus
longue. Nous vous recommandons d’utiliser ce réglage en conjonction avec
des bandes d’exercice pour défier vos fessiers et vos quadriceps d’une
nouvelle façon avec des exercices tels que le squat classique ou le pont de
fessiers.
PARAMÈTRES
D’ENTRAÎNEMENT
SPECS
TECH
MOTEUR
FONCTIONS
PUISSANCE REQUISE
NIVEAUX
PROGRAMMES
FONCTION MANUELLE
POIDS DE L’UTILISATEUR
POIDS DE LA CARTE
GARANTIE
Deux moteurs
Oscillation 3D, Vibration, massage
AC 100-240v / 50-60Hz
180 niveaux
5 programmes
Fonction manuelle complète avec 180
niveaux et contrôle de temps variable
Poids d’utilisateur maximum 150 kg
19kg
Garantie moteur à vie
GARANTIE
Usure générale et marques d’utilisation.
Dégât d’eau.
Dégât du à une mauvaise utilisation.
Dégâts et rayures du châssis en raison d’une mauvaise utilisation ou de la chute.
Dommages électroniques dus à une mauvaise utilisation ou à une chute.
La garantie Bluefin couvre tous les défauts techniques avec votre article pendant
12 mois, si vous avez besoin de faire une demande de garantie, contactez-nous par
courrier électronique à support@bluefintrading.co.uk
Votre garantie commence à la réception de la livraison, les défauts techniques
sont couverts pendant 12 mois et le moteur est couvert à vie!
Si vous avez des questions concernant votre garantie, envoyez-nous un courriel à:
support@bluefintrading.co.uk
Votre garantie ne couvre pas ce qui suit :
GARANTIE MOTEUR A VIE
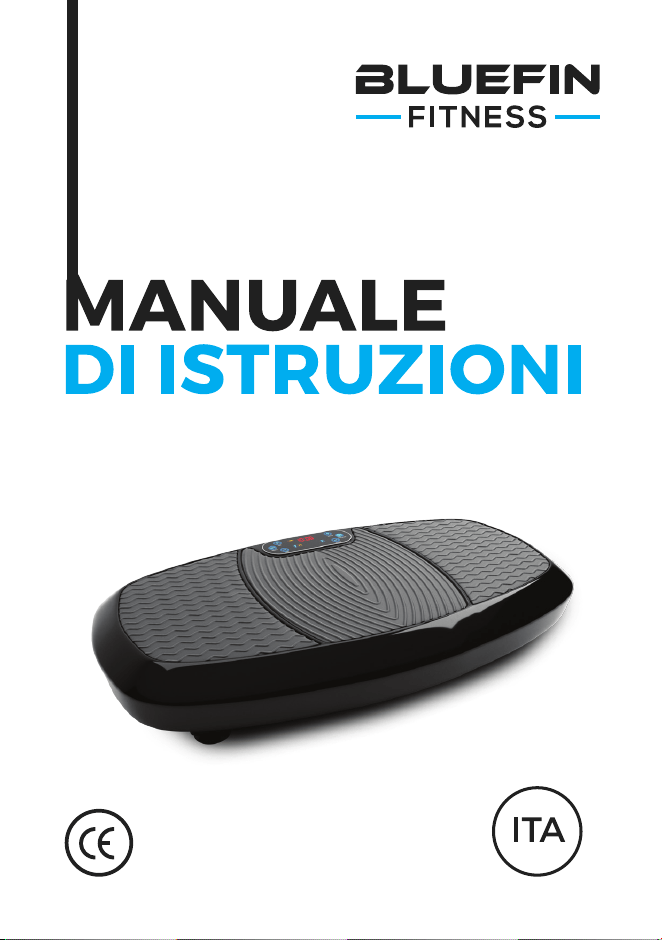
Per l’utilizzo con la pedana vibrante
BLUEFIN FITNESS 3D


COSA C’È NELLA
SCATOLA?
1 x Pedana vibrante Bluefin 3D
1 x cavo di alimentazione UK
1 x cavo di alimentazione UE
1 x manuale di istruzioni
1 x Formazione + Guida nutrizionale
1 x Tabella degli esercizi
2 x Cavi di addestramento
Utilizzo degli accessori:
La pedana 3D viene fornita con 2 cavi elastici da utilizzare negli esercizi
per la parte superiore del corpo in combinazione con la pedana. Si fissino
le clip d’argento sulle cinghie elastiche all’anello d’argento su ogni lato del
fondo della piastra. Non tentare di collegare o scollegare gli accessori dal
tappetino durante l’uso.
Spacchetti la pedana vibrante Bluefin e si la posizioni su una superficie
piana e dura. Se la superficie è leggermente irregolare, regolare i piedi
sotto la pedana. Se si vive in un appartamento o un condominio, si consiglia
di mettere un tappetino per lo yoga o un tappeto sotto il tappetino per
assorbire qualsiasi rumore. Le pedane Bluefin per il fitness sono molto
silenziose, ma tutte le pedane vibranti fanno un po’ di rumore.
Inserire il cavo di alimentazione nella parte posteriore della piastra e
collegare l’altra estremità alla presa a muro. Assicurarsi che il tappetino
sia abbastanza vicino all’uscita in modo che il filo non sia teso. Accertarsi
che l’interruttore di alimentazione accanto alla spina sia acceso. Se
l’interruttore è acceso, il dispositivo è acceso. Quando non è in uso, bisogna
spegnere il dispositivo e assicurarsi che questo pulsante non sia illuminato.
Familiarizzare con il display e il telecomando prima di calpestare il piatto.
Posizionare i piedi su ogni lato della piastra per una maggiore intensità e
un migliore equilibrio. Assicurarsi di salire lentamente e con attenzione
sulla piastra 3D prima di iniziare qualsiasi regolazione dell’allenamento. Si
consiglia di iniziare con velocità inferiori a 120 o di utilizzare l’impostazione
del programma P1.
Inserire 2 batterie AAA nel telecomando.
PER
INIZIARE
La pedana vibrante 3D può essere controllata sia con il touch screen che con
il telecomando. Ci sono 3 programmi manuali (L, H, H, HL) e 5 impostazioni
programmate (P1, P2, P3, P4, P5). La durata massima di ogni impostazione è di 10
minuti. Una volta iniziato l’allenamento manuale, è possibile impostare il timer di
allenamento a meno di 10 minuti, ma non è possibile aumentare il tempo. È possibile
aumentare o diminuire la velocità a metà dell’allenamento con regolazioni manuali
utilizzando i pulsanti S sul telecomando o i pulsanti della velocità sul pannello di
controllo.
Potrebbe essere più facile avere il telecomando a portata di mano invece di cercare di
piegarsi nel bel mezzo dell’allenamento ad una velocità vigorosa.
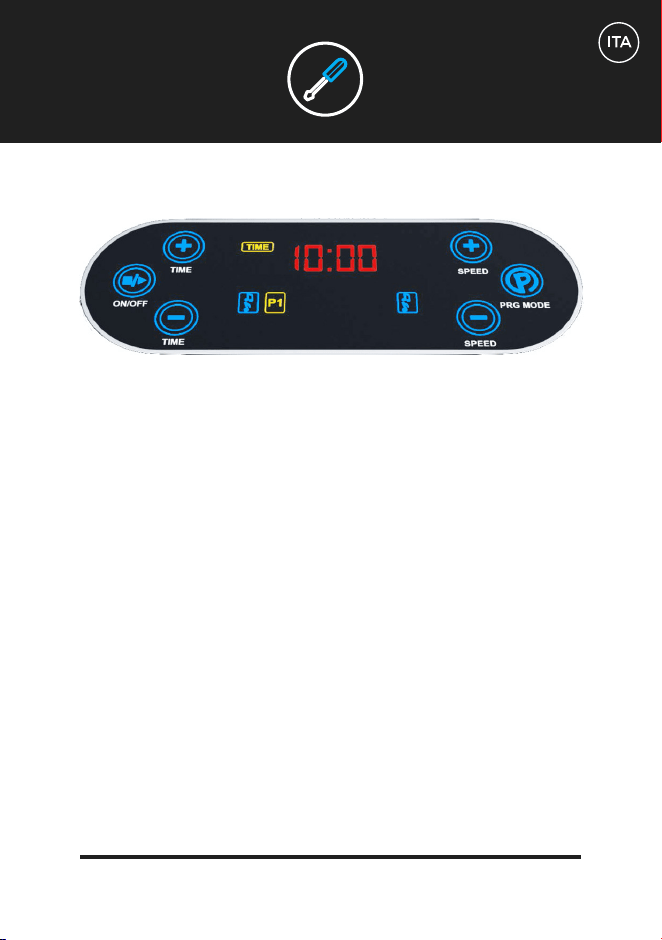
Il tuo schermo di controllo:
La schermata di controllo mostra la configurazione di allenamento in uso, la
durata dell’allenamento in minuti e la velocità della configurazione. Le velocità
della macchina partono da 0 e raggiungono un massimo di 180. Il 180 può essere
raggiunto solo nelle impostazioni manuali L, H, H, HL e nelle impostazioni
programmate P4 e P5. Continua a leggere per maggiori informazioni sui programmi
e le impostazioni.
Sullo schermo di controllo si noterà una serie di lettere e numeri che si muovono
regolarmente durante l’esercizio. La CLL rappresenta una stima delle calorie
bruciate. La distanza rappresenta una stima del numero equivalente di metri che
avresti percorso, tenendo conto sia dell’intensità che della durata dell’allenamento.
CONTROLLI

Utilizzare il pulsante Programma sul lato destro dello schermo per scorrere le opzioni
manuali e programmate. Le prime 3 opzioni di visualizzazione sono impostazioni manuali
(L, H, H, HL) e le successive 5 sono impostazioni programmate (P1, P2, P3, P4, P5).
Una volta che si è passati all’allenamento desiderato, utilizzare il pulsante “On” a sinistra
dello schermo per iniziare l’allenamento. Utilizzare lo stesso pulsante per terminare se si
vuole terminare prima dell’ora indicata sullo schermo.
Quando si utilizzano le impostazioni manuali L, H e HL, la velocità può essere aumentata
o diminuita premendo i pulsanti di velocità a destra. Il tempo può essere ridotto con i
pulsanti del tempo a sinistra. La velocità non può essere regolata nelle impostazioni
programmate da P1 a P5 sul display.
Utilizzo del telecomando:
Utilizzare il telecomando per controllare la piastra di vibrazione senza piegarsi durante
l’allenamento. Si prega di notare che le istruzioni per il telecomando differiscono dalle
istruzioni per l’uso del solo display.
Con il tasto P al centro del telecomando è possibile scorrere le opzioni di
allenamento preimpostate (P1, P2, P3, P4, P5).
CONTROLLI

Per regolazioni manuali:
Premere il pulsante P1 per la regolazione manuale 3D o HL.
Premere il pulsante P3 per la regolazione manuale H
Premere il pulsante P5 per la regolazione manuale L
Premere il tasto “On/Off” per avviare i programmi preimpostati e i programmi manuali
dopo la selezione.
Per modificare l’intensità durante l’allenamento manuale, utilizzare il pulsante S+ per
aumentare la difficoltà e S- per diminuirla.
Per ridurre il tempo di allenamento quando si utilizzano le impostazioni manuali, utilizza-
re il tasto T. Non è possibile aumentare la durata della formazione.
Per terminare l’allenamento in anticipo, utilizzare il pulsante “Off”.
CONTROLLI
Allenamenti manuali:
Lineare: Solo regolazione manuale delle vibrazioni. La velocità può essere
controllata con i tasti S sul telecomando o con i tasti velocità sul pannello di
controllo sulla scheda. Fornisce una piattaforma impegnativa per esercizi
leggeri o di resistenza. È ideale per massaggi a bassa intensità.
Orizzontale: Regolazione manuale della sola oscillazione. La velocità può
essere controllata con i tasti S sul telecomando o con i tasti velocità sul
pannello di controllo sulla scheda. Movimento meno intenso della vibrazione
lineare, ma aumenta la sfida del peso corporeo e degli esercizi di resistenza
leggeri.
Modalità 3D: Questa regolazione oscilla e vibra allo stesso tempo fornendo
una sensazione di vigore in tutto il corpo. L’ambiente di gran lunga più
impegnativo per il peso corporeo e l’esercizio di resistenza alla luce.
Allenamenti in programma:
Questa impostazione è eccellente per permettere ai principianti di abituarsi
al 3D. Si tratta di un allenamento lineare (vibratorio) a bassa intensità della
durata di 10 minuti. Si possono sperimentare intervalli a diverse velocità
fino al livello 100. Si uò utilizzare questa impostazione per introdurre
delicatamente il movimento limitato nella propria routine di esercizio 3D,
come squat e dolci flessioni bicipite. Questa impostazione è utile anche per i
giorni in cui un allenamento a bassa intensità è appropriato.
PROGRAMMI DI
ALLENAMENTO
L
H
HL
P1
Allenamento orizzontale a bassa intensità preimpostato. Questo allenamento
è un leggero aumento dell’intensità di P1 e il movimento primario della
pedana è da lato a lato. Prova a fare P1 il primo giorno e P2 il giorno
successivo per sfidare te stesso con i diversi movimenti. Una volta che ci
si sente a proprio agio a fare entrambe le cose, si è pronti a passare alle
impostazioni più avanzate, che combinano i movimenti.
Allenamento preimpostato che combina movimenti 3D, lineari e orizzontali.
Quando ci si sente a proprio agio con P1 e P2, è il momento di aumentare
l’intensità. La P3 è composta da 10 minuti di moderata difficoltà che combina
oscillazione, vibrazione e intervalli 3D a velocità fino a 160. Questo livello è
considerevolmente più impegnativo della P1 o P2 ed è sicuro di sfidare la
stabilità del nucleo in modi nuovi. Si notino le diverse sensazioni della parete
addominale quando si eseguono movimenti di compressione standard, cioè
quando si comprimono e si rilasciano i muscoli.
Allenamento preimpostato che combina vibrazione lineare e movimento 3D.
Questa impostazione è un’altra progressione di intensità e non deve essere
usata fino a quando non si sono padroneggiate le 3 impostazioni precedenti.
Si compone di 10 minuti di difficoltà più intensa combinando intervalli lineari
e 3D con transizioni più graduali a velocità fino a 180. Questa impostazione è
eccellente per l’uso con esercizi di corpo inferiore che si trovano sul piano di
lavoro, come ponti di testa a una gamba e salti inverso.
PROGRAMMI DI
ALLENAMENTO
P2
P3
P4

P5
Allenamento preimpostato che combina oscillazione orizzontale e
movimento 3D. Questo è il più avanzato di tutti gli allenamenti. Consiste
di 10 minuti degli intervalli di velocità più elevati della durata più lunga.
Si consiglia di utilizzare questa regolazione in combinazione con le fasce
di esercizio per sfidare le vostre natiche e quad in modi nuovi con esercizi
come il classico ponte accovacciato o gluteo.
PROGRAMMI DI
ALLENAMENTO

SPECIFICHE
TECNICHE
MOTORE
FUNZIONI
POTENZA NECESSARIA
LIVELLI
PROGRAMMI
FUNZIONAMENTO MANUALE
PESO UTENTE
PESO PIATTAFORMA
GARANZIA
Doppi motori
Oscillazione 3D, Vibrazioni, massaggi
AC 100-240v / 50-60Hz
180 livelli
5 programmi
Funzionamento manuale completo con 180
livelli e controllo dei tempi variabile.
Peso massimo dell’utente 150kg
19kg
Garanzia del motore a vita

GARANZIA
Usura generale e segni di utilizzo.
Danni da acqua.
Danni dovuti ad uso improprio.
Danni del telaio e gra da uso improprio o cadute.
Danni elettronici da uso improprio o cadute.
La garanzia Bluefin copre i difetti tecnici del tuo articolo per 12 mesi, se dovesse
servirti far valere la garanzia contattaci via e-mail all’indirizzo
support@bluefintrading.co.uk
La garanzia comincia con la ricevuta di consegna, i guasti tecnici sono coperti per
12 mesi e il motore è coperto per tutta la vita!
Se hai domande sulla garanzia scrivici all’indirizzo:
support@bluefintrading.co.uk
La garanzia non comprende quanto segue:
GARANZIA MOTORE A VITA


support@bluefintrading.co.uk
www.bluefinfitness.com