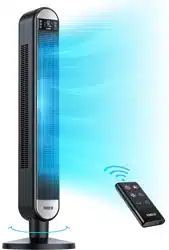
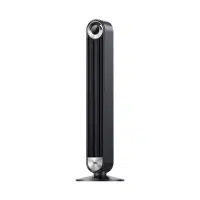
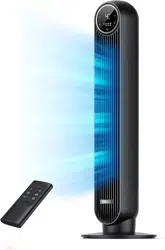
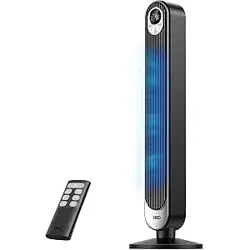
DREO TOWER FAN DR-HTF002.
Safety Warning
IMPORTANT SAFETY INSTRUCTIONS READ AND SAVE THESE SAFETY INSTRUCTIONS BEFORE USE
When using the fan,the following basic instructions should always be followed to reduce the risk of fire, electric shock, and injury to persons, including the following:
- Read and save these instructions
- This appliance has a polarized plug (one blade is wider than the other). To reduce the risk of electric shock, this plug is intended to fit in a polarized outlet only one way, If the plug does not fit fully in the outlet. reverse the plug. If it still does not fit, contact a qualified electrician. Do not attempt to defeat this safety feature.
- This unit should be placed on the smooth floor and the power cord can’t close to heating appliances.
- Please check the consume voltage applied with this unit. This unit consume voltage is 120V AC, 60Hz.
- Please don't use such power cord: too long, damaged. Before use, the power cord can't be pushed by force to avoid damage. And if the power cord is too long, it is easy to produce fire electric shock and others.
- Before assemble completes, please don't use this unit.
- If don’t use it, please cut off the power cord and keep apart the power supply.
- Please keep your hands dry when connect the power supply.
- Please don’t put your fingers, pencil and other things into the grill when blades are operating.
- Unplug or disconnect the appliance from the power supply before cleaning.
- Don't let this unit immerse into water, oil, basically, acidity high temperature condition.
- Please note not to cover by window curtain or others to avoid the blades draw them.
- This unit don’t use in outdoor.
- Please don't use insecticide on the unit, or the resin and paint is easy to be damaged.
- Please don't use directly in long time when have little baby, patient, old man.
- Store the fan in a clean dry place when not in use.
- WARNING: Chemical Bum Hazard. Keep batteries away from children.
- This product contains a lithium button/coin cell battery. If a new or used lithium button/coin cell battery is swallowed or enters the body, it can cause severe intimal bums and can lead to death in as little as 2 hours. Always completely secure the battery compartment. If the battery compartment does not close securely, stop using the product, remove the batteries, and keep it away from children. If you think batteries might have been swallowed or placed inside any part of the body. seek immediate medical attention.
- WARNING: To reduce the risk of fire or electric shock, Do not use this fan with any solid-state speed control device.
FOR HOUSEHOLD USE ONLY READ AND SAVE THESE INSTRUCTIONS
Packing Details:
- DREO Tower Fan Body
- Front Fan Base
- Rear Fan Base
- 04 Thumbs Screws
- Remote Controller
- CR2032 Type Lithium Battery(Installed In The Remote Controller)
- Use Guide
- Quick Start Guide
Fused Safety Plug - For US Only
This fan features a fused safety plug which is designed to cut off electric current to the fan if an electrical fault occurs. Please see below for more information on how to properly use your fan and replace the safety plug fuse, if needed.
User Servicing Instructions
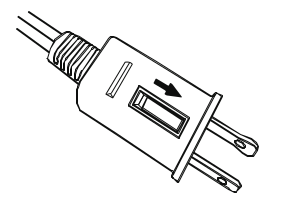
If your fan loses power and you suspect that the fuse on your fan has blown, grasp plug and remove from the receptacle or other outlet device. Do not unplug by pulling on cord.
Slide fuse cover, located on the top of the plug, towards the prongs of the plug.
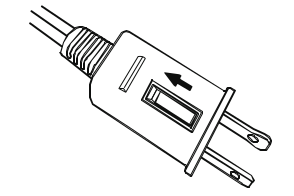
Carefully remove the blown fuse and snap a new fuse into place. Fully close the fuse door by sliding back into place. Discard the blown fuse. The plug should now be ready for normal use.
Slide fuse cover, located on the top of the plug, towards the prongs of the plug.
To Reduce the Risk of Fire, do not replace attached plug. Contains a safety device (fuse) that should not be removed. Discard product if the attached plug is damaged.
If you need further information on how or when to replace the fuse in the safety plug, please contact Customer Service for support.
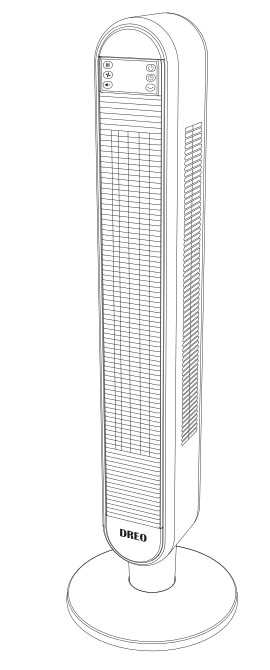
Assembly Instructions
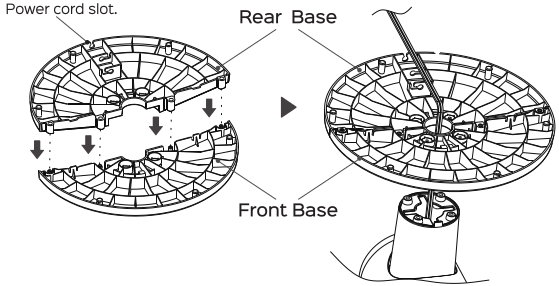
Step 1:
Do not operate the tower fan without the base. The tower fan base is composed of two pieces(Front Base and Rear base). The base needs to be connected together prior to attaching it tothe tower fan Align, and then insert, the plastic pegs of the BASE BACK with the holes on the BASE FRONT until both pieces snap together.
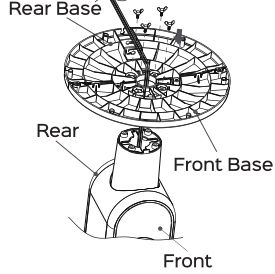
Step 2:
Now thar the base is connected togeher. add the screw and rotate it clockwise to secure the base.
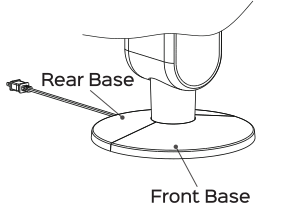
Step 3:
Gently pressing the wire into the clamps, Your tower fan is now ready for use.
Control Panel /Remote Control
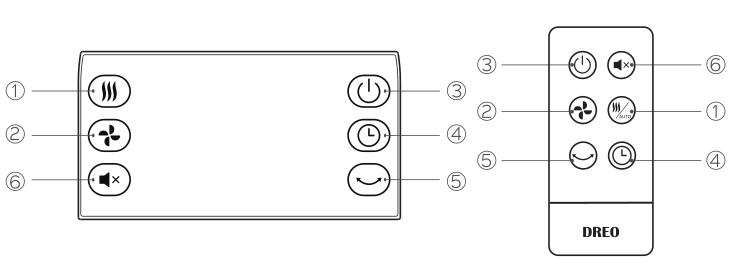
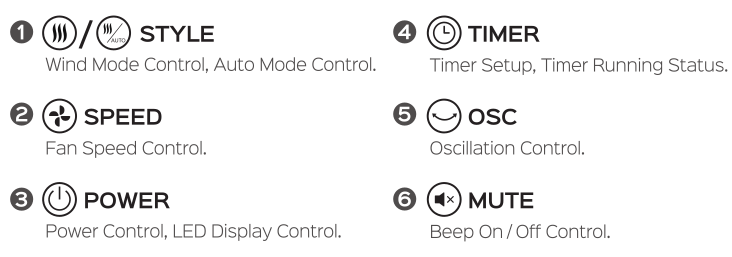
POWER 
Press POWER to turn the fan on or off. The fan will restore to the speed of the most recent use.
Remark: Timer and auto feature will not be restored.
LED Display Control
Press POWER for 3 seconds to turn the LED display on or off.
 STYLE
STYLE
Change the wind mode , NORMAL  , NATURAL
  , SLEEP
NORMAL , 6 speed levels.
NATURAL , 6 speed levels. simulate a natural breeze controlled by designed fan speed algorithm.
SLEEP 6 speed levels.Fan speed will decrease from current setting every twenty minutes until it reaches speed level 1.
And LED display will be off after 20 seconds.
AUTO feature
Press and hold STYLE for 2 seconds to turn the Automatic control feature on or off AUTO will be lighted accordingly.
When AUTO feature is on
Fan speed will adapt to the temperature of the surrounding environment.
 SPEED
SPEED
Fan speed control.
 OSC
OSC
Turn the oscillation feature on or off.
TIMER
Press TIMER  to set a timer or to display timer running status while timer is working.
Temperature will displayed instead of timer after 20 seconds
Turn off timer, Press TIMER repeatly and select 0H, or Press POWER turn off the fan and turn it on again.
Display timer running status, Press TIMER to display timer running status while timer is working.
MUTE (remote control)
Turn the beeping that occurs you press a button on or off and
MUTE  will be lighted accordingly.
Specifications
- Model: DR-HTFOO2
- Rated: Power 45W
- Input AC 120V 60HZ
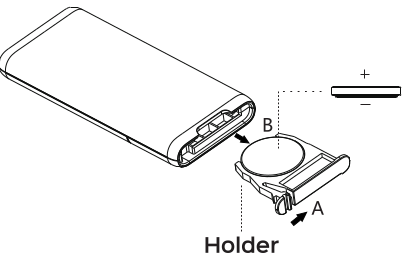
Battery Replacement
Danger of explosion if battery is incorrectly replaced. Replace only with the same or equivalent type.
1, Remove the battery holder by pressing the locking tab Awith your thumb and pulling it out as per arrow B.
2. Replace the battery with the same type (CR2032 Type Lithium Battery), making sure the (+) side facing up.
3. Gently push in the hloder until securely locked into place.
Back of remote control
CAUTION: Danger of explosion if battery is incorrectly replaced. Replace only with the same or equivalent type.
WARNING: Chemical Burn Hazard Keep batteries away from children.
This product contains a lithium buttor/coin cell battery. If a new or used lithium button/coin cell battery is swallowed or enters the body, it can cause severe internal burns and can lead to death in as little as 2 hours. Always completely secure the battery compartment. If the battery compartment does not close securely, stop using the product, remove the batteries, and keep it away from children. If you think batteries might have been swallowed or placed inside any part of the body, seek immediate medical attention.
The cells shall be disposed of properly, including keeping them away from children; and Even used cells may cause injury.
Cleaning And Storage
- Ensure the fan is turned off and unplugged.
- Use only a soft cloth to gently wipe the outer surfaces of the fan clean.
- To clean between the grills and fan blade area, we recommend using a pipe cleaner, flexible dust wand, vacuum cleaner or compressed air to gently remove the dust.
- To clean the rear grill use a soft dry cloth.
- DO NOT immerse the fan in water and never allow water to drip into the motor housing.
- DONOT usr gasoline, paint thinner or other chemicals to clean the fan.
- For storage,you may leave the fan assembled and covered to protect it from dust. Store the fan in a cool, dry place.
Warranty And Services
- This prodcut found to be derective in material or workmanship is covered by 1-year limited warranty from the date of its original purchse. If any problems occur, please contact the DREO Customer Care Center for replacement or repairment.
- Wecan only provide customer care sevice for products sold by DREO or DREO authorized retailers or distributors. If you purchase the product other than this, please contact the seller for warranty service.
- Contact information: [email protected]