Loading ...
Loading ...
Loading ...
Continued on Next Page
SB-F-EXPED2/10W3v3_INSTR_SKU#011237
SB-F-EXPED2/10W3v3_INSTR_SKU#011237
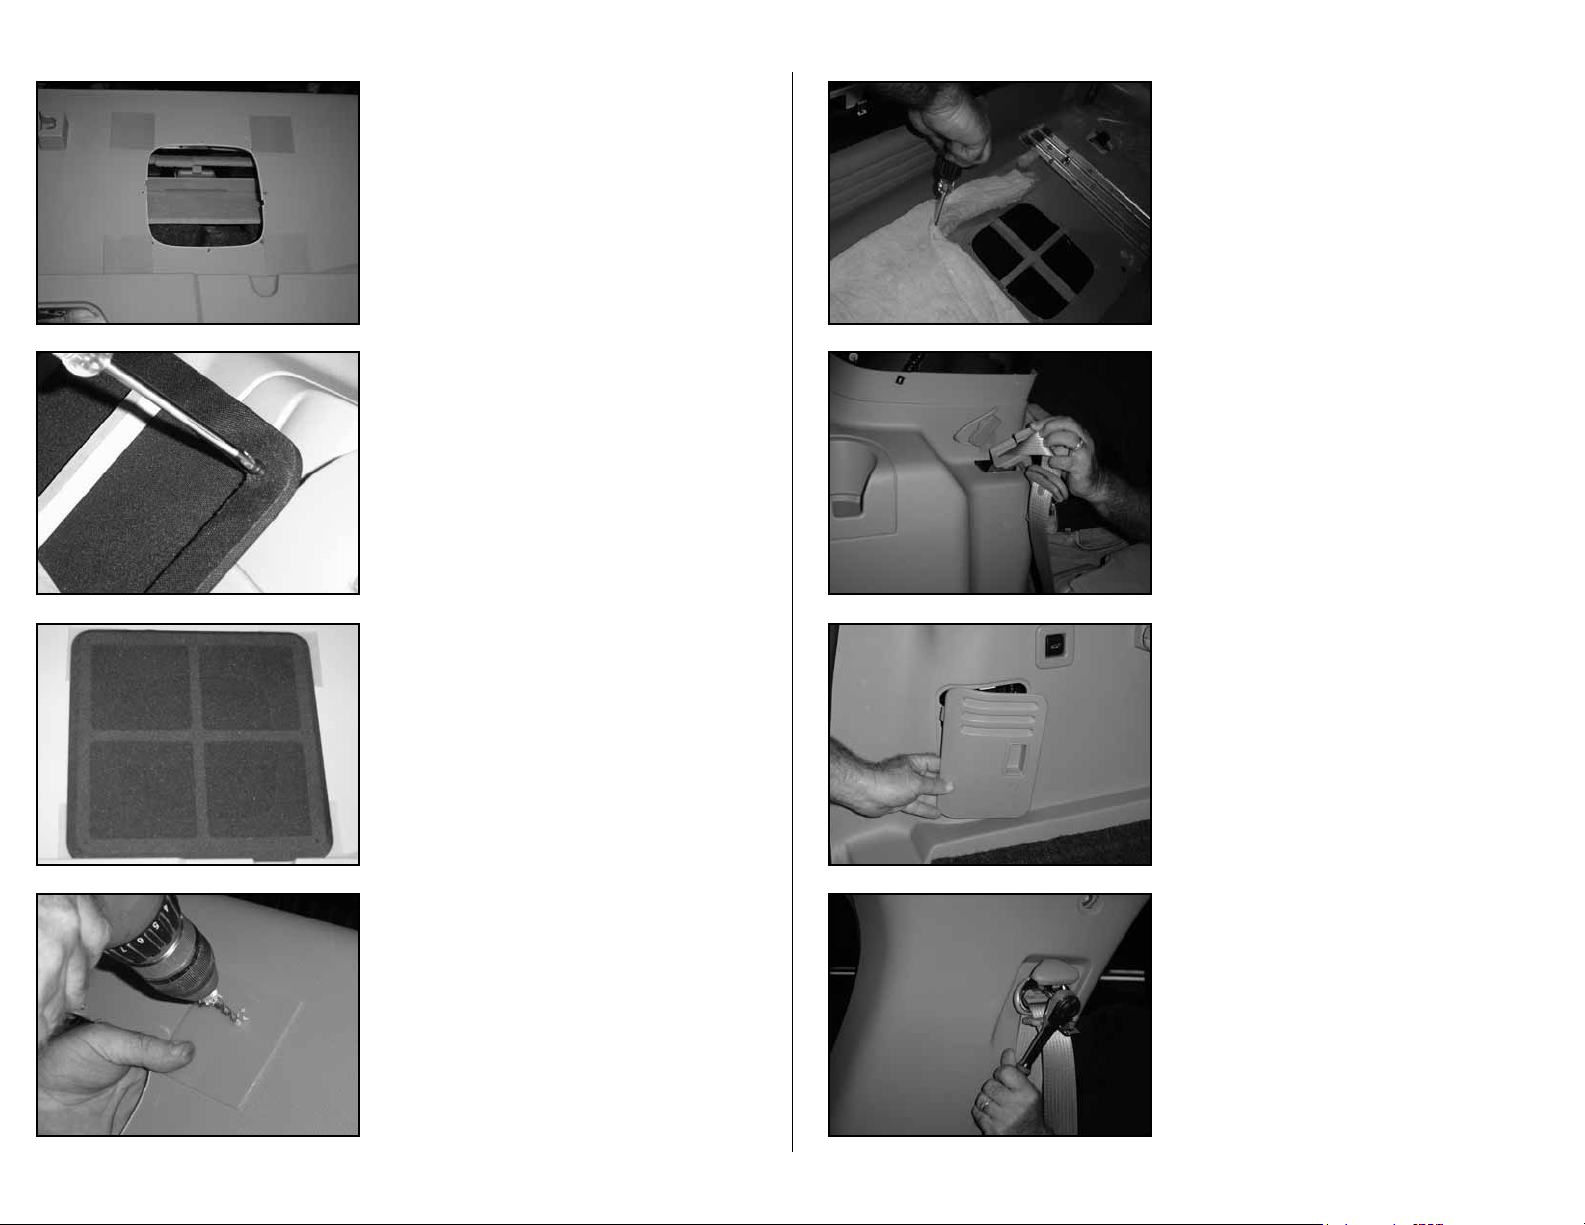
STEP 31
With a drill and a 1/8-inch drill bit, drill through the
impression made in each wax square and into the vehicle’s
side panel.
Remove the wax squares.
STEP 30
Position the grille assembly onto the wax squares, with the
screw heads up against the wax squares.
Firmly press onto each corner of the grille.
Remove each grille assembly carefully, leaving the wax
squares in place. The head of the screws will leave an
impression on each wax square.
STEP 29
Mount each supplied Phillips head screw into each corner of
the backside of the supplied grille, as pictured.
STEP 28
From the back side of the removed side panel. Grind off the
plastic weld that holds the factory woofer grilles onto the
side panel. Remove the grille from the panel.
From the front side of the removed side panel. Place the
supplied wax squares into positions, as pictured.
Page 5 • JL Audio, Inc 2007
STEP 33
Feed the second and third row seat belts back through the
side panel, from STEPs 17 & 18.
STEP 35
Place the cover back onto the c-pillar, from STEP 13.
Secure the bolt and replace the cover from STEP 12.
Secure the second row seat belt back onto the c-pillar and
floor from, STEPs 10 & 11.
STEP 34
Reattach the wire harness to the power lift gate switch and
access door from STEP 6.
Secure the side panel metal bracket to the floor,
from STEP 16.
STEP 32
Remove the screws from the grille assembly. Place a supplied
#8 washer onto each screw.
To secure the grille onto the front side of the side panel. The
screws are to pass through from the back side of the side
panel into the back side of the grille.
Do not over tighten the screws.
Place the side panel back into the SUV.
Loading ...