Loading ...
Loading ...
Loading ...
BLENDING IN THE 20 OUNCE
(0.6L)CONTAINER
WARNING
Parts will become hot with extended use.
DO NOT touch the drive socket in the motor base or the drive spline in the blade base.
To avoid damage or personal injury, DO NOT use the 20 ounce (0.6 L)
container (including the blade base or flip-top lid) in the microwave.
DO NOT blend hot liquids in the 20 ounce (0.6 L) container.
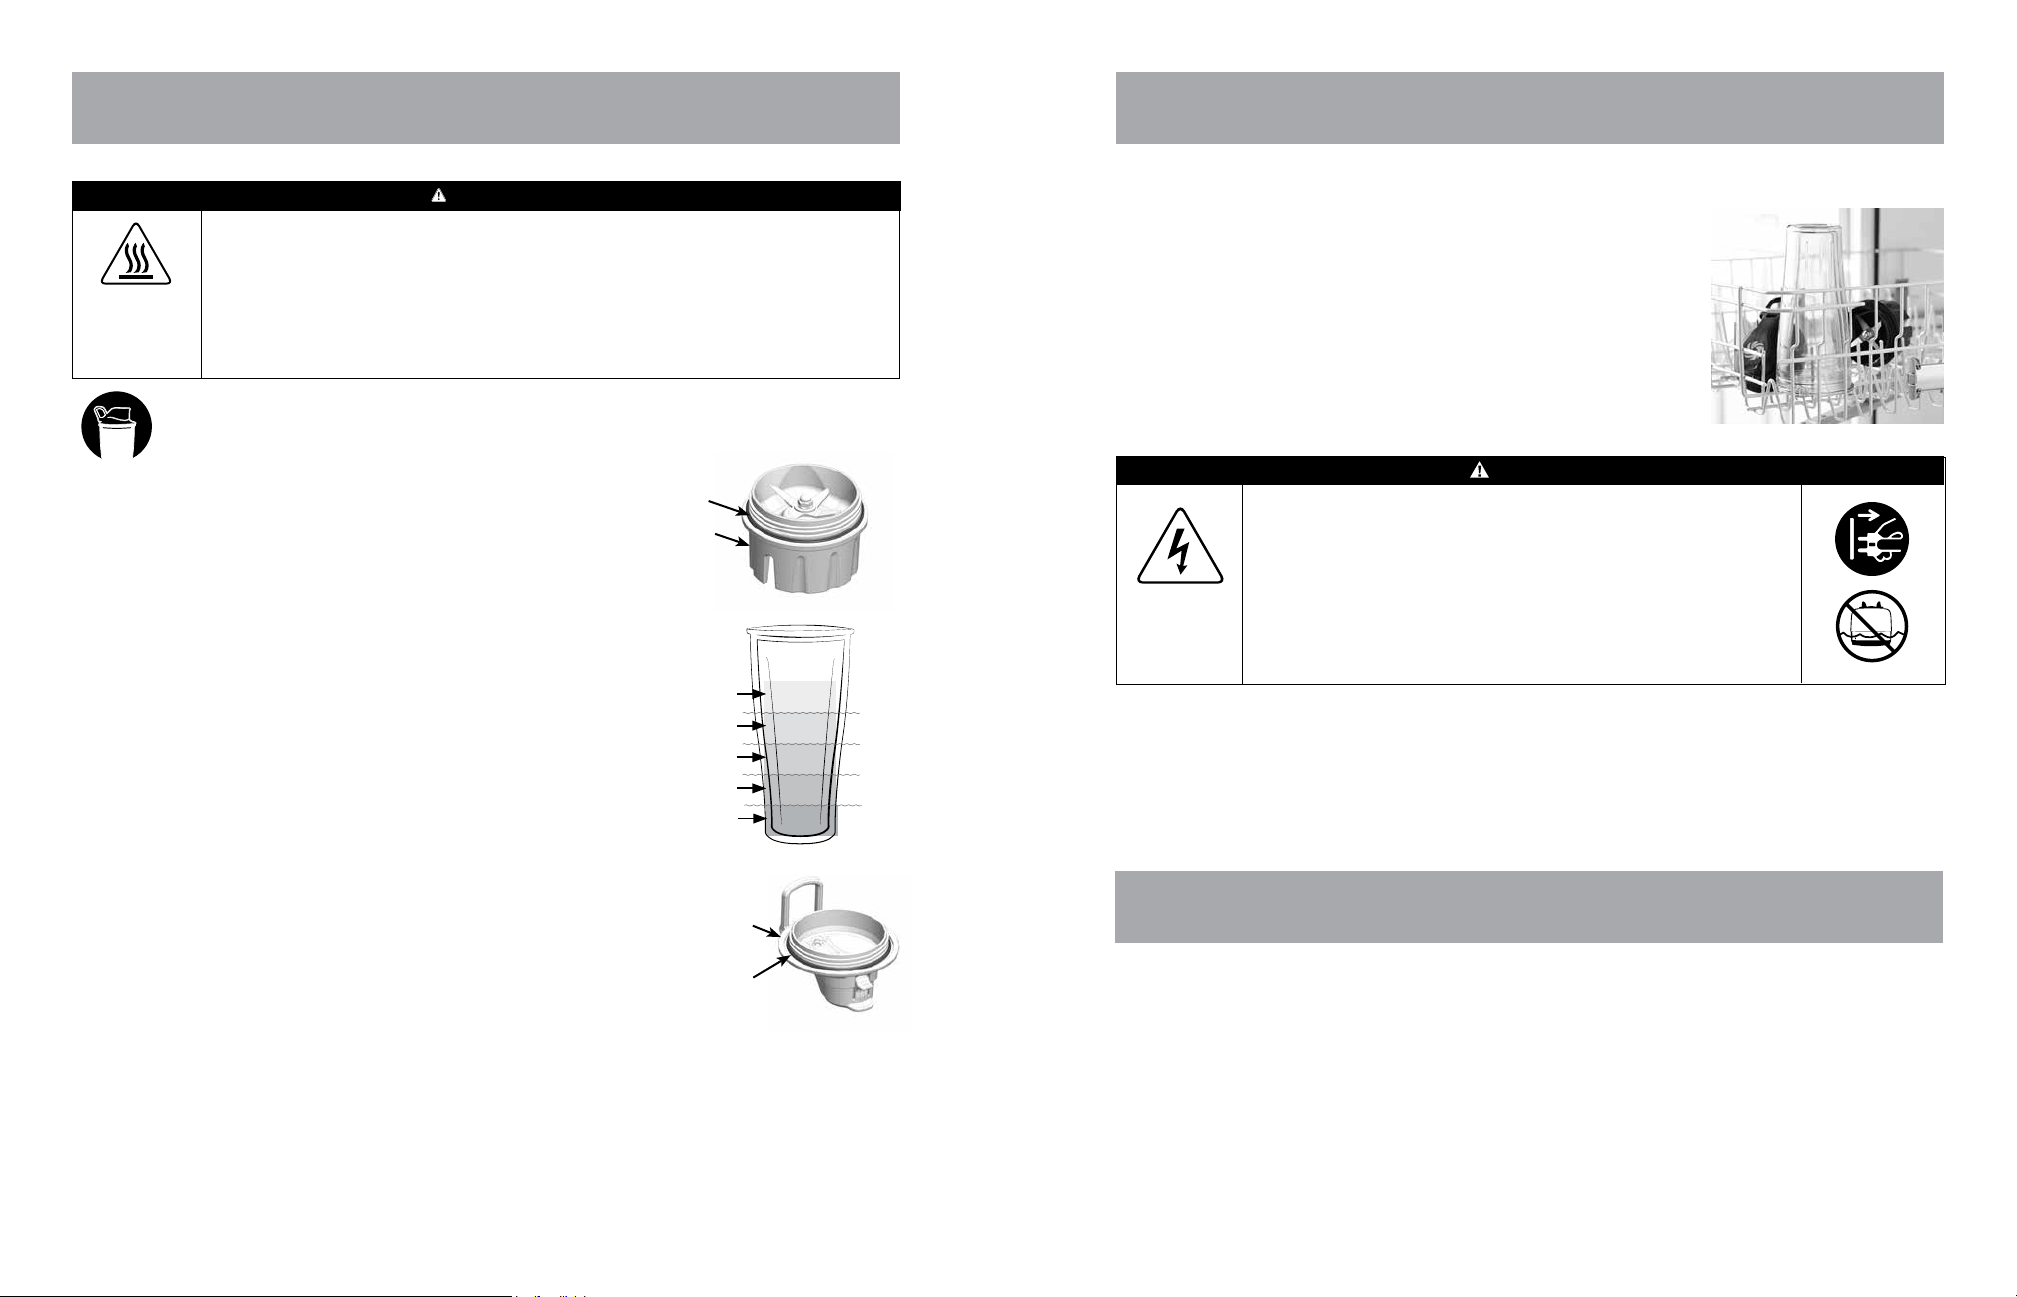
1. To begin, put a seal on the bottom thread of the blade base.
The seal should fit snugly and evenly around the thread.
2. Load the 20 ounce (0.6 L) container according to the recipe.
3. Thread the blade base onto the 20 ounce (0.6 L) container in
a clockwise direction just until tight. DO NOT overtighten or
leaking can occur.
This icon corresponds to suggested recipes for the 20 ounce (0.6 L) container in your cookbook.
SCALE 1.000
Seal
Blade Base
SCALE 1.000
Seal
Flip-top Lid
4. Invert the 20 ounce (0.6 L) container so the blade
assembly is on the bottom. Place the container on
the motor base. The interlock tabs on the 20 ounce
(0.6 L) container will lower into the cutouts in the
motor base.
5. Begin blending by slowly rotating the control to the
desired program, variable speed setting or to pulse.
Once you are at the setting you would like to start
blending on, push the knob in to start the blades.
Follow the recipe guidelines to finish the blend.
6. Wait until the blades come to a complete stop before removing the
container from the motor base.
7. Invert the 20 ounce (0.6 L) container. Unthread the blade base from
the container in a counter-clockwise direction.
8. Put a seal on the flip-top lid. The seal should fit snugly and evenly
around the bottom thread of the flip-top lid.
12
Ice and Frozen Ingredients
Leafy Greens
Soft Fruits and Veggies
Liquids
(water, juice, yogurt)
20 ounce (0.6 L)
Container
Dry Goods (grains, seasonings, powders)
9. Thread the flip-top lid onto the 20 ounce (0.6 L) container in a clockwise direction until just tight.
DO NOT overtighten or leaking can occur.
10. To open the flip-top lid, hold the container with one hand, press the two tabs on lid with the other hand
and lift up to release.
CARE AND CLEANING
Containers, Lids, Lid Plug, Tamper, Blade Base and Seals
Motor Base
1. Unplug the power cord.
WARNING
Electrical shock hazard.
Disconnect power before cleaning machine. Do not immerse or
place the motor base in water.
Failure to follow instructions can cause death or electrical shock.
• Are top rack dishwasher safe. The parts may become damaged if
they are not washed on the top rack.
• Remove the blade base from the container after blending. Clean the
threads on the blade base and the seal thoroughly to avoid ingredient
build up between blends. Ingredient build up might cause problems
when trying to remove the blade base from the container if it has
been attached and allowed to sit for a long period of time.
Automatic Overload Protection
Your Vitamix machine is equipped with automatic overload protection. This built-in feature is designed to
protect the motor and prevent your machine from overheating. When engaged, the automatic overload
protection will cause the motor to shut o and possibly emit a light odor. If the motor shuts off, turn the
control knob back to the stop symbol (O) and let the blender sit for 45 minutes to cool.
Do not fill the 40 ounce (1.2 L) container more than two-thirds full (approximately 28 ounces) when blending
thick texture recipes (e.g., hummus or nut butters). This allows room at the top of the container to use the
tamper, to add liquid to the blend if necessary and will reduce the chances of overheating the unit.
TROUBLESHOOTING
13
2. Wash the outside surface with a damp soft cloth or sponge, which has been rinsed in a mild solution of
liquid detergent and warm water.
3. Thoroughly clean the control knob so it works freely. Moisten a cotton swab with a household degreaser
or cleaner and clean the grooves around the control.
4. Moisten a cotton swab and wipe out the overflow opening at the back of the motor base.
5. Immediately dry all surfaces. Polish surfaces with a soft cloth.
CARE, CLEANING AND TROUBLESHOOTING
Loading ...
Loading ...
Loading ...