Loading ...
Loading ...
Loading ...
BLENDING IN THE 40 OUNCE
(1.2L)CONTAINER
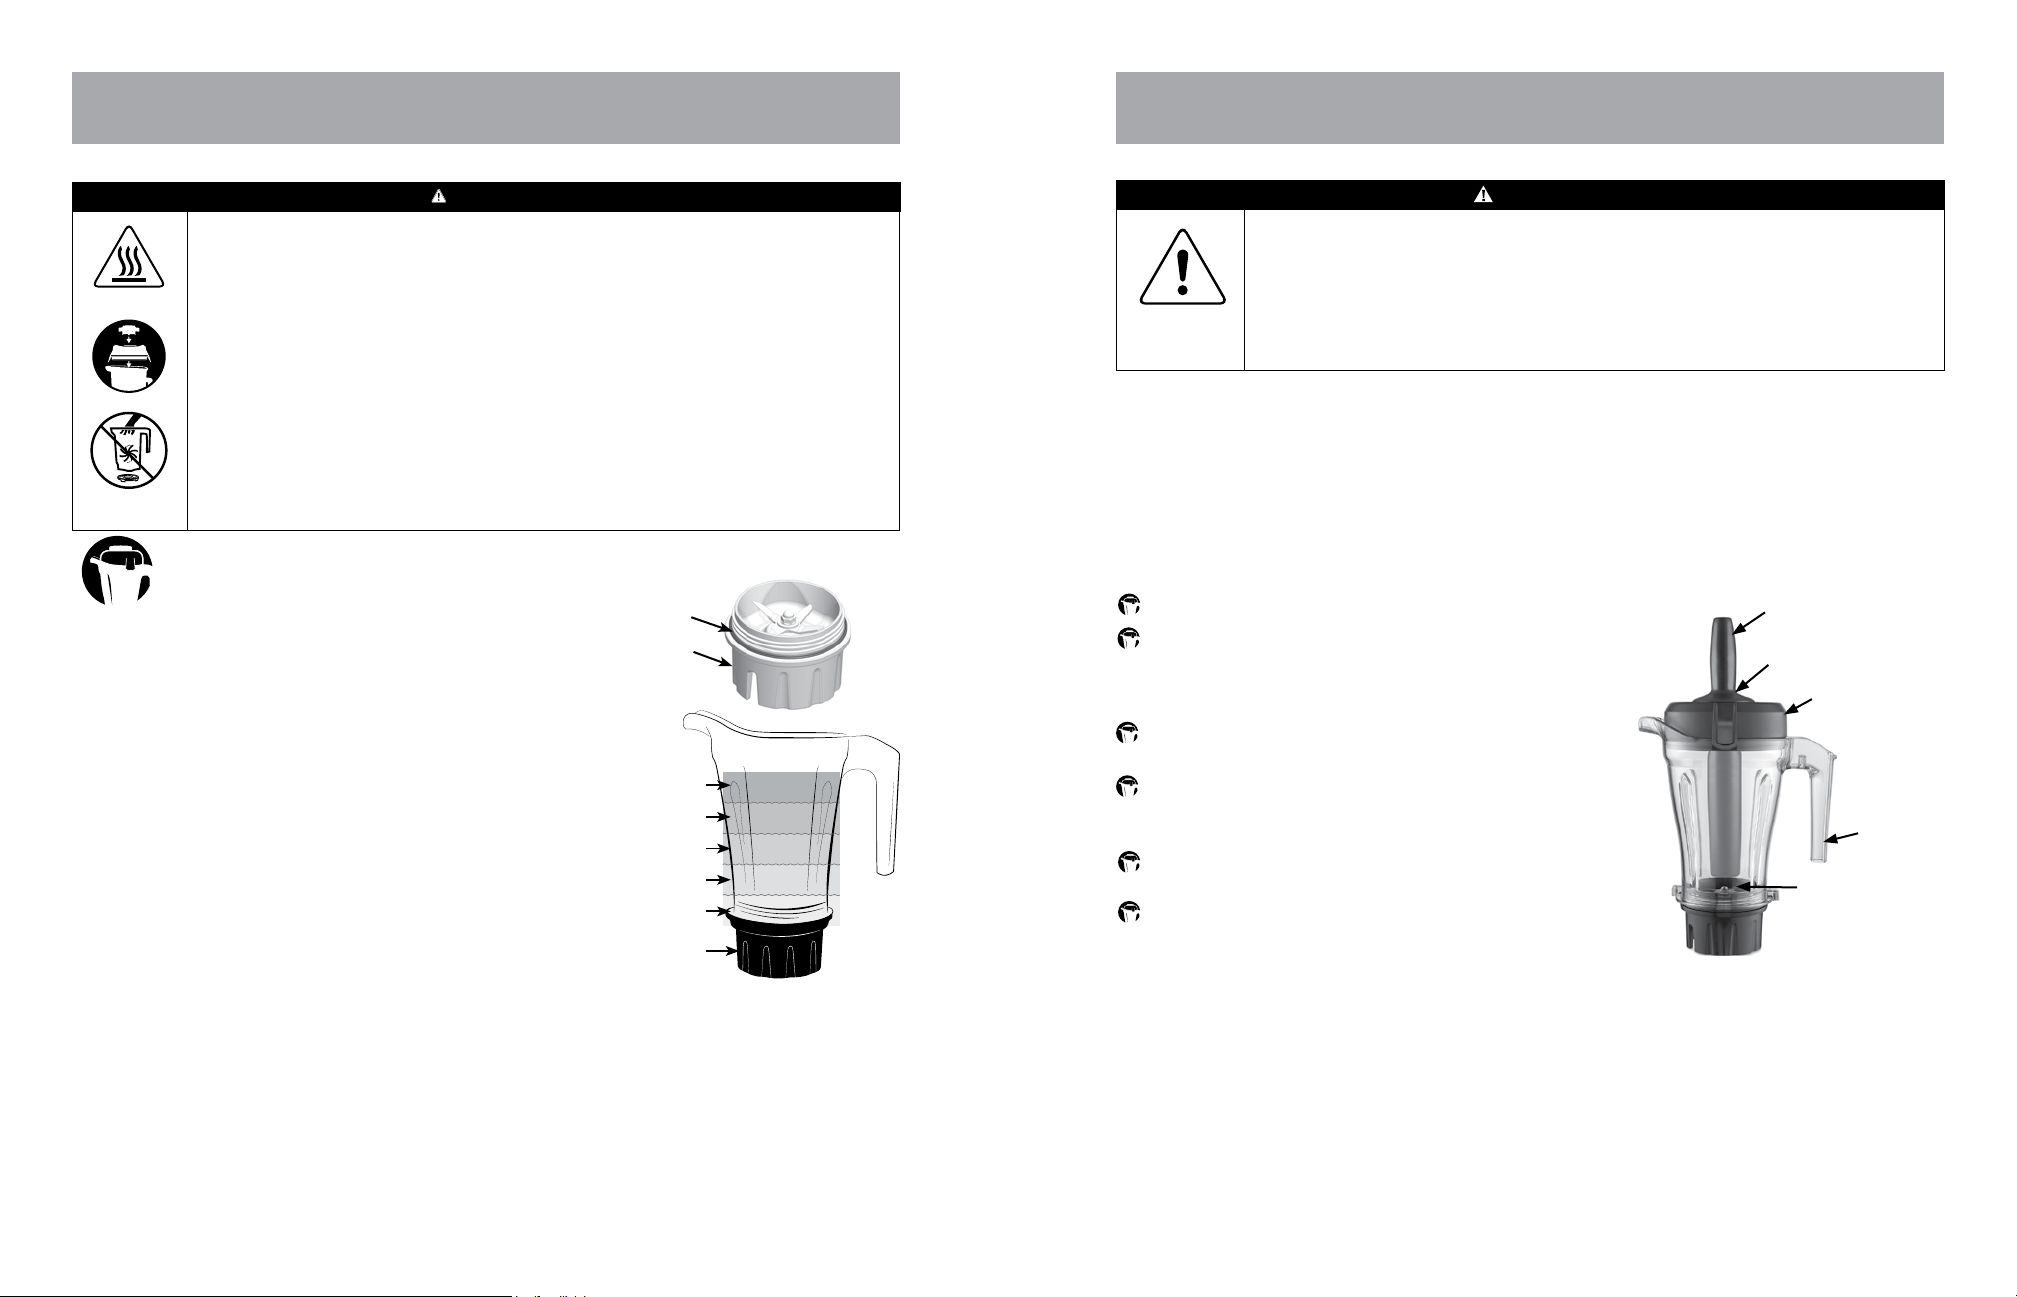
1. To begin, put a seal onto the bottom thread of the blade
base. The seal should fit snugly and evenly around the thread.
WARNING
Parts will become hot with extended use.
DO NOT touch the drive socket in the underside of the blade base or the drive spline
inside the motor base.
When blending hot liquids in the 40 ounce (1.2 L) container, escaping
steam, splashes or contents may scald.
To secure the contents, lock the lid and lid plug securely in place prior to blending hot
liquids in the 40 ounce (1.2 L) container.
Rotating blades can cause severe injury.
DO NOT reach into container while machine is running.
To avoid damage or personal injury, DO NOT use the 40 ounce (1.2 L)
container (including the blade base, seal, lid and lid plug) in the microwave.
SCALE 1.000
Seal
Blade Base
2. Thread the blade base onto the 40 ounce (1.2 L) container
in a clockwise direction just until tight. Do not overtighten
or leaking can occur.
10
Liquids (water, juice, yogurt)
Fruits and Veggies
Leafy Greens
Ice and Frozen Ingredients
Dry Goods
(grains, seasonings, powders)
40 ounce (1.2 L)
Container
3. Load the 40 ounce (1.2 L) container according to
the recipe.
4. Put the lid onto the 40 ounce (1.2 L) container.
Make sure that the tabs on the lid snap onto
the container.
5. Insert the lid plug into the opening in the lid.
Turn the lid plug counterclockwise to lock.
Pull up on the lid plug to make sure it is secure.
6. Set the 40 ounce (1.2 L) container onto the
motor base with the container handle facing you.
This icon corresponds to suggested recipes for the 40 ounce (1.2 L) container in your cookbook.
Blade Base
The interlock tabs on the 40 ounce (1.2 L) container will lower into the cutouts in the motor base.
7. Begin blending by slowly rotating the control to the desired program, variable speed setting or to pulse.
Once you are at the setting you would like to start blending on, push the knob in to start the blades.
Follow the recipe guidelines to finish the blend.
8. Wait until the blades come to a complete stop before removing the lid or the container from the
motor base.
9. Empty the container. Unthread the blade base from the container in a counter-clockwise direction.
TAMPER
CAUTION
Rotating blades can cause damage.
Lids and tampers are not interchangeable between dierent Vitamix machines, container
styles, types, or sizes. Always use the tamper that was supplied with your machine.
DO NOT put hands, spatulas, etc. in the container while the machine is running or while
the container is still on the base.
The tamper that was supplied with your blender is the correct tamper to use in the 40 ounce (1.2 L) container.
DO NOT use any other Vitamix tampers in the 40 ounce (1.2 L) container.
The tamper should easily fit into the lid opening and not come in contact with the blades no matter how you
move the tamper inside the container. If the tamper you are using touches the blades at any angle, DO NOT
use that tamper. Contact Vitamix Customer Service at 1.800.848.2649 or 1.440.235.4840 to order a new
tamper, appropriate for use with your 40 ounce (1.2 L) container.
Important for use
Blades
Tamper Splash Disk
Lid
Tamper
Hold onto the container handle while tamping.
DO NOT rock or tip the container on the motor base while
tamping. If the container comes o of the motor base, put
the container back onto the motor base and press in on the
center of the control knob to start the blades.
The tamper splash disk and lid prevent the tamper from
hitting the blades when the lid is in place.
The 40 ounce (1.2 L) container should not be more than
two-thirds full (28 ounces) if using the tamper during
the blend.
To avoid overheating, DO NOT use the tamper for more than
30 consecutive seconds.
Holding the tamper straight up and down may not help the
ingredients circulate. If necessary, point the end of the tamper
toward the container walls. DO NOT try to force the tamper
deeper into the container.
Container
Handle
11
Loading ...
Loading ...
Loading ...