Loading ...
Loading ...
Loading ...
4
Note: This icemaker should be installed by a licensed plumber only.
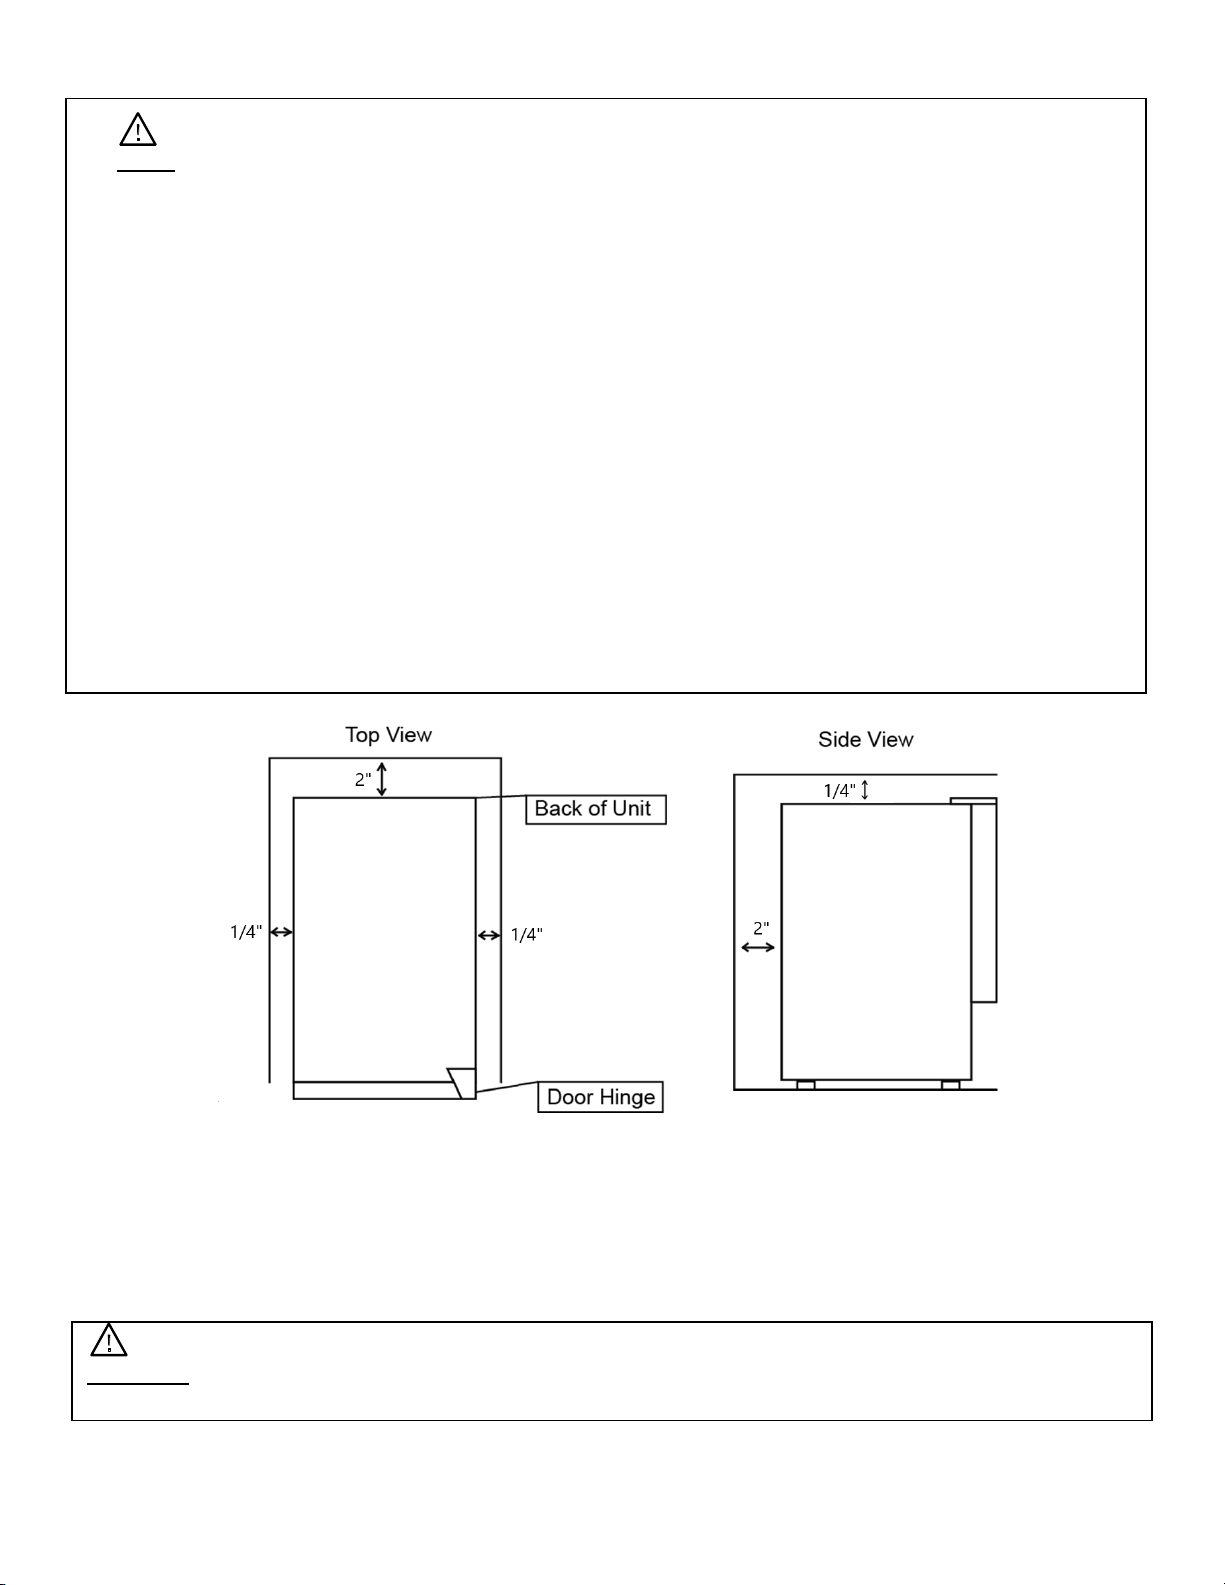
• To ensure proper service access and ventilation, allow more than 2” of clearance at the rear
and
1
/
4
” at the top and the sides. The installation should allow the icemaker to be pulled
forward for servicing if necessary.
• When installing the ice maker under a counter, follow the recommended spacing
dimensions shown. Place electrical and water supplies and drain fixtures in the
recommended locations as shown.
• Choose a well ventilated area with temperatures above 50° F and below 100° F. This unit
MUST be installed in an area protected from the elements, e.g., wind, rain, water spray, or
drips.
• The icemaker should not be located next to ovens, grills, or other high heat sources.
• The ice maker requires a continuous water supply with a minimum pressure of 15 psi and a
static pressure not to exceed 80 psi. The temperature of the water feeding into the ice
maker should be between 41° F and 90° F for proper operation. The ambient operational
temperature should be between 50° F and 100° F. Operation outside these temperatures
may result in lowered production or other adverse effects.
Installation Clearance Requirements
• The unit should be located on a firm and level surface. It is important for the ice maker to be level
in order to work properly. If needed, you can adjust the height of the ice maker by rotating the feet.
See the “Leveling the Ice Maker” section.
• A standard electrical supply (115 VAC only, 60 Hz, 15 A), properly grounded in accordance with
National Electrical Code and local codes and ordinances is required.
Important: Don’t kink or pinch the power supply cord between the ice maker and the wall or
cabinet.
Loading ...
Loading ...
Loading ...