
Loading ...
Loading ...
Loading ...
5
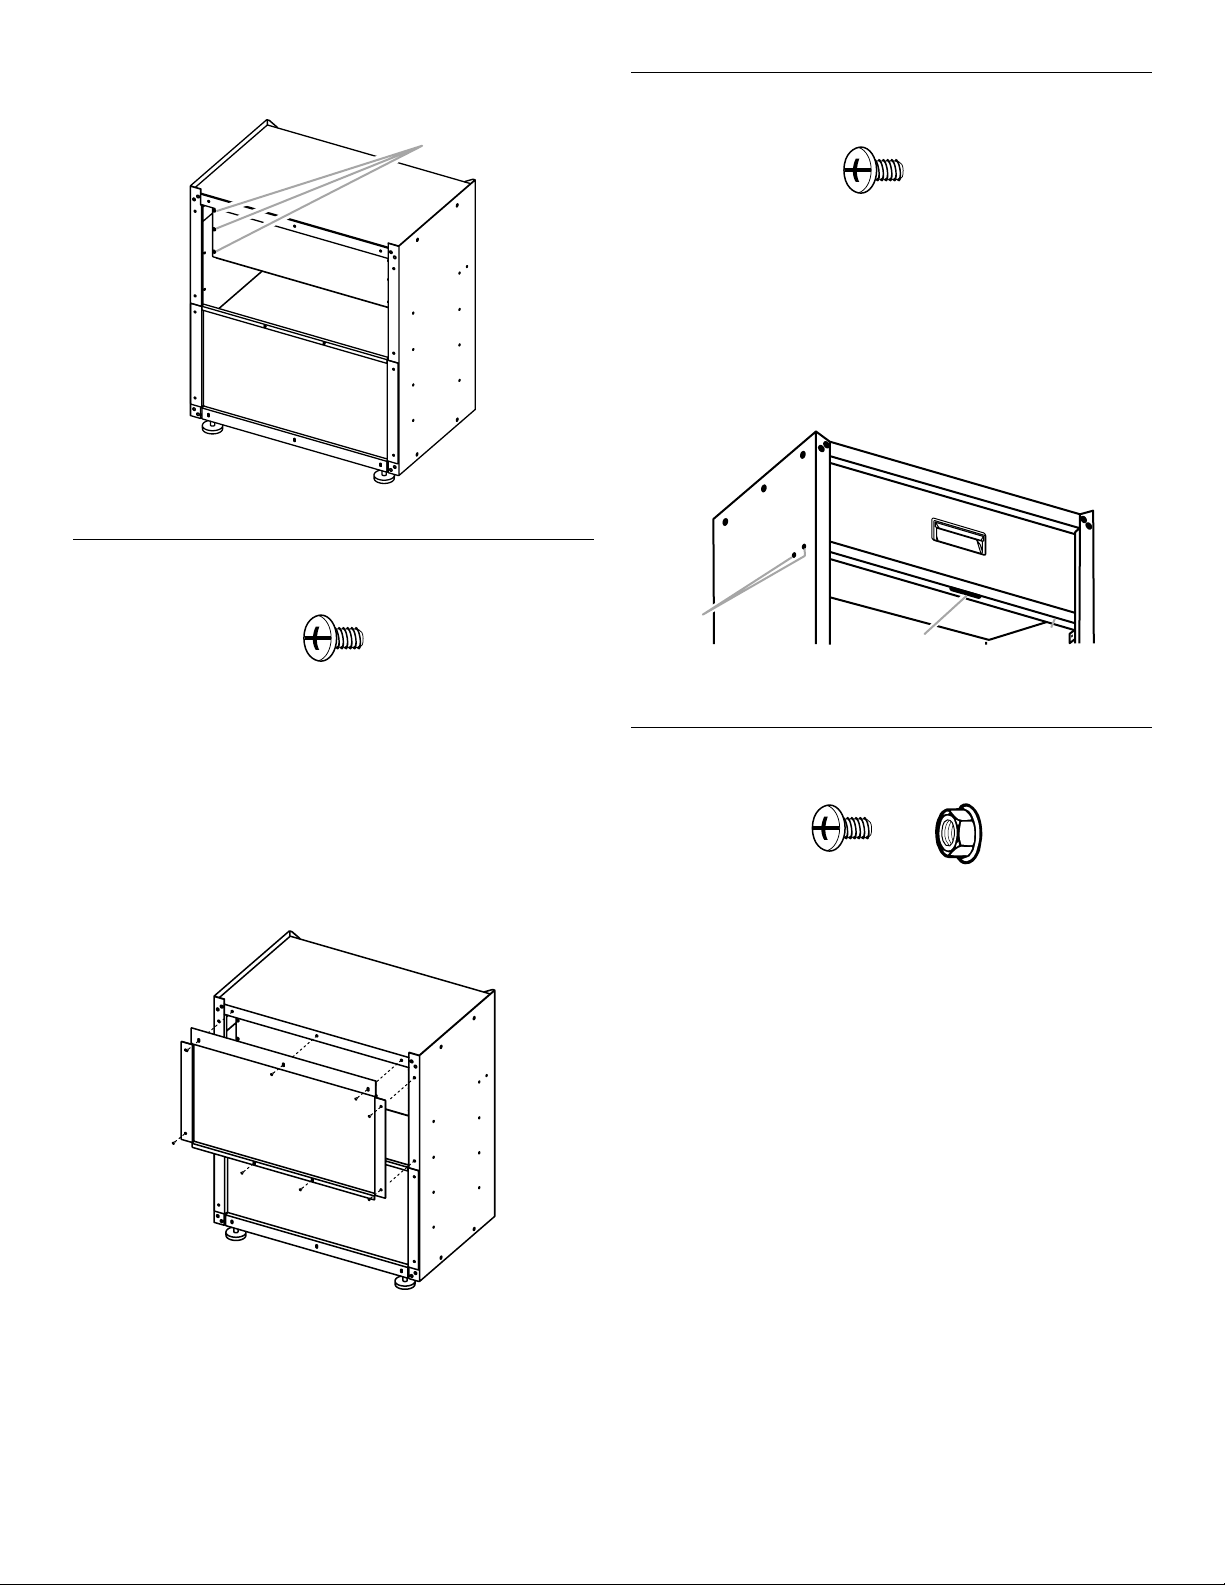
8. Once the drawer is in place, work from the rear of the cabinet to
completely tighten the six screws attaching the drawer back.
Attach Upper Back Panel
1. Align back panel (P5) with the holes in the top (P2). Using seven
Phillips-head screws (F3b), attach back panel (P5) to the top (P2)
and sides (P1 and P3) as shown. Do not tighten screws
completely.
NOTE: Back panel (P5) will slightly overlap back panel (P6)
2. Using two Phillips-head screws (F3b), attach the upper back
panel (P5) to the lower back panel (P6) as shown.
3. Completely tighten all back panel screws starting with the sides
and continuing with the top, middle, and bottom.
Install Door Latch Bar
IMPORTANT: So the doors will close and lock, the latch bar (P8)
must be installed using the indicated pair of holes on each cabinet
side.
1. Align the latch bar with the pair of holes shown.
NOTE: Make sure the slot in the latch bar is facing down.
2. Using two Phillips-head screws (F3b) per side, fasten the latch
bar (P8) to the cabinet sides (P1 and P3).
Install Shelf
IMPORTANT: The shelf may be installed using any of the lower sets
of holes in the cabinet sides.
1. Place the shelf (P9) in the cabinet so that the long edge with the
door magnets is facing out.
2. Align the holes in the shelf ends with the desired set of holes in
the cabinet sides (P1 and P3).
3. Using two Phillips-head screws (F3b) and two small flange nuts
(F4) per side, fasten the shelf to the cabinet sides (P1 and P3).
A. Tighten drawer screws.
F3b
F3b Phillips-head screw (9 - black)
P6
P3
P1
D2
A
P2
P6
P5
P1
P2
D2
F3b
F3b Phillips-head screw (6 - black)
A. Holes for installing latch bar
B. Slot in latch bar
F3b F4
F3bPhillips-head screw (4 - black) F4 Small flange nut (4)
B
A
P1
D5
P8
Loading ...
Loading ...
Loading ...