Loading ...
Loading ...
Loading ...
8
STEAM/FROTHING MILK
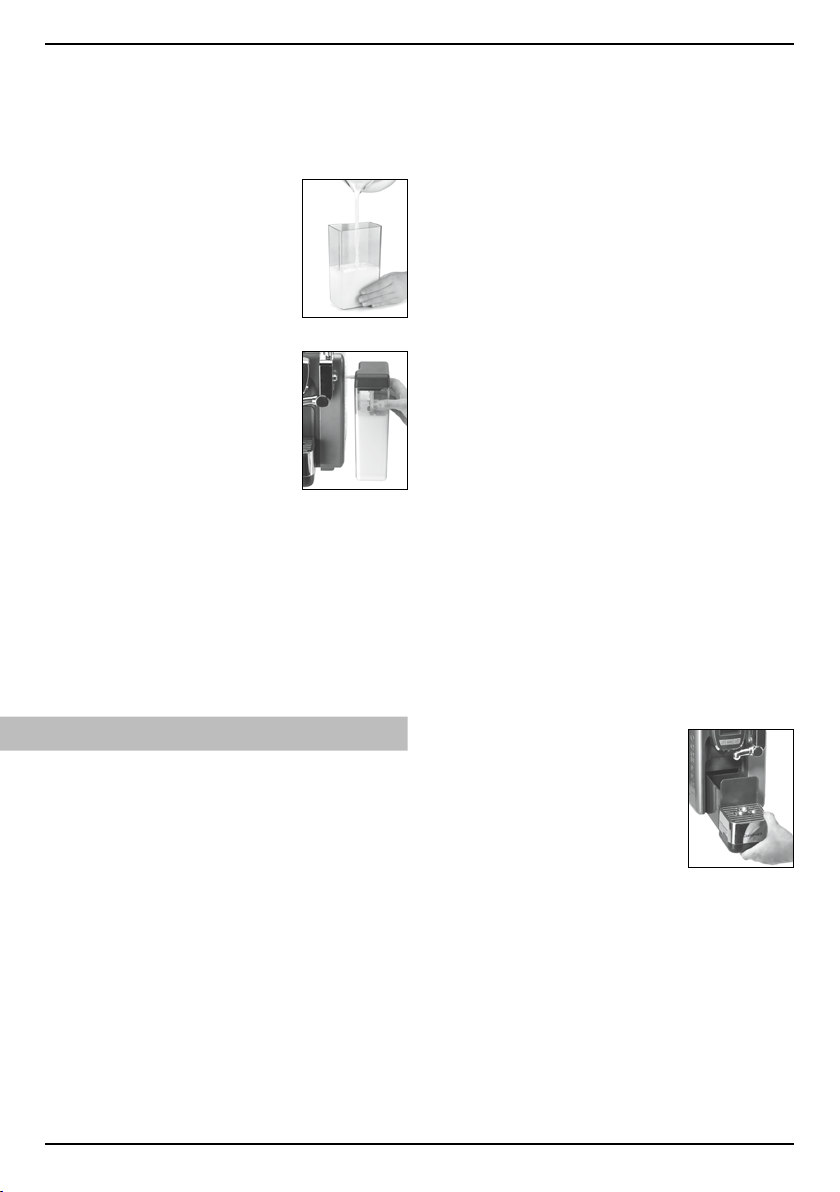
1. Remove the milk tank by holding the milk
tank and cover, and pulling away from the
machine.
2. Remove cover. Pour milk into
the tank.
3. Replace the cover, align the
milk tank to the connector on
the side of the machine, and
push in to install.
4. Press MENU and select
STEAM MILK, then EDIT.
5. Select START and your
steamed milk will start to
dispense. Select STOP when
your preferred amount of milk
is achieved.
NOTE: If STOP is not selected,
the unit will dispense steamed
milk for 45 seconds.
NOTES:
• To remove the milk tank, pull straight out. To
replace, push into connection on unit.
• It is not recommended to leave milk
unrefrigerated for longer than 1 hour. Be sure
to clean the milk frother part every time after
use and clean the milk tank regularly. See
Cleaning the Milk Tank on the next page.
LITTLE OR NO FROTH?
If you experience little to no froth on your
cappuccino or latte, simply remove milk pin
from frothing mechanism, rinse or wipe
clean, and replace. Ensure milk pin is
properly in place by aligning the arrow on
the milk pin with the arrow on the unit.
Resume use. If problem remains, follow full
cleaning instructions for cleaning the milk
tank on page 9.
Tips for creating a perfect froth:
Milk frothing is the steaming of milk. The
steam does two things: It heats milk and it
mixes in air to form a foamy texture. As with
anything, perfecting the art of milk texturing
takes practice, but the results are well worth
it!
Use cold, refrigerated milk in the milk tank.
Any type of milk may be used, but for best
results, whole milk is recommended. Keep in
mind that the milk volume will increase during
frothing, so use a large enough cup.
STANDBY/ENERGY-
SAVING MODE
Following the preset Standby/Energy Saving
Mode time (30 min.), if there is an additional
30 minutes of nonuse, the espresso machine
will turn off. Open and close the brew head,
or switch unit off and on again to start
preheat mode.
CLEANING AND
MAINTENANCE
Cleaning Used-Capsule Container
Container holds approximately 12 capsules and
some residual liquid after brewing. After 12
brew cycles, your unit will alert you to EMPTY
BIN. Dispose of used capsules, replace bin and
continue to use as desired. Be sure to empty
the container of any used capsules when
prompted. Wash the container with warm,
soapy water.
Cleaning External Parts
We recommend regular cleaning of the
espresso maker’s external components.
Cleaning the Housing
Never immerse the machine in water or other
liquids. The housing may be cleaned with a
soapy, damp, nonabrasive cloth.
Cleaning the Drip Tray
To remove the drip tray, simply
lift it up off the unit, keeping it
level at all times in order to
prevent spills. Clean the drip
tray with a soapy, damp,
nonabrasive cloth. Do not clean
drip tray with cleansers, steel
wool pads or other abrasive materials.
Cleaning the Water Reservoir
Wash water reservoir with warm, soapy water.
It is normal over time for discoloration, spotting
or staining to appear in the water reservoir. This
will vary depending on the mineral content of
the bottled or filtered water used, but will not
affect the operation of the machine. However,
be sure to clean the water reservoir regularly to
minimize buildup.
Loading ...
Loading ...
Loading ...