Loading ...
Loading ...
Loading ...

User Manual
11
Lab automatically. If the darkslide has not
ejected,removethelmpackandre-insertit,
making sure it is pushed all the way to the back
of the
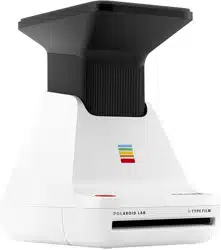
Polaroid Lab
.
Note Pleasecheckindividuallm
packaging for development time, handling
and storage details.
4. Turn the Polaroid Lab on
Push the black button on the right side of
the Polaroid Lab to raise the phone platform
to the photo taking position and power on.
The Rainbow logo LED will light up and the
lmcounterLEDwilllightuptoshowhow
many shots are remaining in the
Polaroid
Origilals App
. When you’re done, turn off the
Polaroid Lab by pushing down the platform.
Alternatively, it will turn itself off automatically
after several minutes of inactivity.
5. Open the app and select your photo
Open the Polaroid App and select the Polaroid
Lab section. Tap the image selection button to
choose the image you want to expose and tap
proceed. The app will guide you through your
rstexposure.
6. Place your phone on the phone platform
Place your phone on the phone platform
with the screen facing toward the lens of the
Polaroid Lab. Ensure that it is correctly aligned:
the top of your phone must be facing the rear
of the camera. Remove any phone covers or
screen protectors to ensure best performance.
The app will detect the Polaroid Lab and
orientate the image to be perfectly aligned
withthelm.Itwillalsodisplayacalibration
image above the light sensor to correctly
expose your image without having to adjust
your phone’s backlight. Make sure that you
turnoffallsettingsorappswhichinuencethe
color of the display, such as night shift or true
tone,asthesecanseverelyimpingethenal
photograph.
7. Push the red Shutter button
The Polaroid Lab will detect your phone on
the platform and will measure the brightness
of the display to ensure the perfect exposure.
WaituntiltheRainbowlogoLEDashesthen
press the red shutter button. The photo will be
ejected from the slot at the front of the camera
as soon as you let go of the shutter button.
Removethephotofrombeneaththelmshield
and let the shield roll back into the Polaroid
Lab. Place the photo face down to continue
shielding it from light as it develops.
If you want to take another photo of the same
image then press the shutter button again.
Further Guidance
1. How much lm is left in the pack?
There are 8 orange LED lights on the front of
the Polaroid Lab. When the Lab is switched on
and not in sleep mode, the LEDs will constantly
displaythelmcount.ThenumberofLEDs
which light up corresponds to the number of
shotsleftinthelmpack.Forexample:If6
LEDs light up, that means there are 6 shots
leftinthelmpack.Ifyouhaveusedupall8
shotsinthelmpack,orifthereisnolmpack
inserted in the camera, then the LEDs will blink
rapidly when you turn the Polaroid Lab on or
press the shutter button.
2. How much battery is left?
The Polaroid Lab displays the remaining battery
level on four LED above the USB slot. When the
PolaroidLabischargingtheLEDwillash,and
when fully charged with a USB cable inserted
the LEDs will all be unlit as it will be running on
power directly from the charger.
Battery level:
1. Between 1 to 4 LEDs light upBetween 1 to 4 LEDs light up
One LED indicates enough charge for
atleast2packsoflm.
2.
Battery charged and USB cable Battery charged and USB cable
connected: No LEDs light up.connected: No LEDs light up.
ThelmcounterLEDwillshowthe
remaining number of photos.
3.
Battery emptyBattery empty
No charge remaining. No LEDs light No charge remaining. No LEDs light
up, and the Polaroid Lab will cease to up, and the Polaroid Lab will cease to
operate until it is recharged.operate until it is recharged.
3. Compatible lm
The Polaroid Lab works with all Polaroid i-Type
Loading ...
Loading ...
Loading ...